HR Management
![]() Copied
Copied
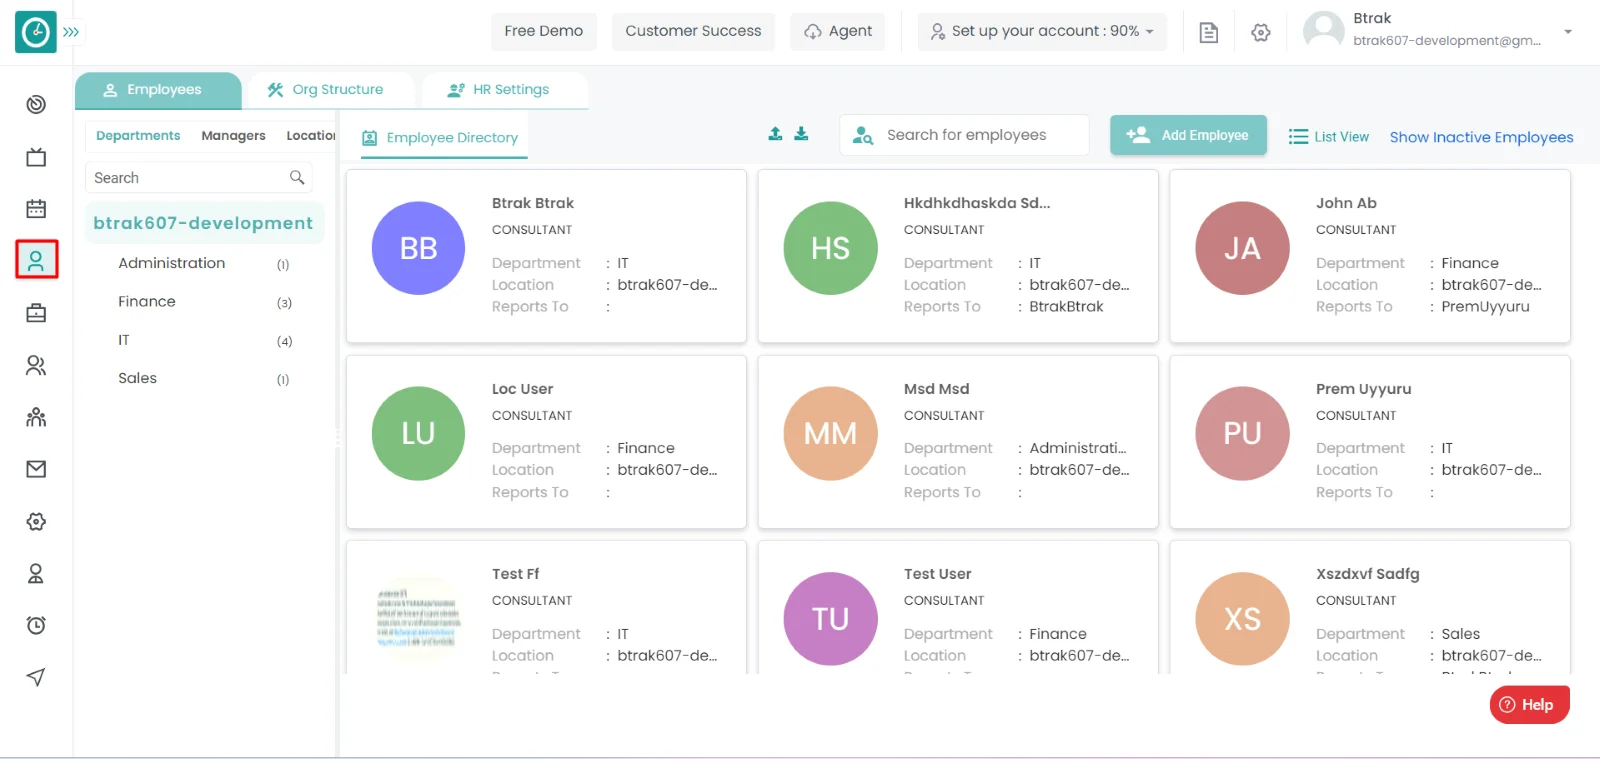
Time Champ has an HR module that allows businesses to manage their employees' personal data and achievements. The HR module is in charge of three major functions: employee recruitment and compensation, as well as employee management.
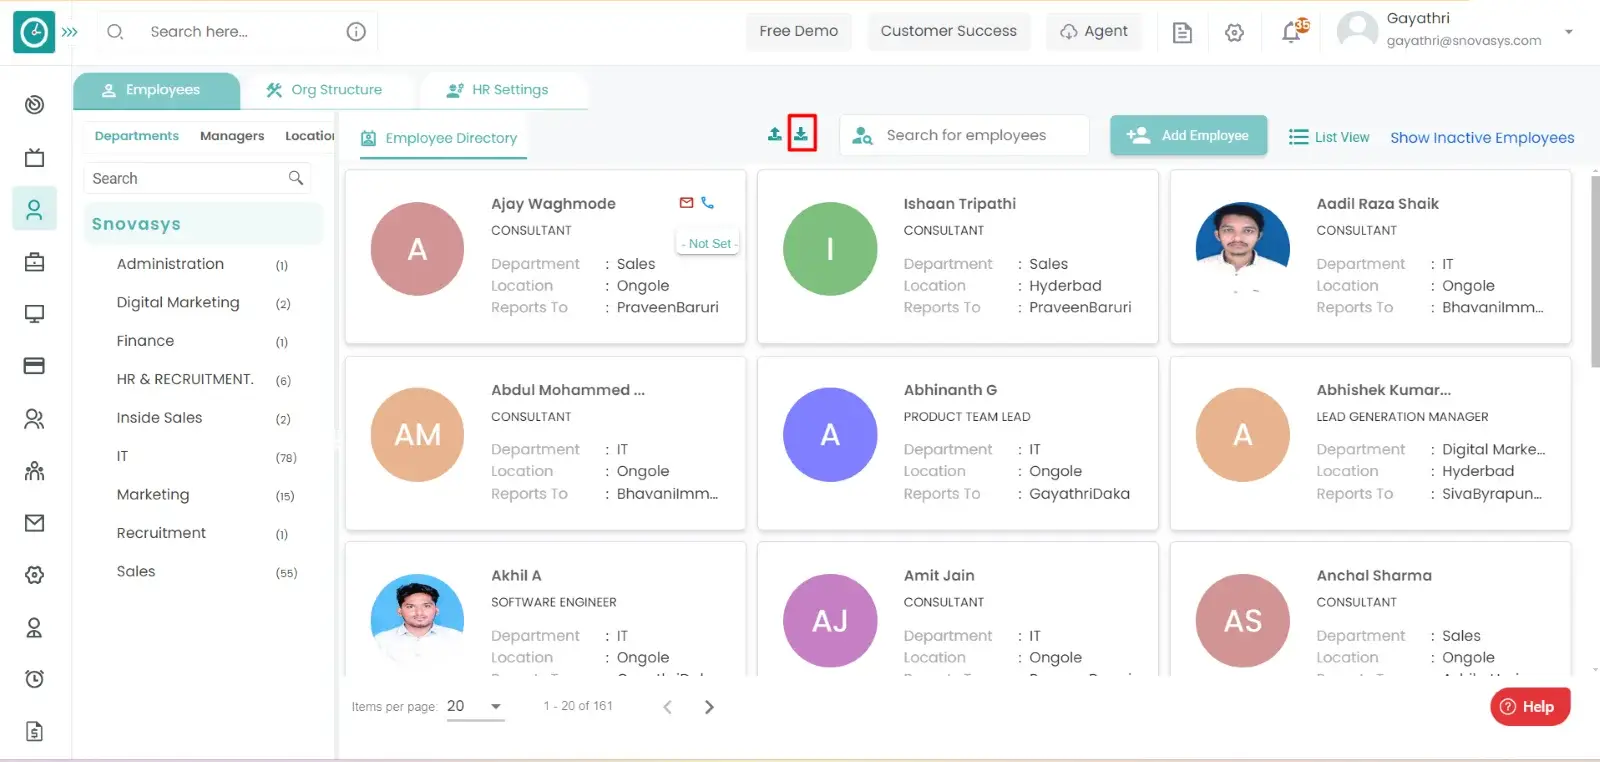
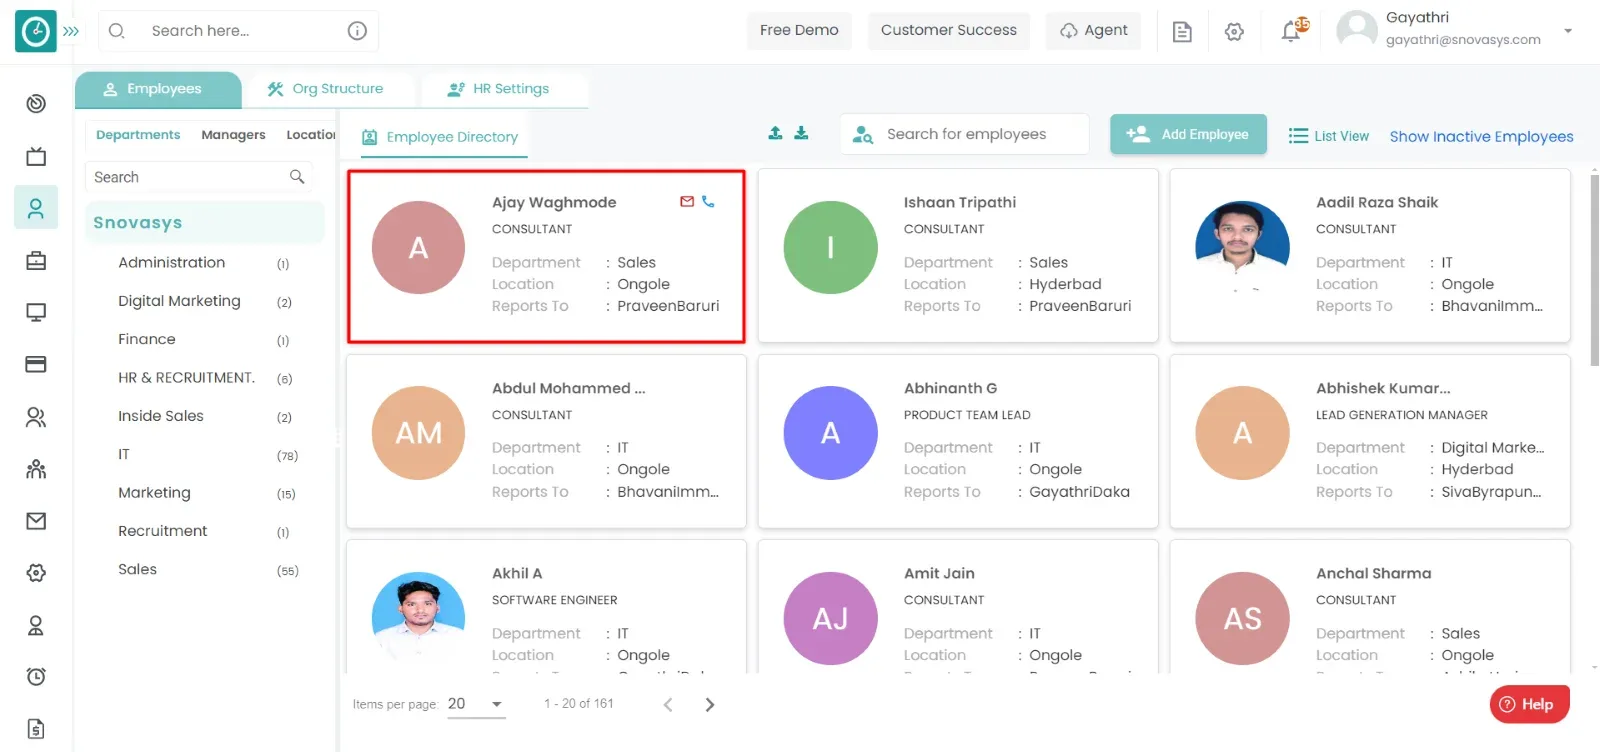
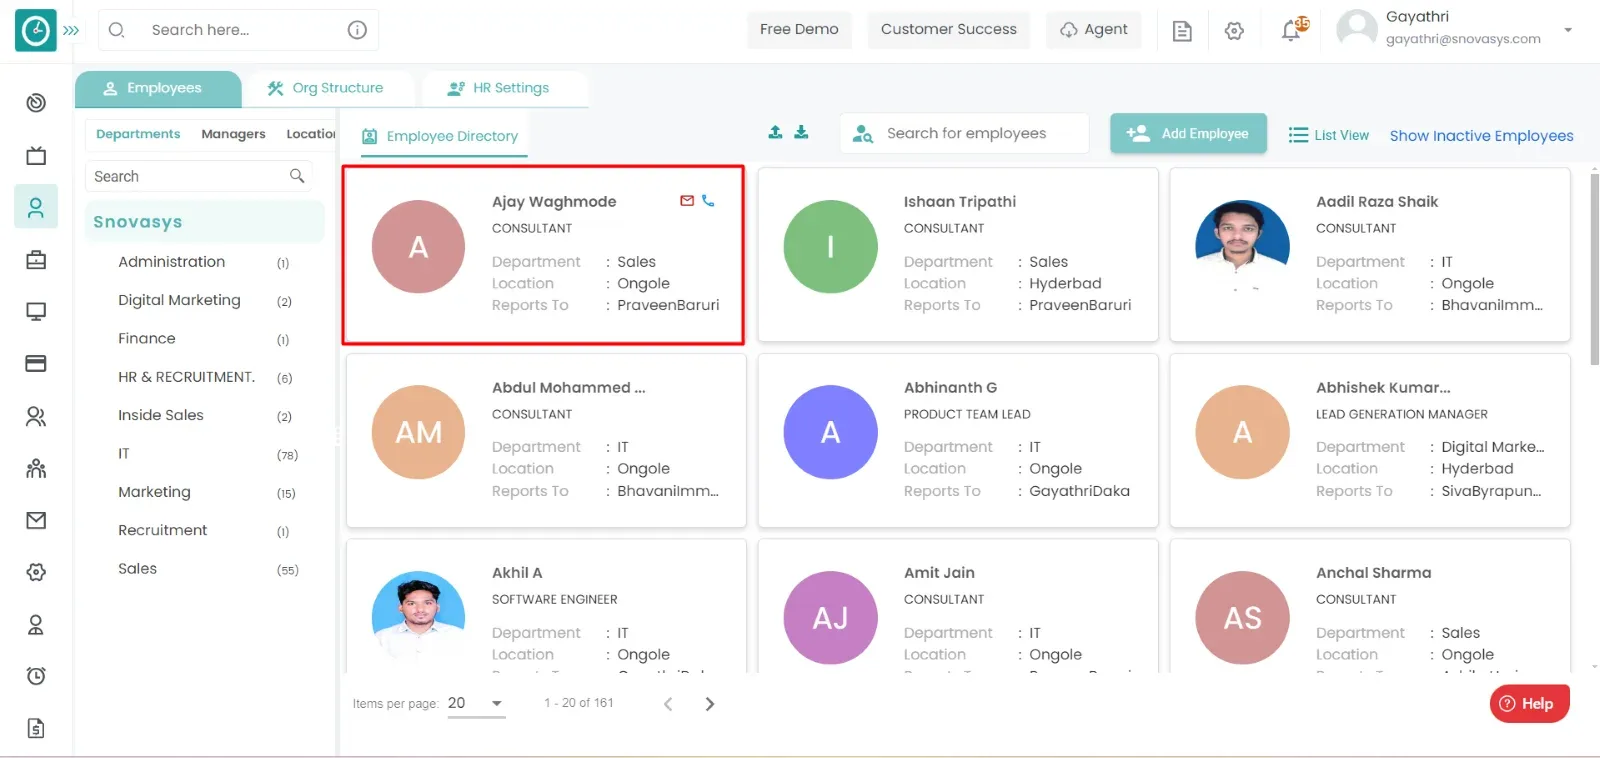
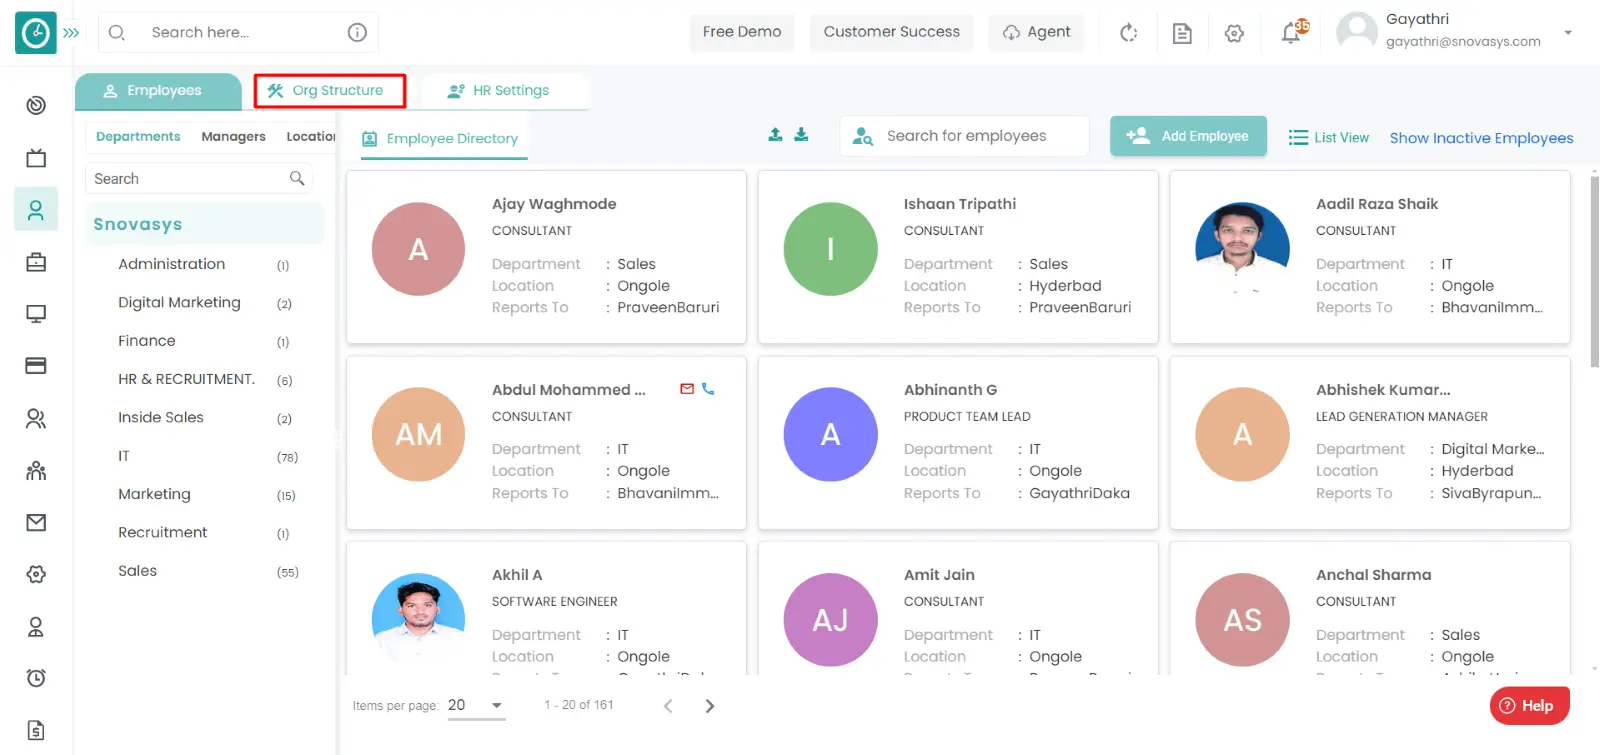
Read MoreThe new module includes a comprehensive employee directory, enabling quick and convenient access to employee information. You can search for employees by name, department, designation, or any other relevant criteria. This feature enhances collaboration and fosters effective communication across the organization.
Navigation: Goto HR => HR Tab
If the user is having Super Admin
Permissions, then he can be able to view Users details in Organization.
This permission can be configured by following the steps: -
View My Detailed Profile / View My Subordinate Profile
then select the roles for what you must give the permissions to configure and check them.View My Detailed Profile / View My Subordinate Profile
for the defined roles.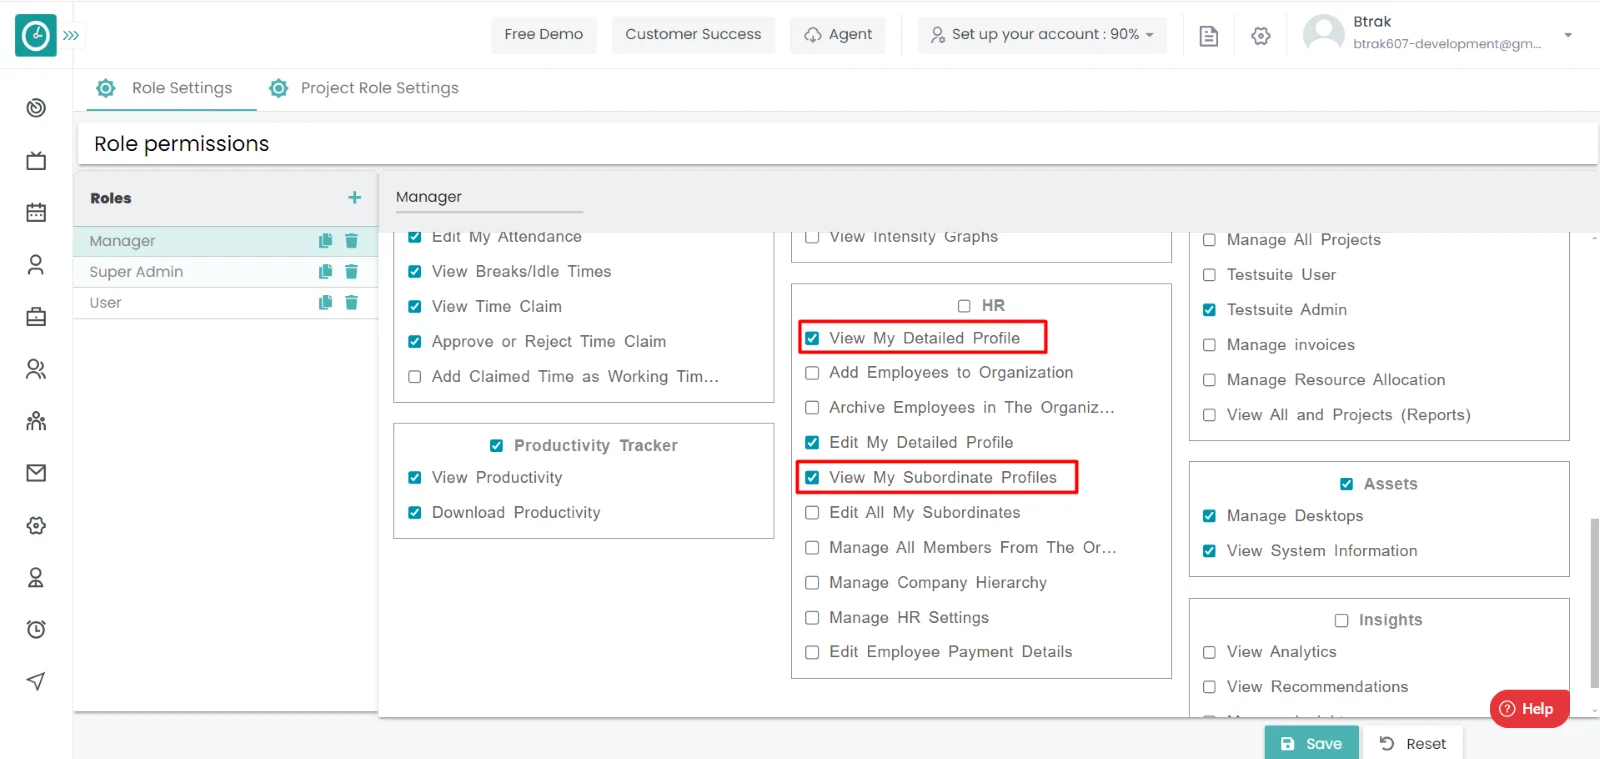
HR
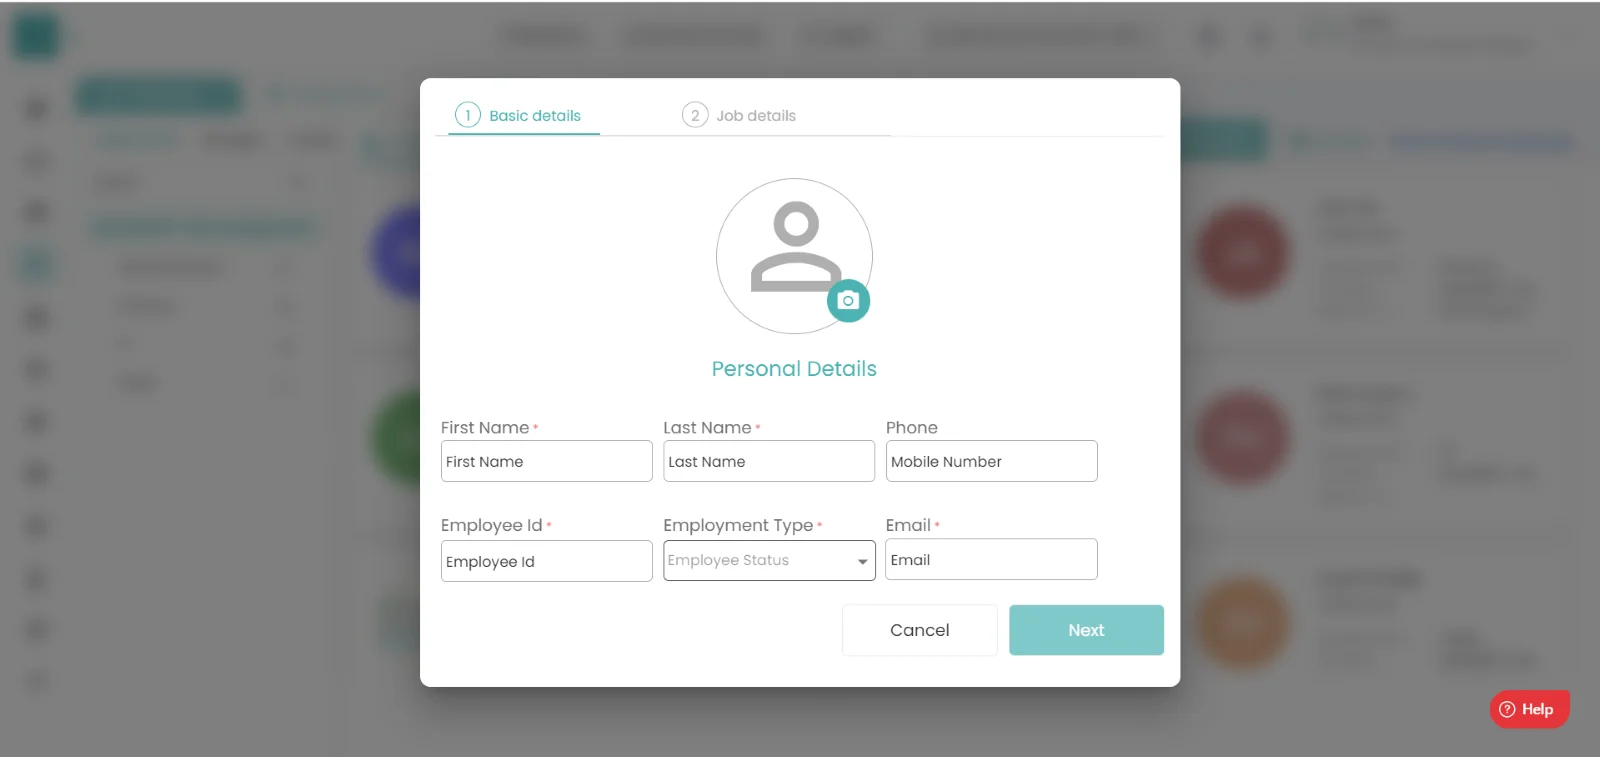
You can add new employee to the HR list.
Navigation: Goto HR => HR Tab

If the user is having Super Admin
Permissions, then he can be able to add employee in Organization.
This permission can be configured by following the steps: -
Add Employee to Organization
then select the roles for what you must give the permissions to configure and check them.Add Employee to Organization
for the defined roles.
Add Employee :-

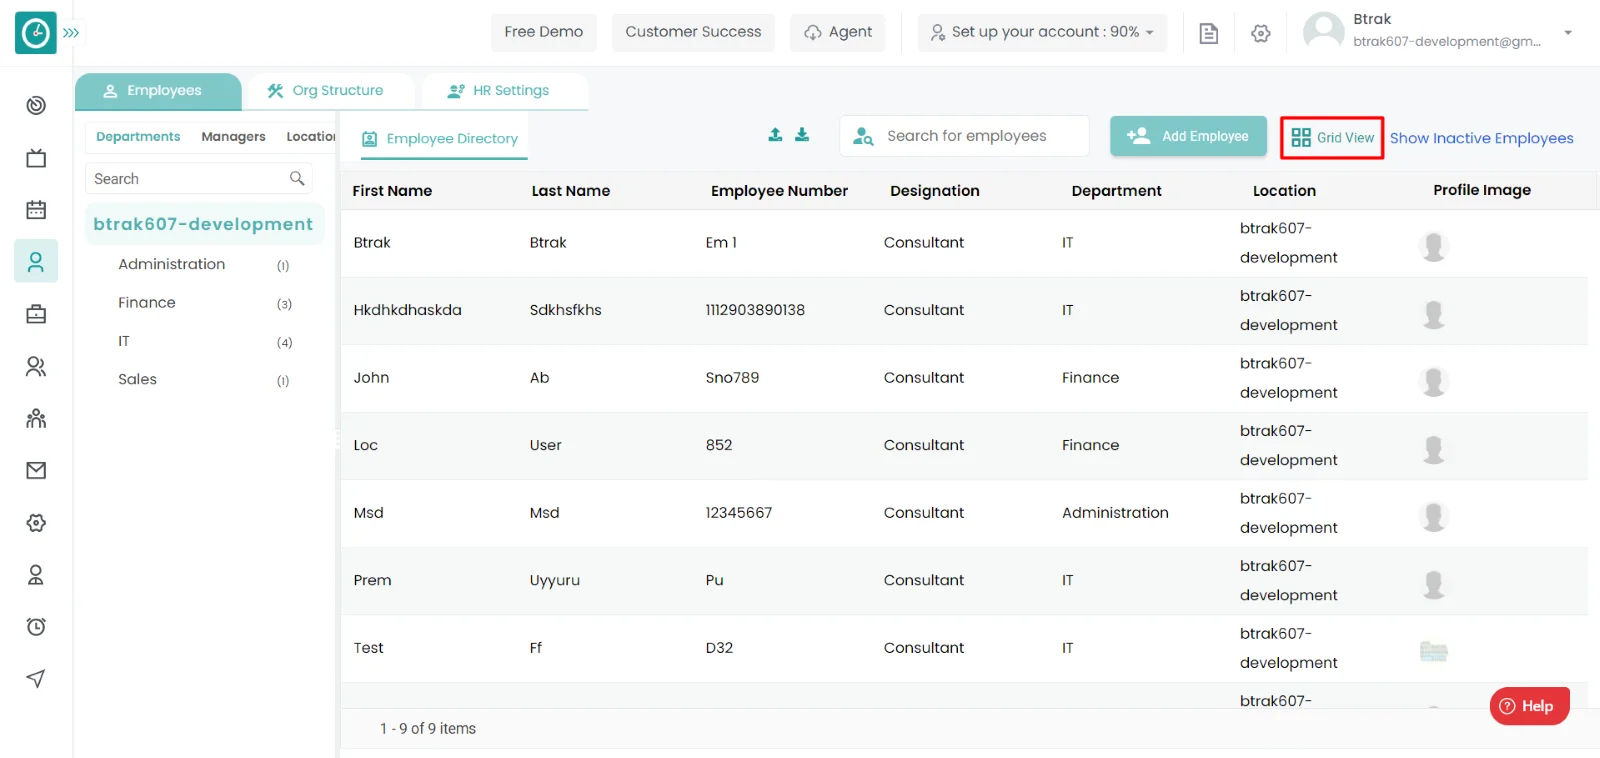
Yes, you can save time by uploading a list of employees to the organization.
Navigation: Goto HR => Employees => Employee Directory

If the user is having Super Admin
Permissions, then he can be able to upload employee in Organization.
This permission can be configured by following the steps: -
Add Employee to Organization,
then select the roles for what you must give the permissions to configure and check them.Add Employee to Organization
for the defined roles.
Upload Employee :-

Navigation: Goto HR => HR Tab

If the user is having Super Admin
Permissions, then he can be able to view the inactive employees.
This permission can be configured by following the steps: -
View Subordinate Profiles / Manage All Members From The Organization,
then select the roles for what you must give the permissions to configure and check them.View Subordinate Profiles / Manage All Members From The Organization
for the defined roles.
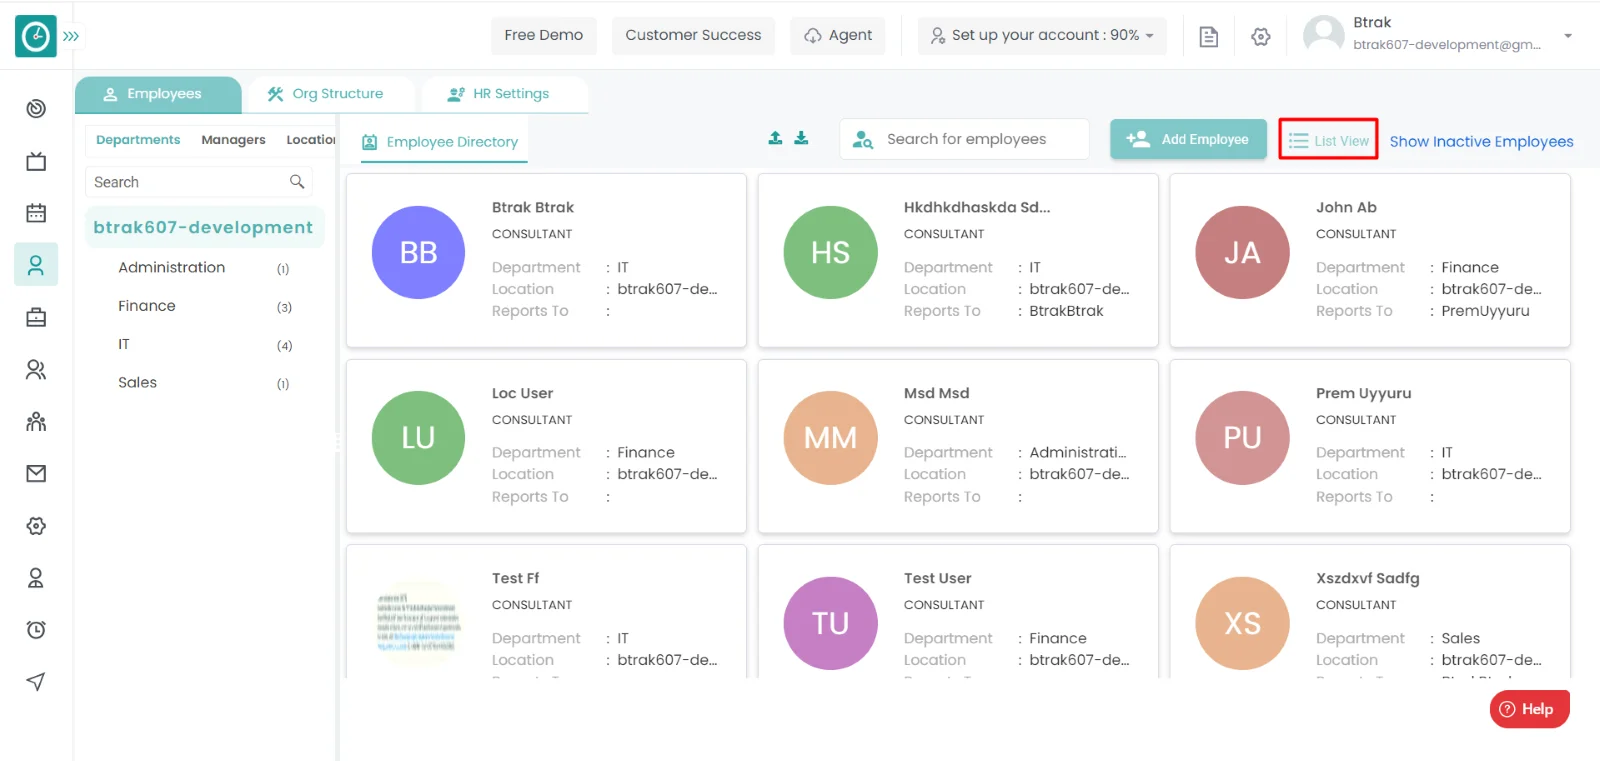
View Inactive Employees :-

Navigation: Goto HR => HR Tab
If the user is having Super Admin
Permissions, then he can be able to view employee personal details in
Organization.
This permission can be configured by following the steps: -
View My Detailed Profile / View My Subordinate Profile,
then select the roles for what you must give the permissions to configure and check them.View My Detailed Profile / View My Subordinate Profile
for the defined roles.View employee personal details :-

You can download sample employee list with details in organization.
Navigation: Goto HR => HR Tab
If the user is having Super Admin
Permissions, then he can be able to download employee details list in
Organization.
This permission can be configured by following the steps: -
Add Employees to organization from HR,
then select the roles for what you must give the permissions to configure and check them.Add Employees to organization from HR
for the defined roles.
Download employee list :-
Navigation: Goto HR => HR Tab
If the user is having Super Admin
Permissions, then he can be able to view inactive employee.
This permission can be configured by following the steps: -
Edit My Detailed Profile / Edit All My Subordinates / Manage All Members From The Organization,
then select the roles for what you must give the permissions to configure and check them.Edit My Detailed Profile / Edit All My Subordinates Manage / All Members From The Organization
for the defined roles.
Active / Inactive employee :-

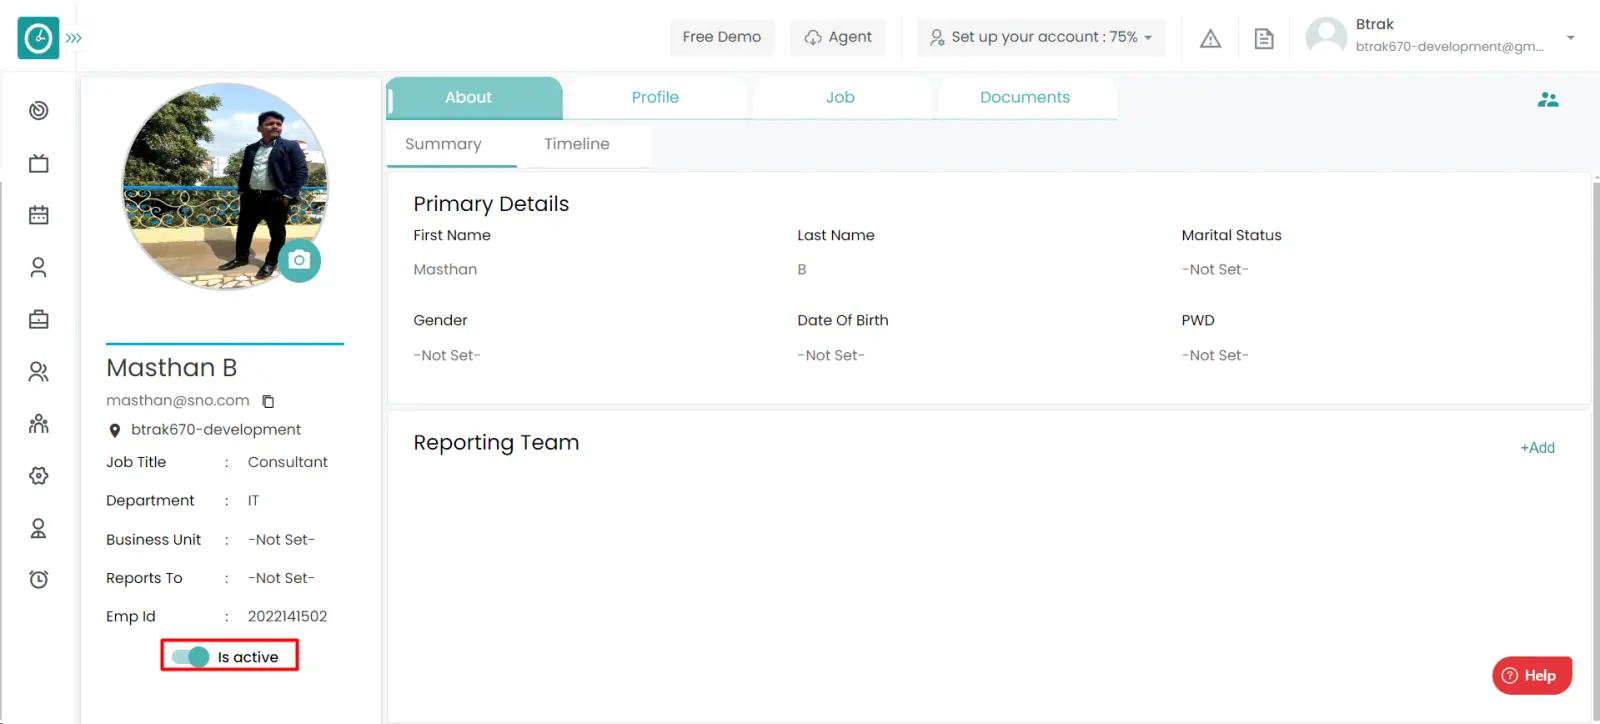
Navigation: Goto HR => HR Tab
If the user is having Super Admin
Permissions, then he can be able to setup the reporting team of an employee.
This permission can be configured by following the steps: -
Edit My Detailed Profile / Edit All My Subordinates / Manage All Members From The Organization,
then select the roles for what you must give the permissions to configure and check them.Edit My Detailed Profile / Edit All My Subordinates Manage / All Members From The Organization
for the defined roles.
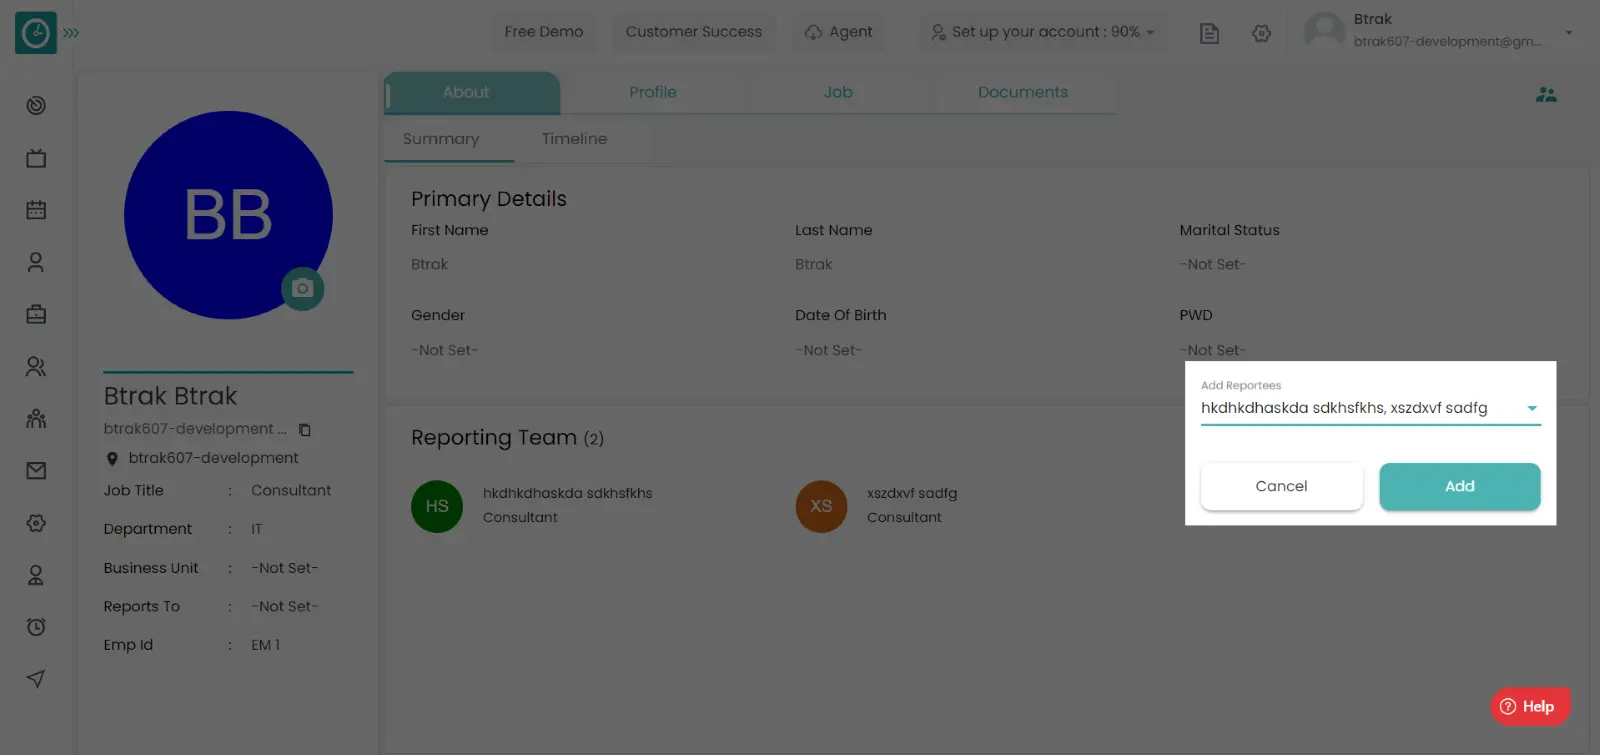
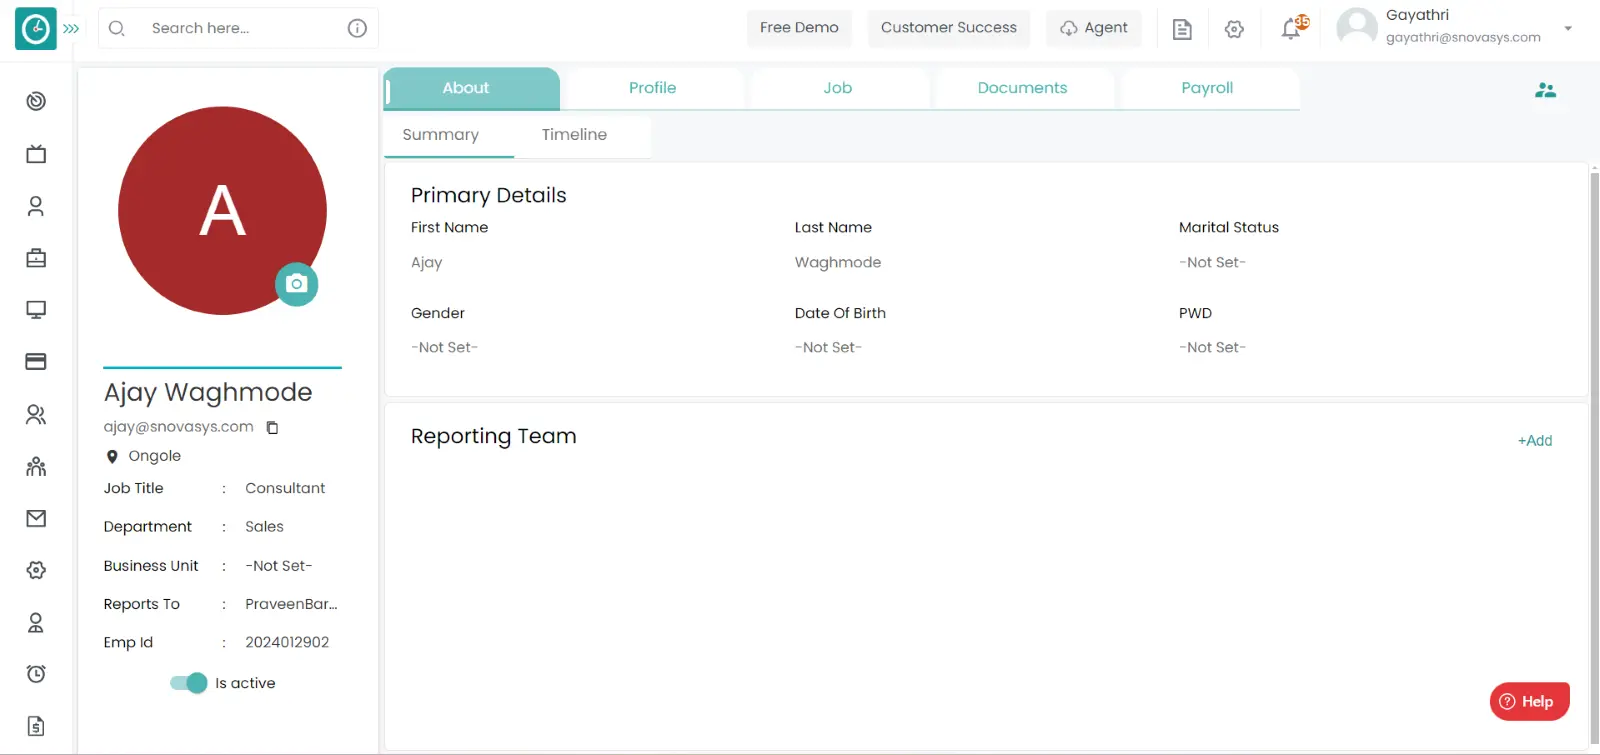
Assign Reporting Team :-

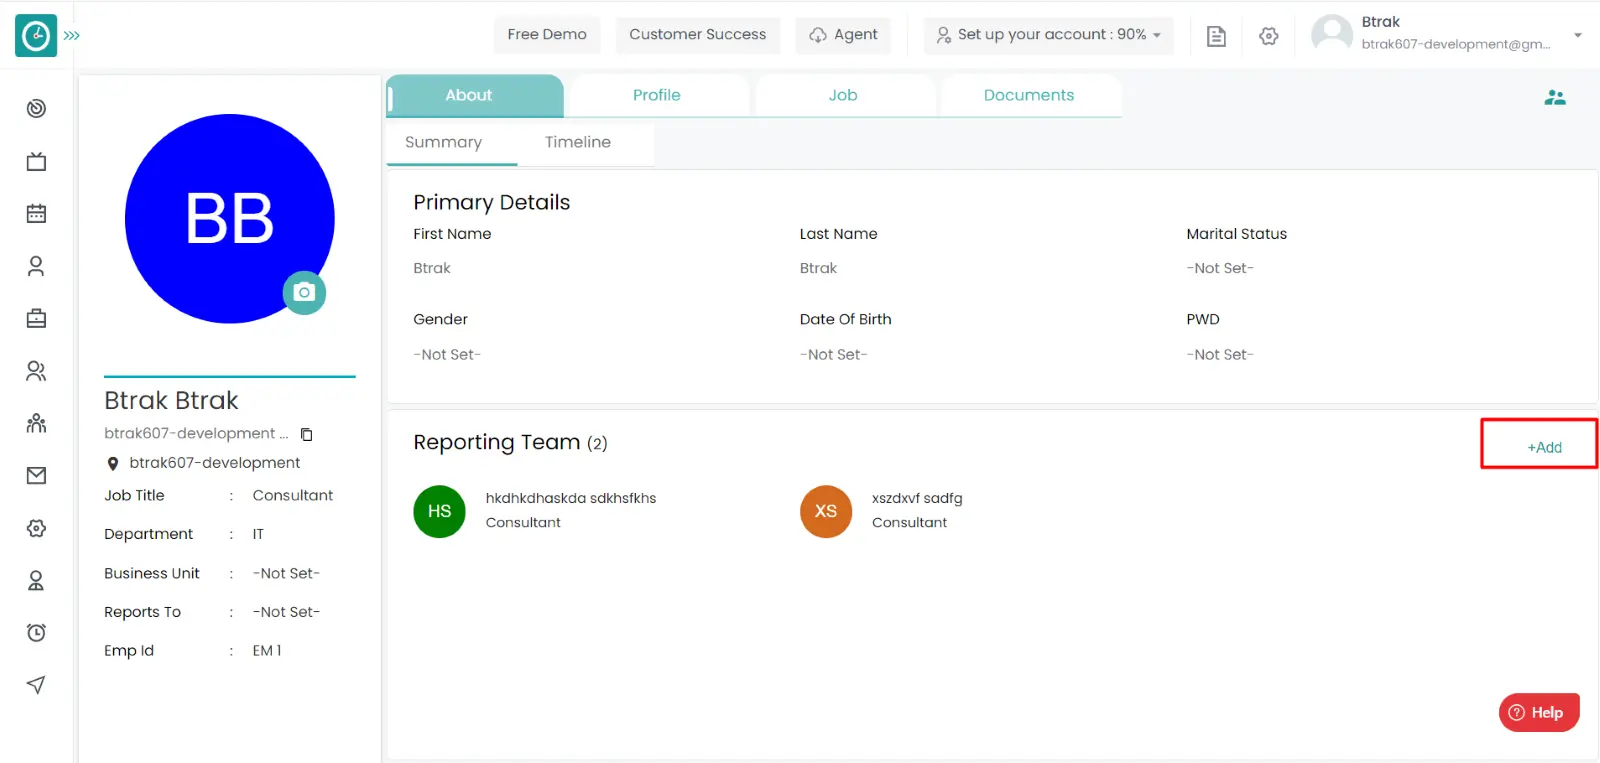
Navigation: Goto HR => HR Tab
If the user is having Super Admin
Permissions, then he can be able to setup the line manager to an employee.
This permission can be configured by following the steps: -
Edit My Detailed Profile / Edit All My Subordinates / Manage All Members From The Organization,
then select the roles for what you must give the permissions to configure and check them.Edit My Detailed Profile / Edit All My Subordinates Manage / All Members From The Organization
for the defined roles.
Assign Line Manager :-


Navigation: Goto HR => HR Tab
If the user is having Super Admin
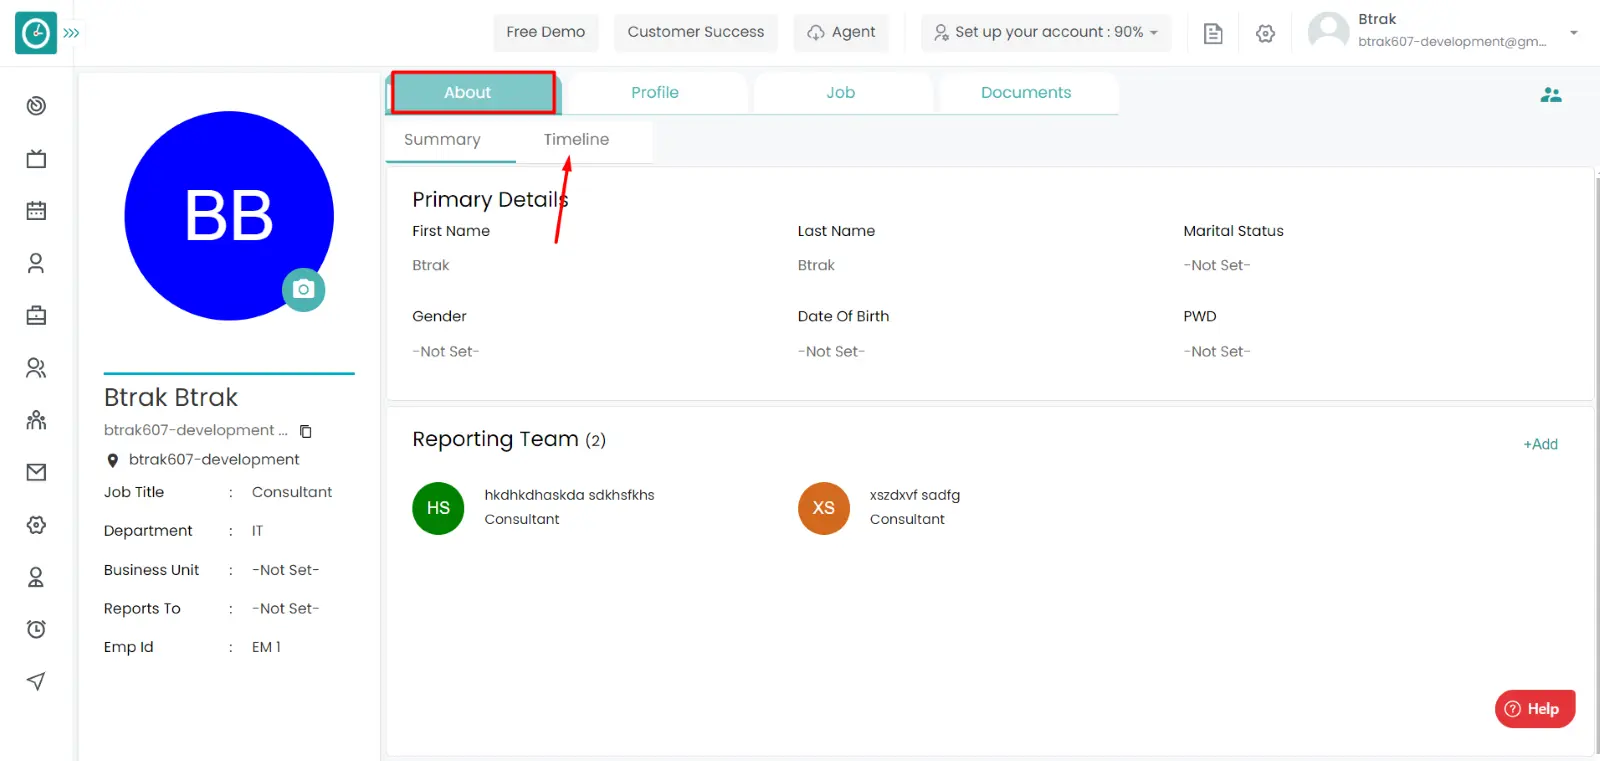
Permissions, then he can be able to view the timeline of and employee.
This permission can be configured by following the steps: -
Edit My Detailed Profile / Edit All My Subordinates / Manage All Members From The Organization,
then select the roles for what you must give the permissions to configure and check them.Edit My Detailed Profile / Edit All My Subordinates Manage / All Members From The Organization
for the defined roles.View Employee Timeline :-

Navigation: Goto HR => HR Tab
If the user is having Super Admin
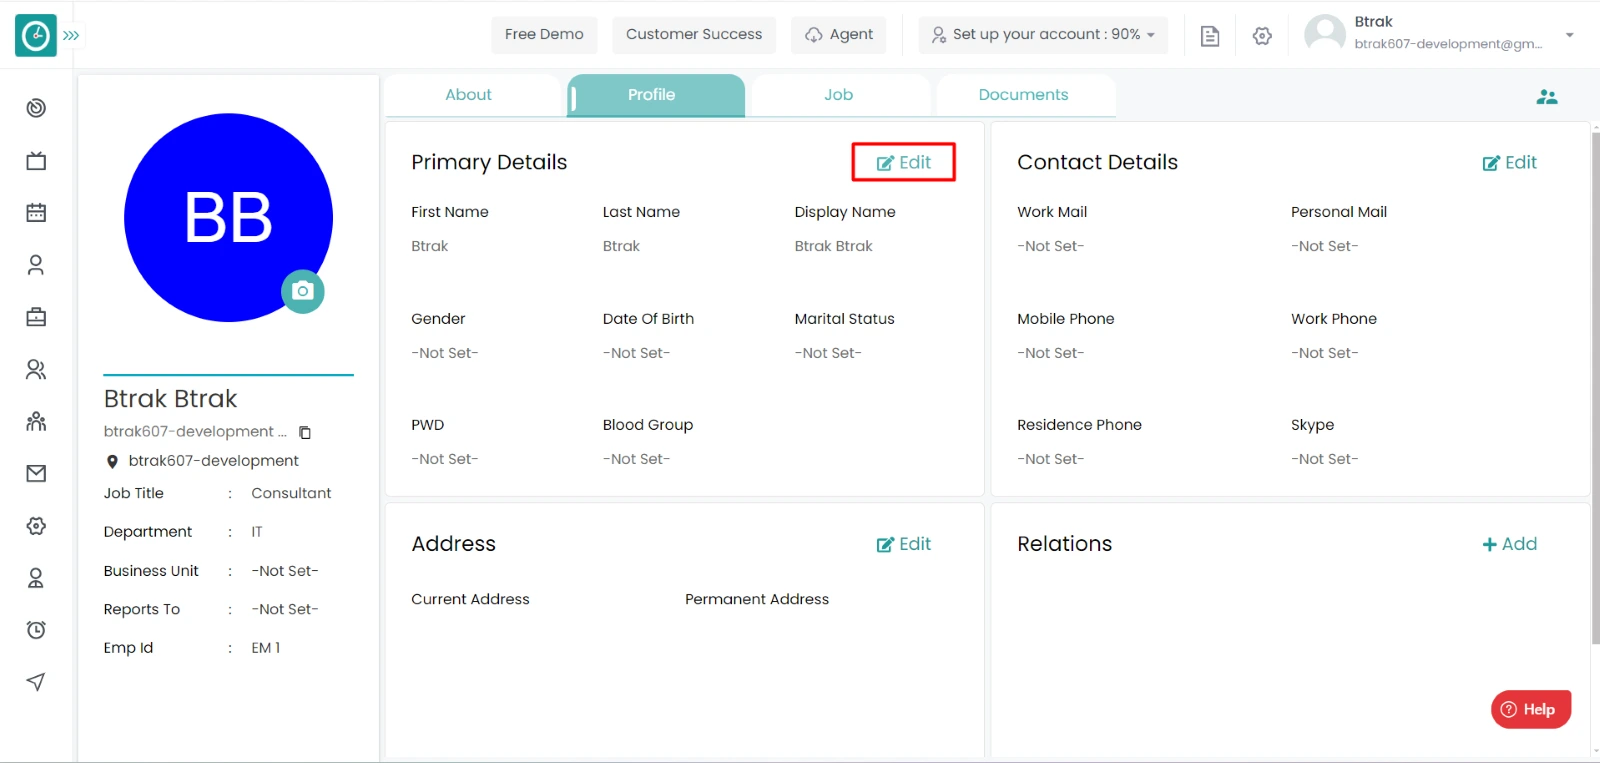
Permissions, then he can be able to view/manage profile details of an employee.
This permission can be configured by following the steps: -
Edit My Detailed Profile / Edit All My Subordinates / Manage All Members From The Organization,
then select the roles for what you must give the permissions to configure and check them.Edit My Detailed Profile / Edit All My Subordinates Manage / All Members From The Organization
for the defined roles.
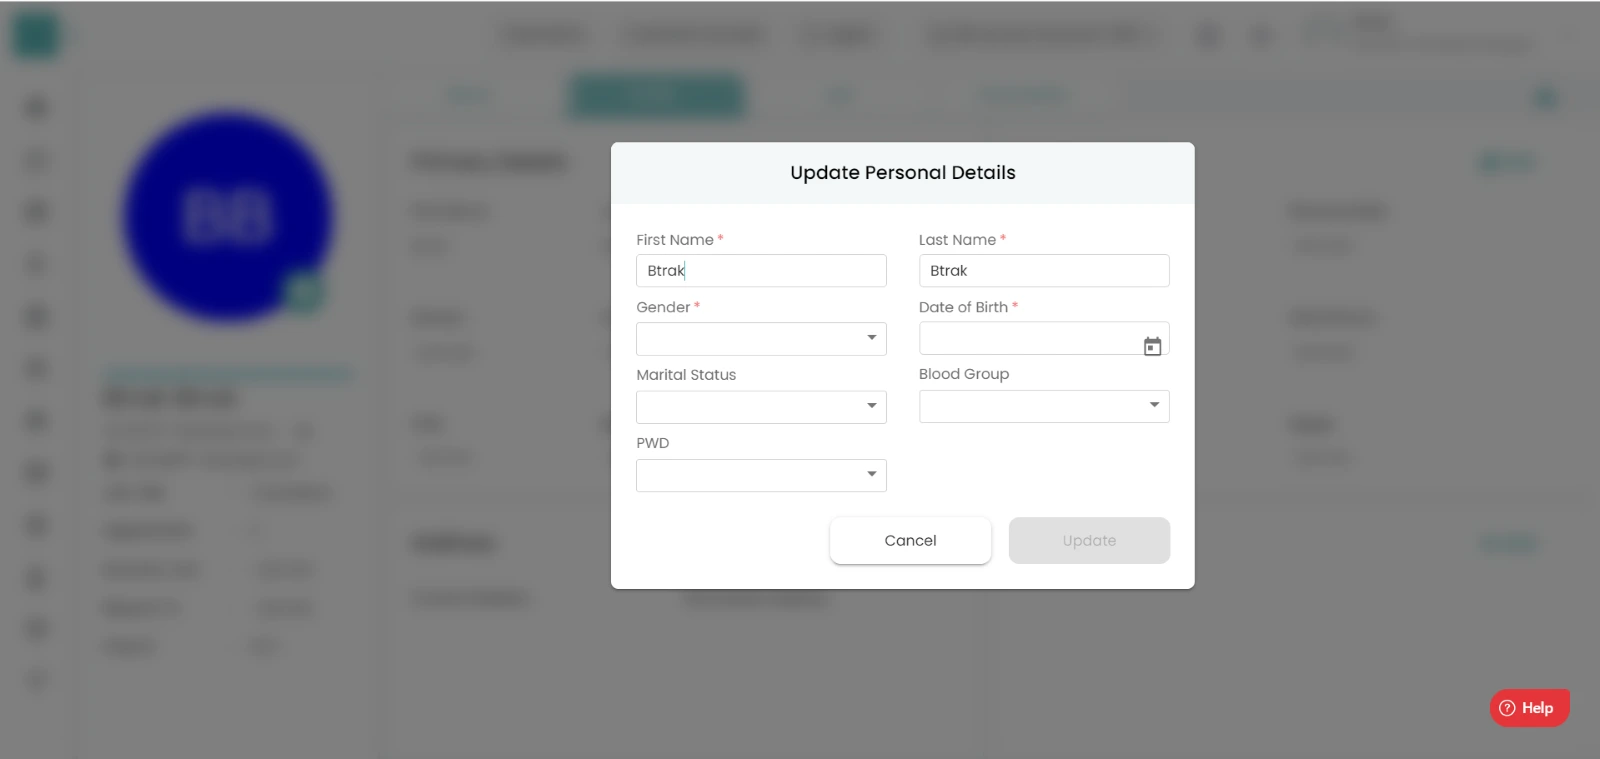
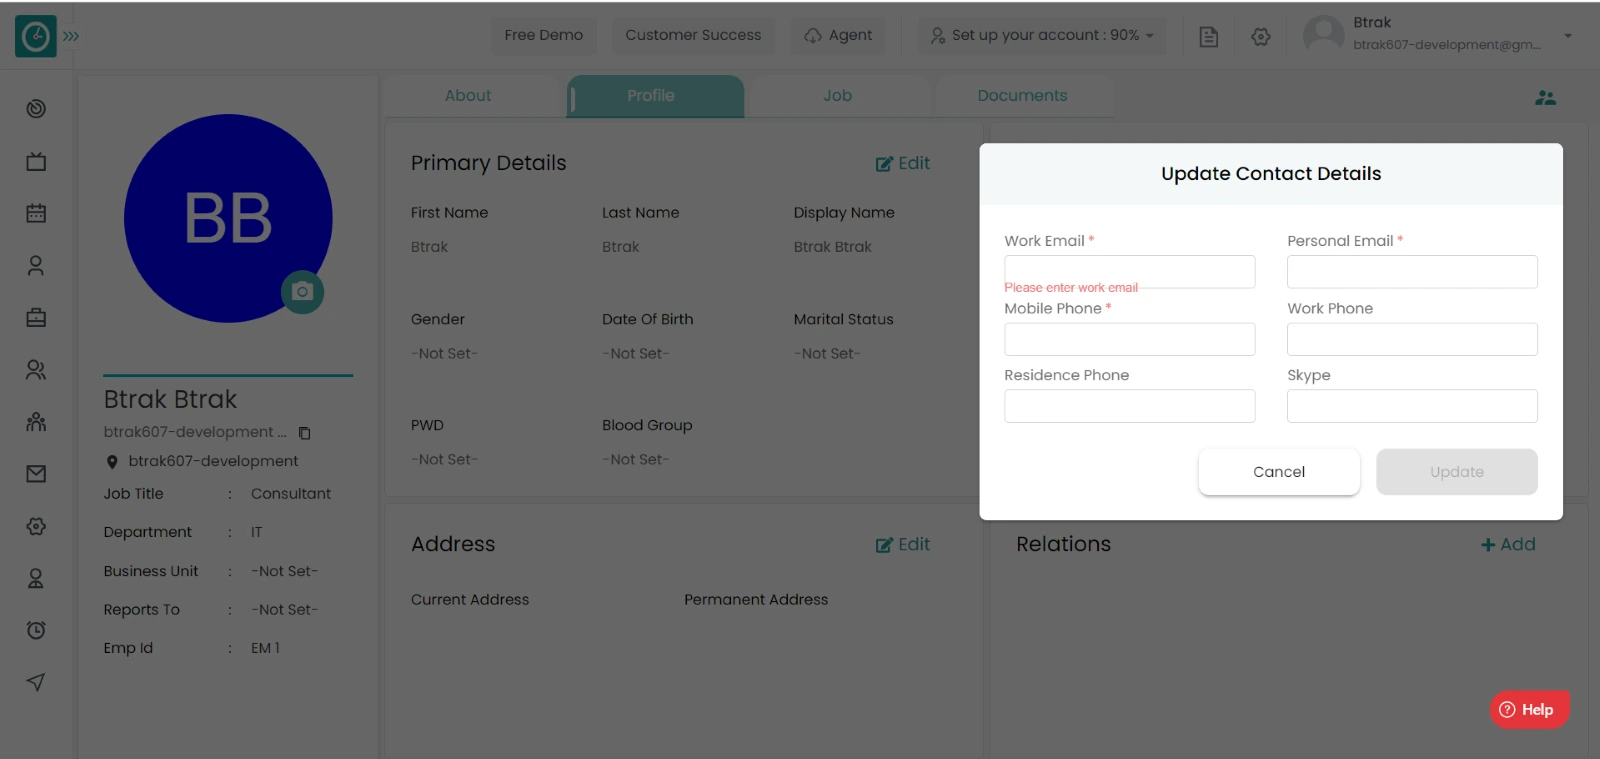
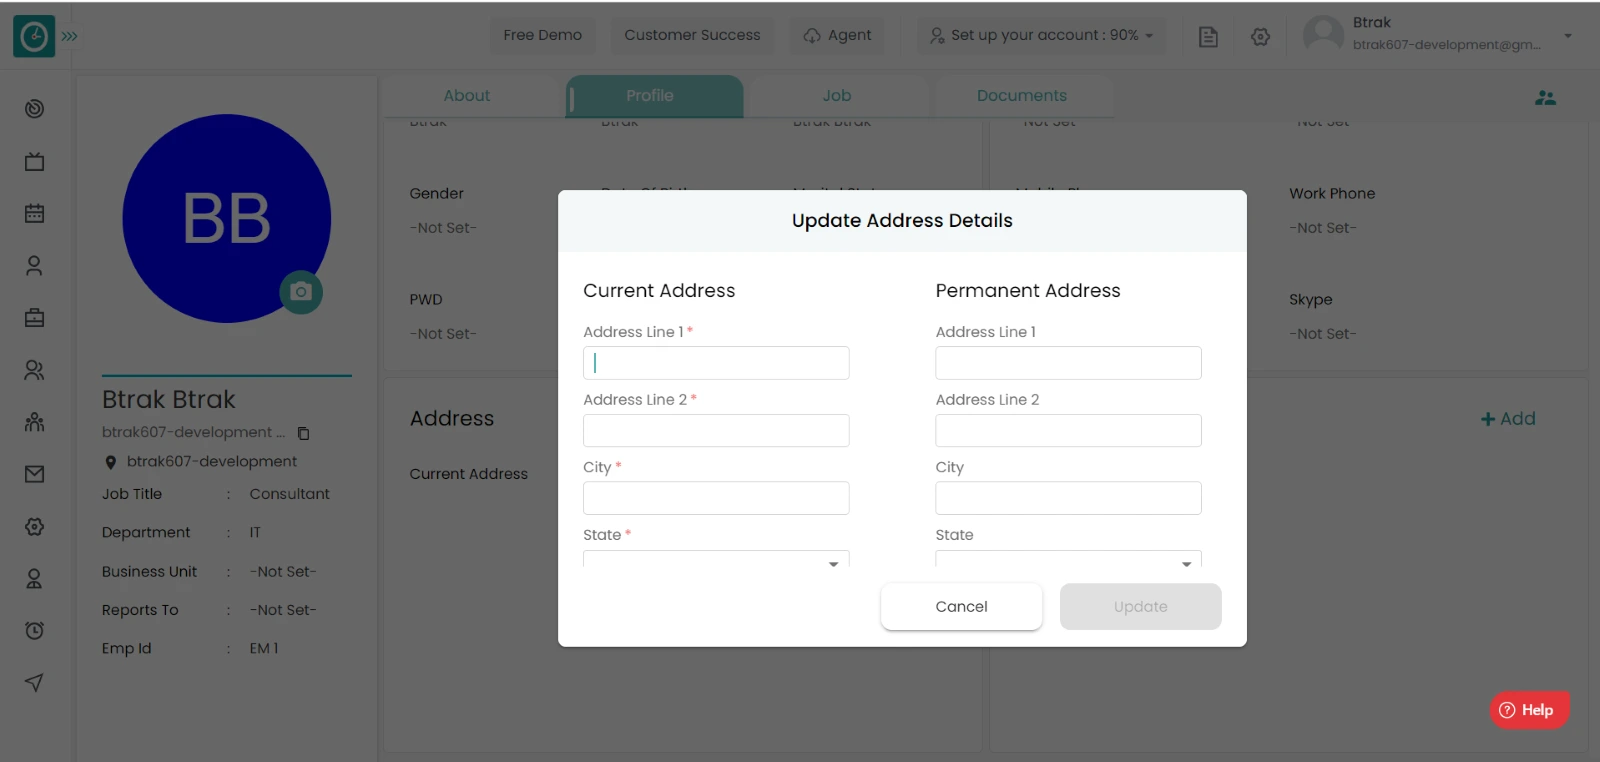
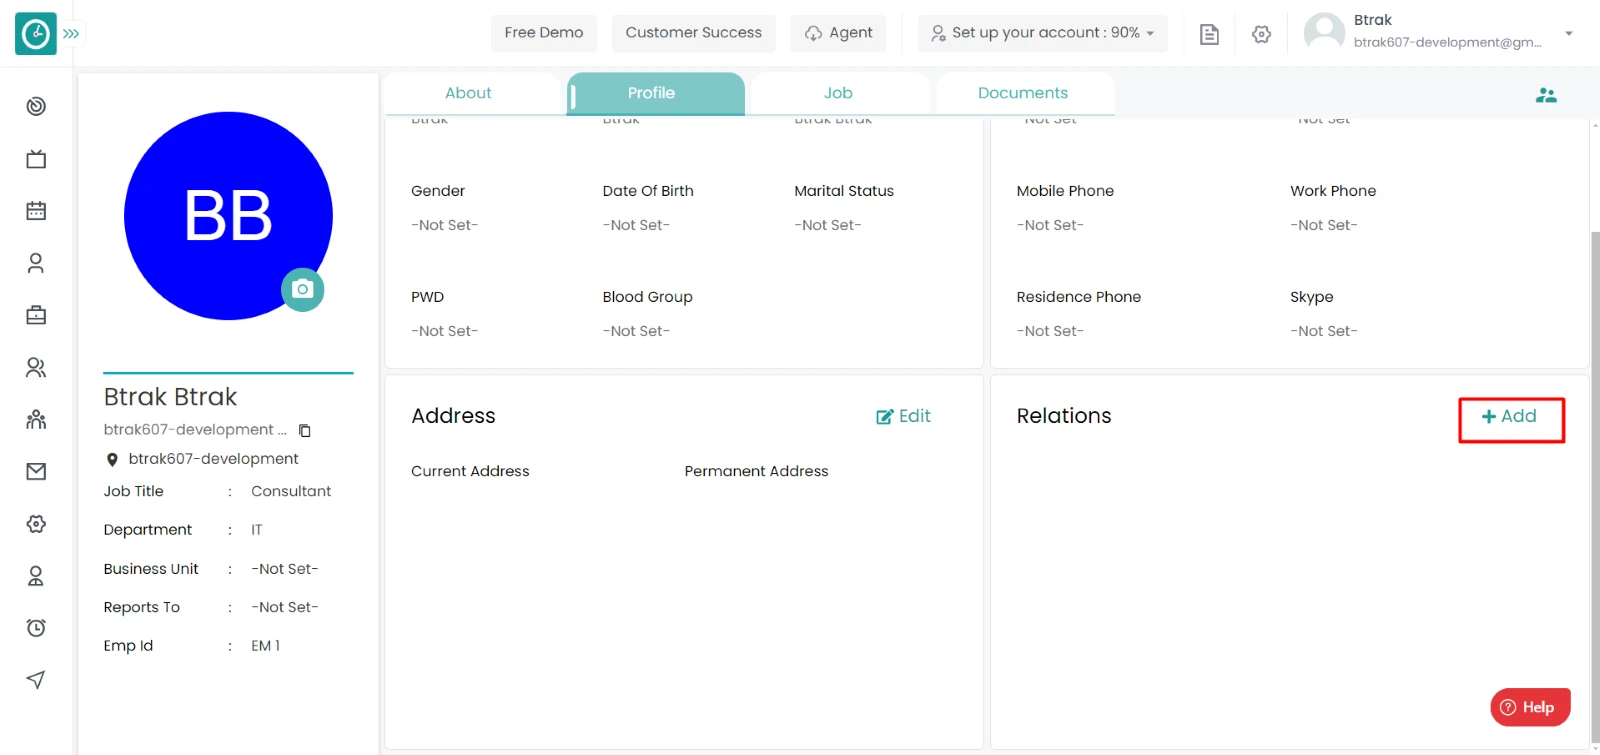
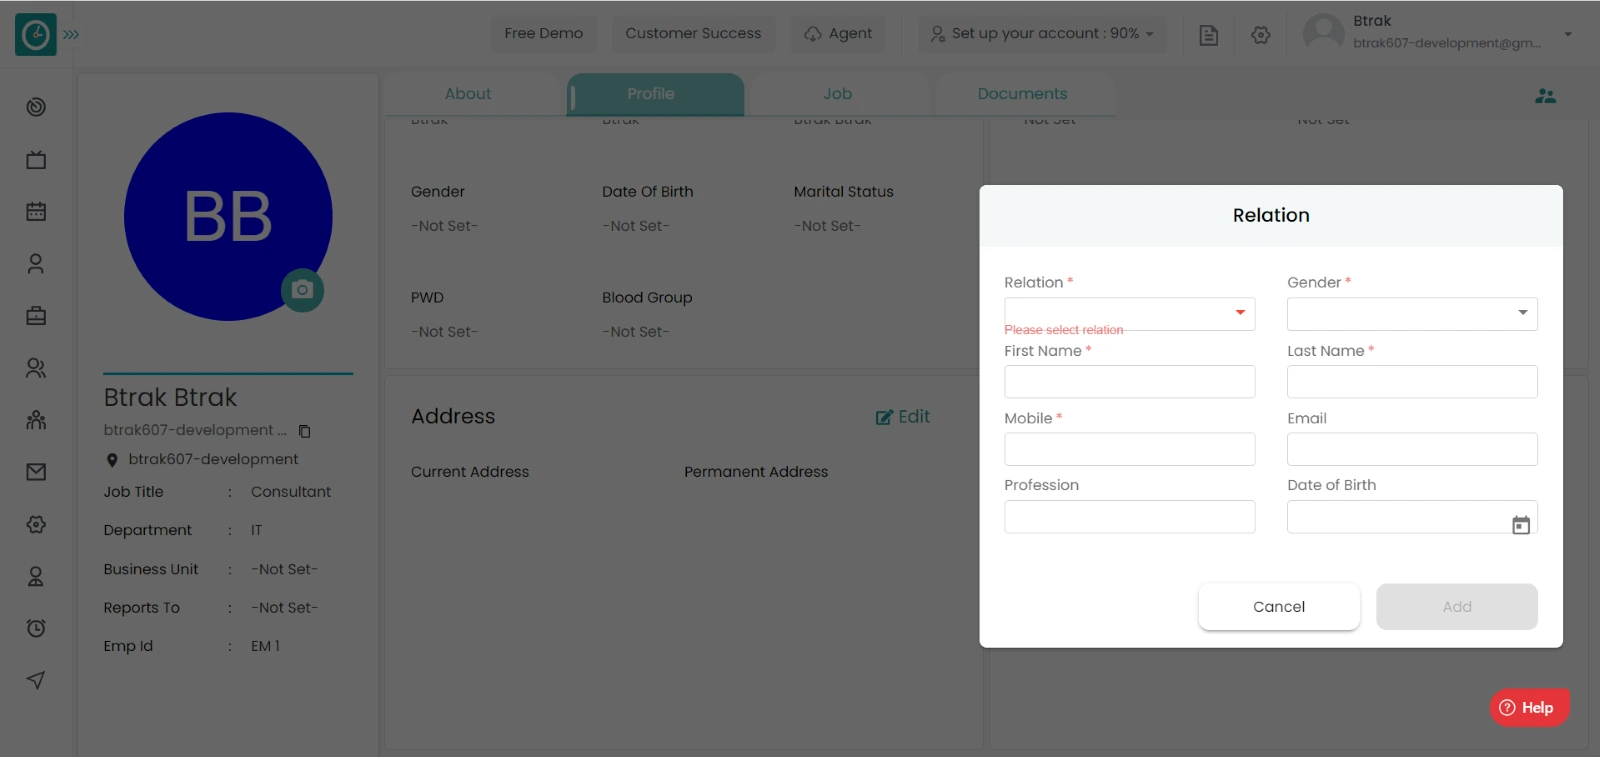
Manage employee profile details :-


Primary Details :-
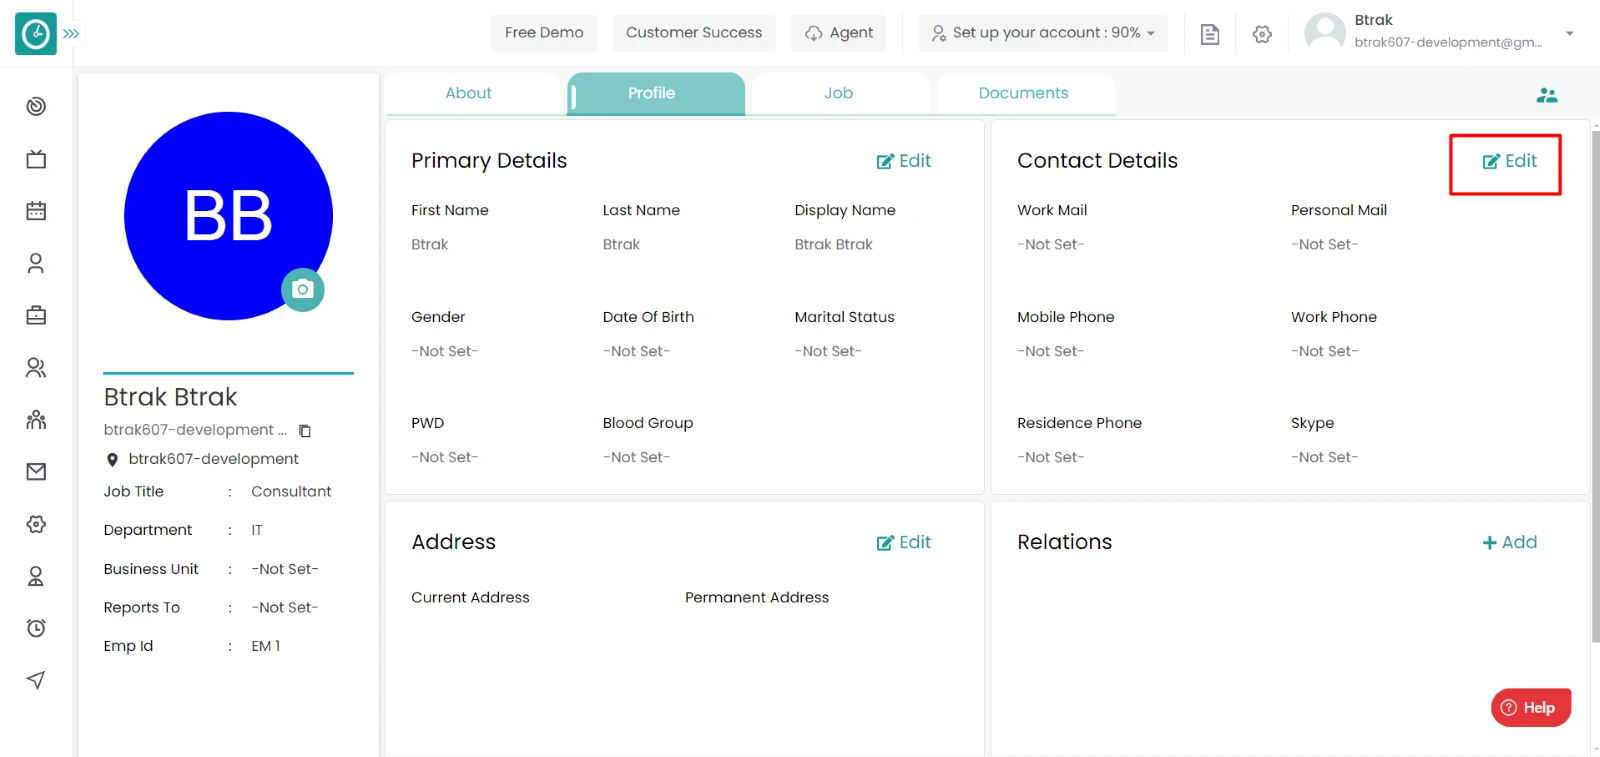
Contact details :-
Addresses :-

Relations :-
Navigation: Goto HR => HR Tab
If the user is having Super Admin
Permissions, then he can be able to view/manage job details of an employee.
This permission can be configured by following the steps: -
Edit My Detailed Profile / Edit All My Subordinates / Manage All Members From The Organization,
then select the roles for what you must give the permissions to configure and check them.Edit My Detailed Profile / Edit All My Subordinates Manage / All Members From The Organization
for the defined roles.
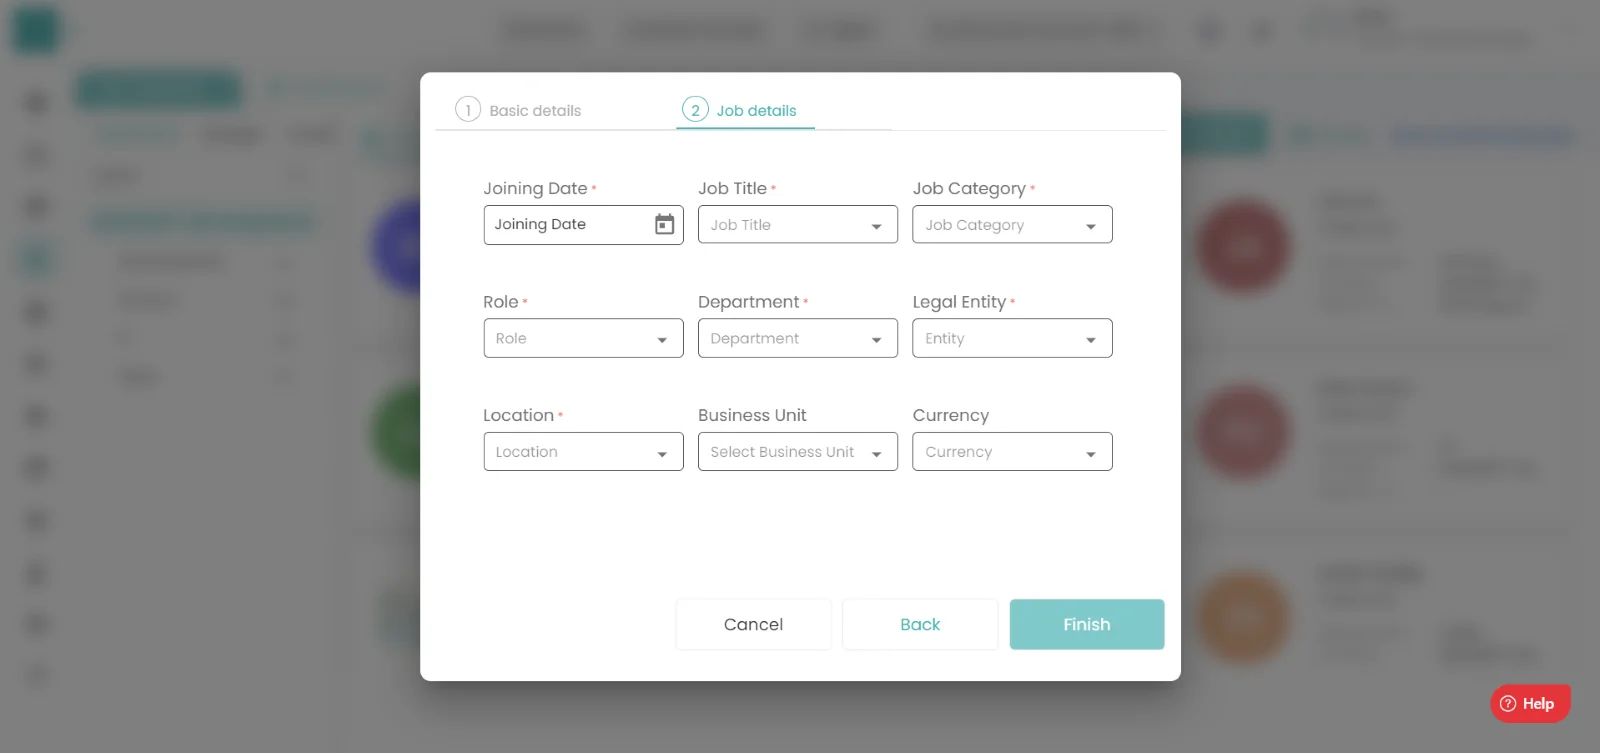
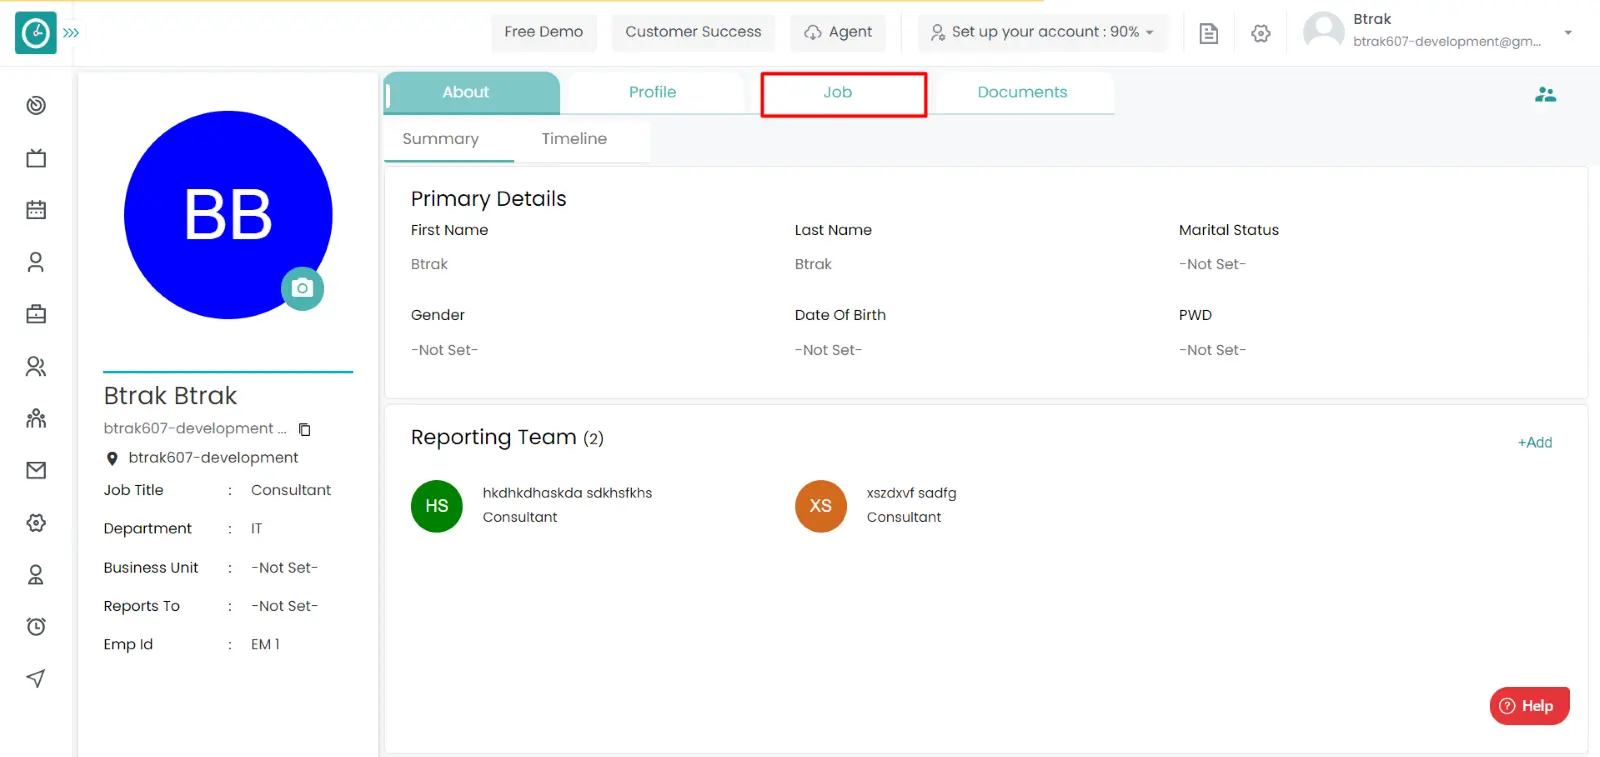
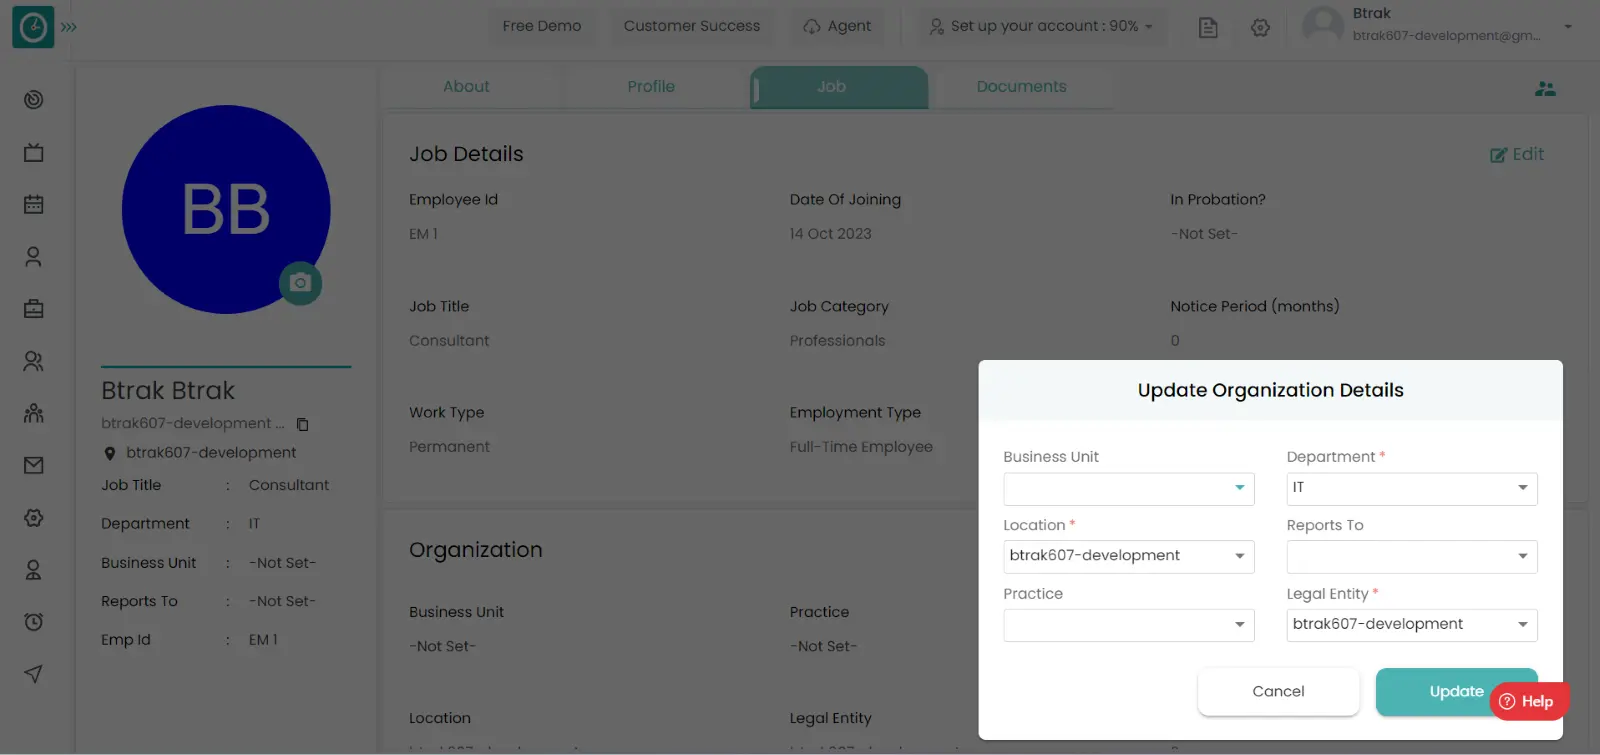
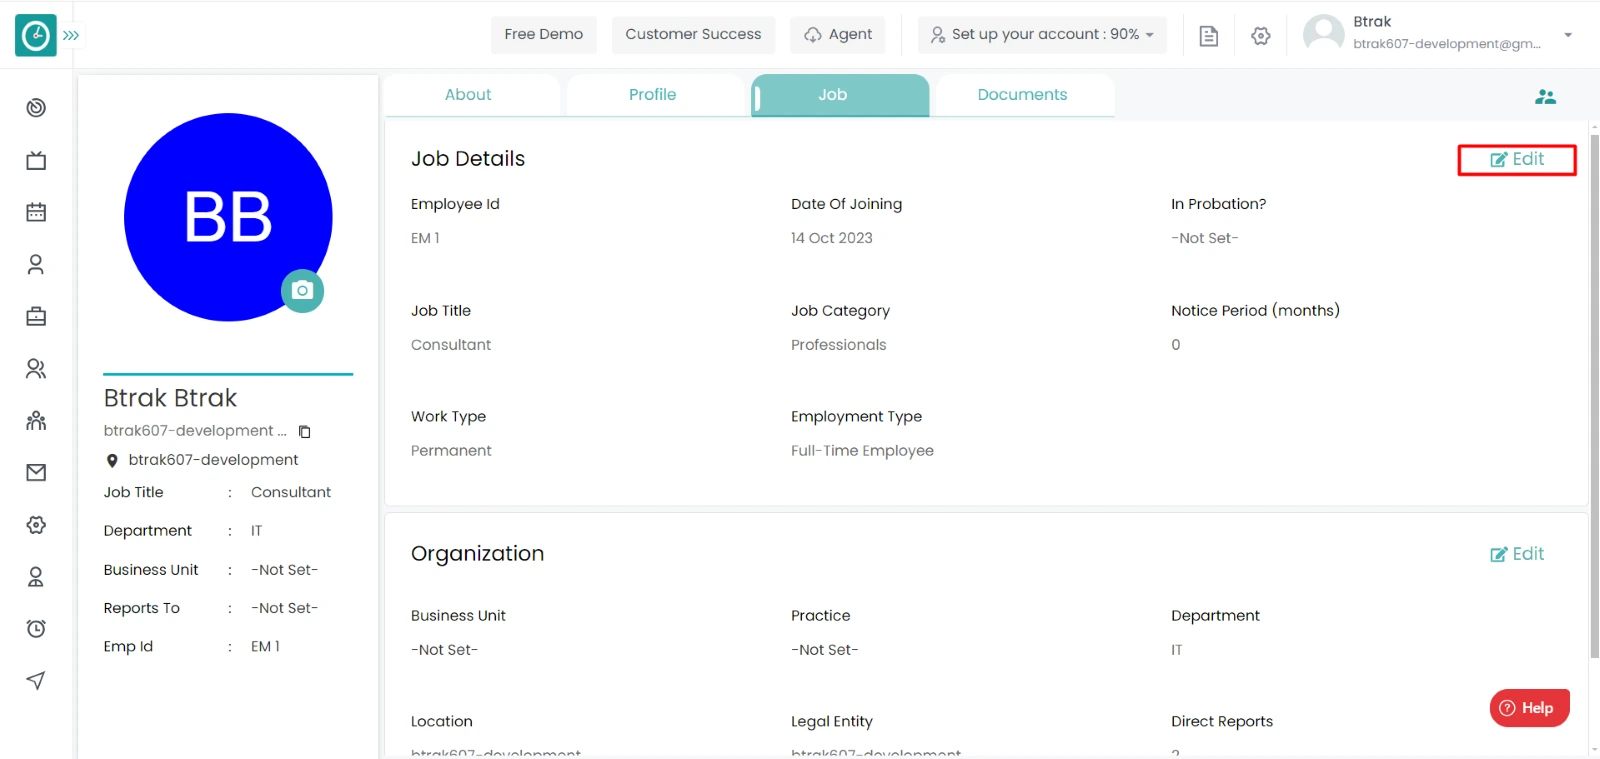
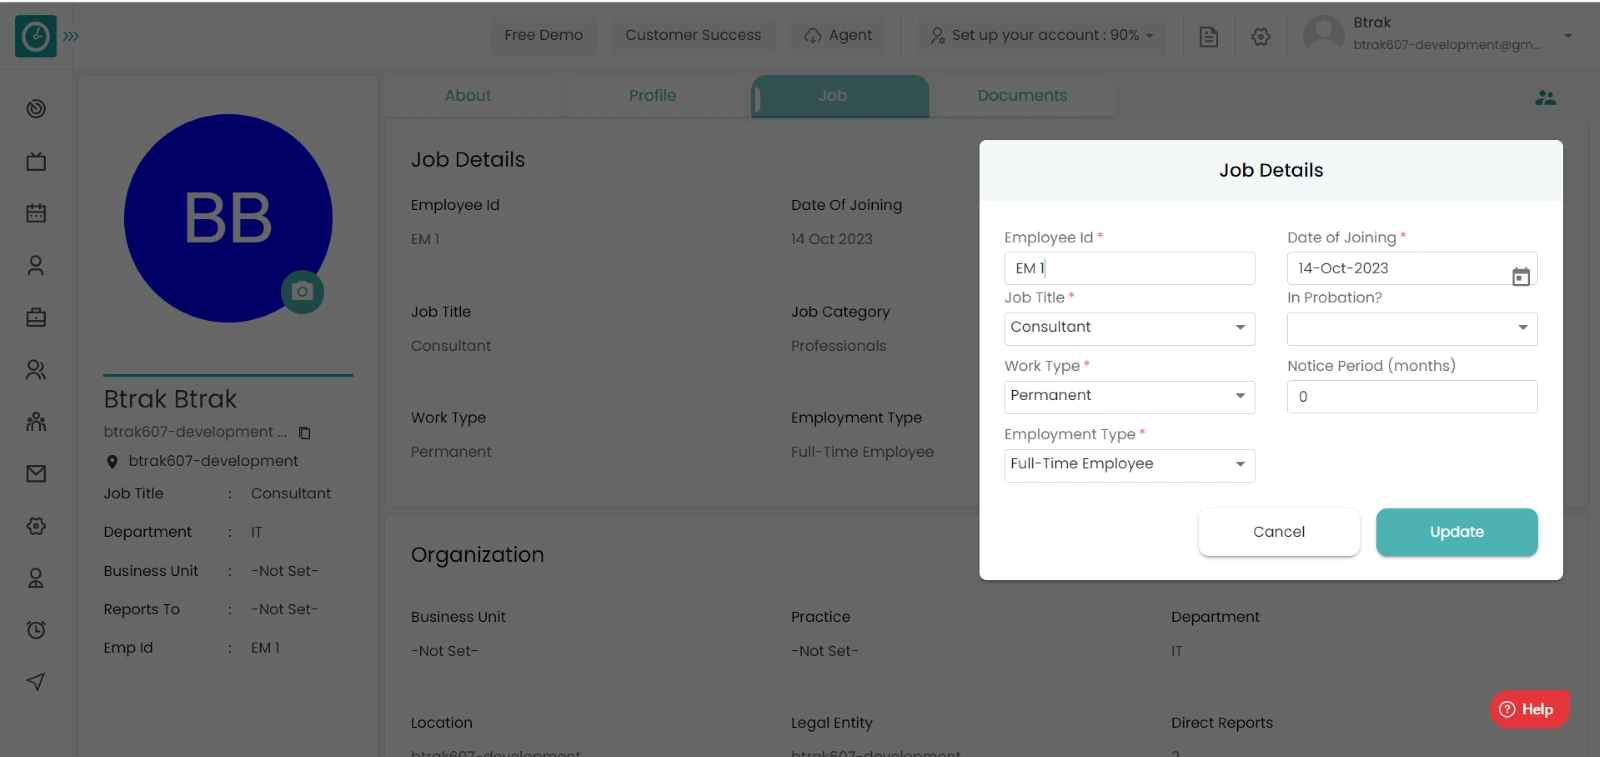
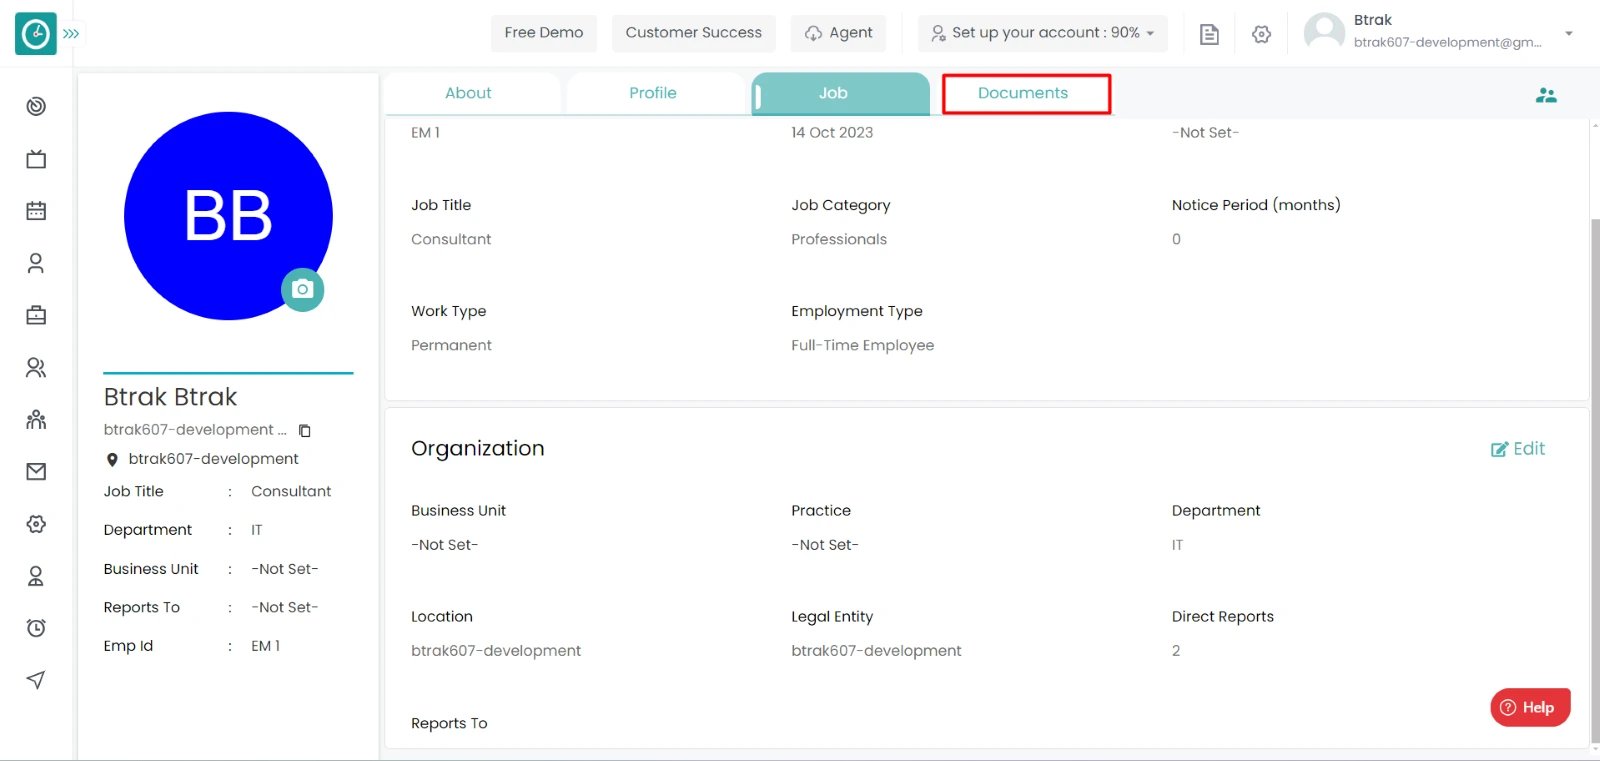
Manage Job details :-


Job Details :-
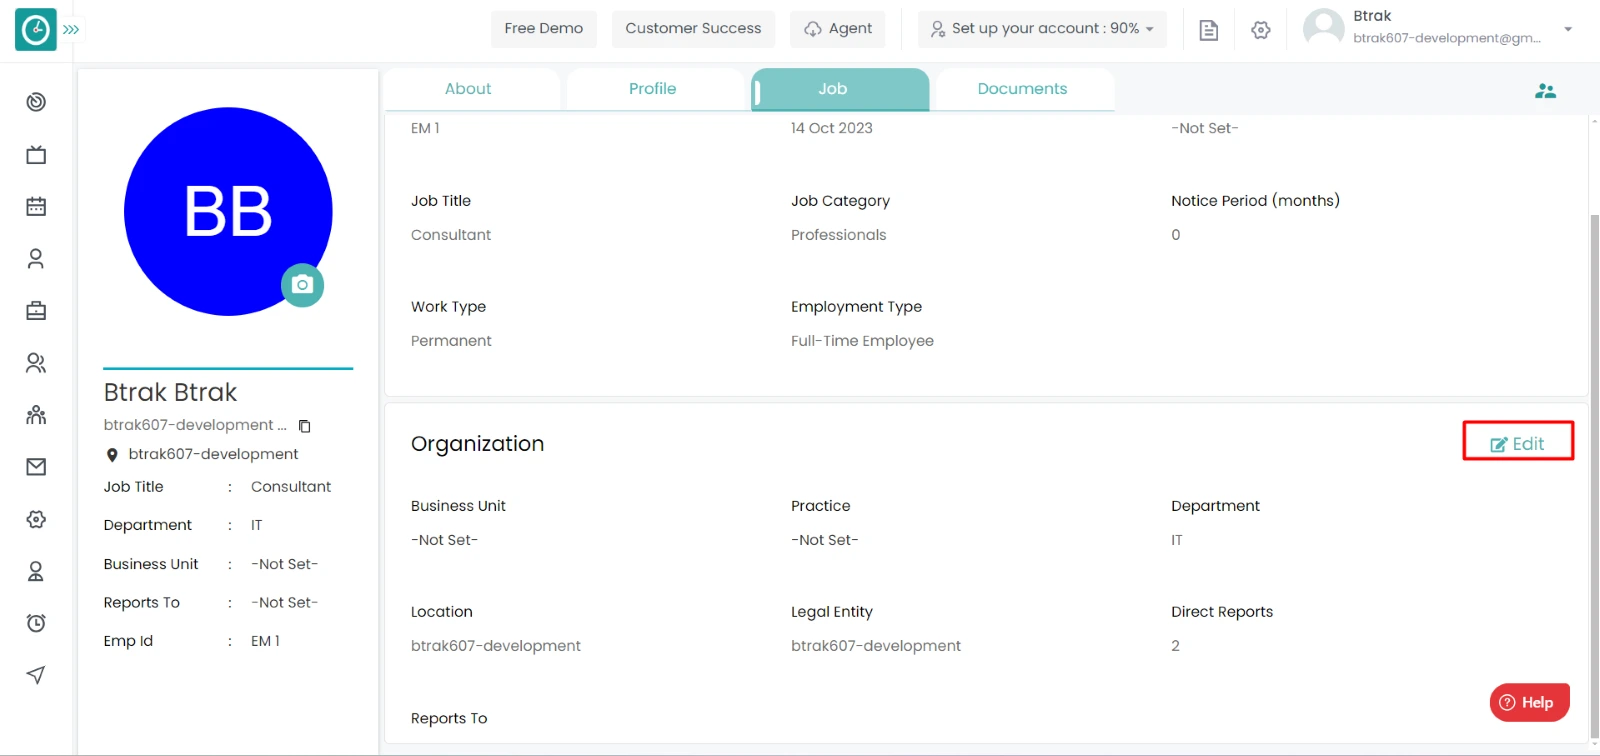
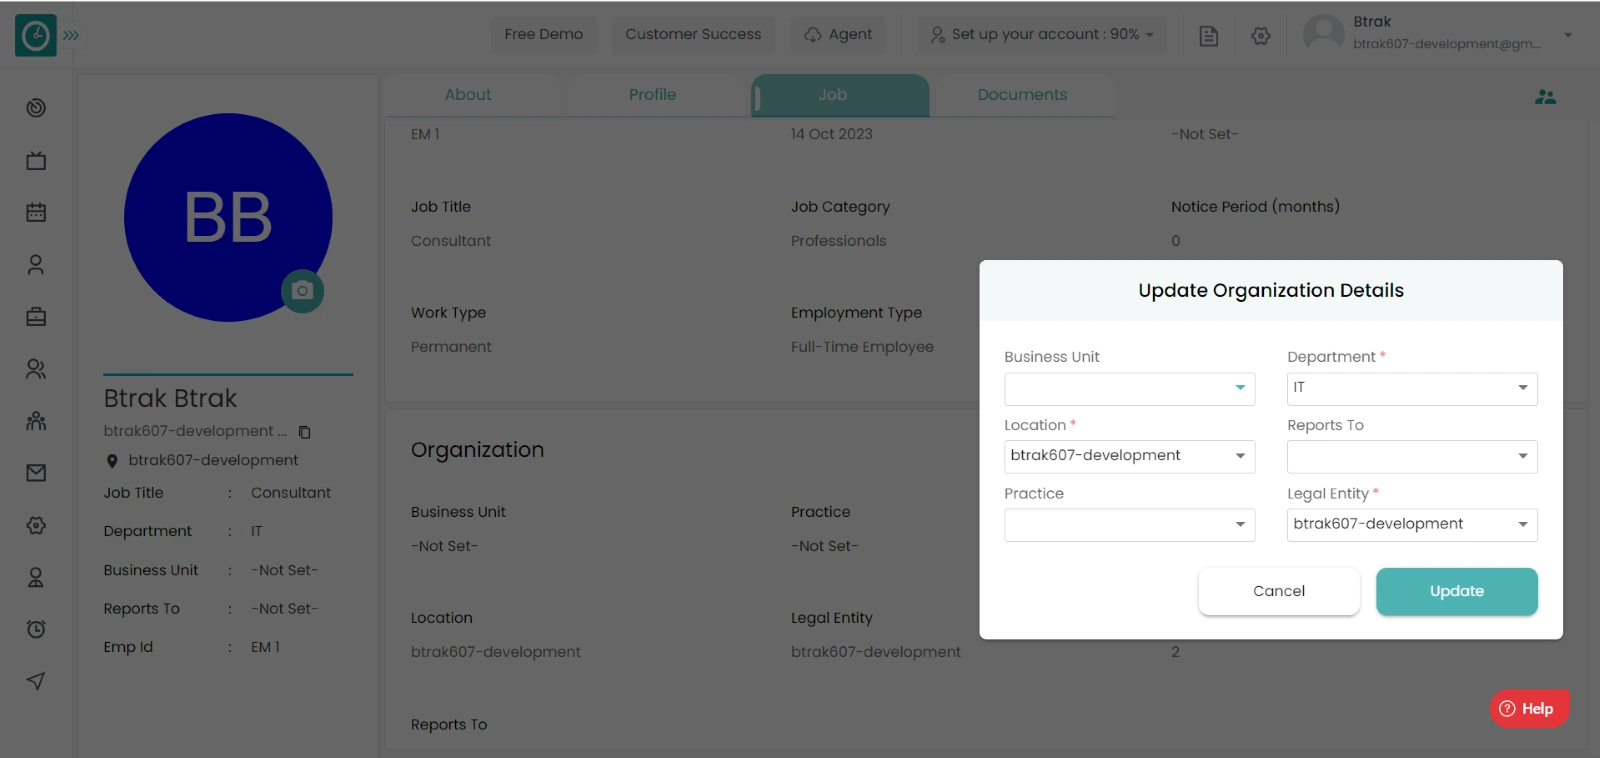
Organization :-
Navigation: Goto HR => HR Tab
If the user is having Super Admin
Permissions, then he can be able to view/manage the documents of an employee.
This permission can be configured by following the steps: -
Edit My Detailed Profile / Edit All My Subordinates / Manage All Members From The Organization,
then select the roles for what you must give the permissions to configure and check them.Edit My Detailed Profile / Edit All My Subordinates Manage / All Members From The Organization
for the defined roles.
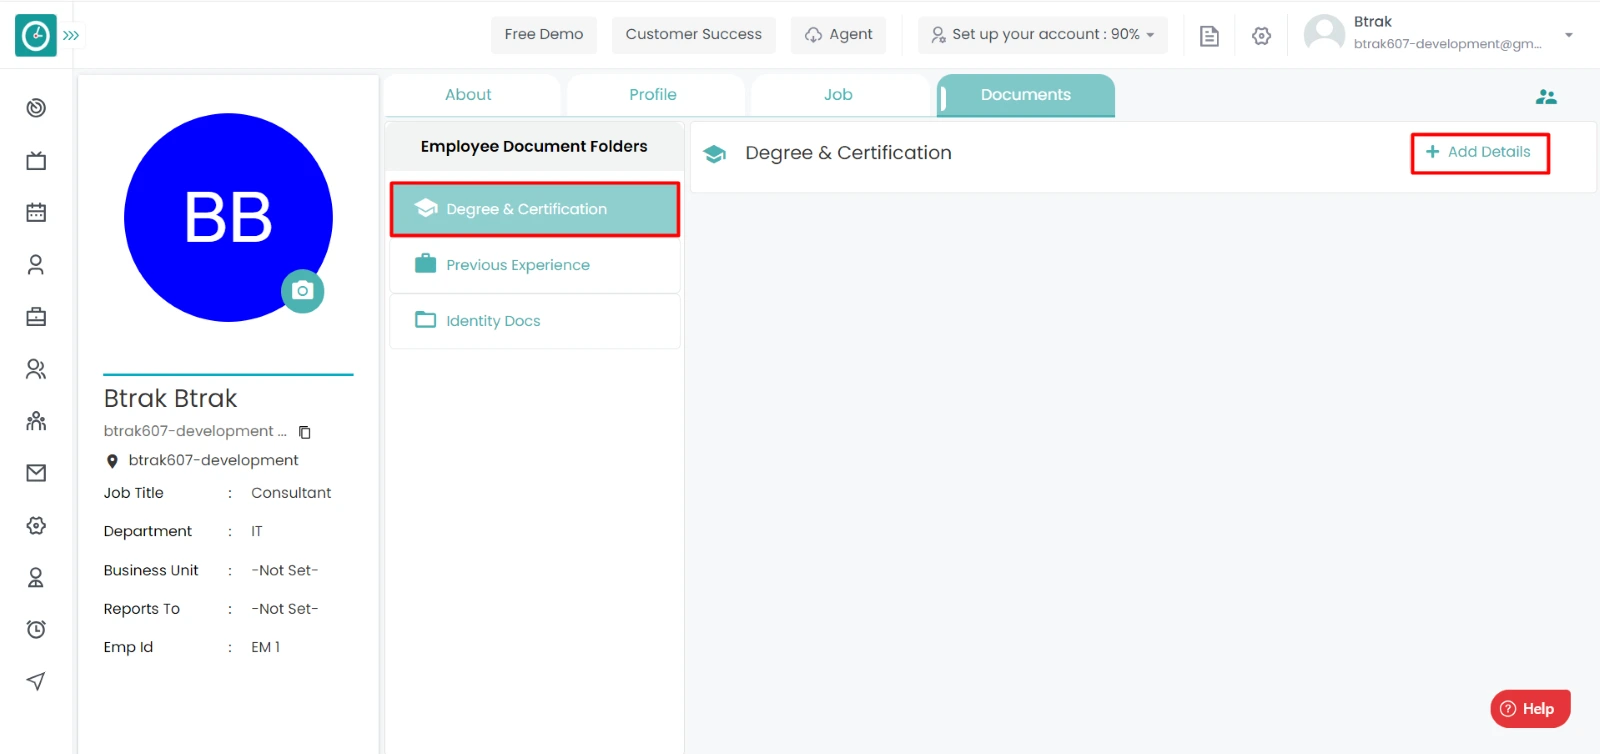
Manage Documents :-
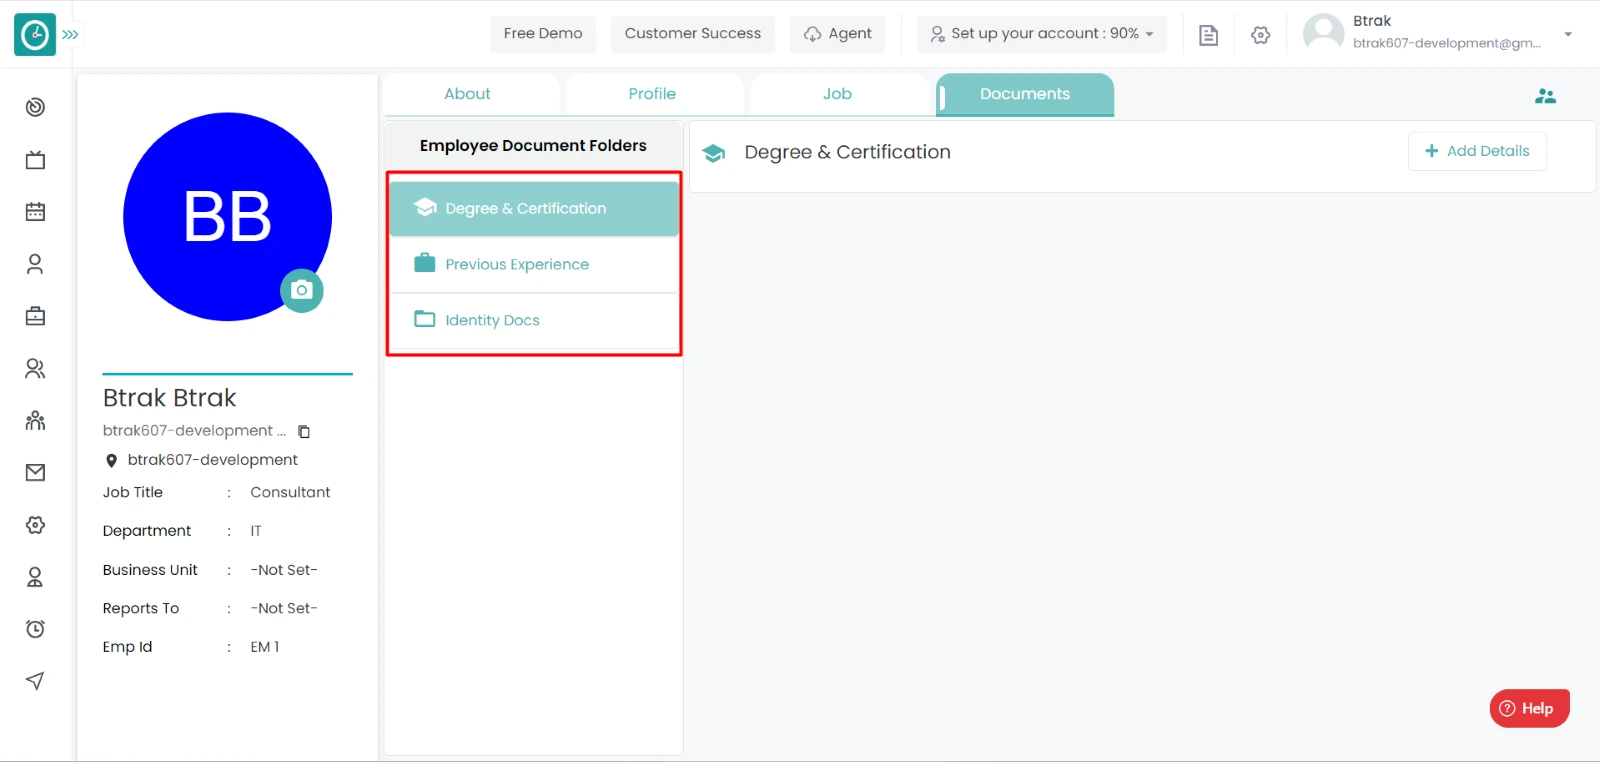
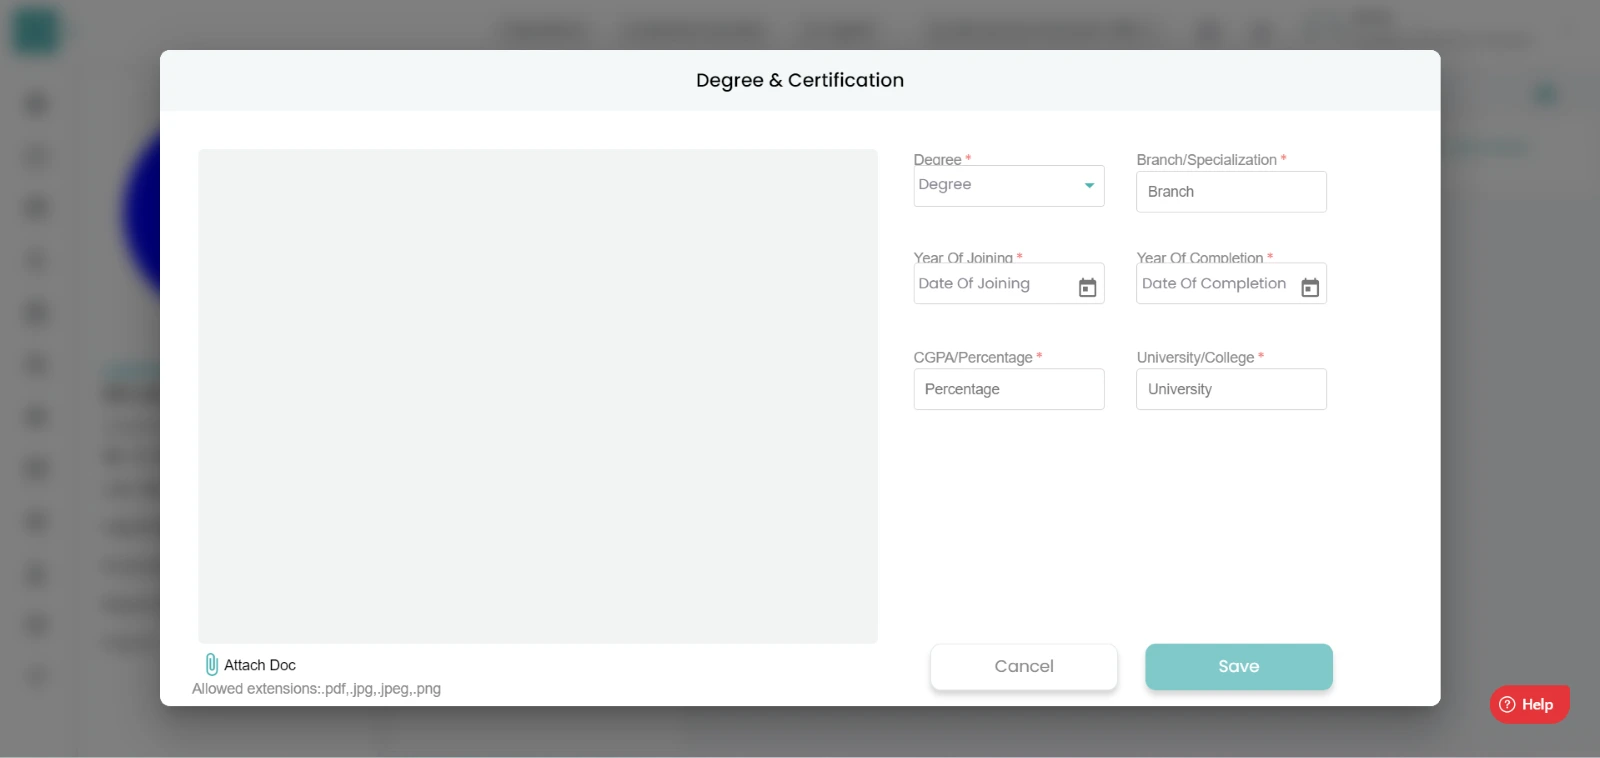
Degree and certificates :-
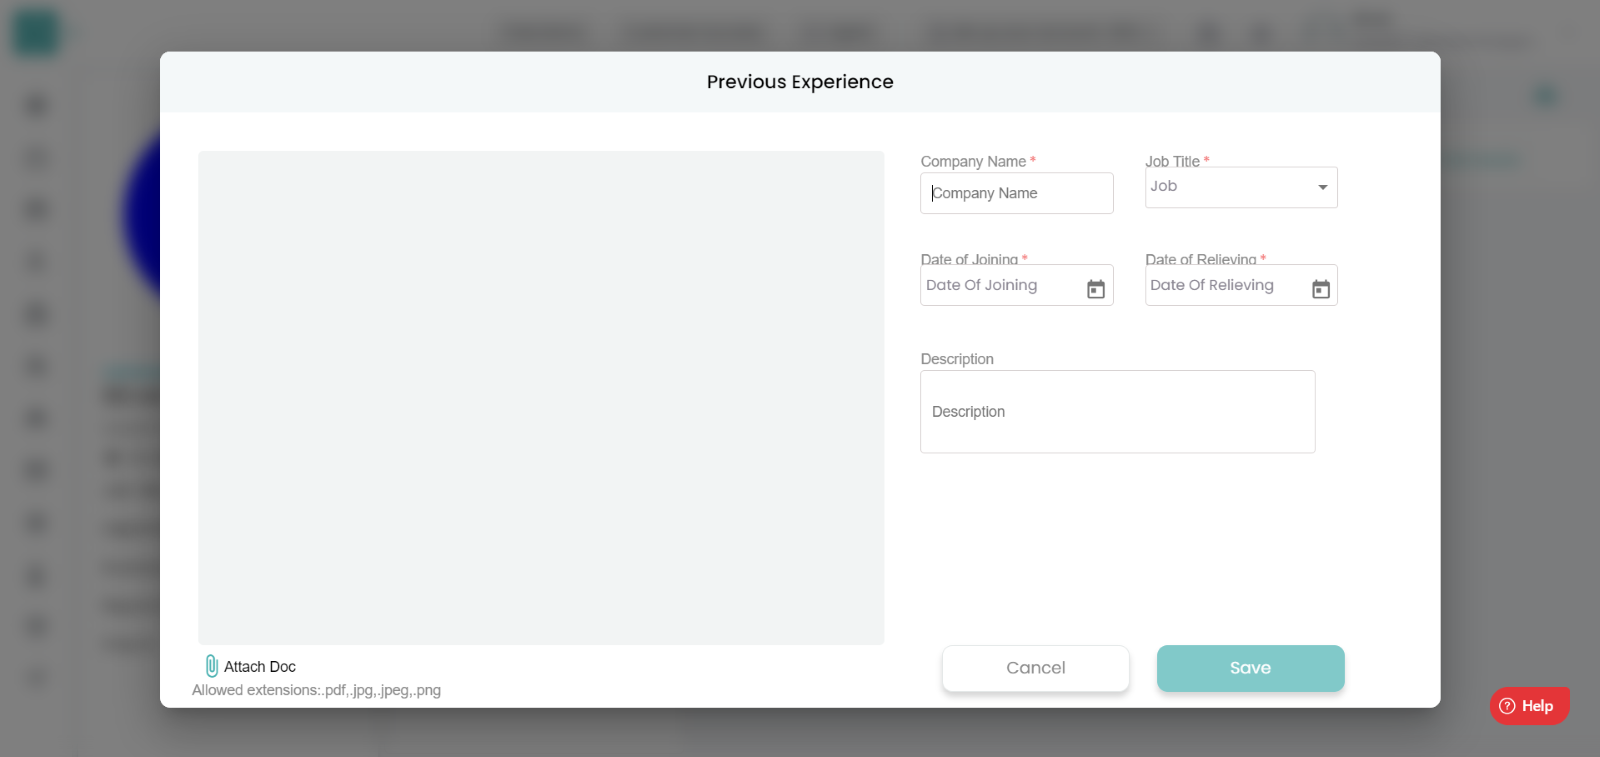
Previous experience :-
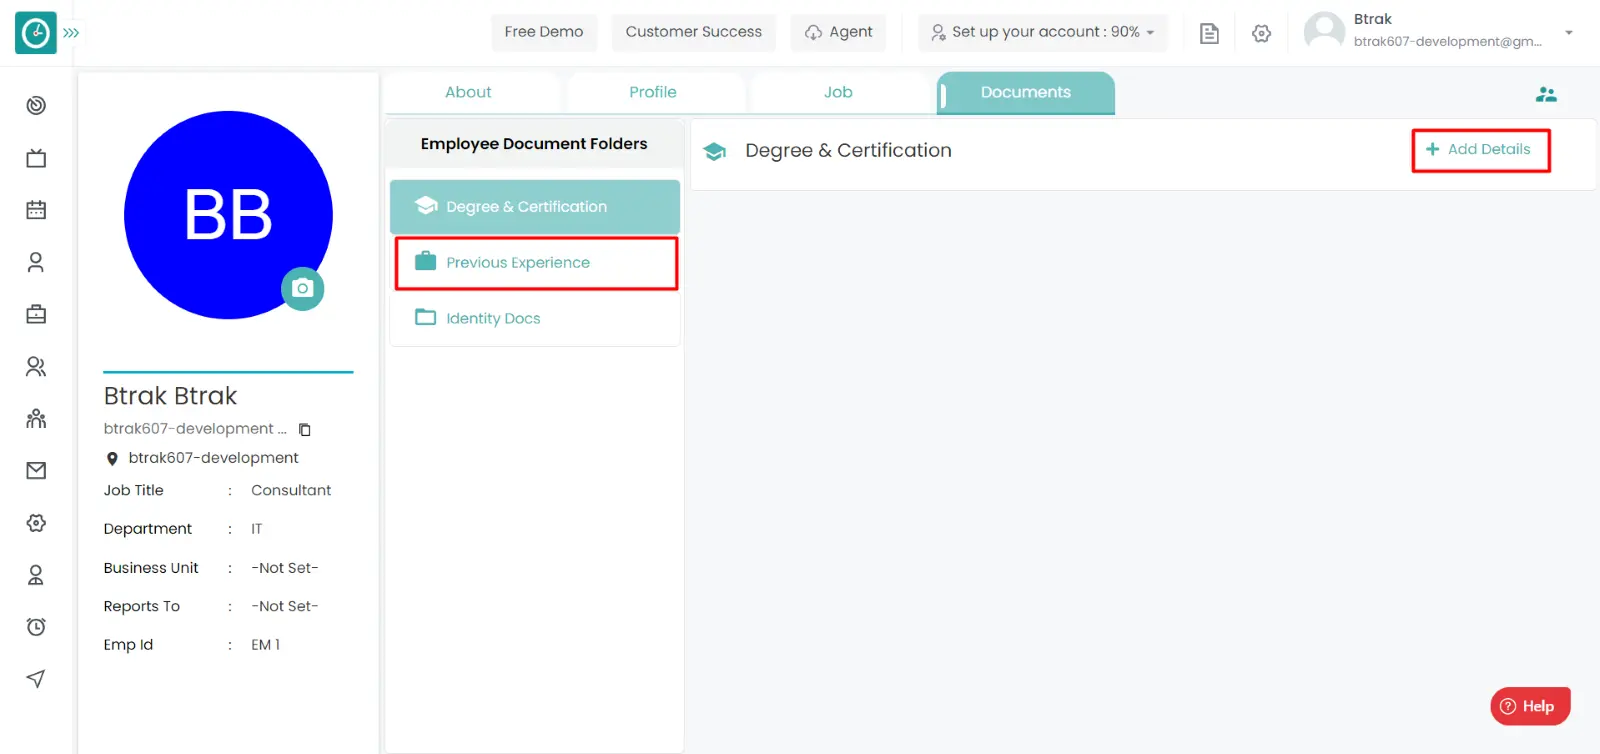
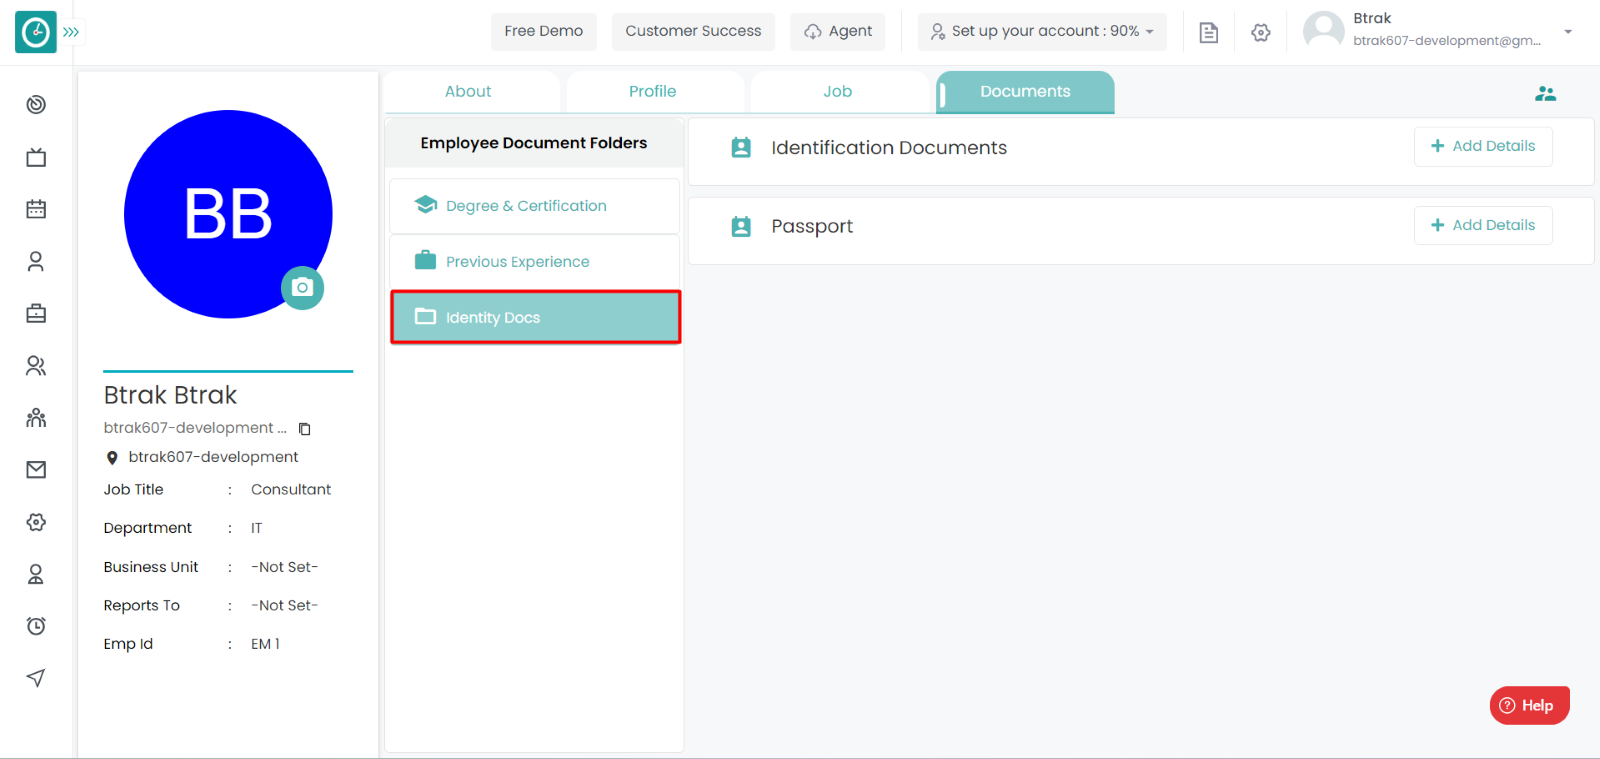
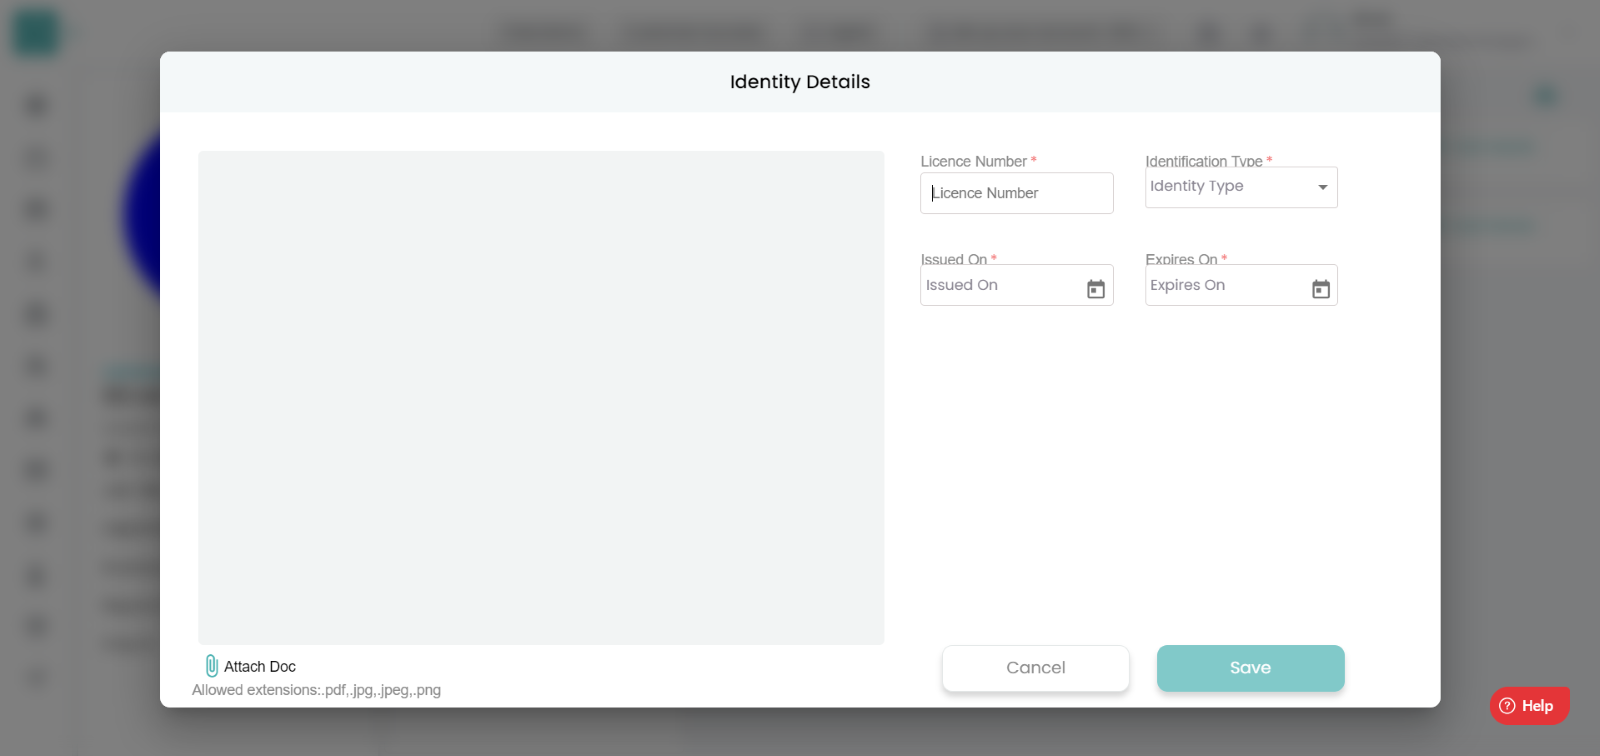
Identity Documents :-
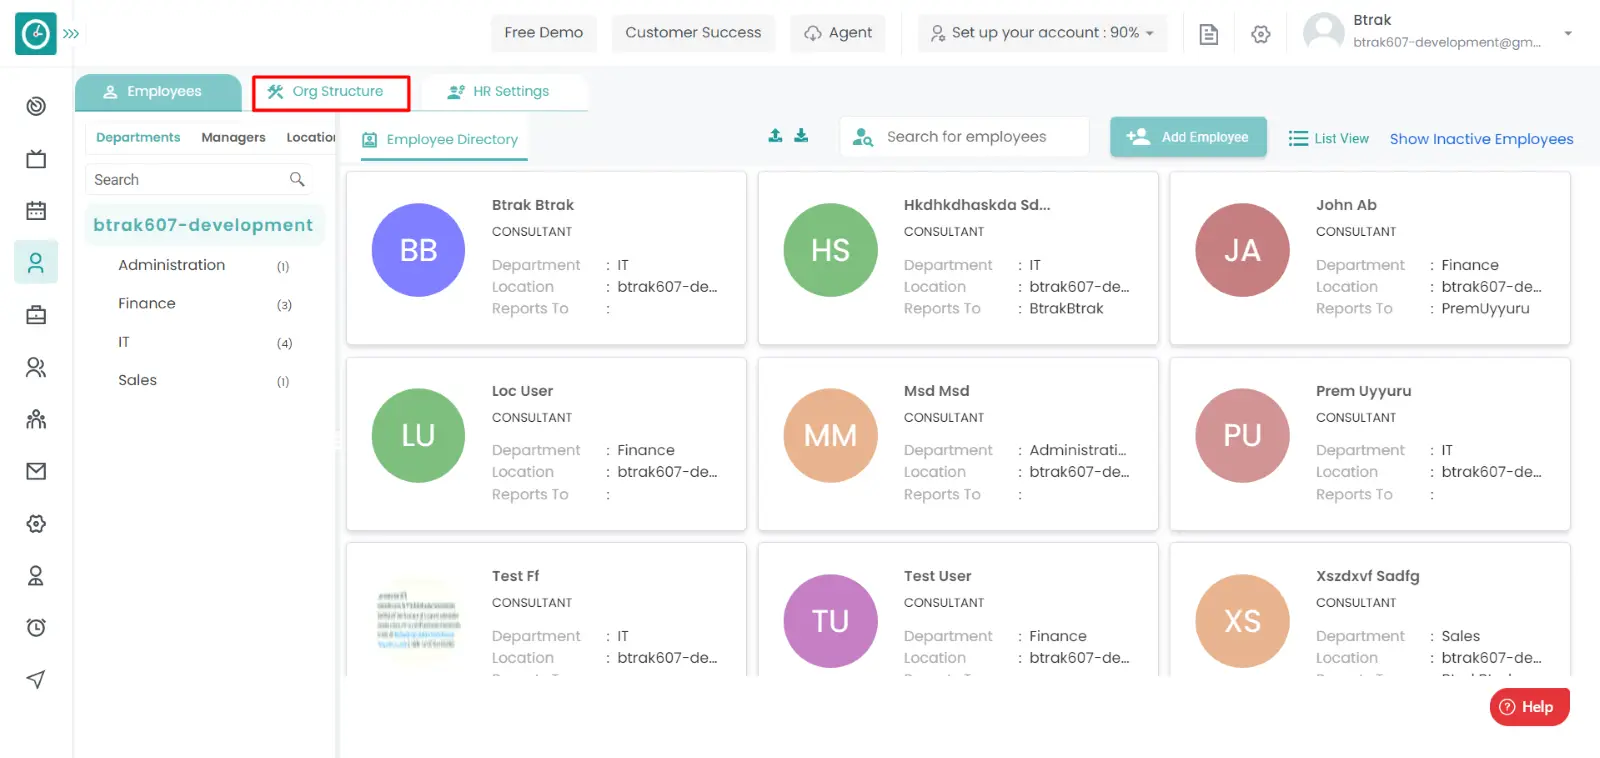
Navigation: Goto HR => HR Tab
If the user is having Super Admin
Permissions, then he can be able to view/manage the business unit.
This permission can be configured by following the steps: -
Manage HR Settings from HR module,
then select the roles for what you must give the permissions to configure and check them.HR Settings
for the defined roles.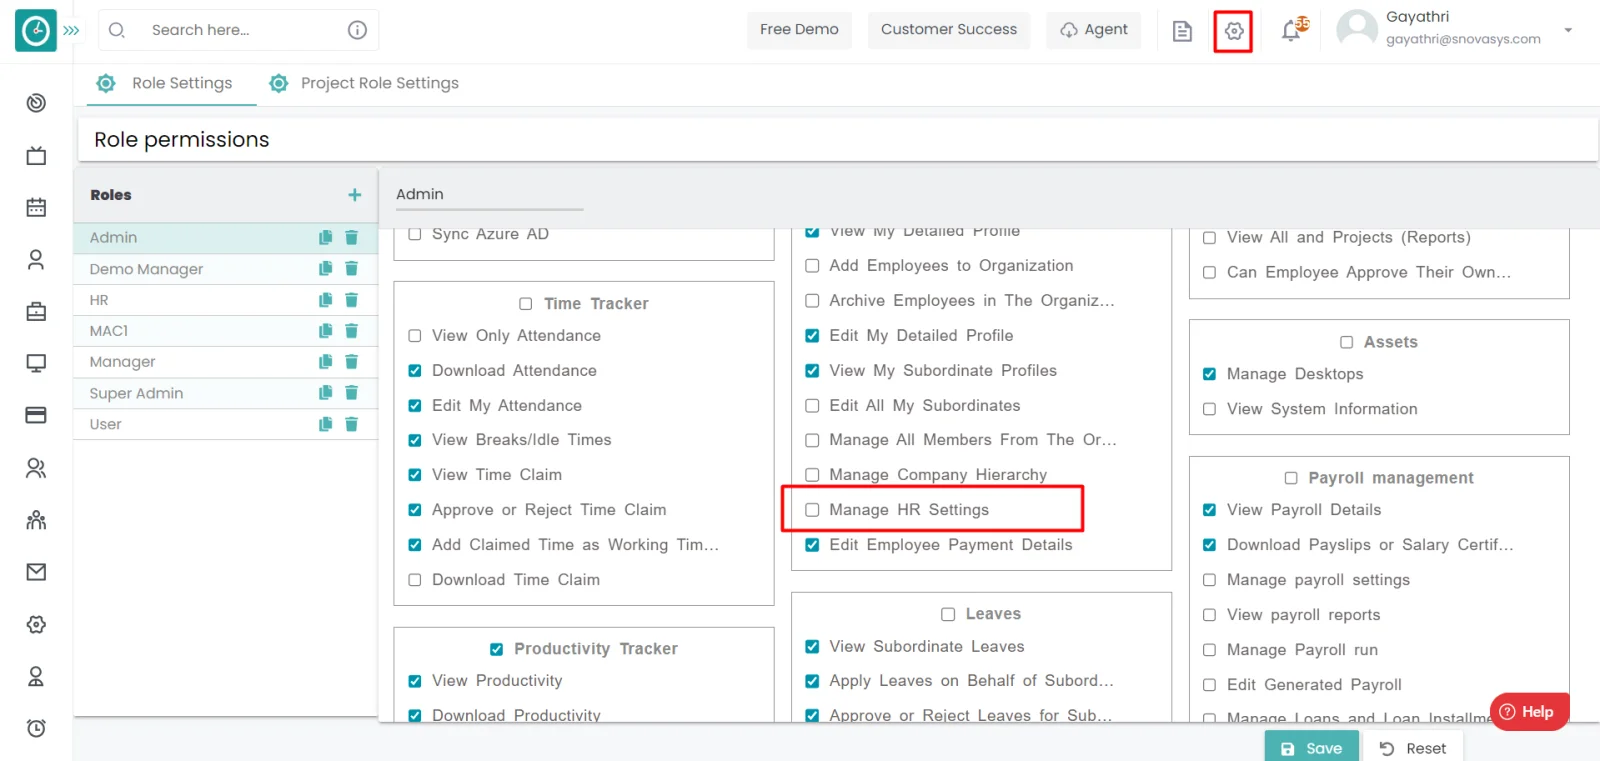
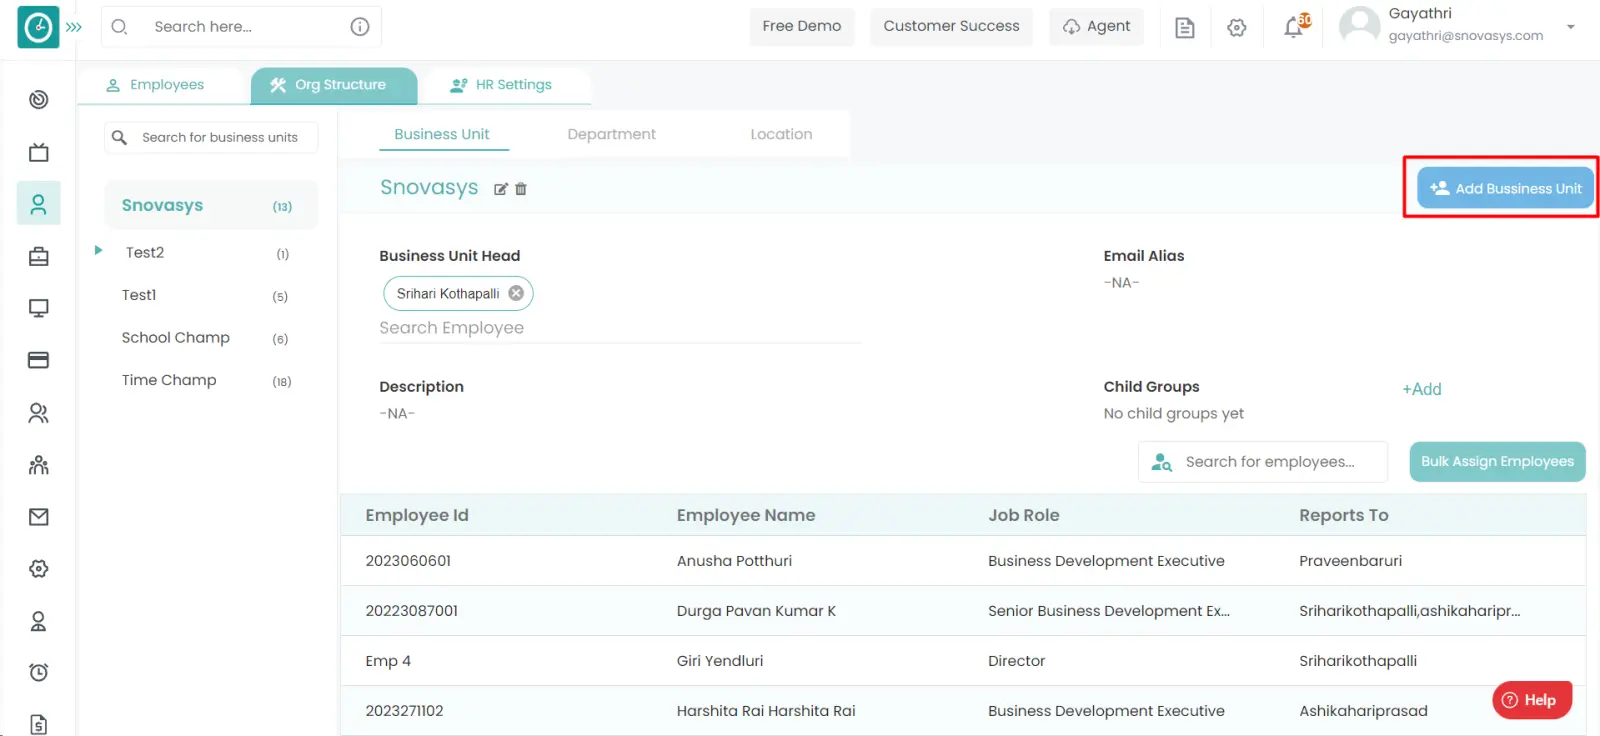
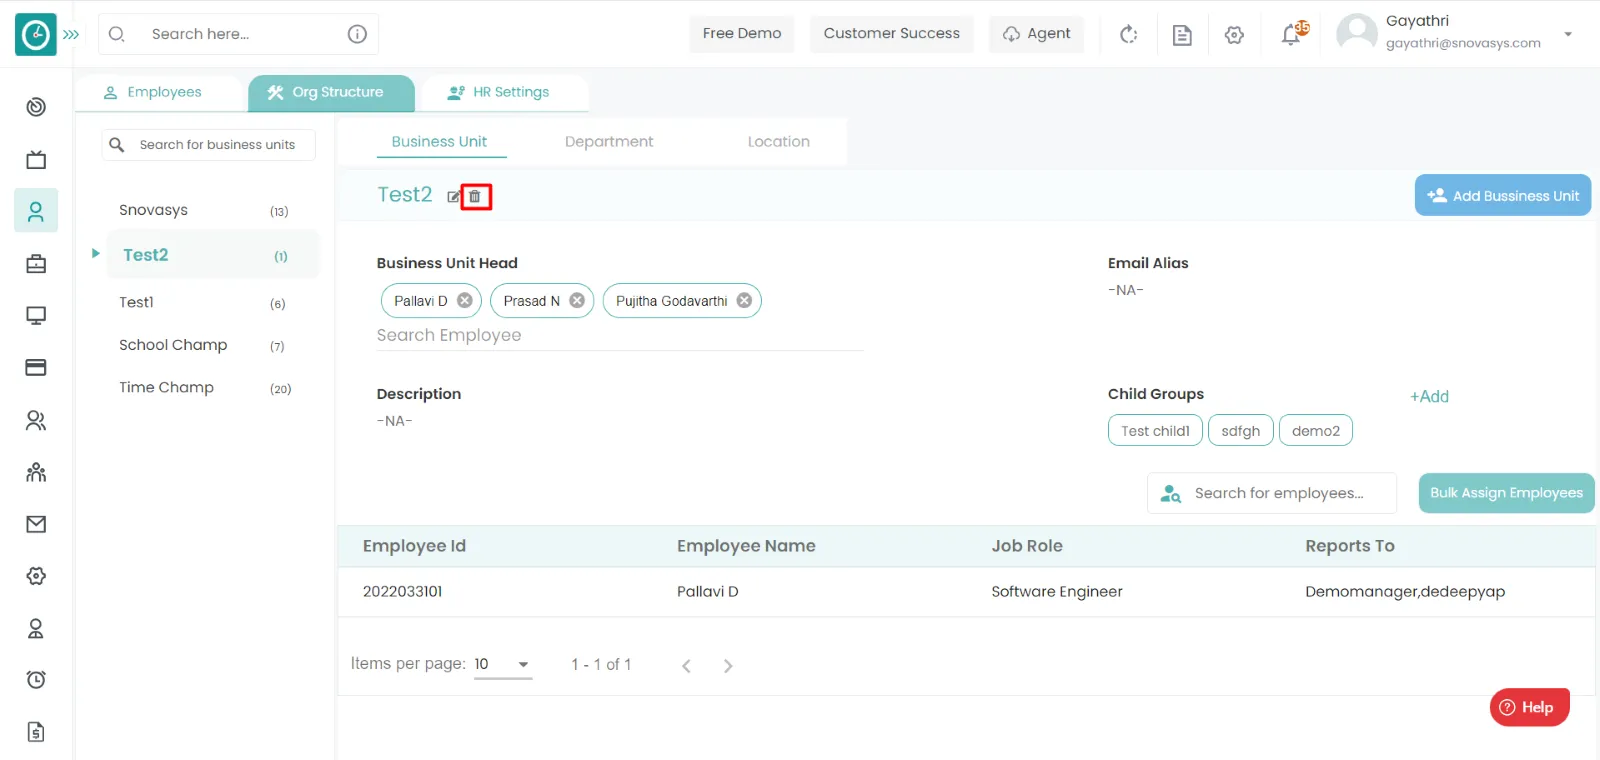
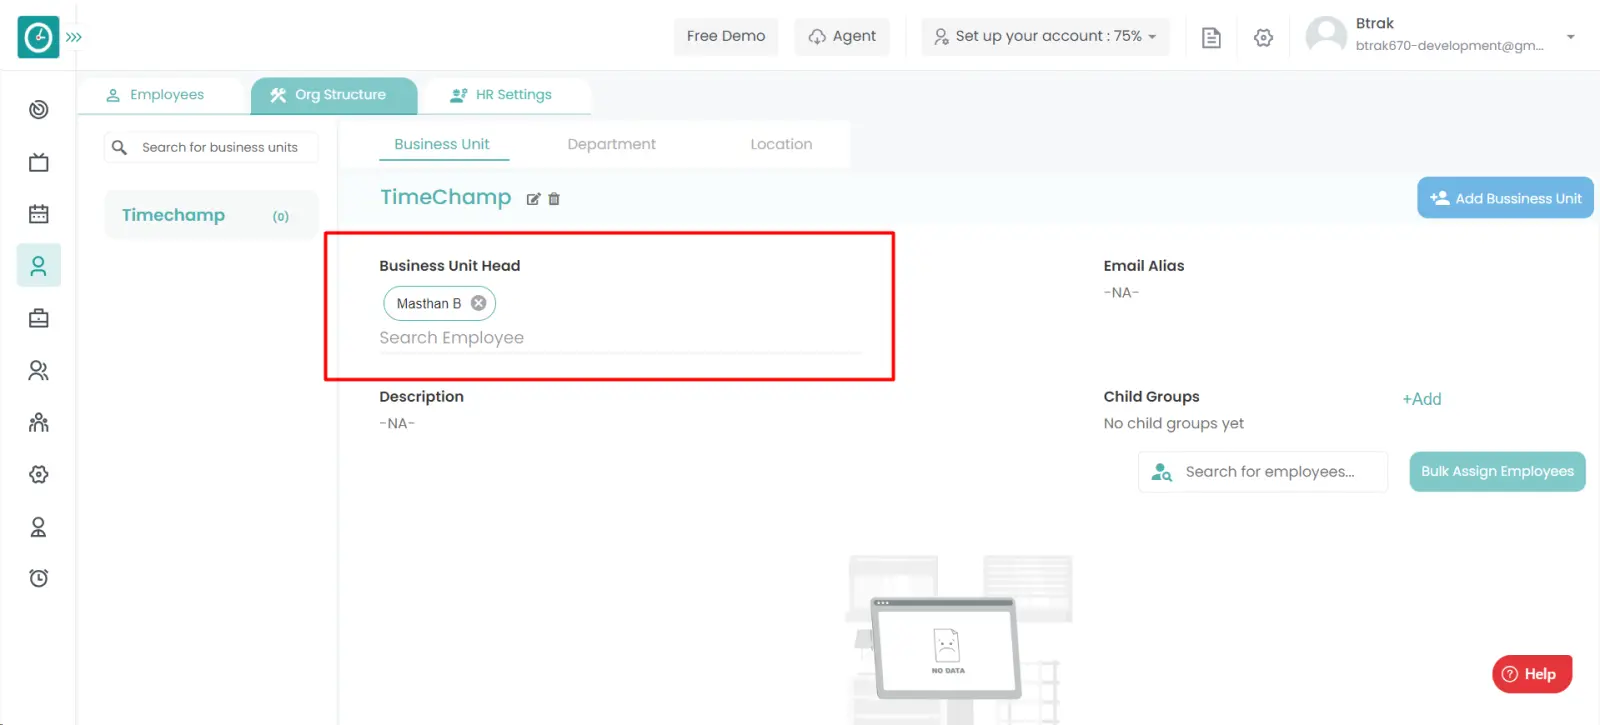
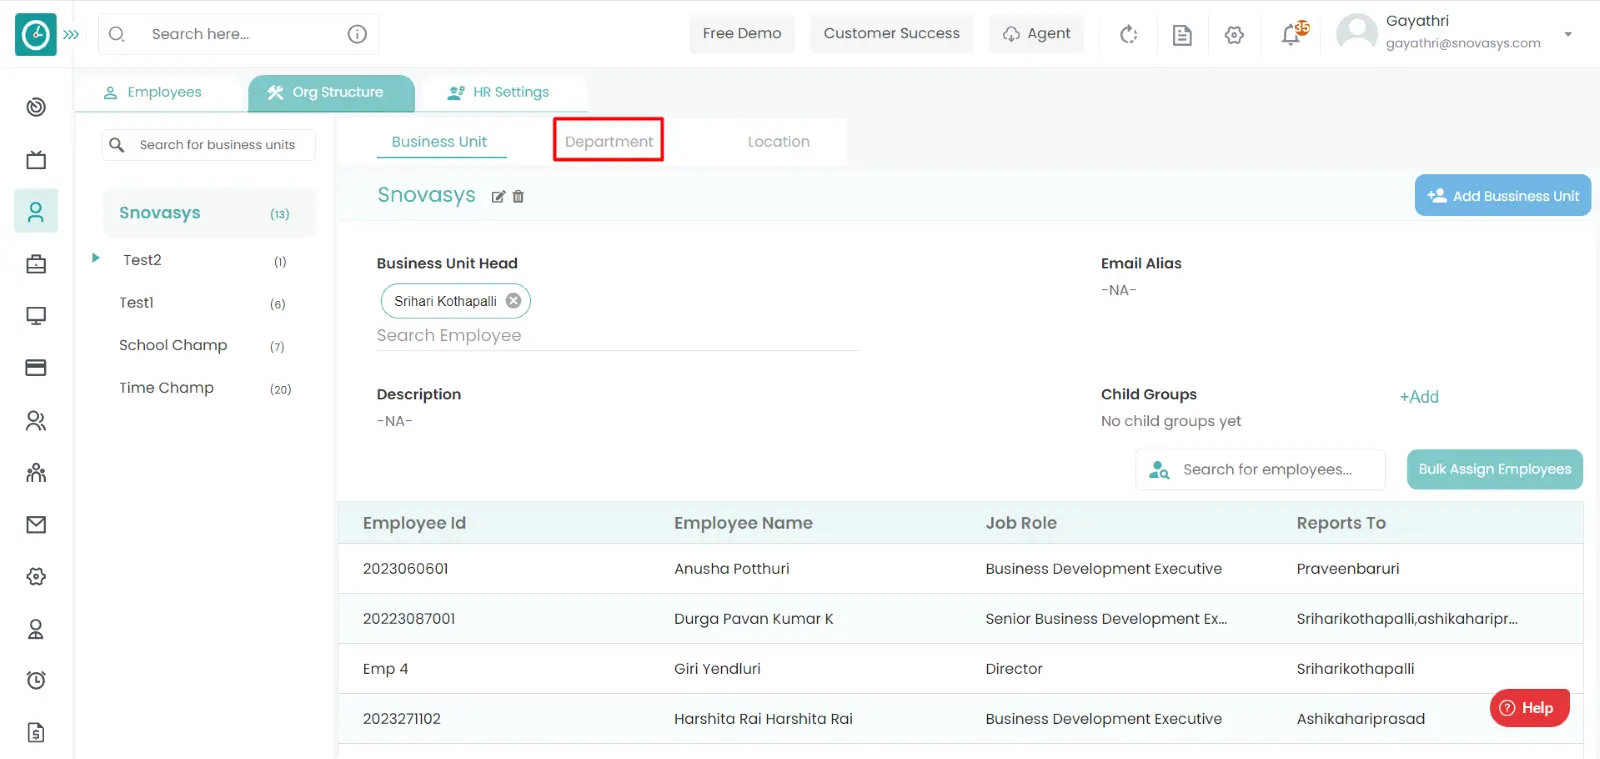
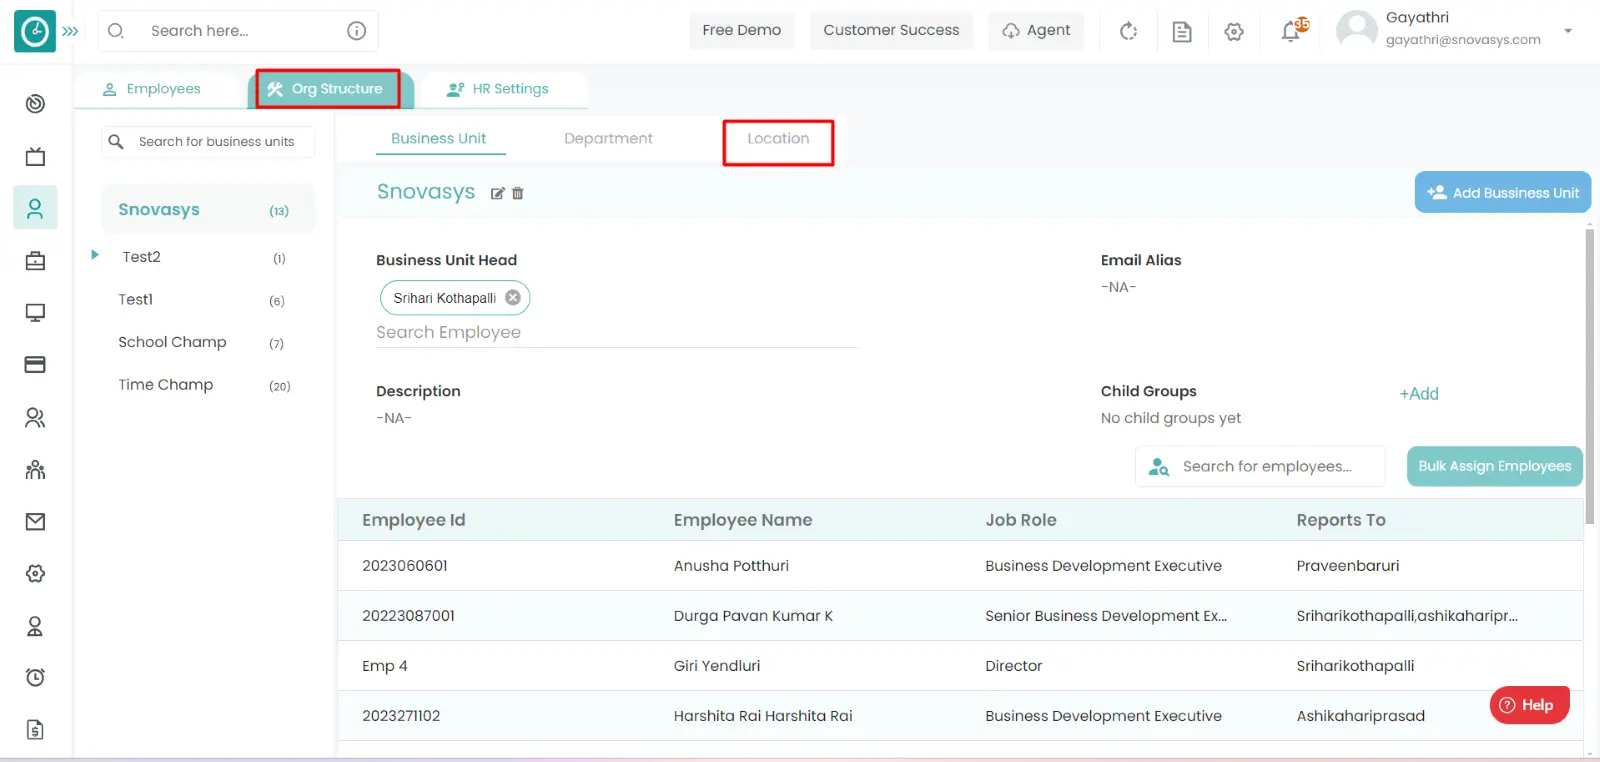
Business Unit :-
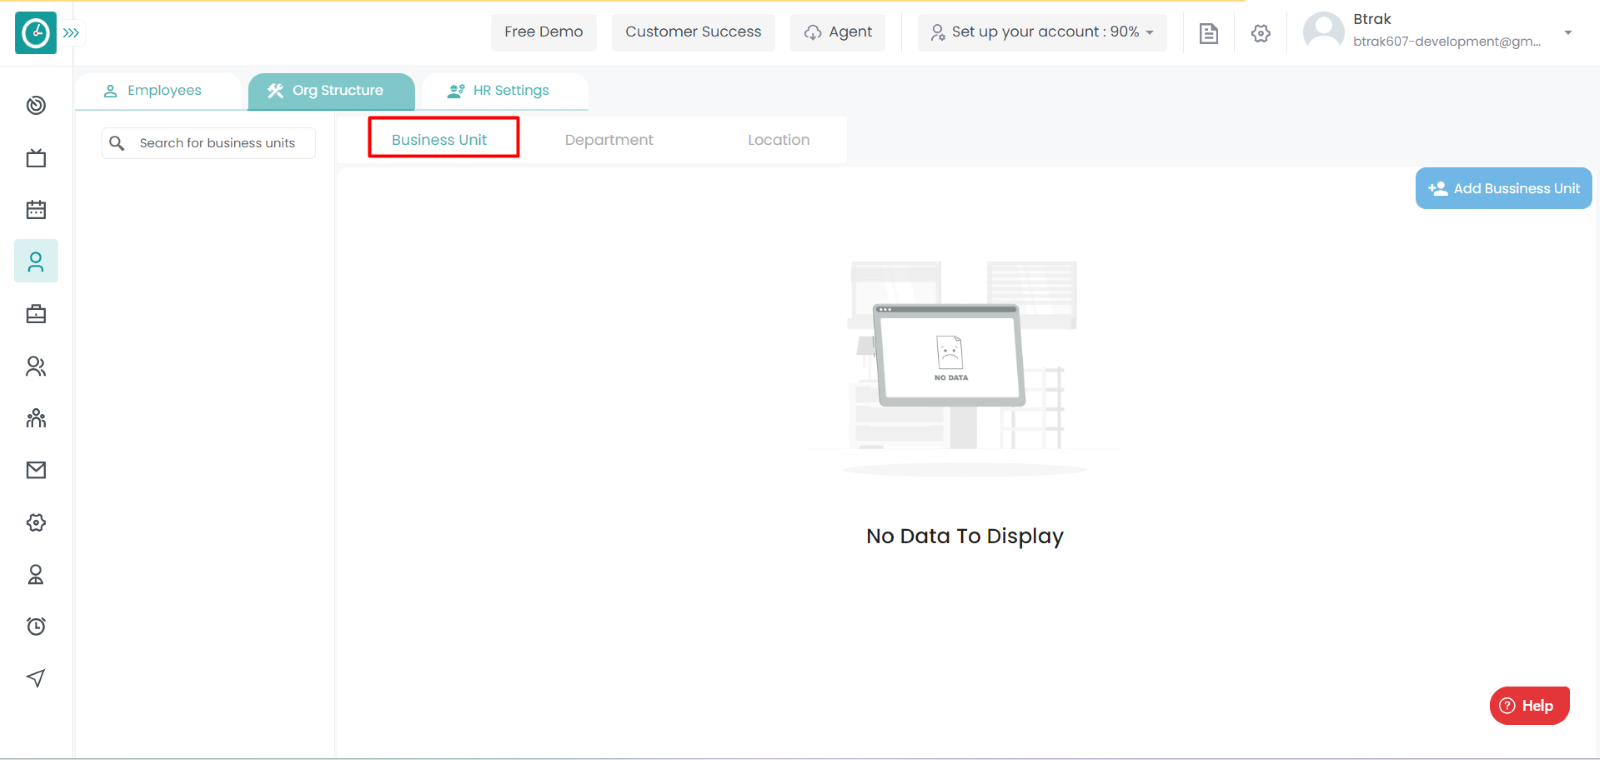
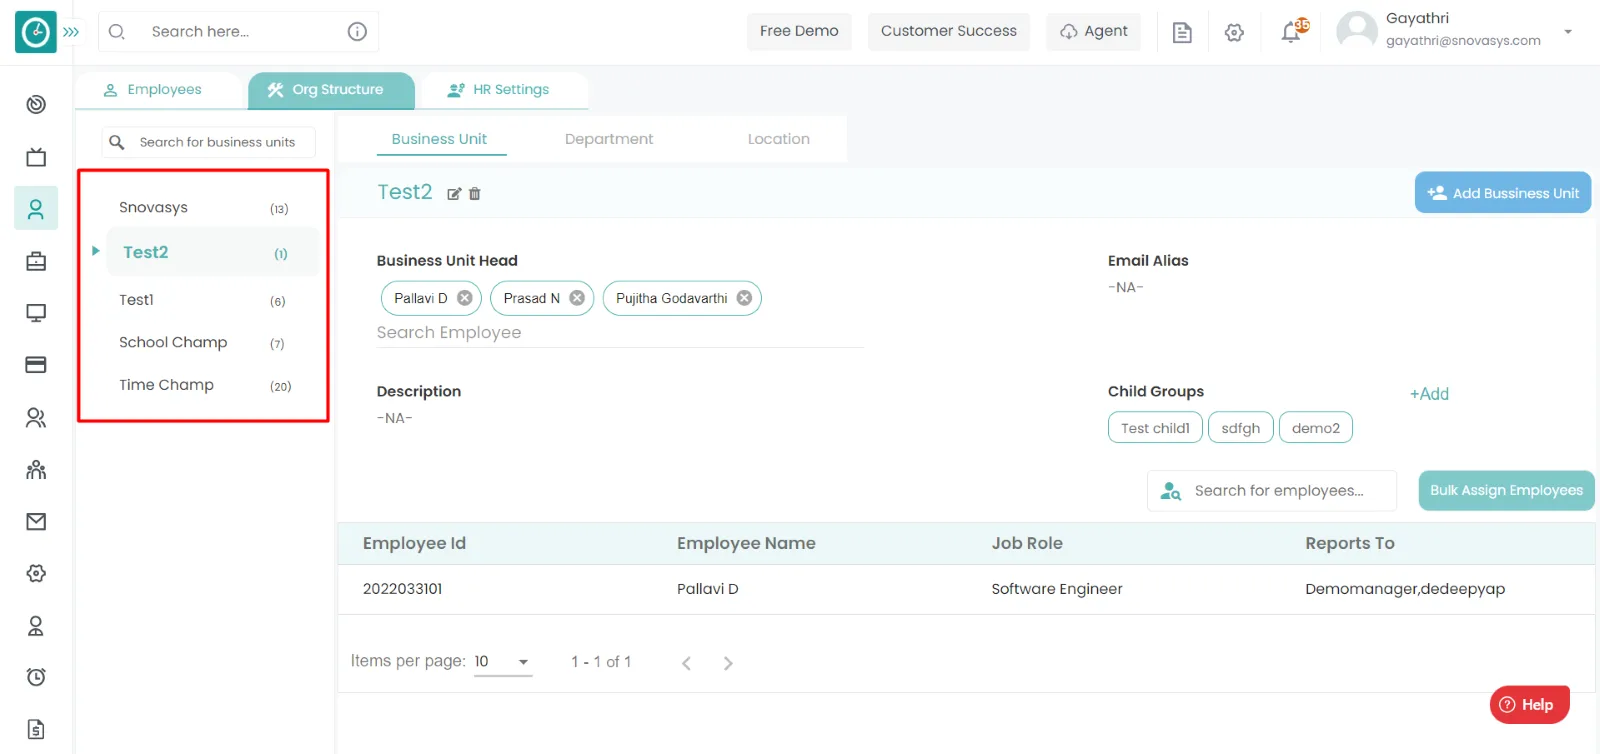
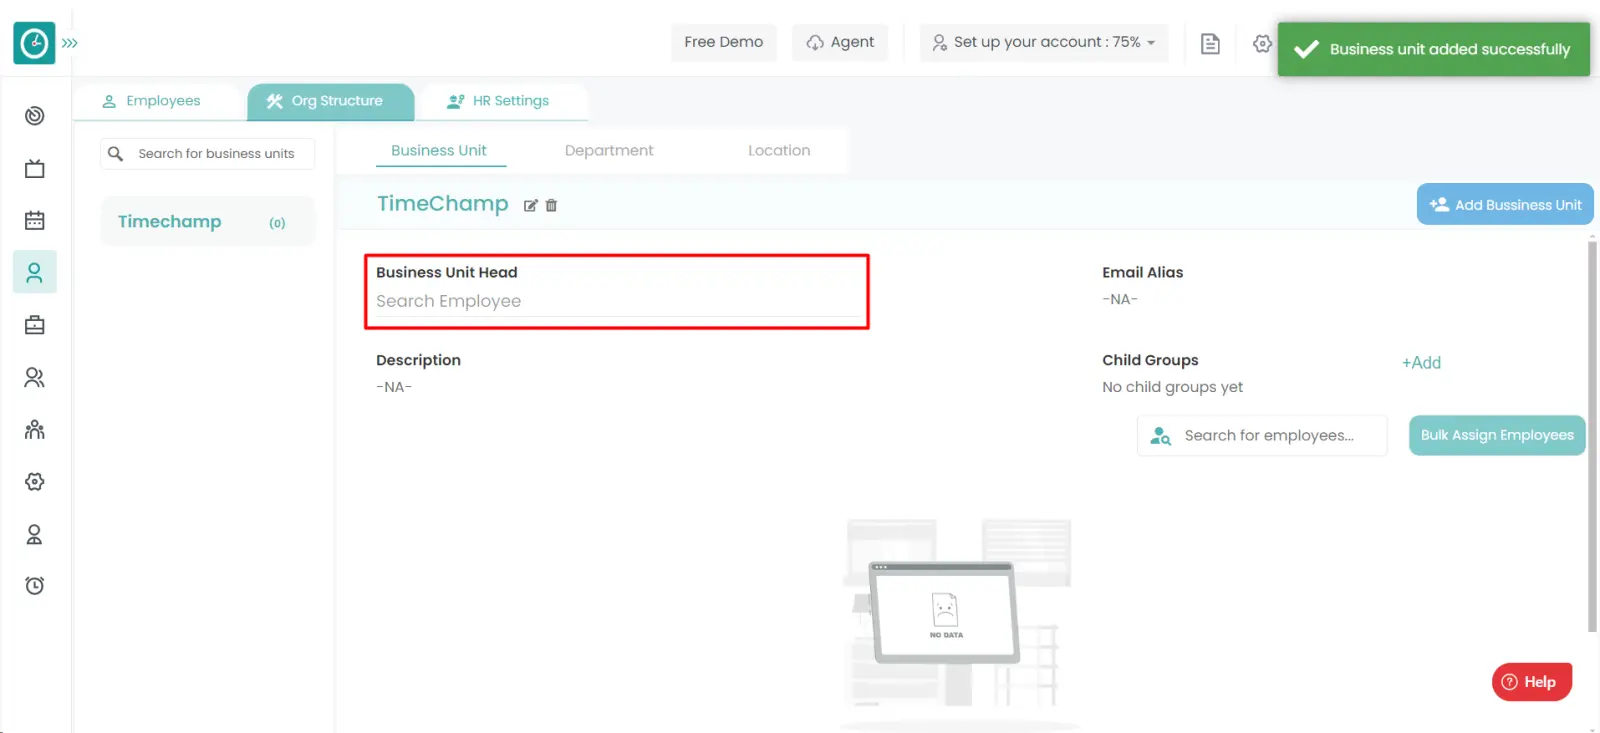
Add Business Unit :-

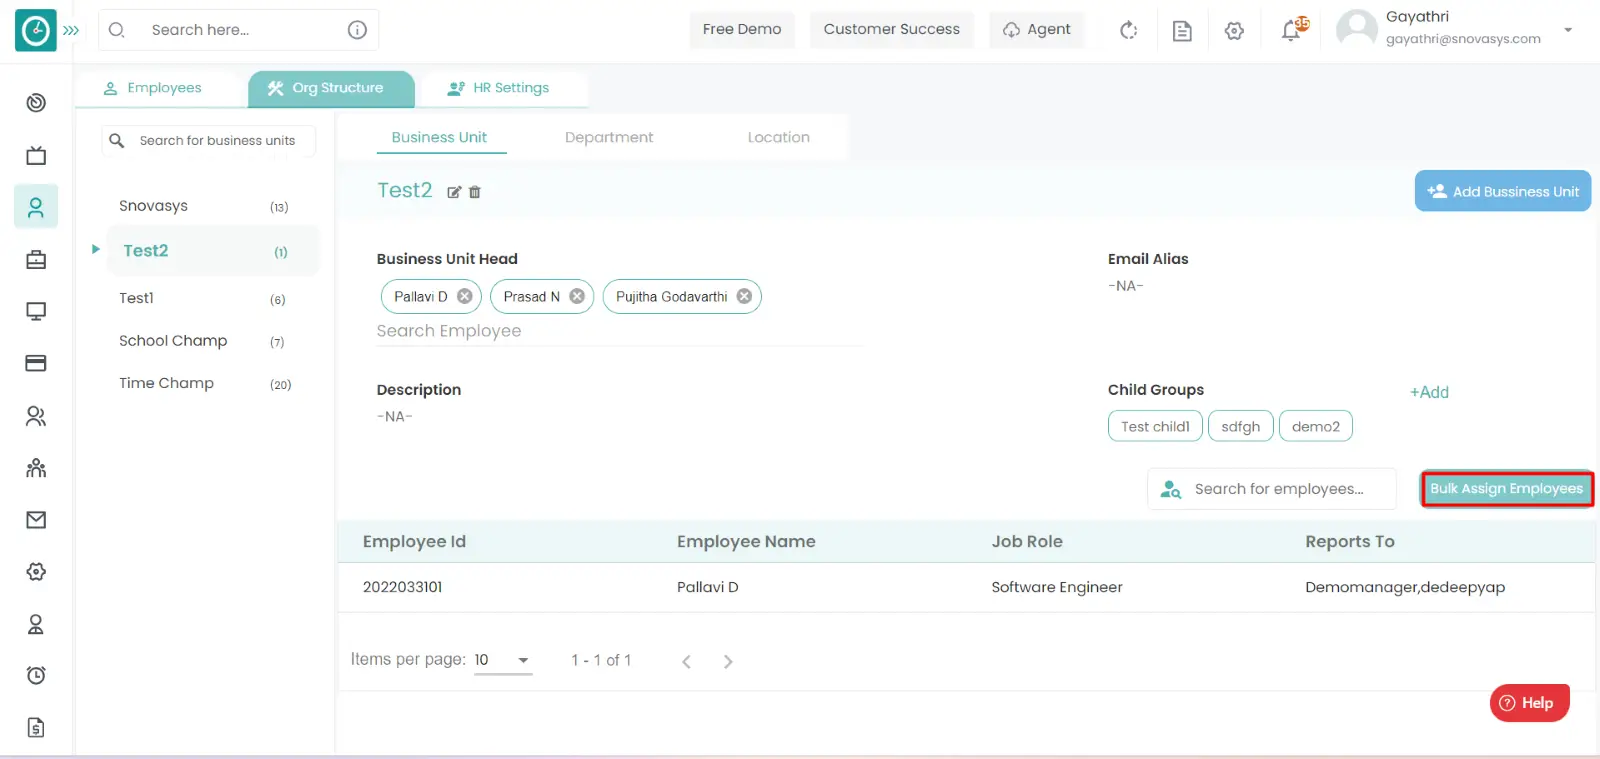
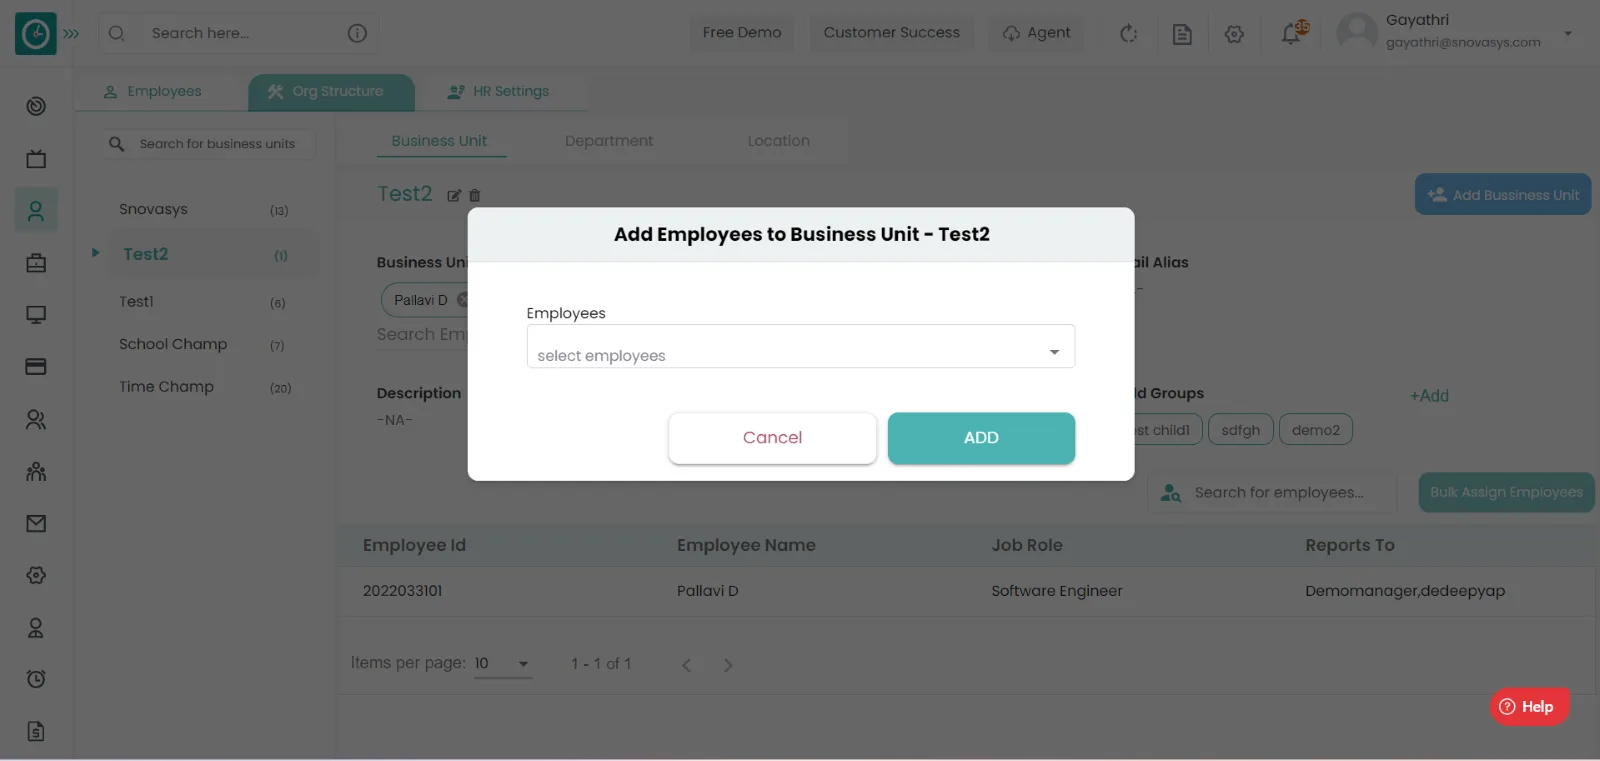
Bulk Assign Employees :-
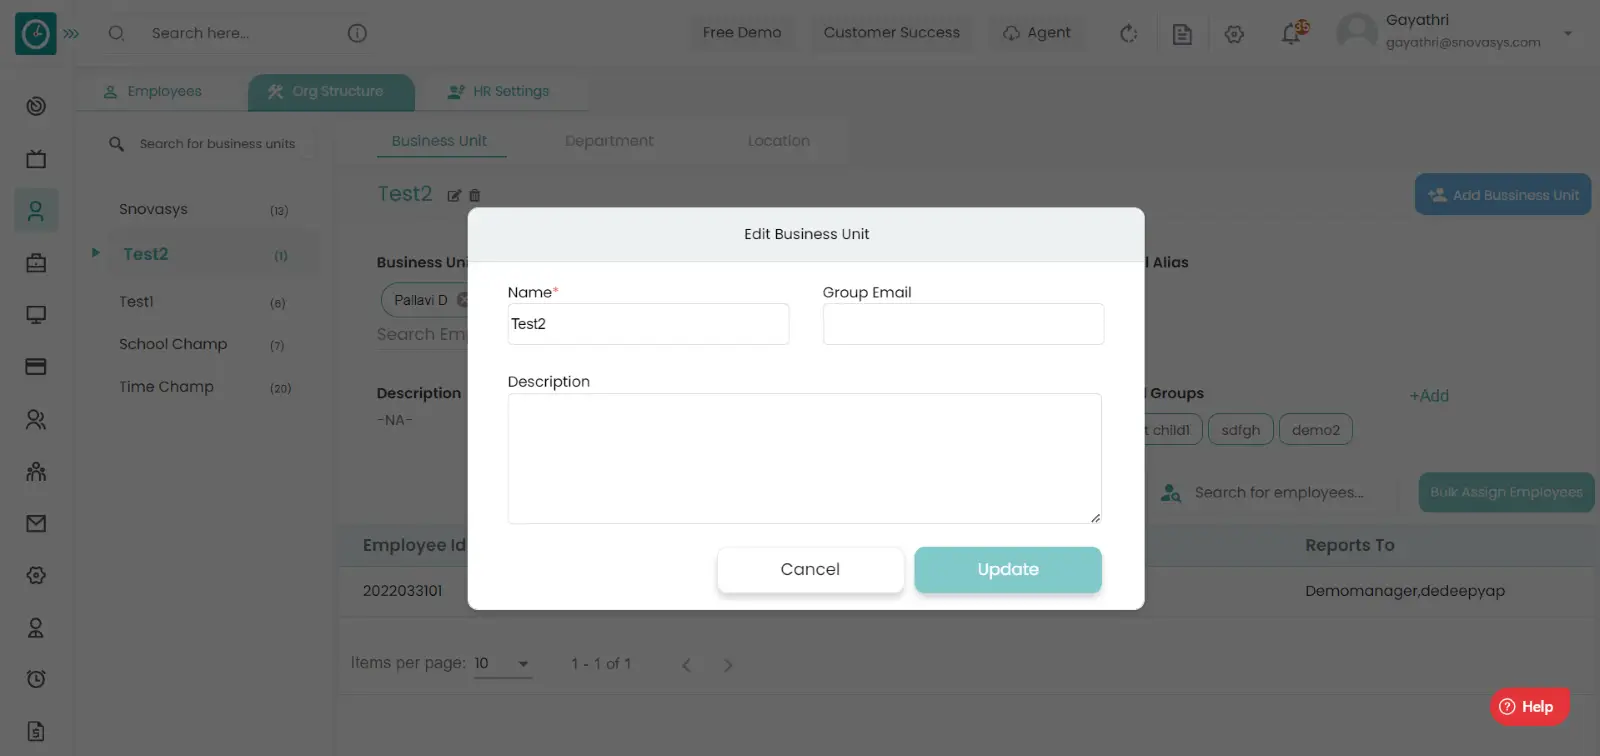
Edit Business Unit :-

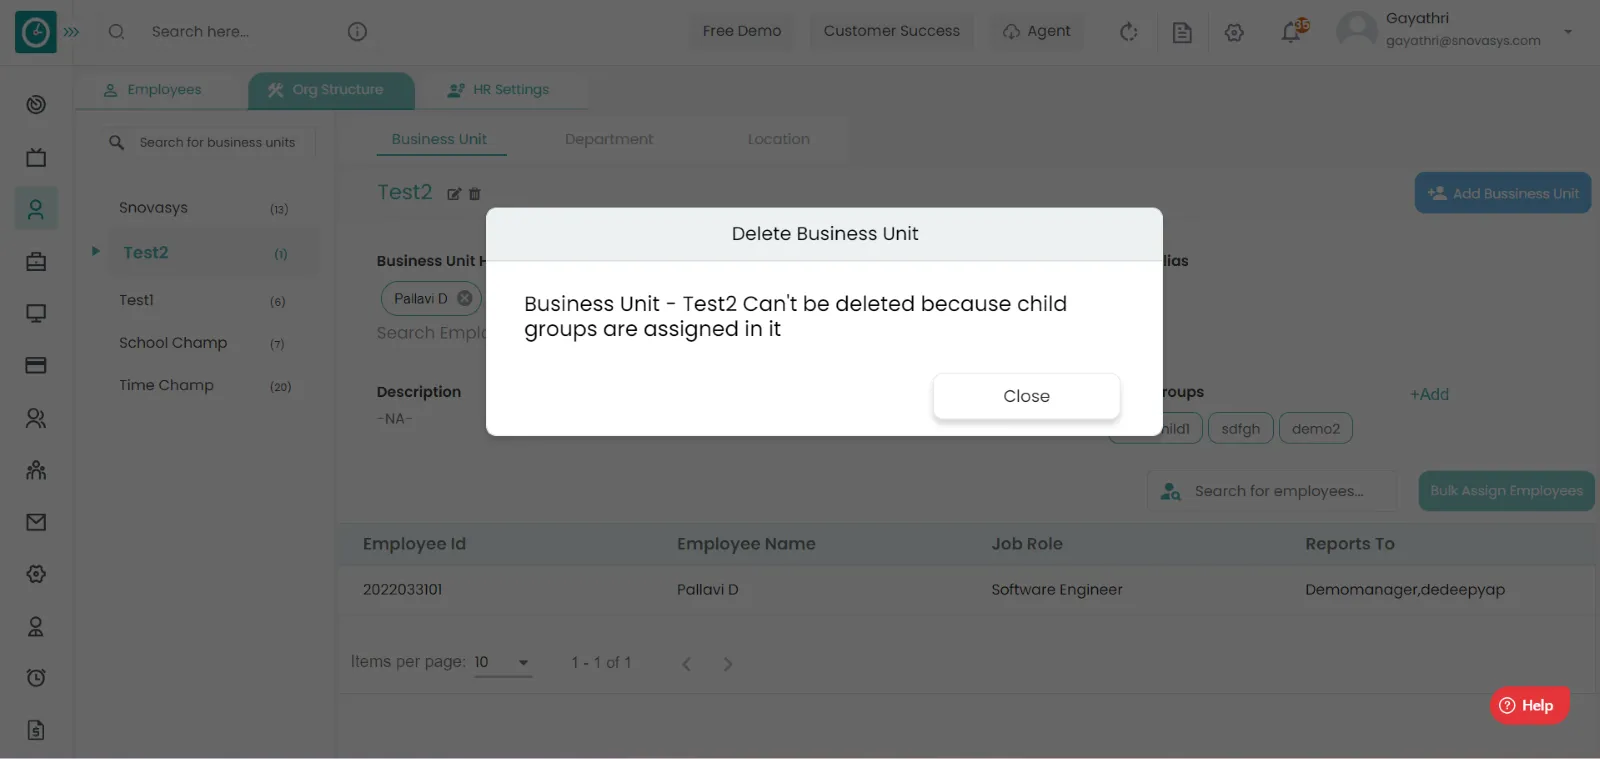
Delete Business Unit :-
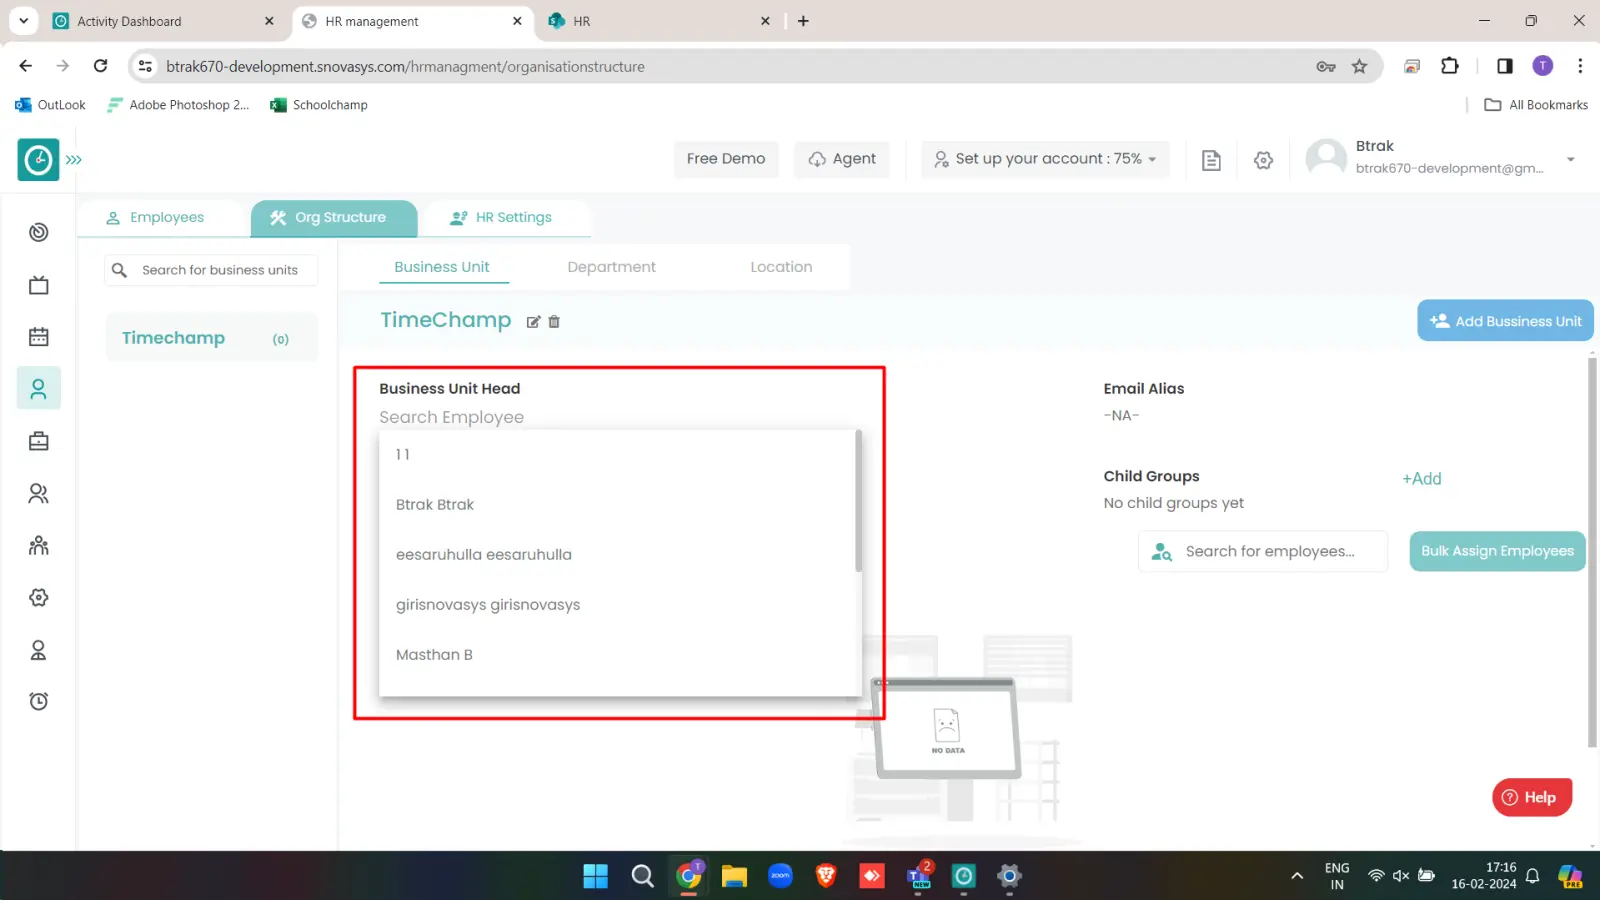
Assign Business Unit head :-
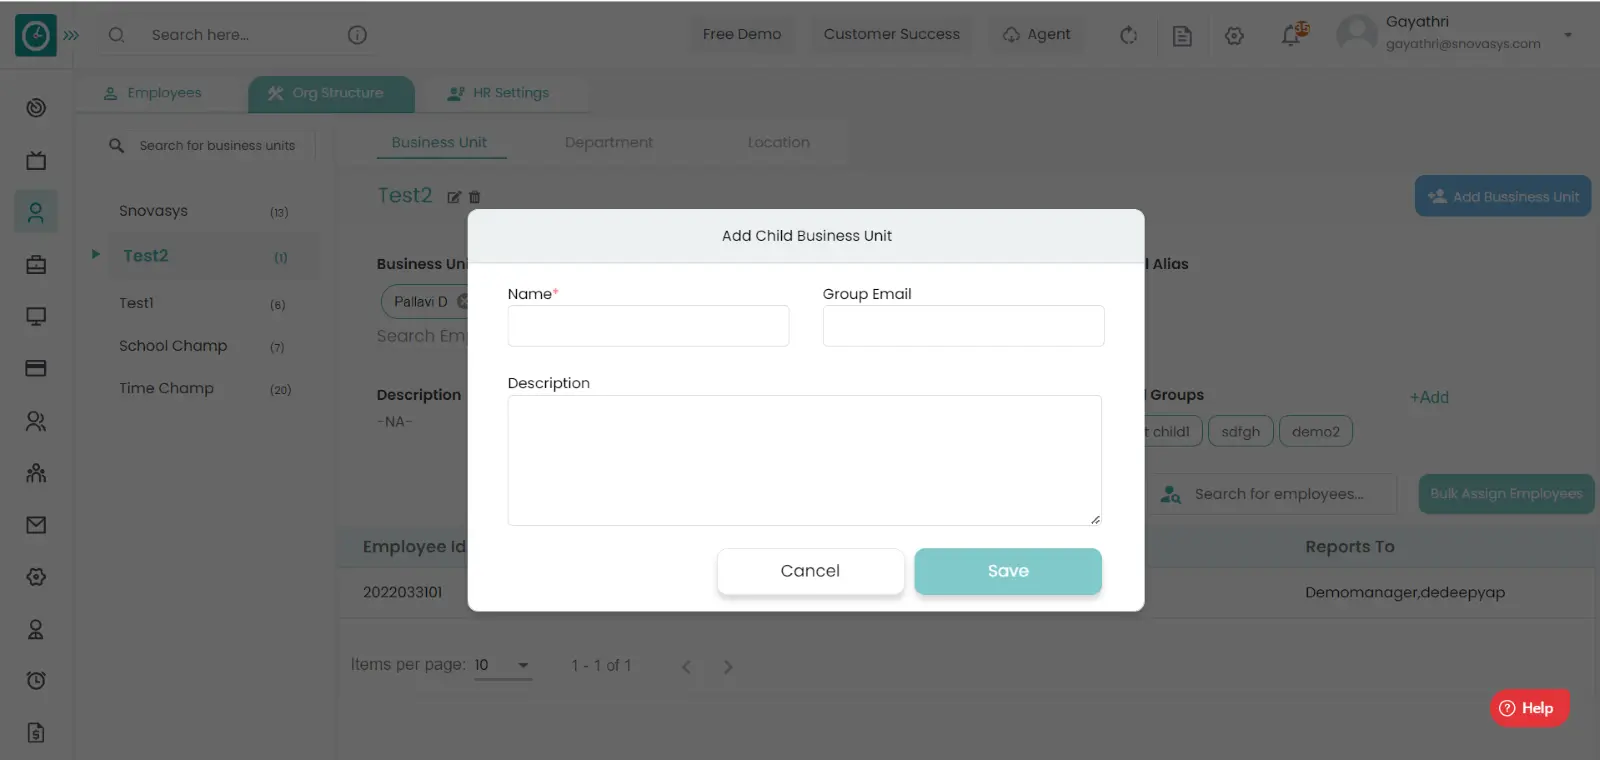
Add Child Group :-

Navigation: Goto HR => HR Tab
If the user is having Super Admin
Permissions, then he can be able to view/manage Department in Organization.
This permission can be configured by following the steps: -
Manage HR Settings from HR module,
then select the roles for what you must give the permissions to configure and check them.HR Settings
for the defined roles.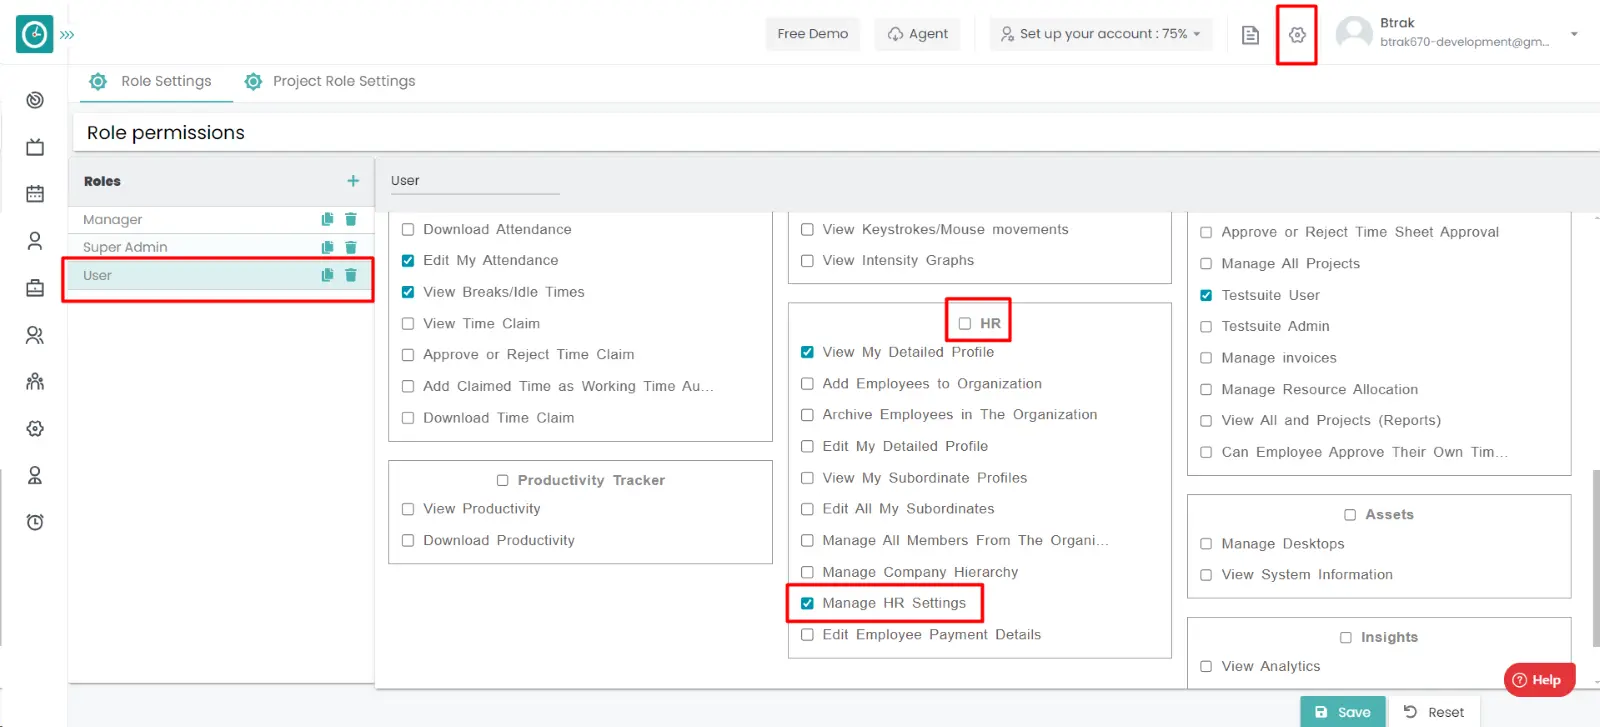
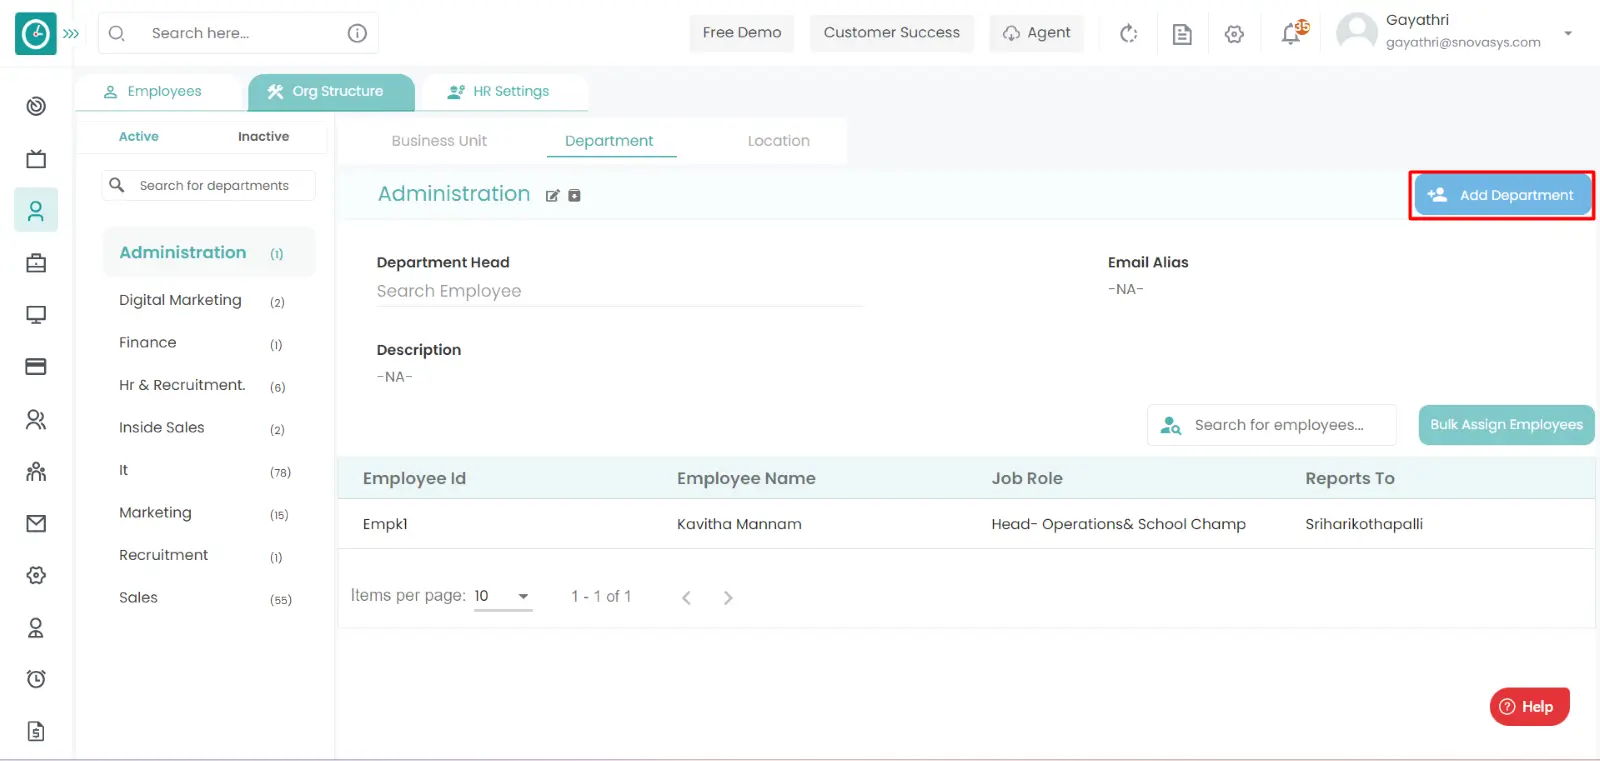
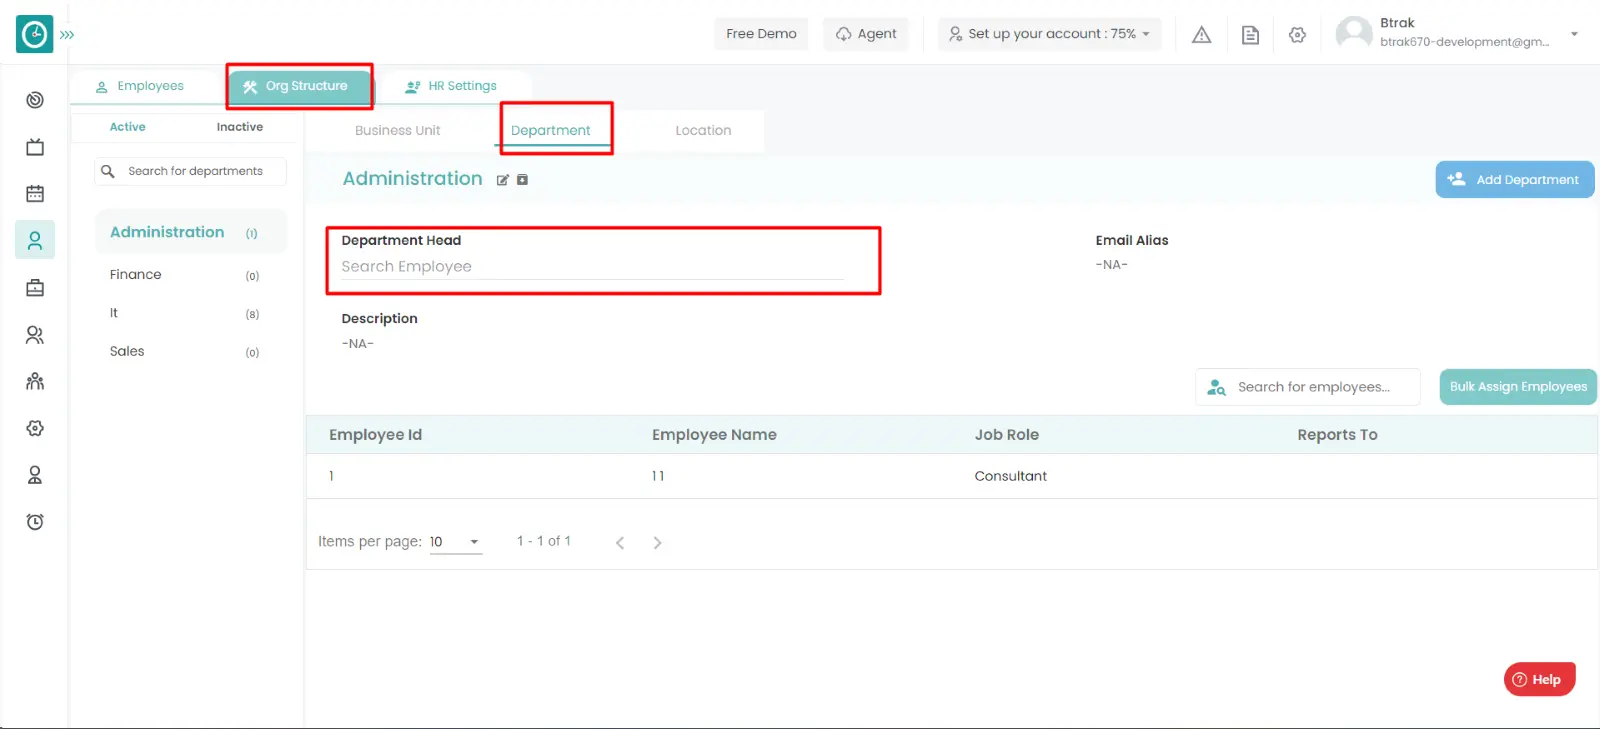
Department :-
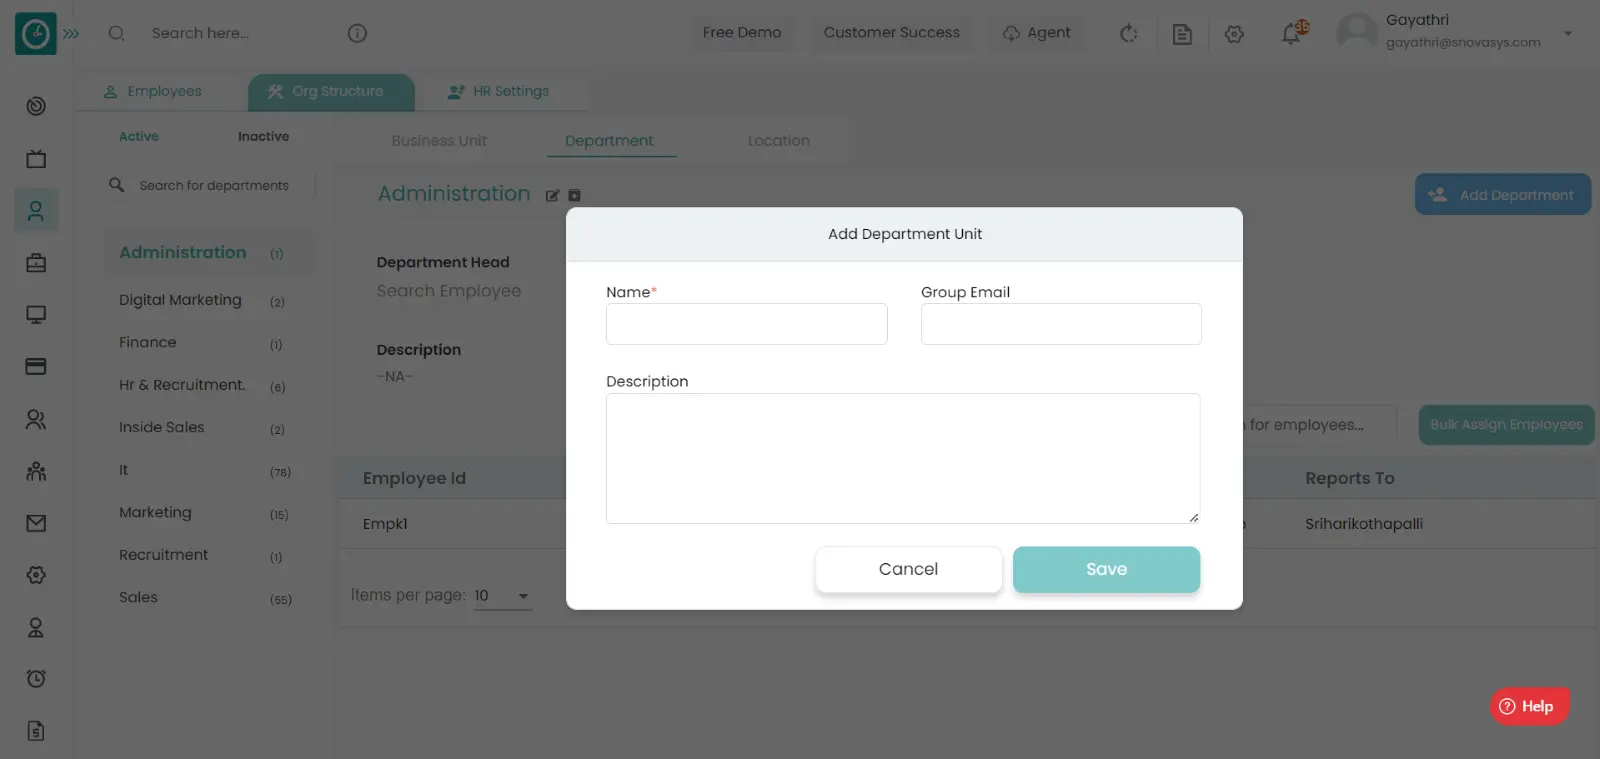
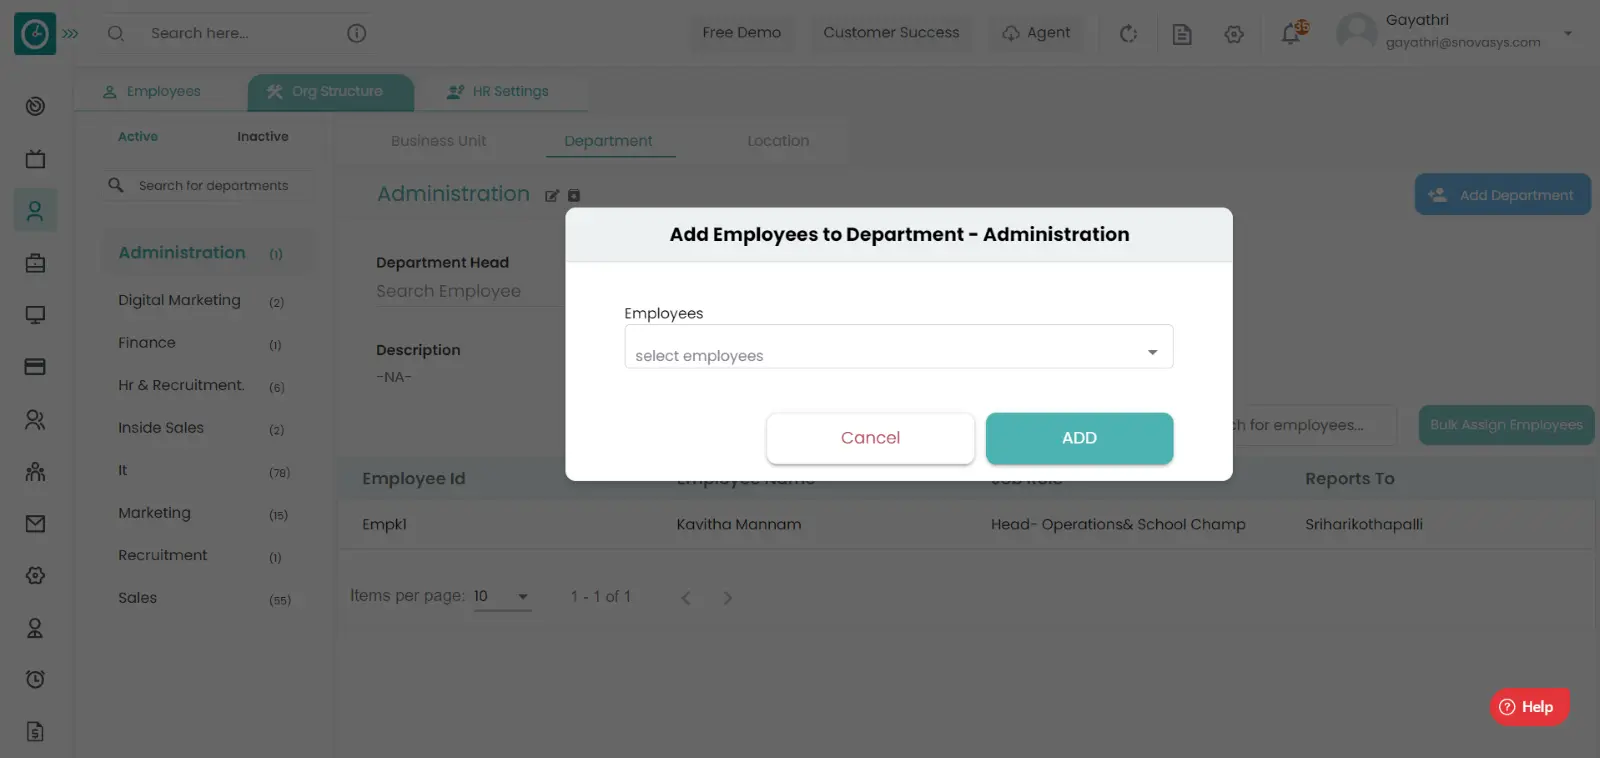
Add Department :-
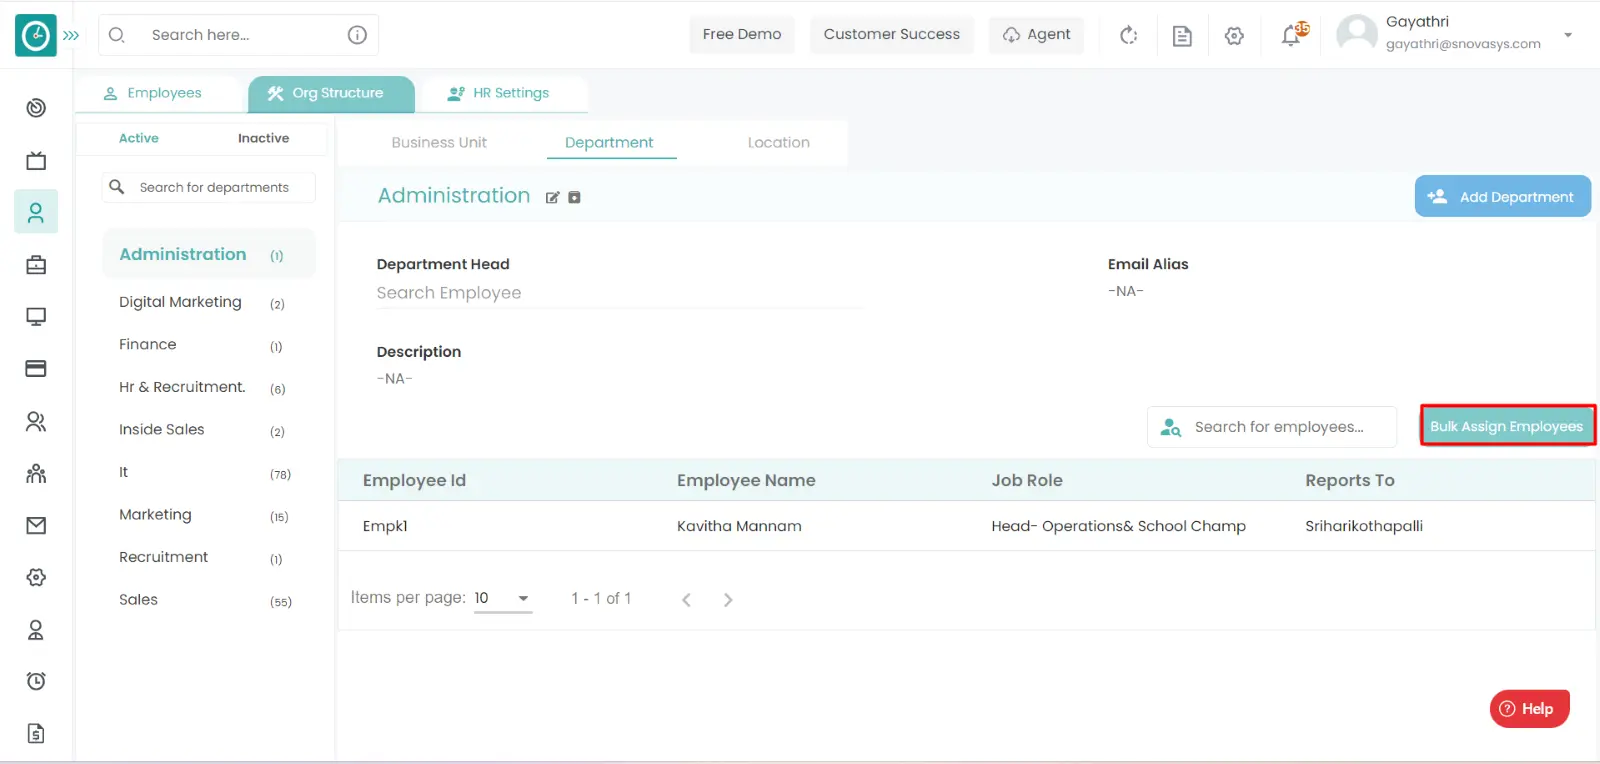
Bulk Assign Employees :-
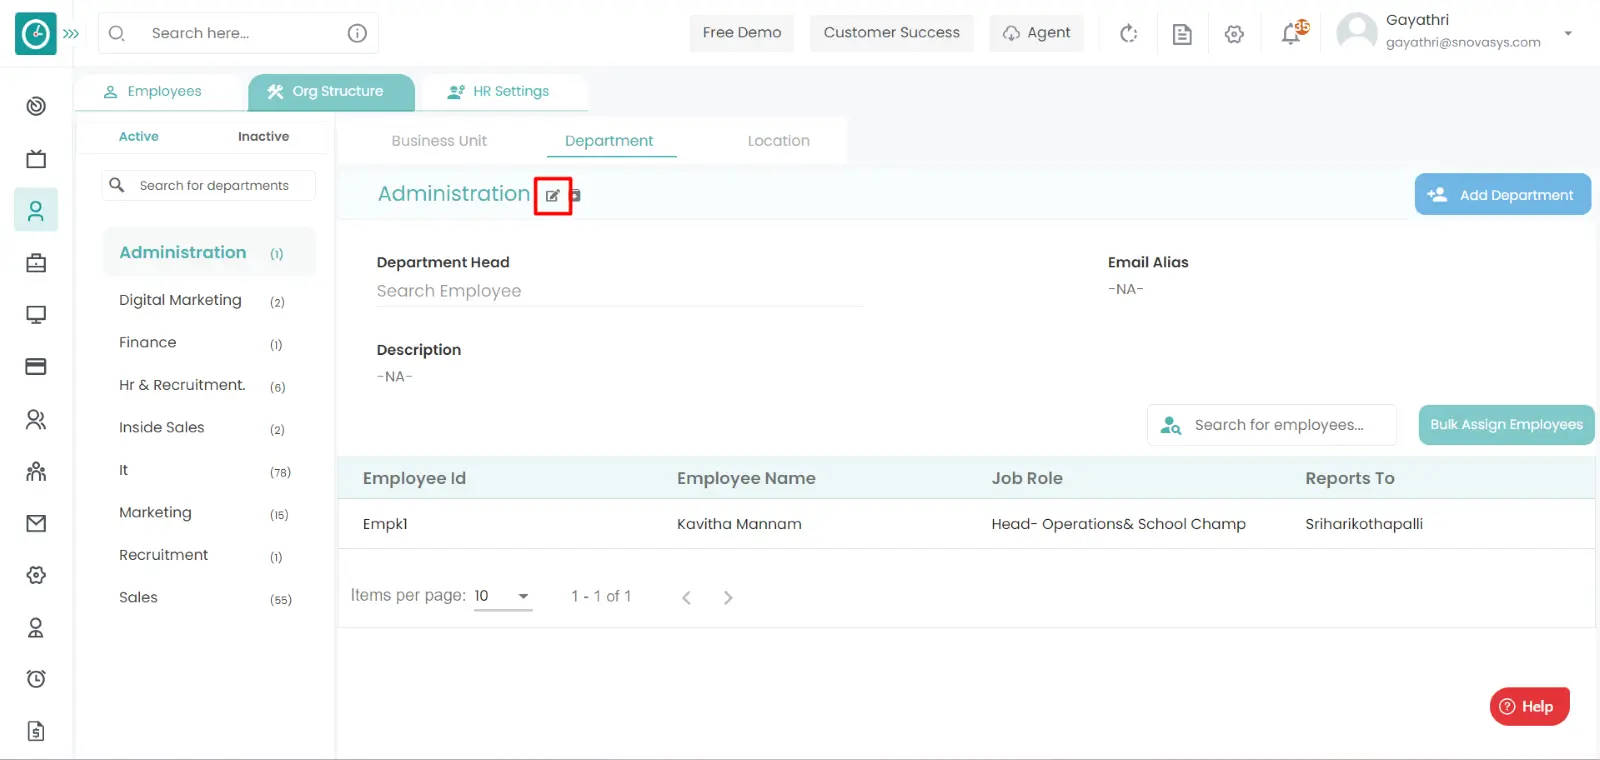
Edit Department :-

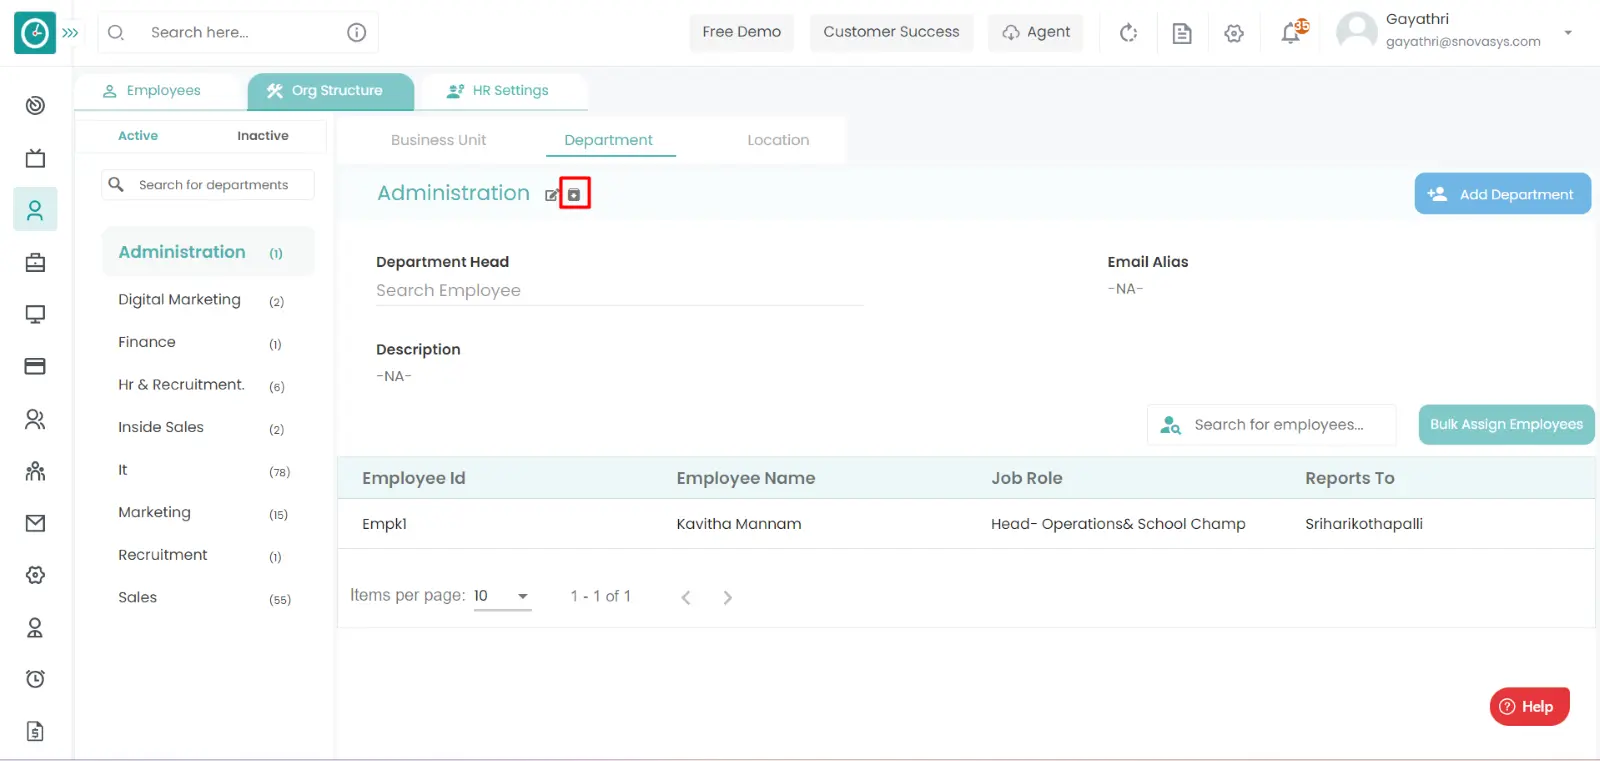
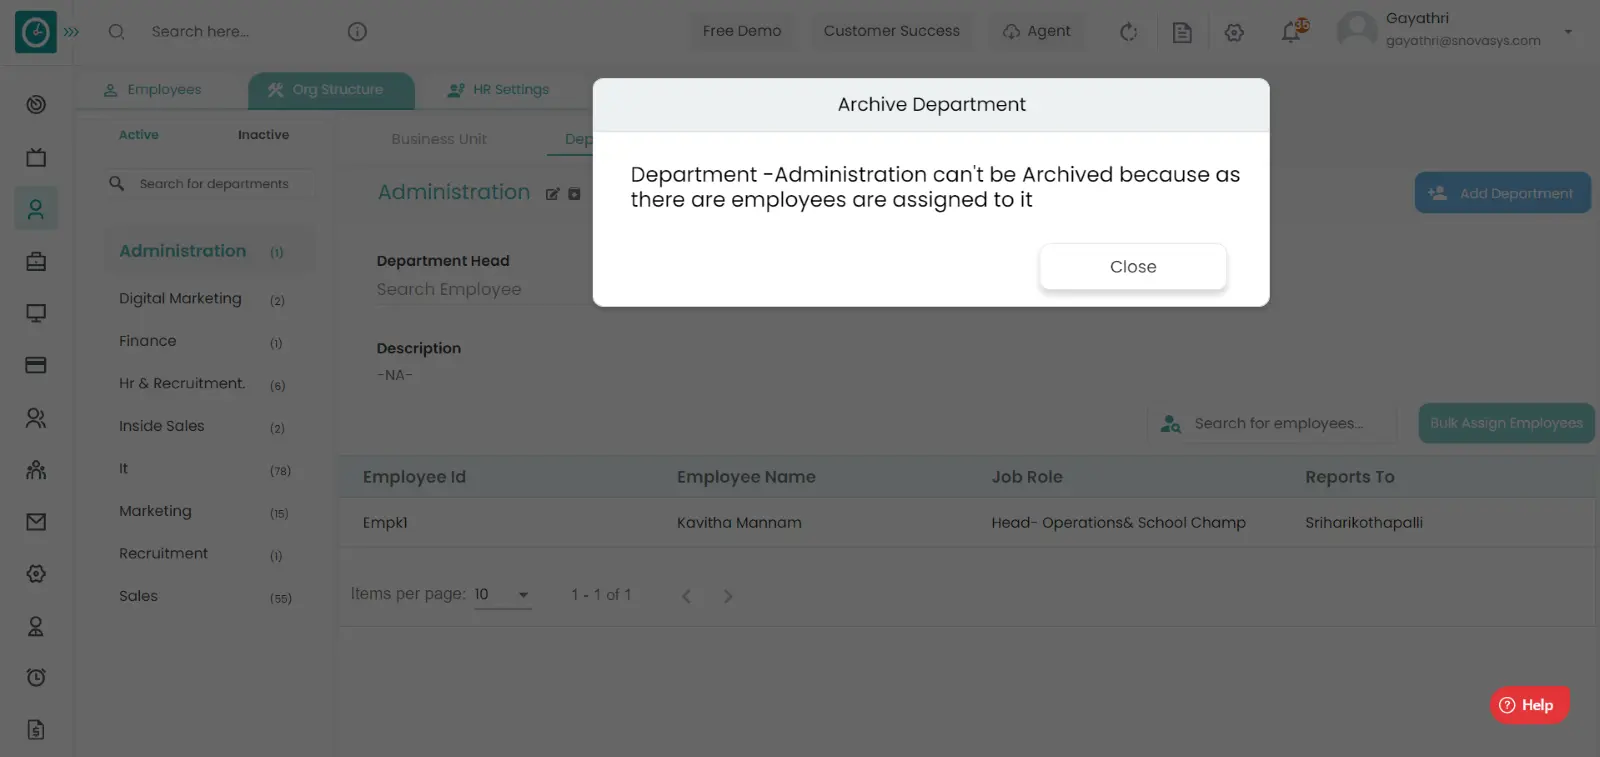
Archive Department :-
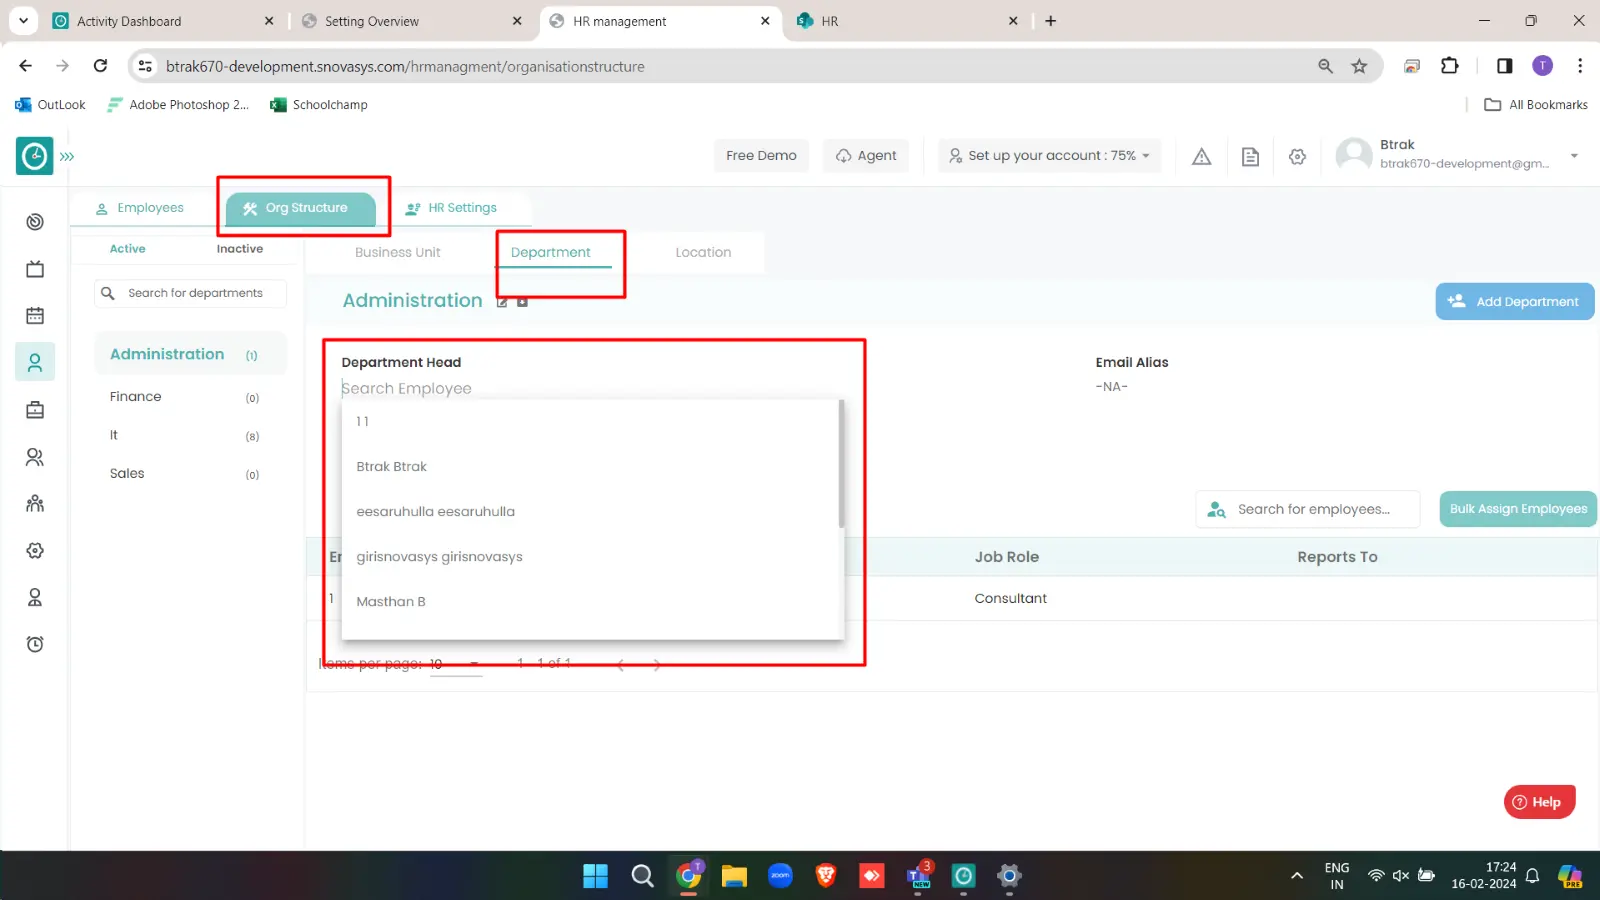
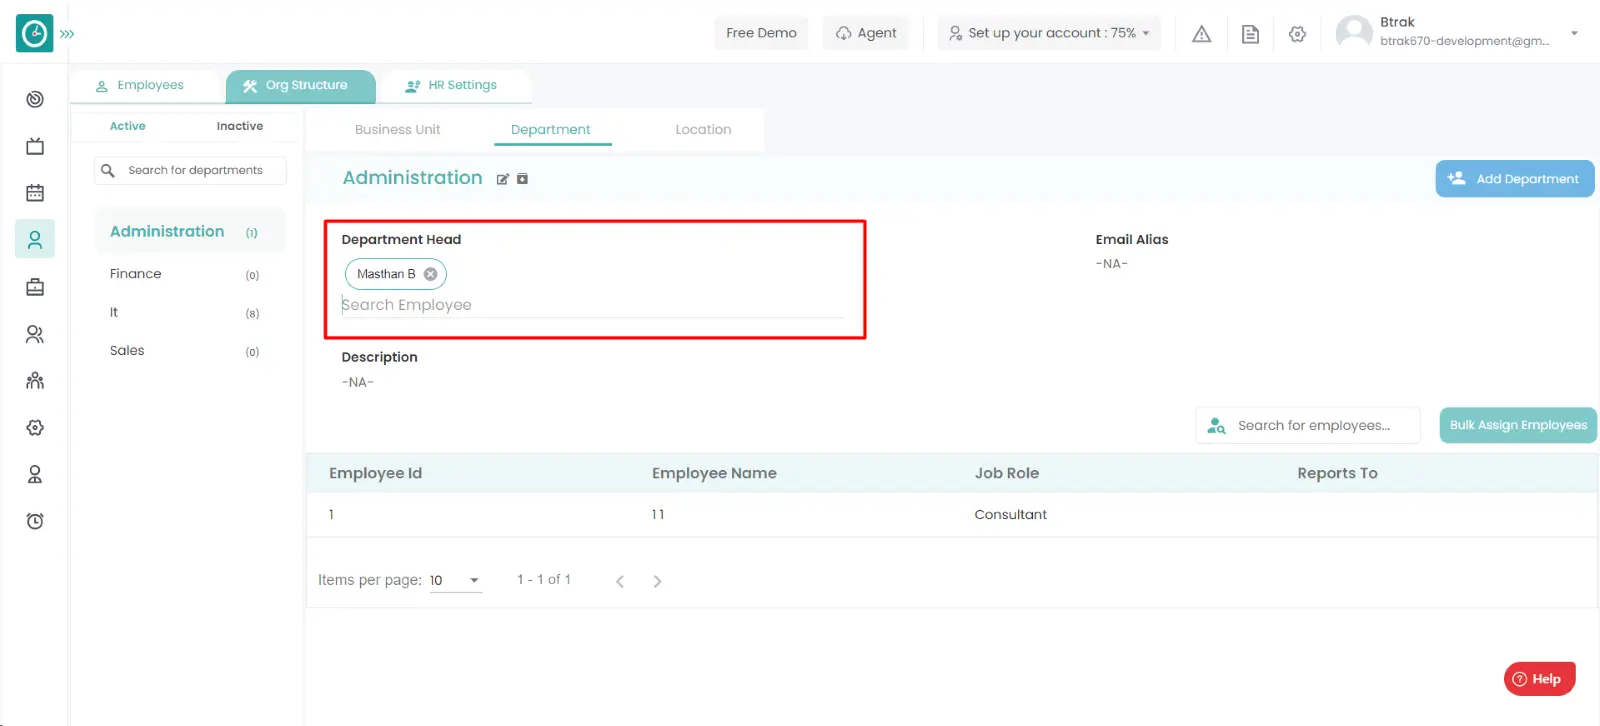
Assign Department head :-
Navigation: Goto HR => HR Tab
If the user is having Super Admin
Permissions, then he can be able to view/manage location in Organization.
This permission can be configured by following the steps: -
Manage HR Settings from HR moule,
then select the roles for what you must give the permissions to configure and check them.HR Settings
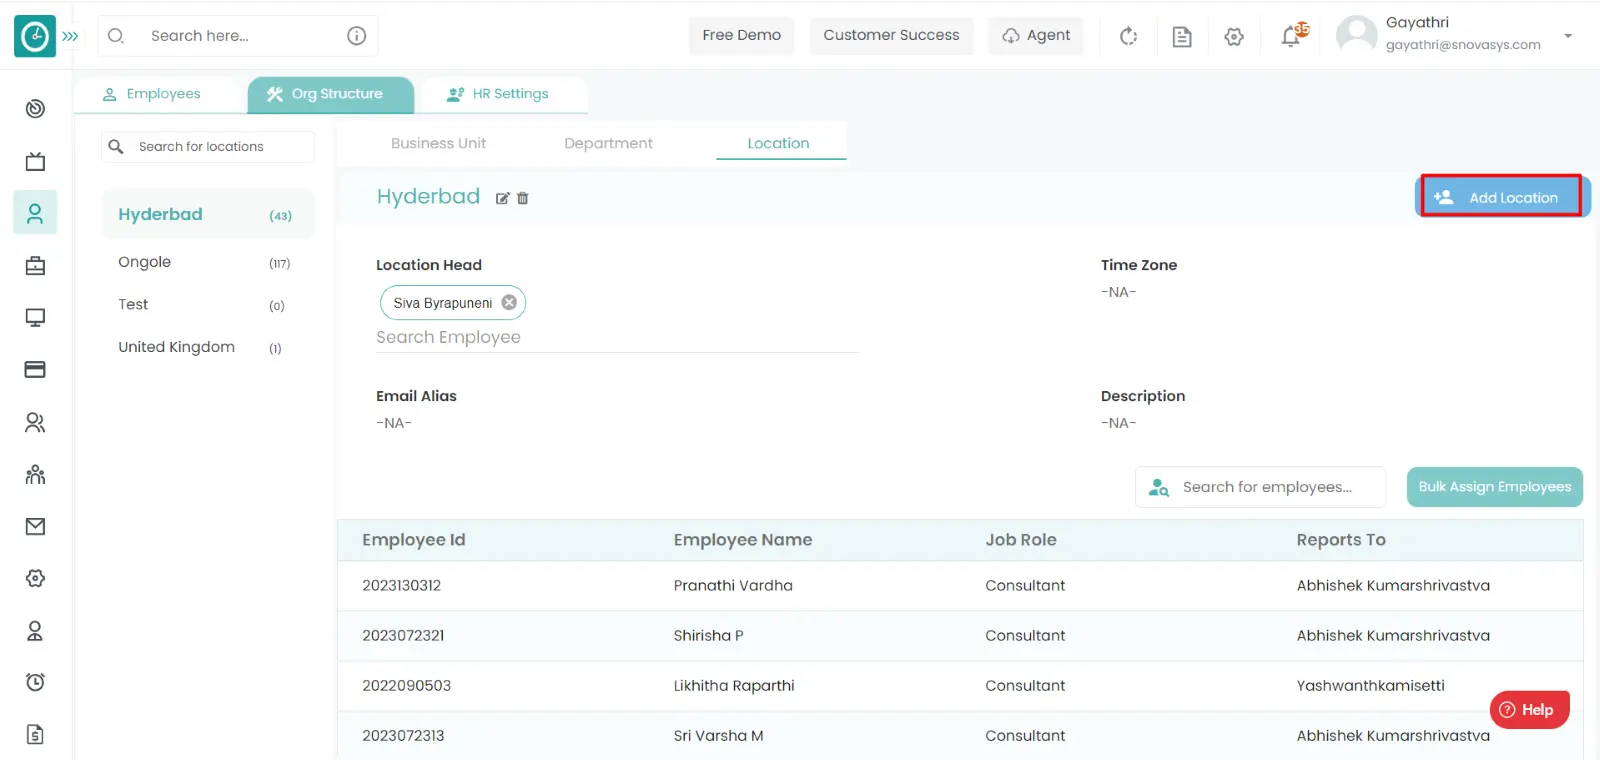
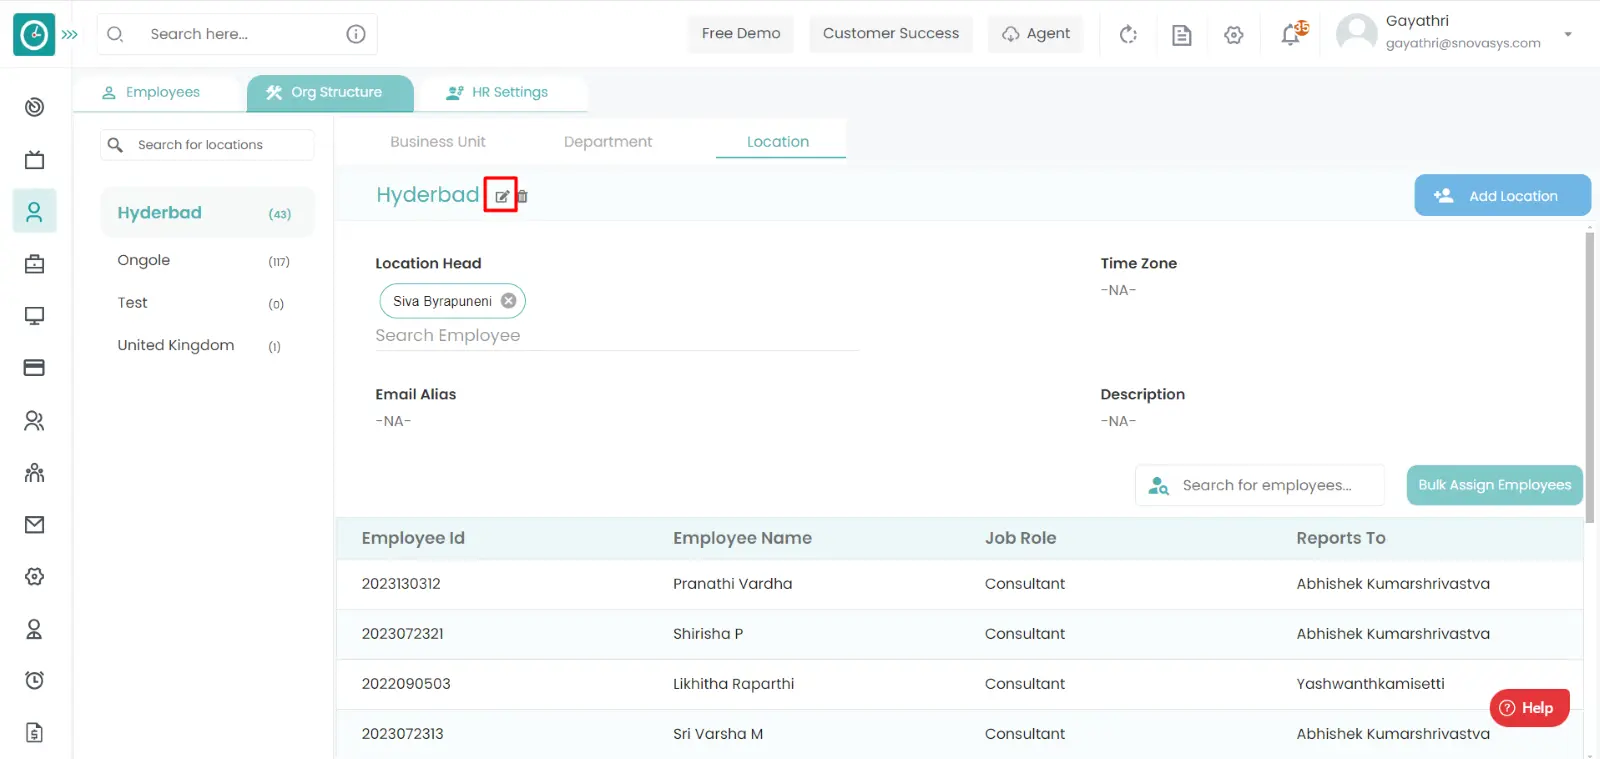
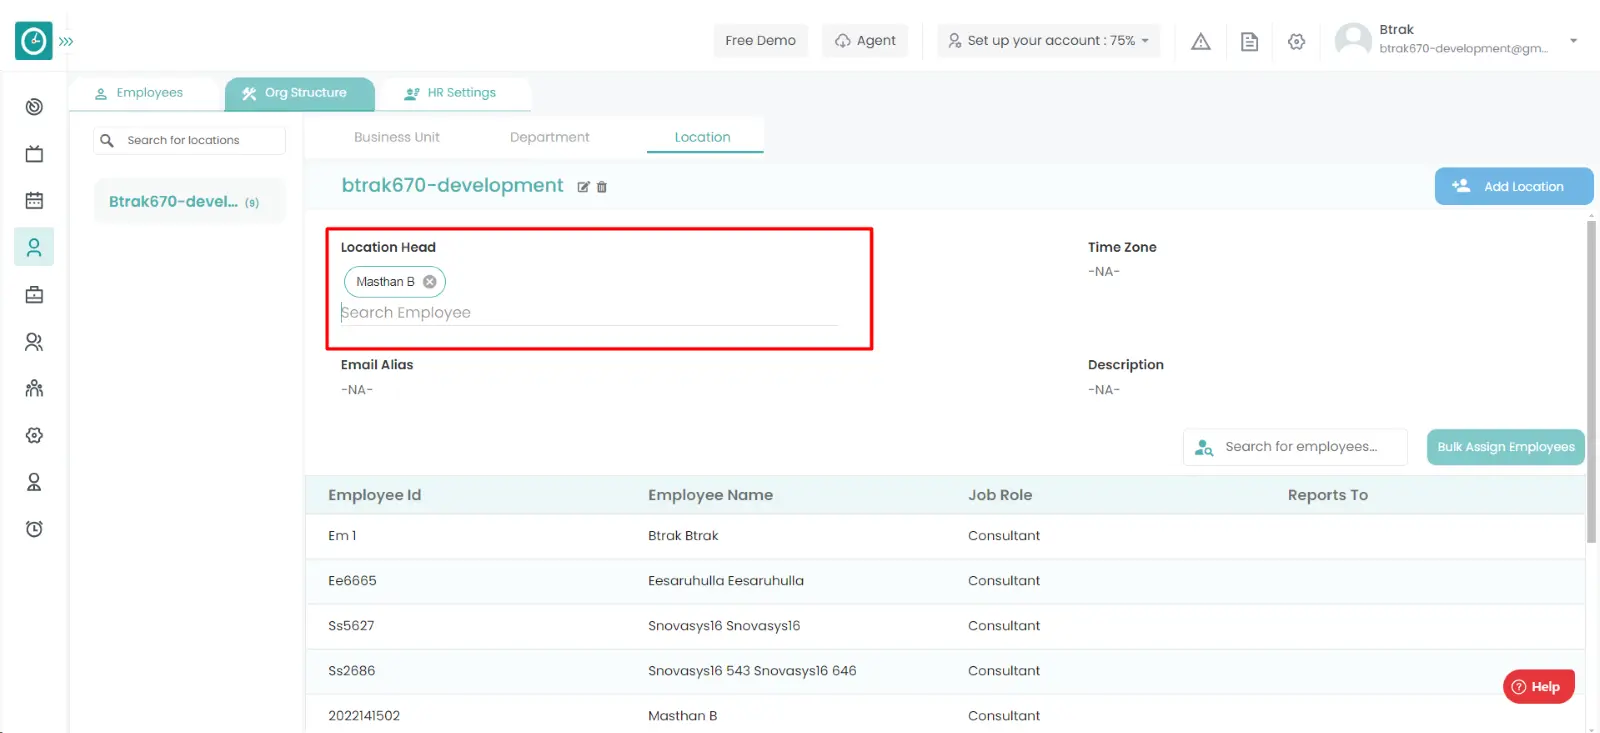
for the defined roles.Location :-
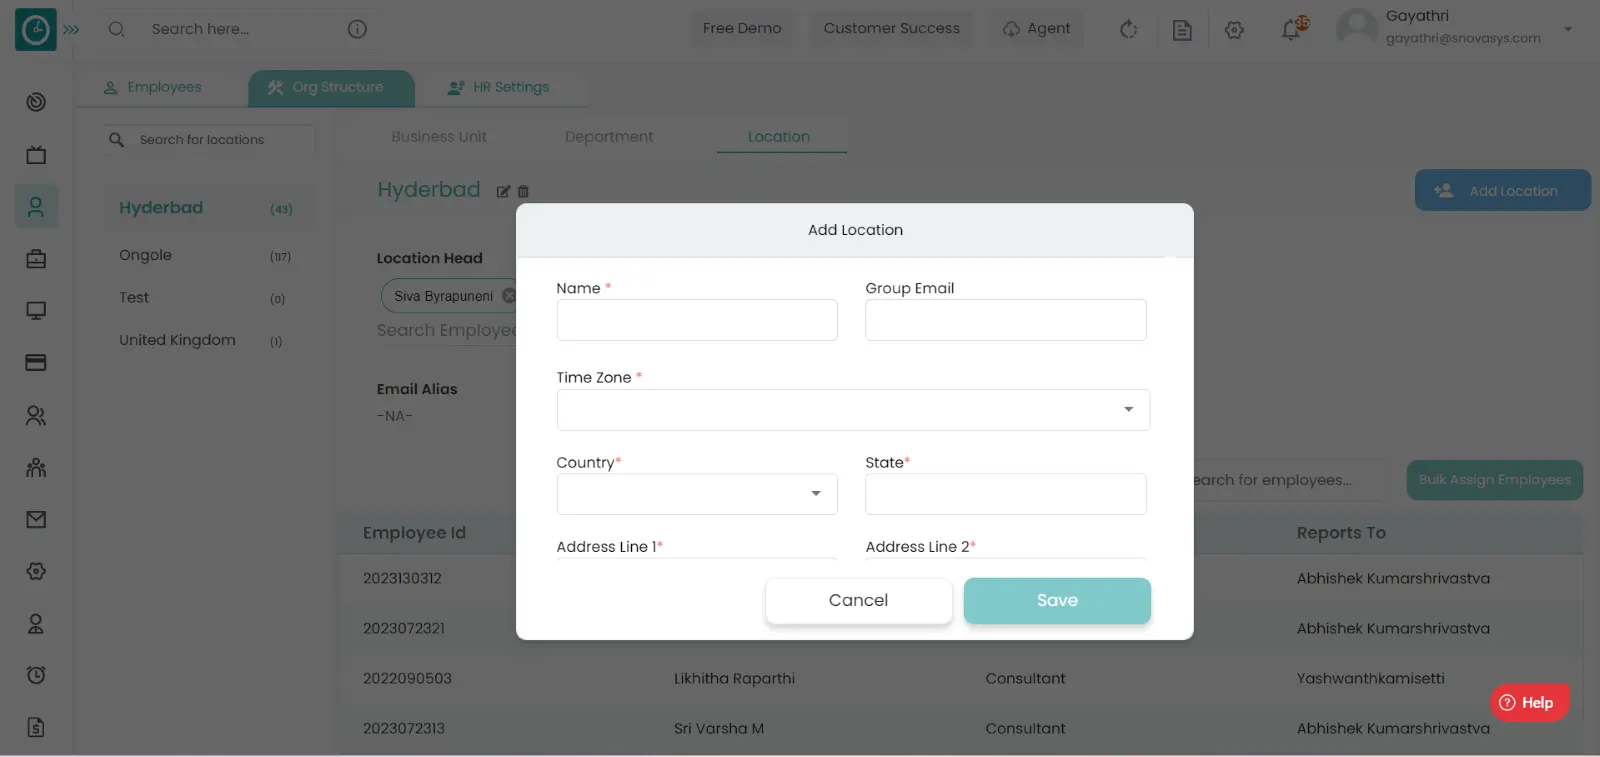
Add Location :-
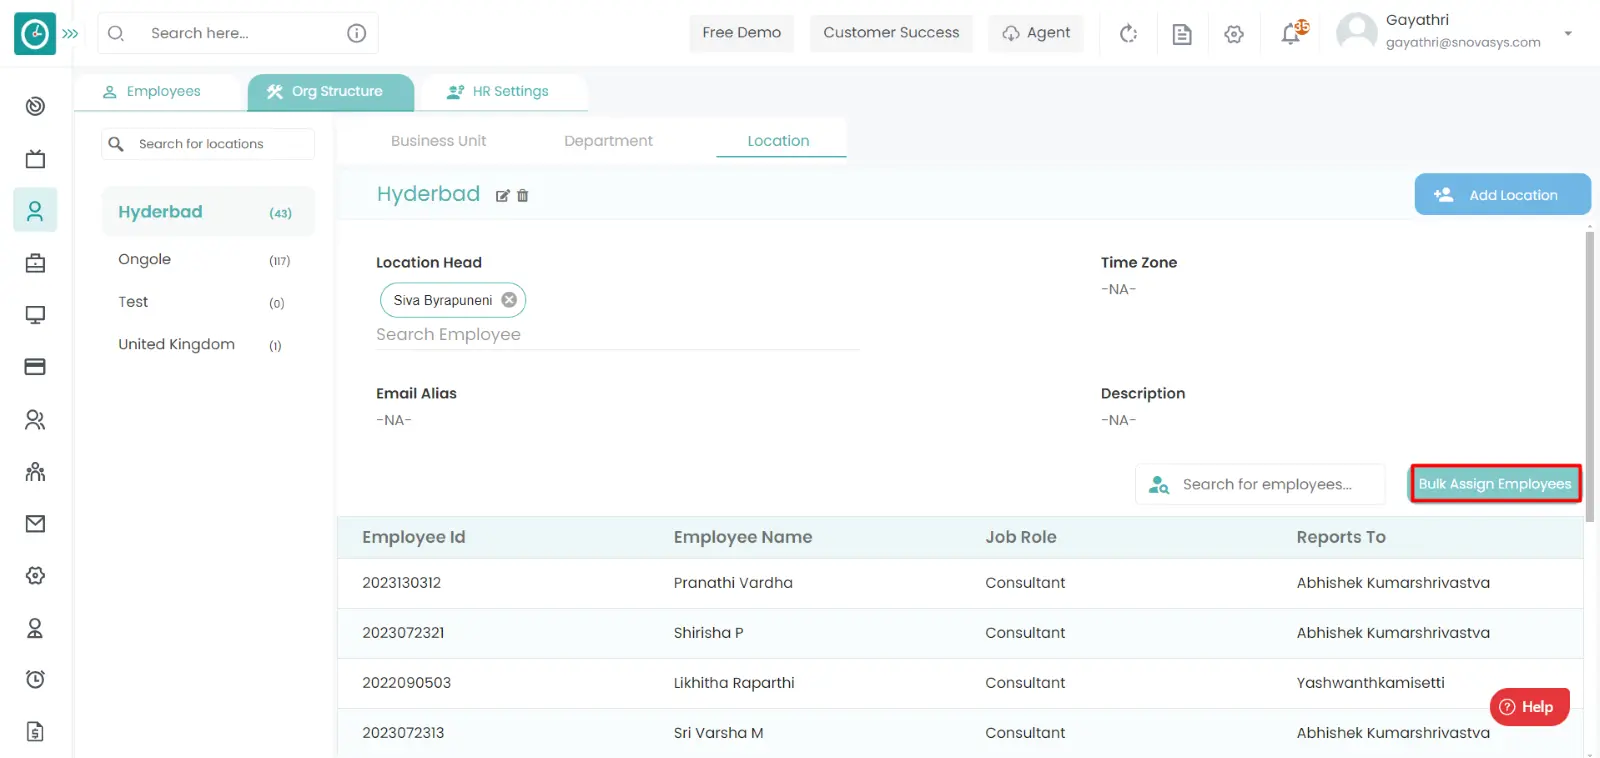
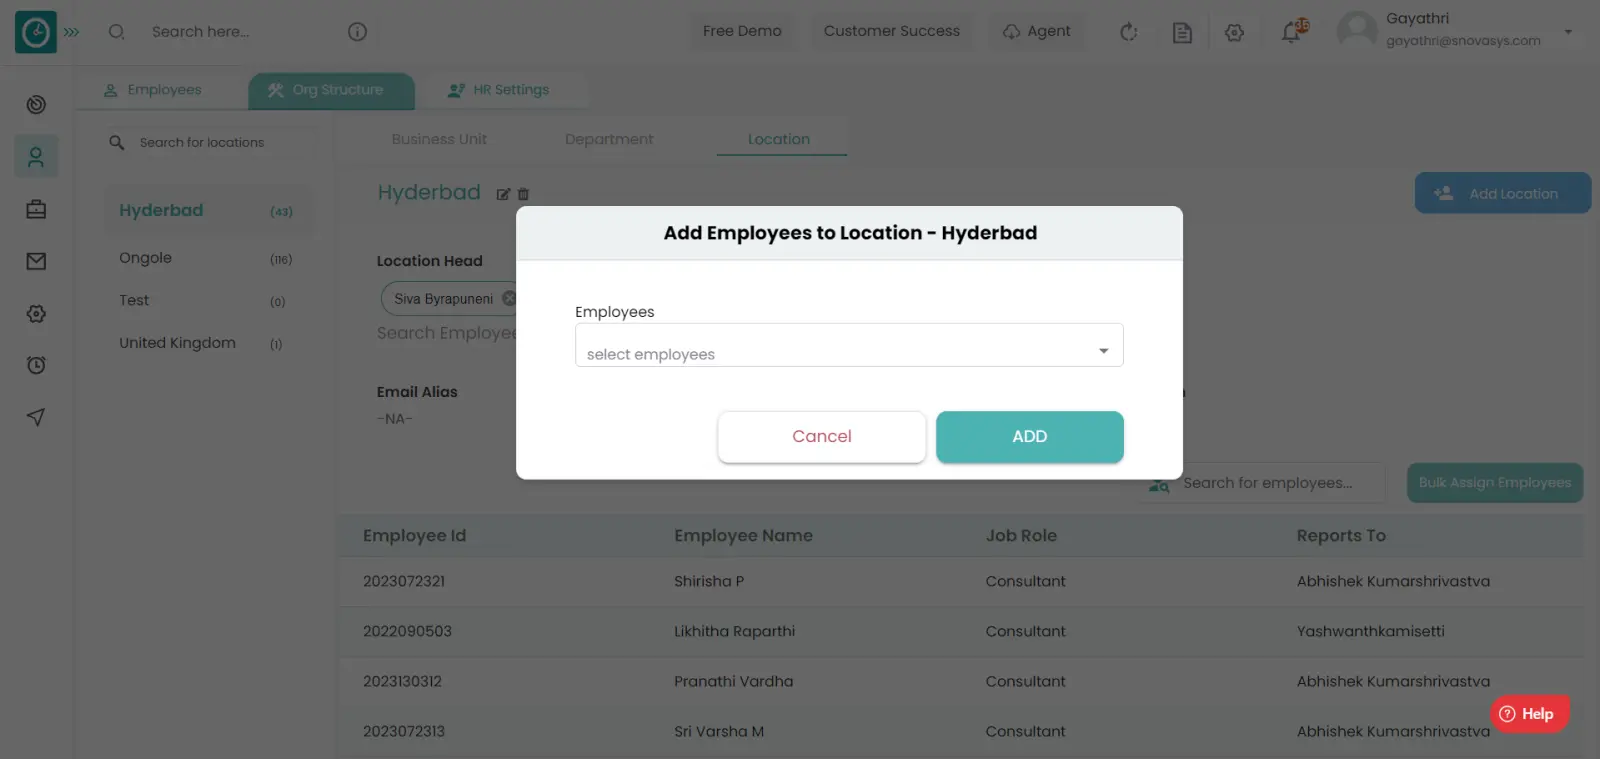
Bulk Assign Employees :-
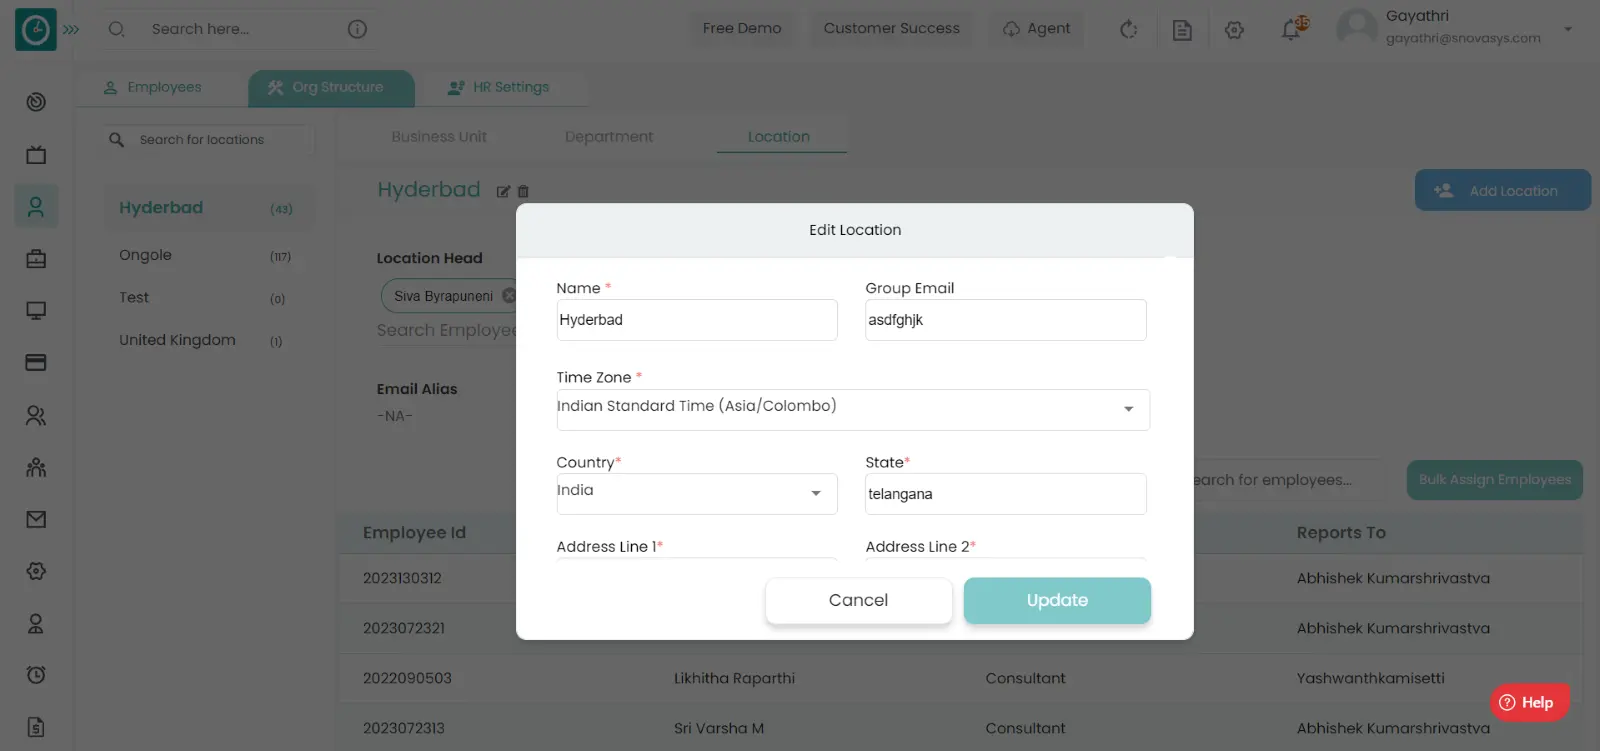
Edit Location :-
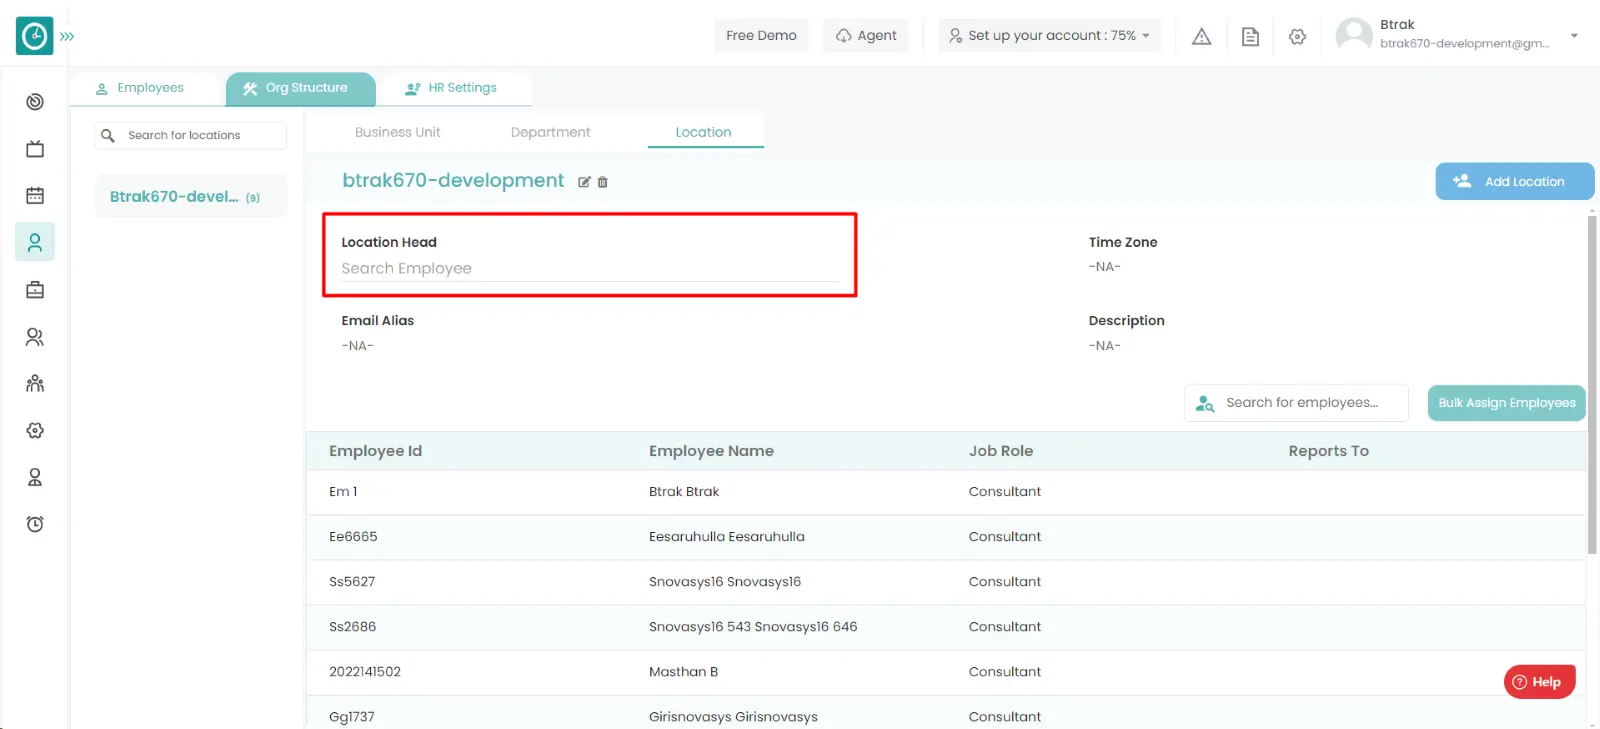
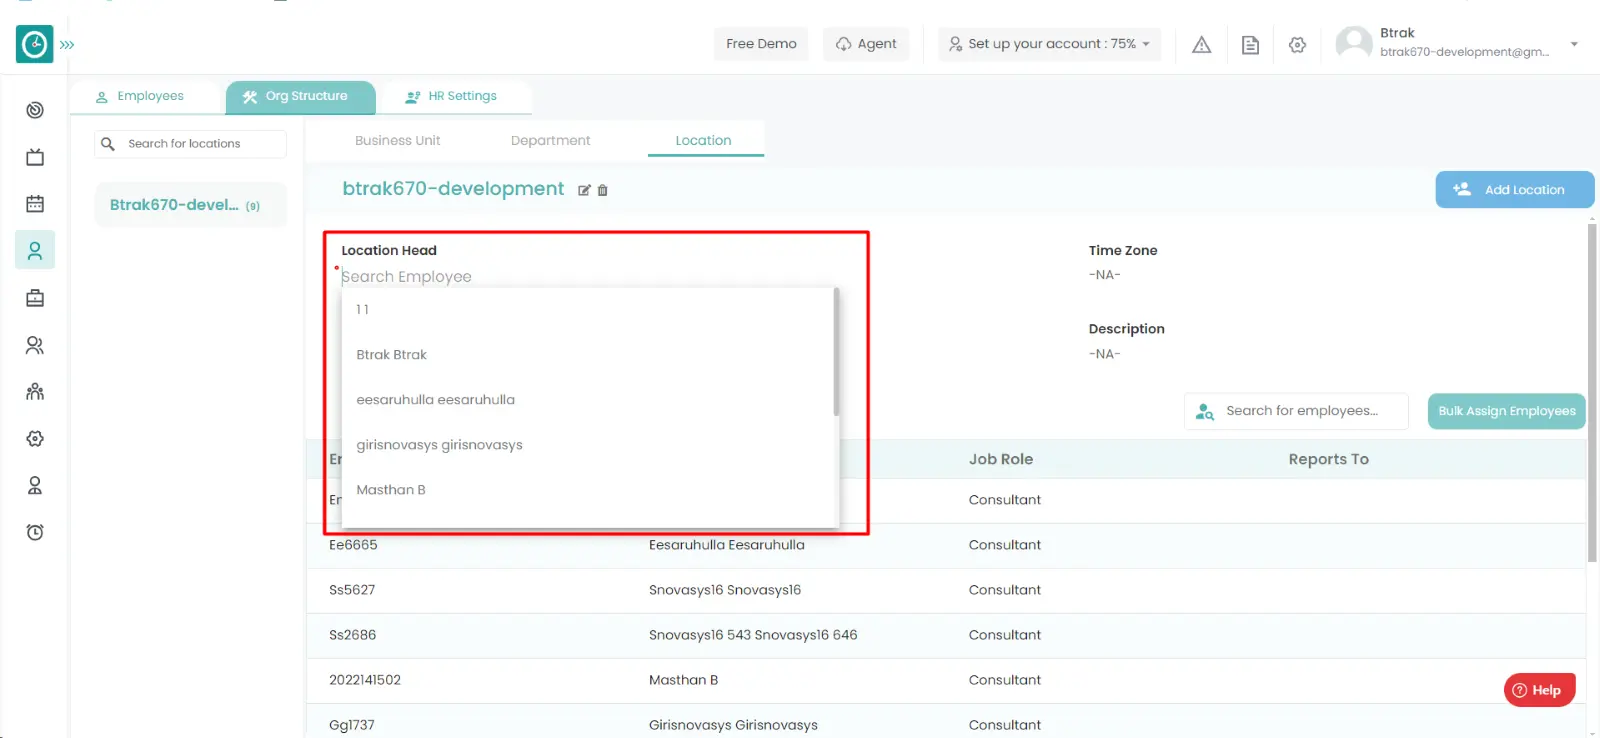
Assign Location head :-
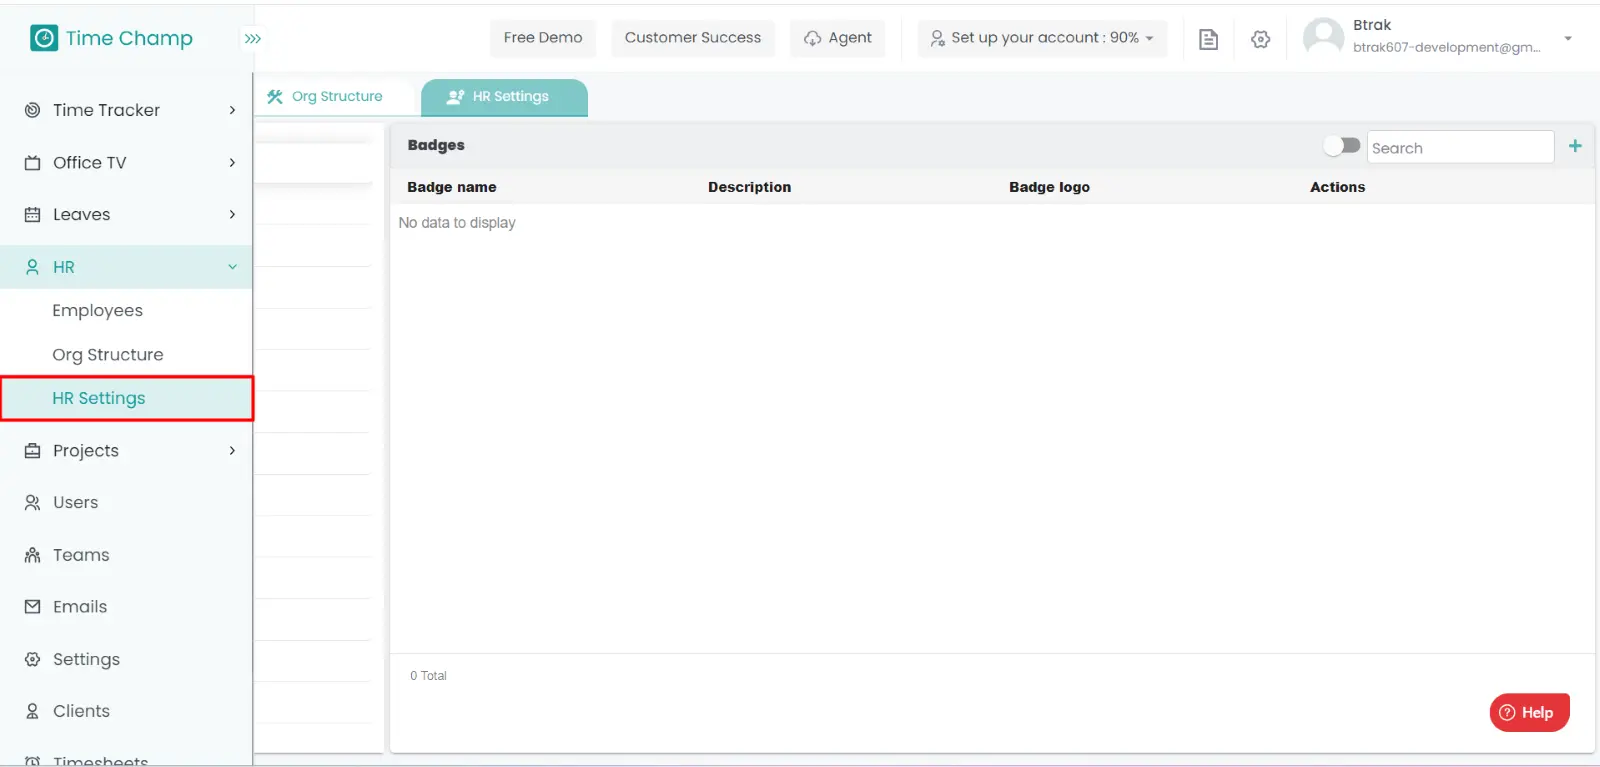
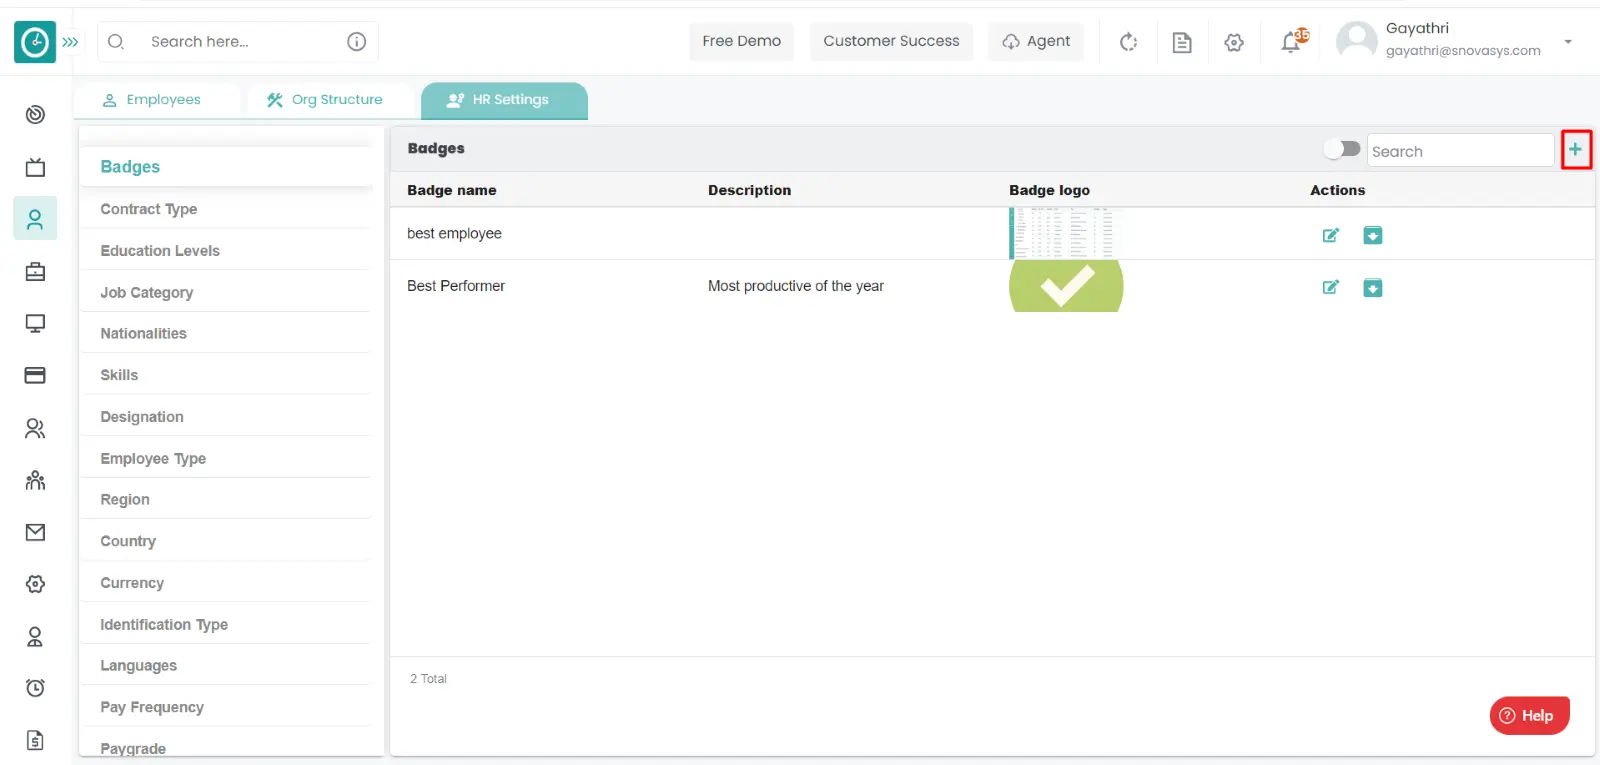
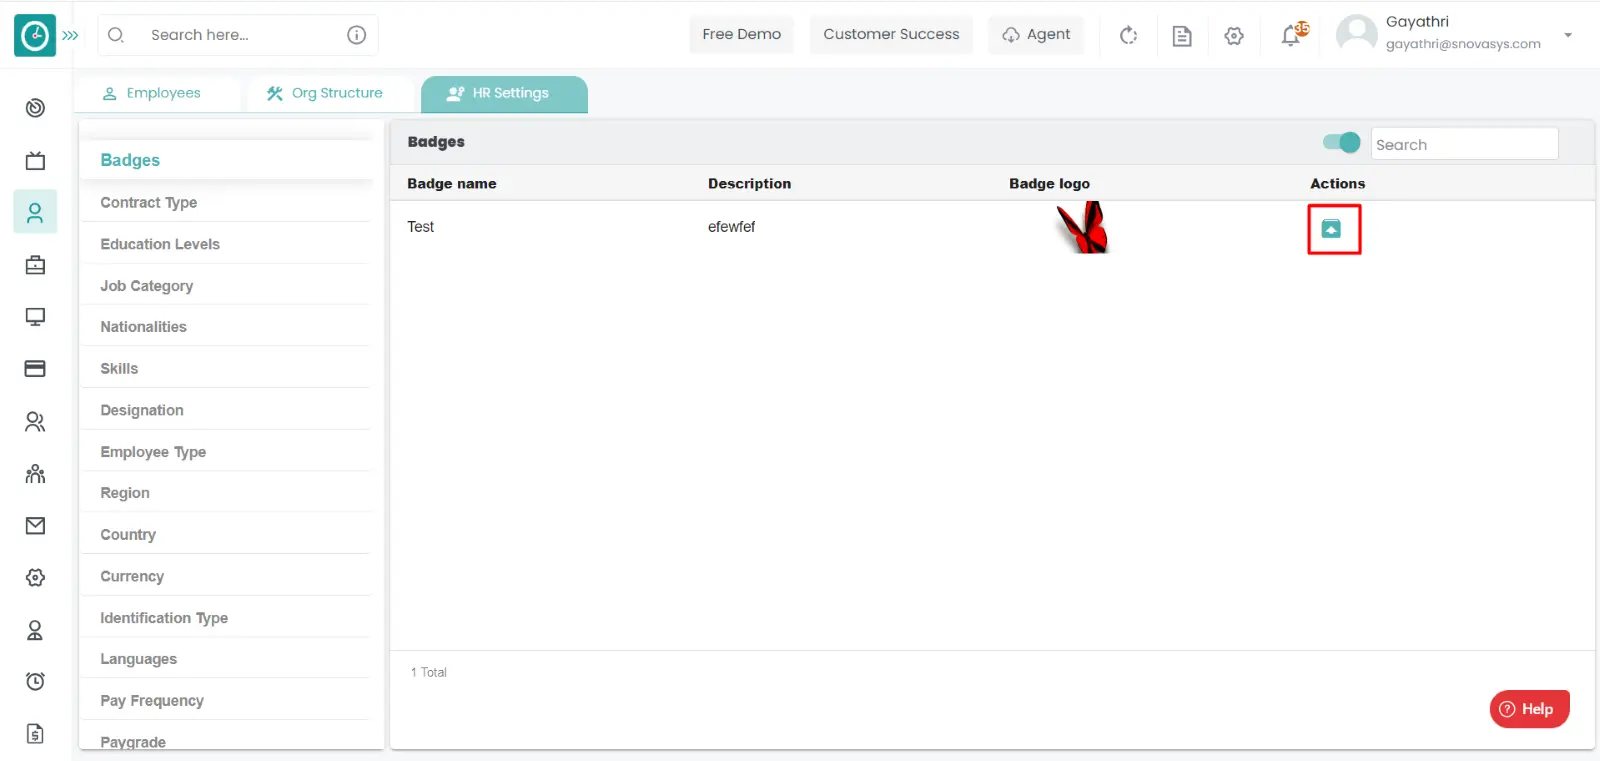
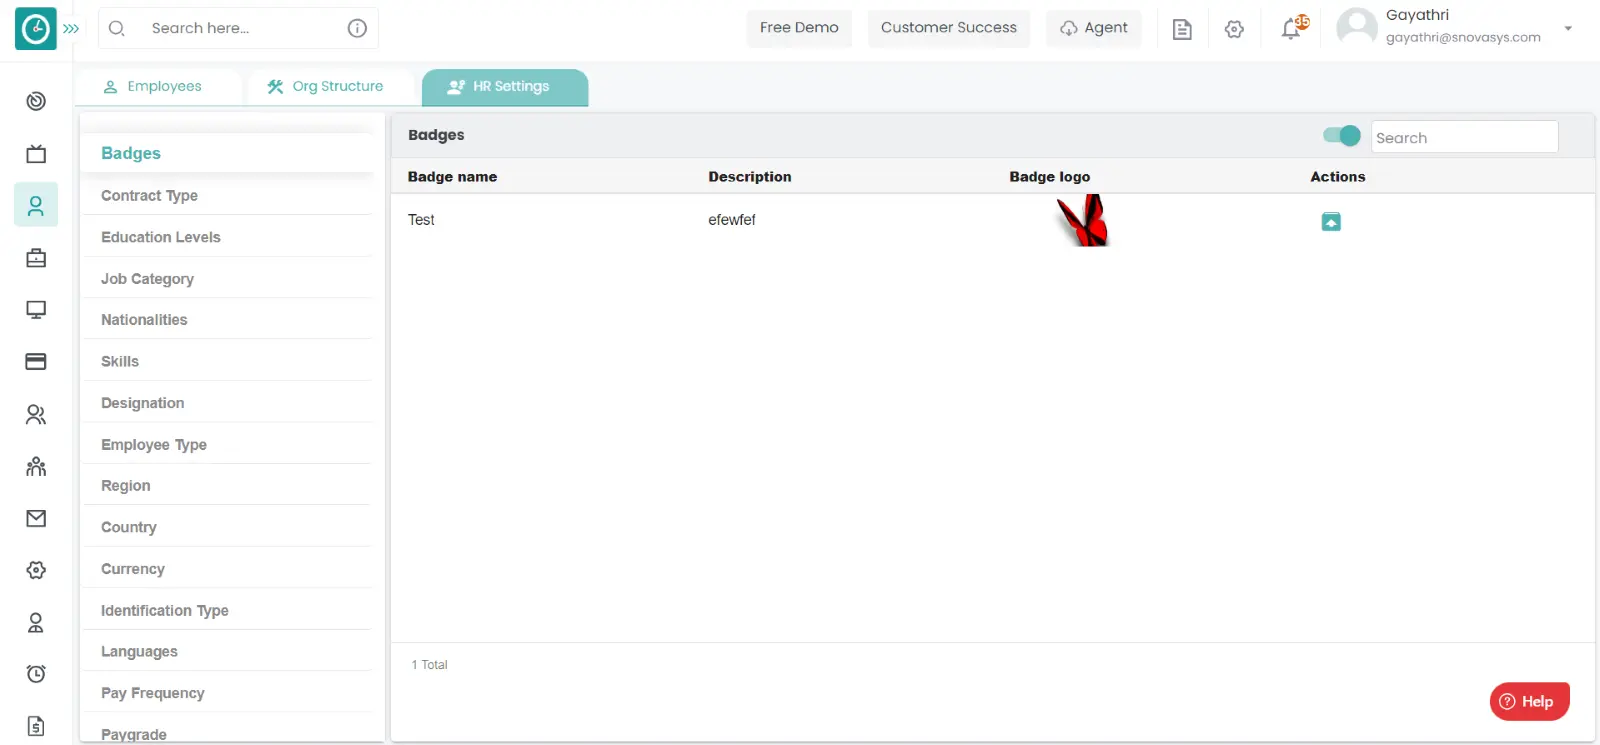
Organizations generally awards employee to encourage employees, In Time Champ you can mention/record employee awards as badges.
Navigation: Goto HR => HR Tab => HR settings
If the user is having Super Admin
Permissions, then he can be able to access/view the employee badges in
organization.
This permission can be configured by following the steps: -
View My Detailed Profile / View My Subordinate Profile / Edit My Subordinate Profile / Manage HR settings,
then select the roles for what you must give the permissions to configure and check them.View My Detailed Profile / View My Subordinate Profile / Edit My Subordinate Profile / Manage HR settings
for the defined roles.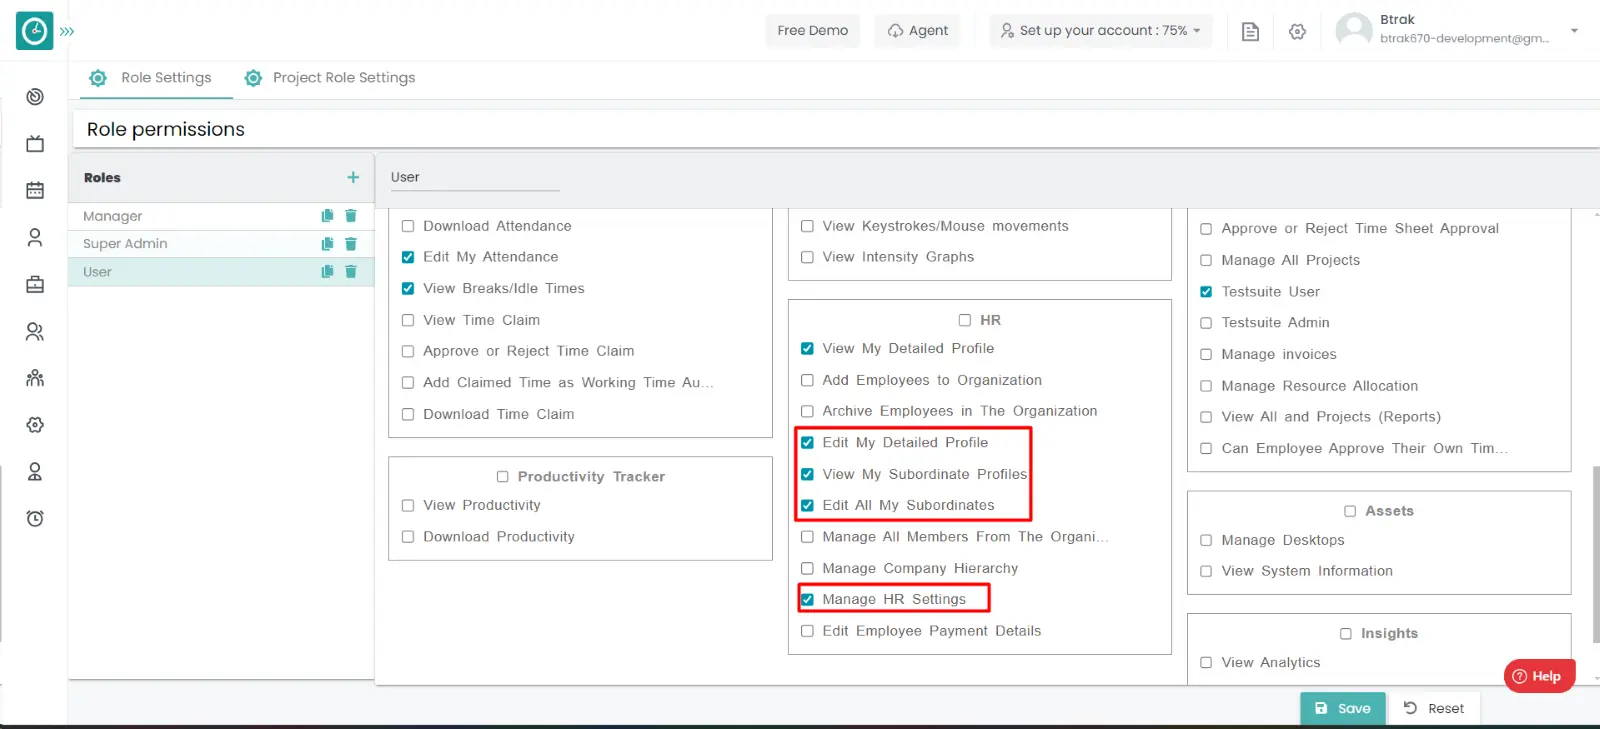
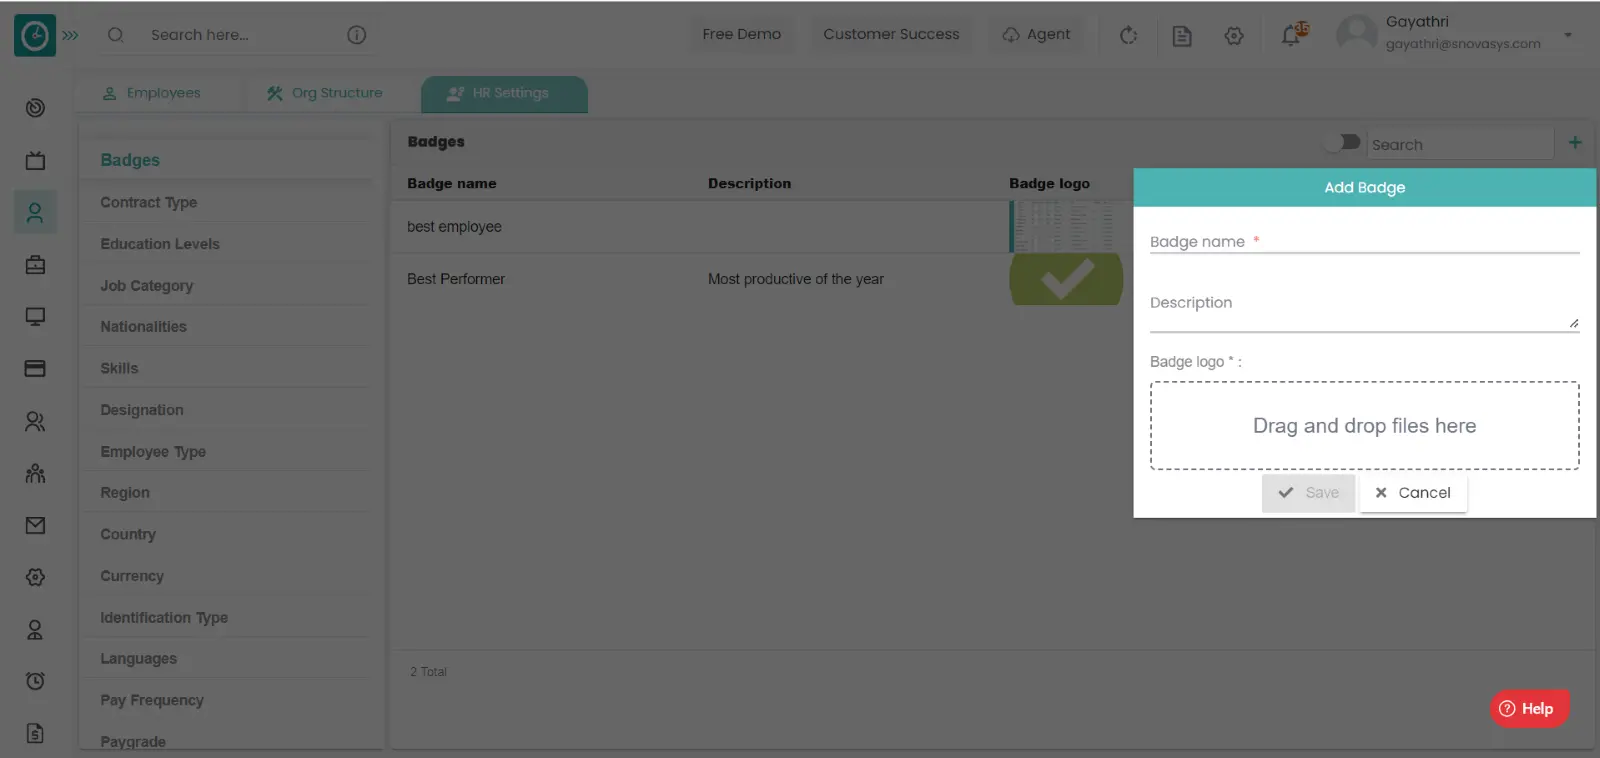
Add new badge :-
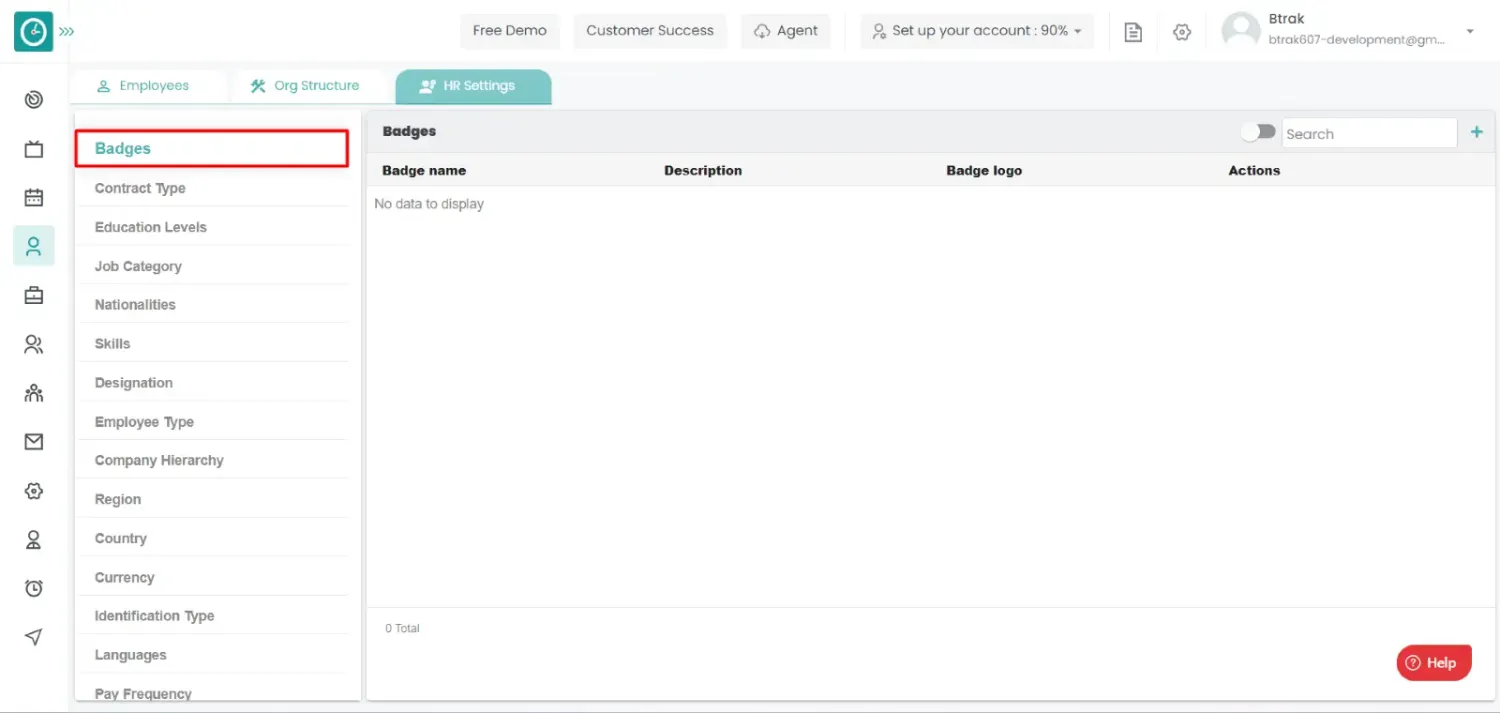
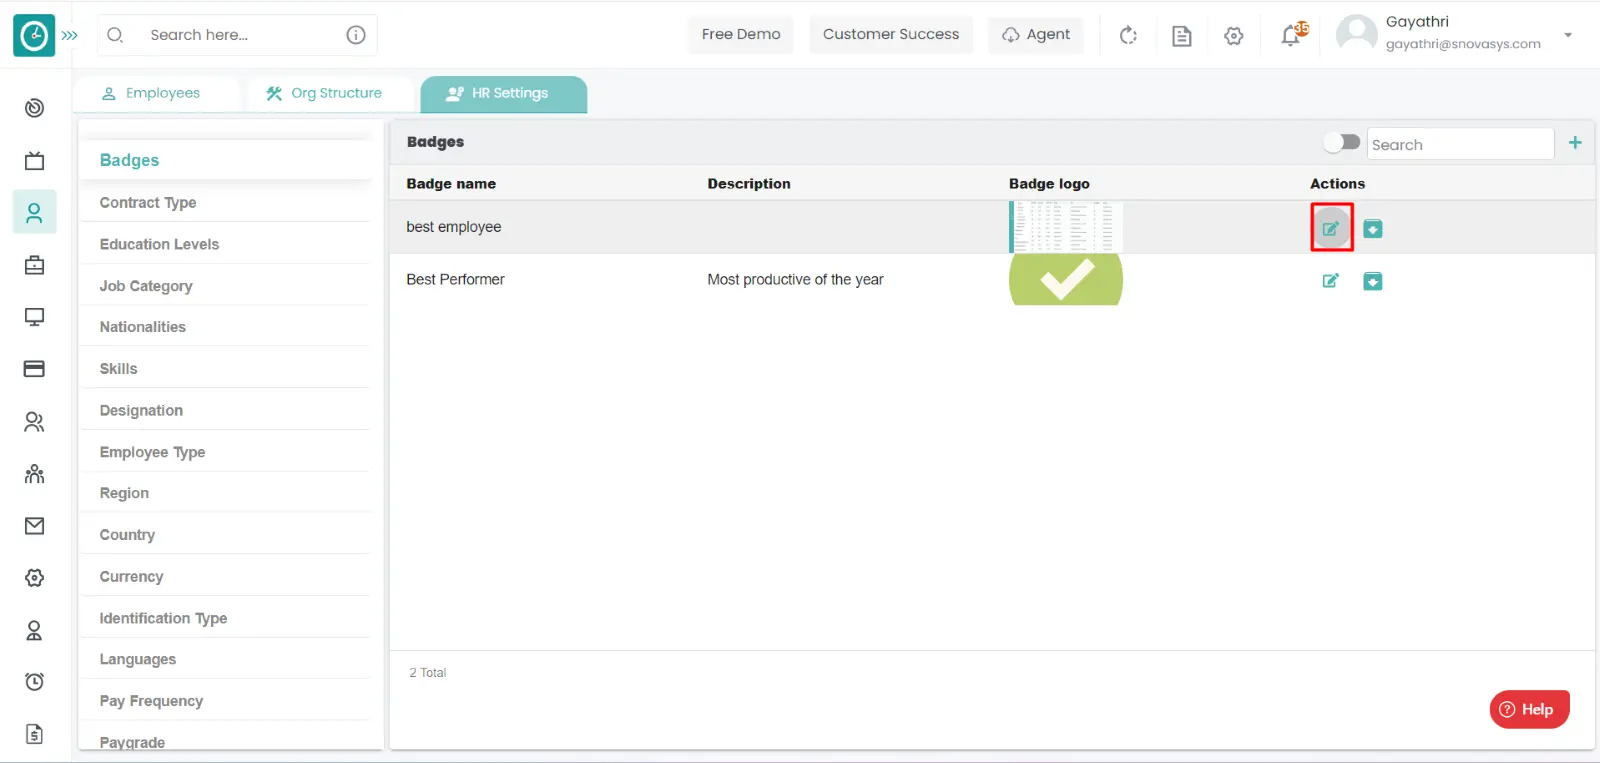
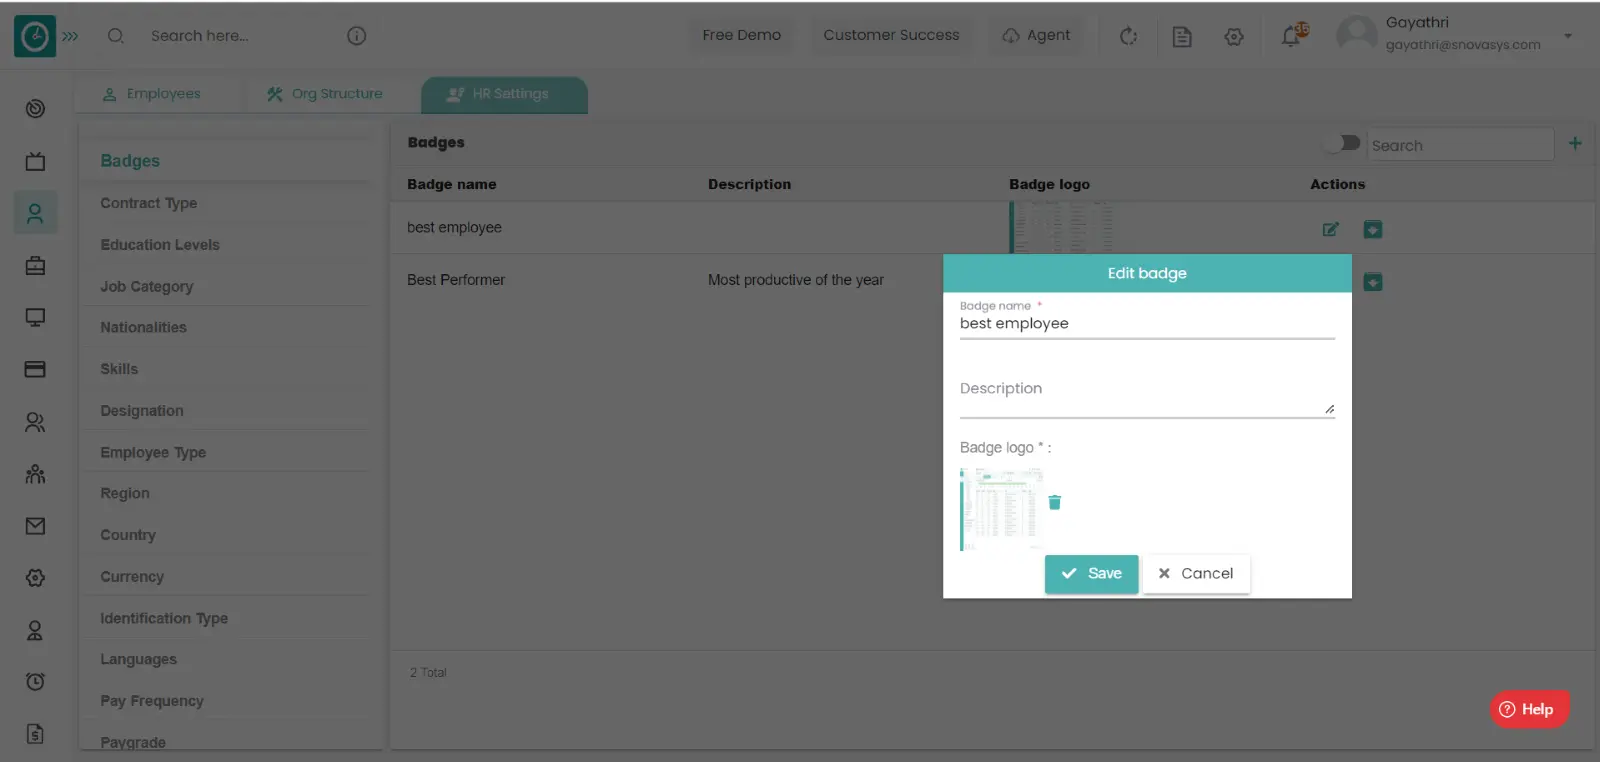
Edit badge :-
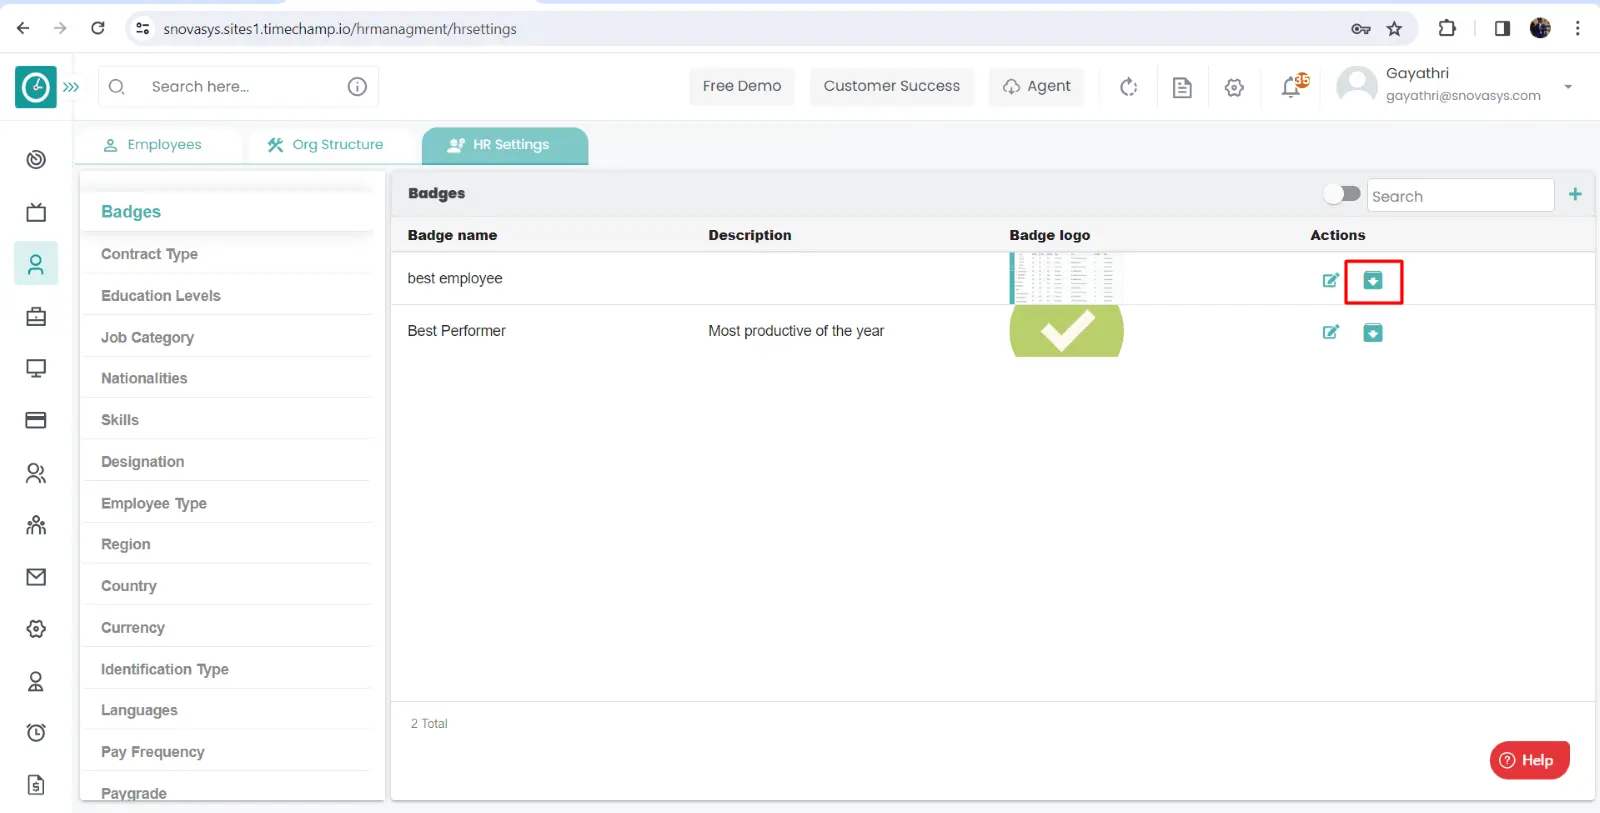
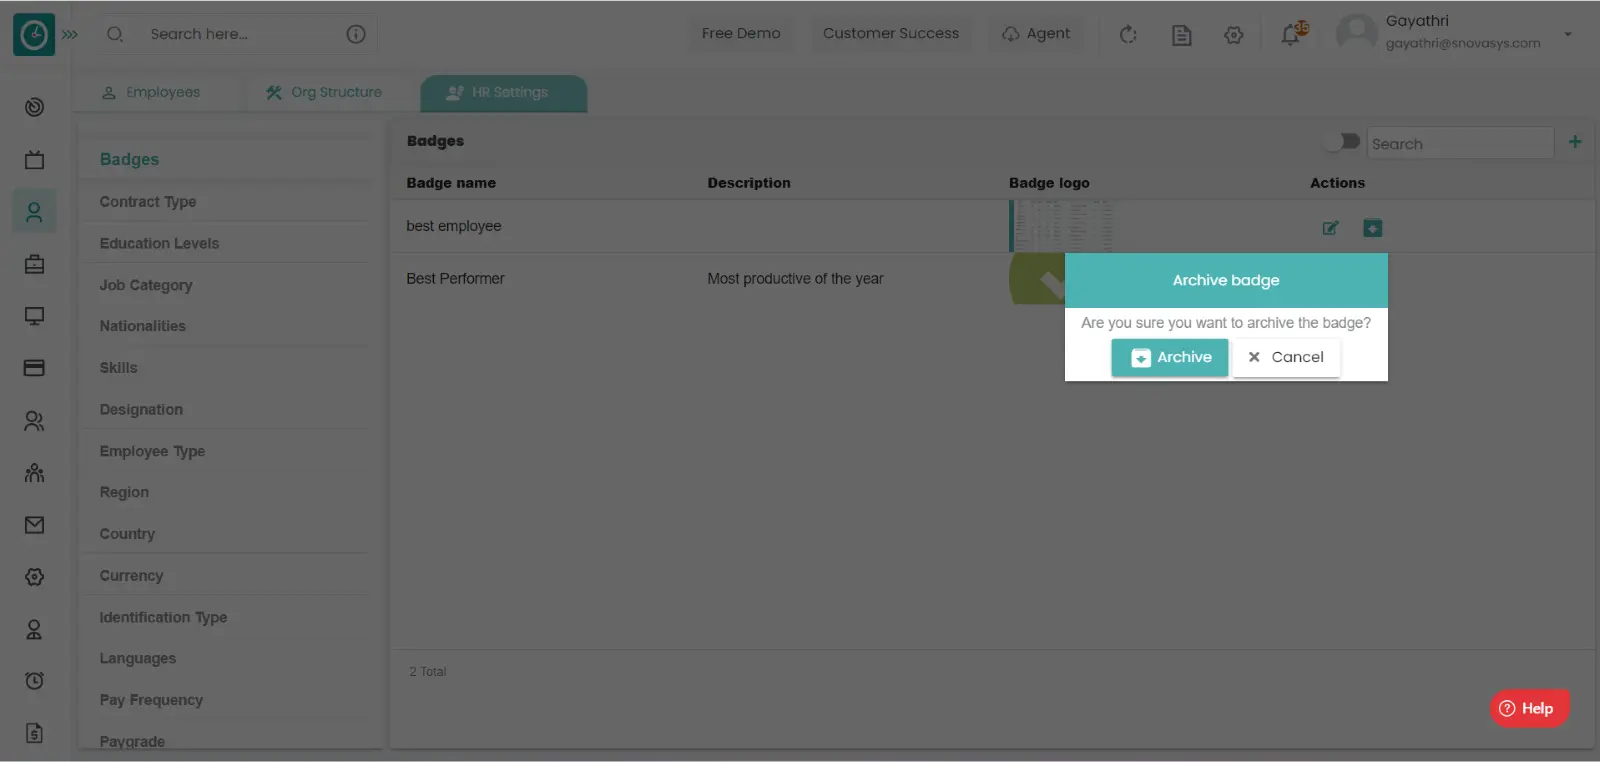
Archive badge :-
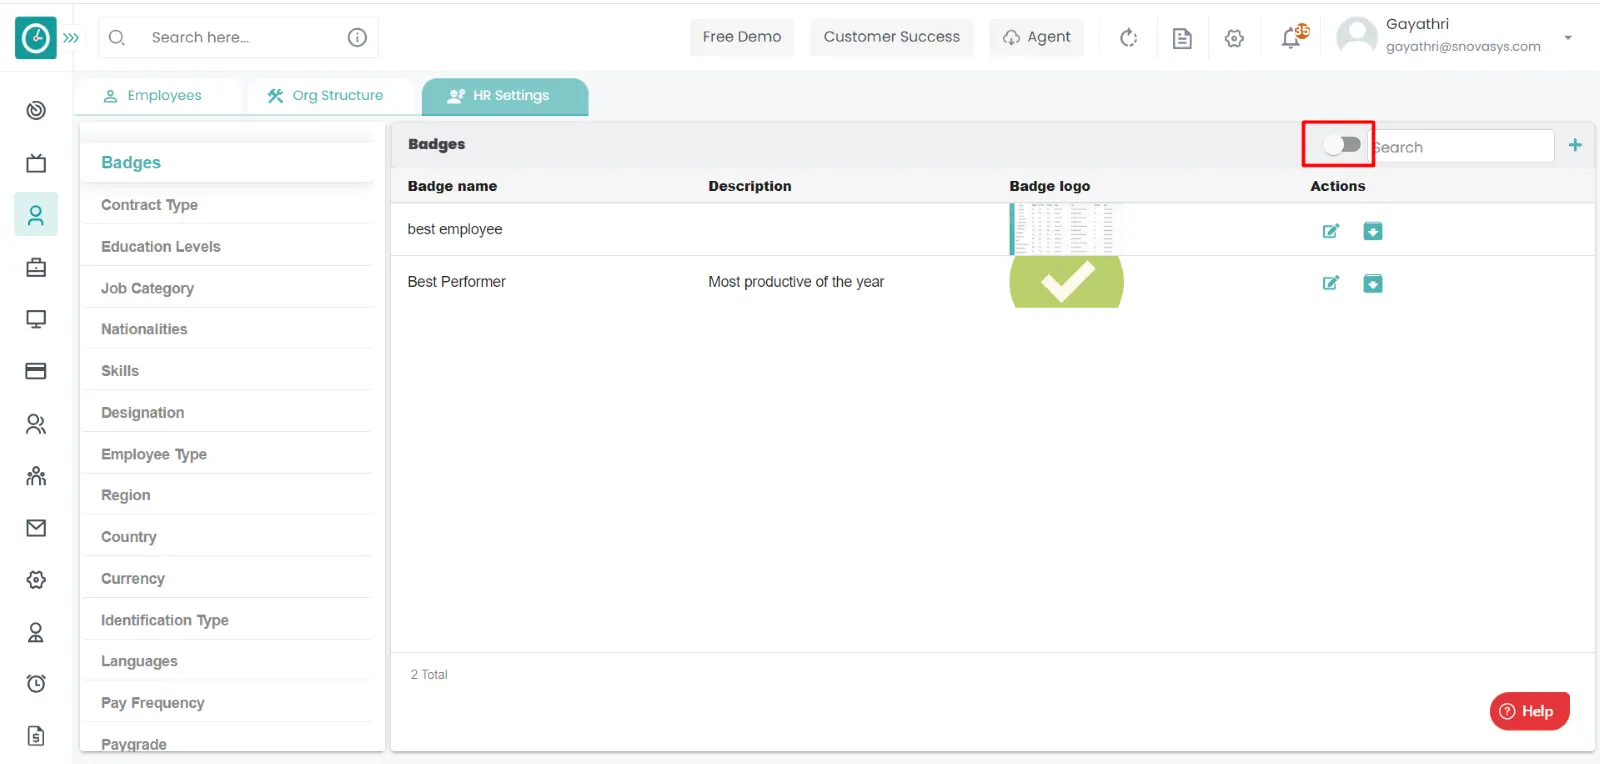
View Archived badge :-
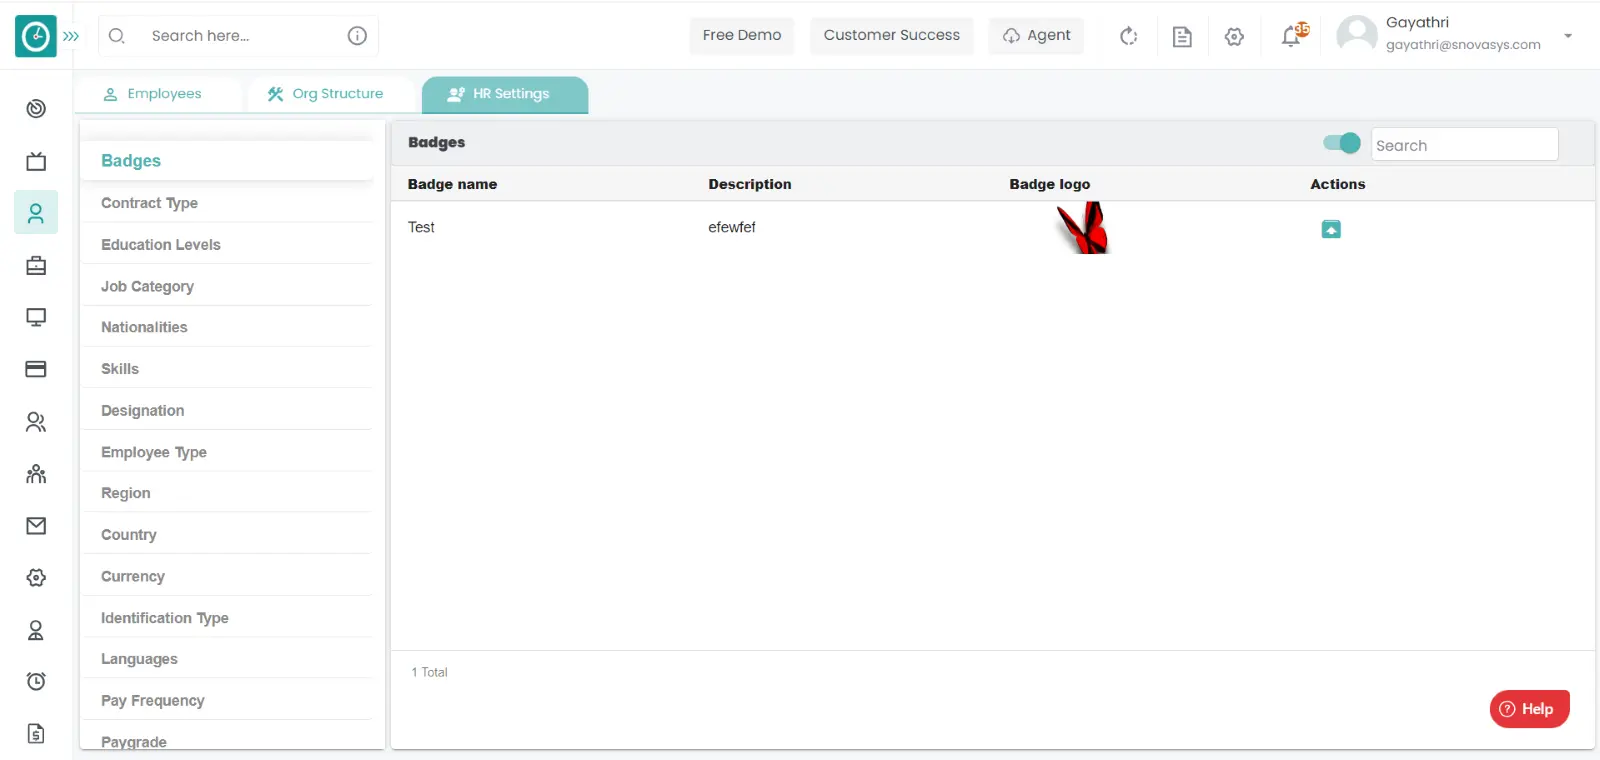
Unarchive badge :-
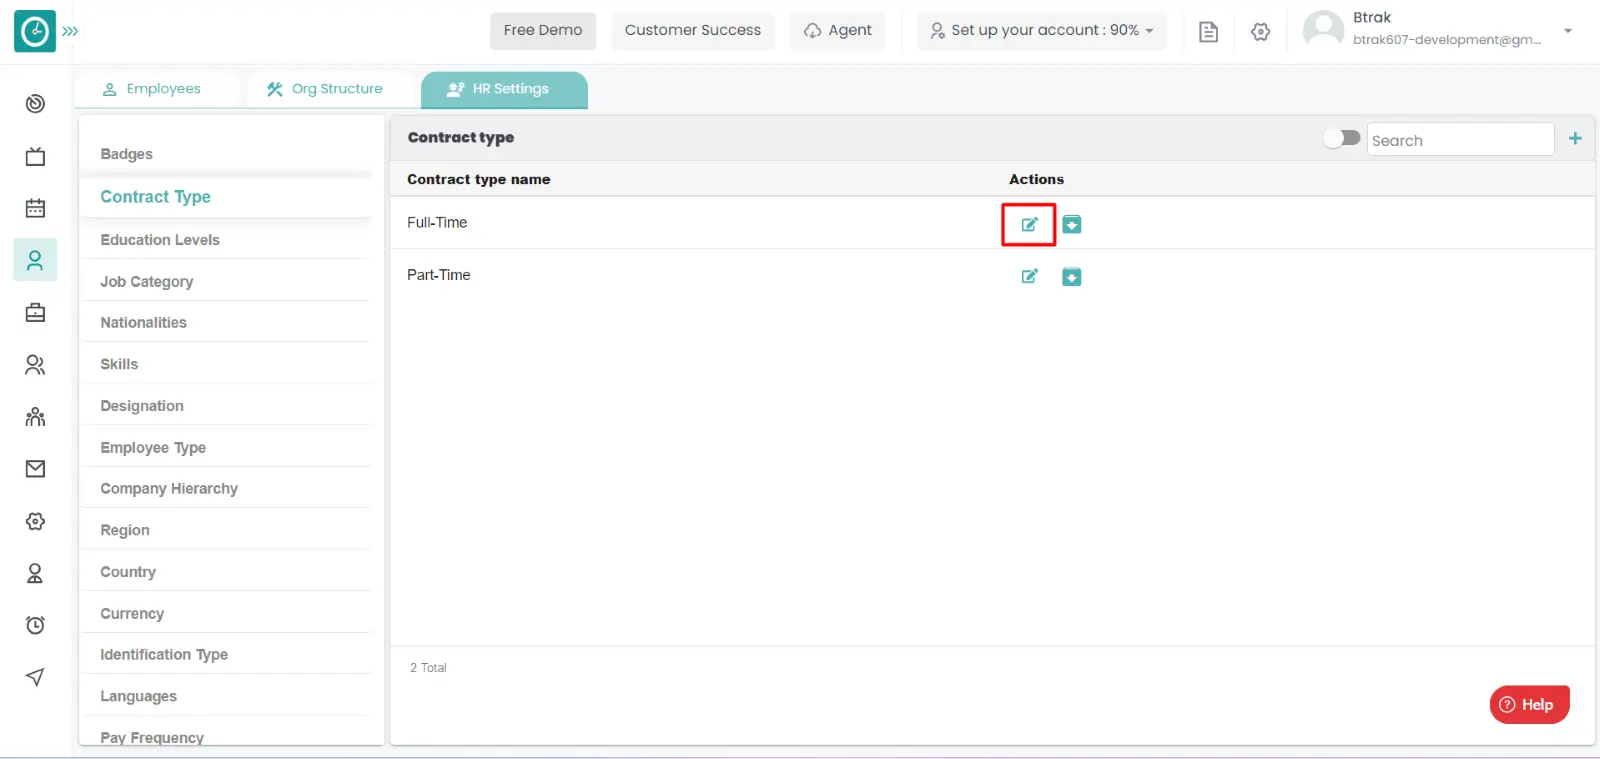
You can access/view the contract type of employee in organization.
Navigation: Goto HR => HR Tab => HR settings
If the user is having Super Admin
Permissions, then he can be able to access/view contract type in organization.
This permission can be configured by following the steps: -
View My Detailed Profile / View My Subordinate Profile / Edit My Subordinate Profile / Manage HR settings,
then select the roles for what you must give the permissions to configure and check them.View My Detailed Profile / View My Subordinate Profile / Edit My Subordinate Profile / Manage HR settings
for the defined roles.
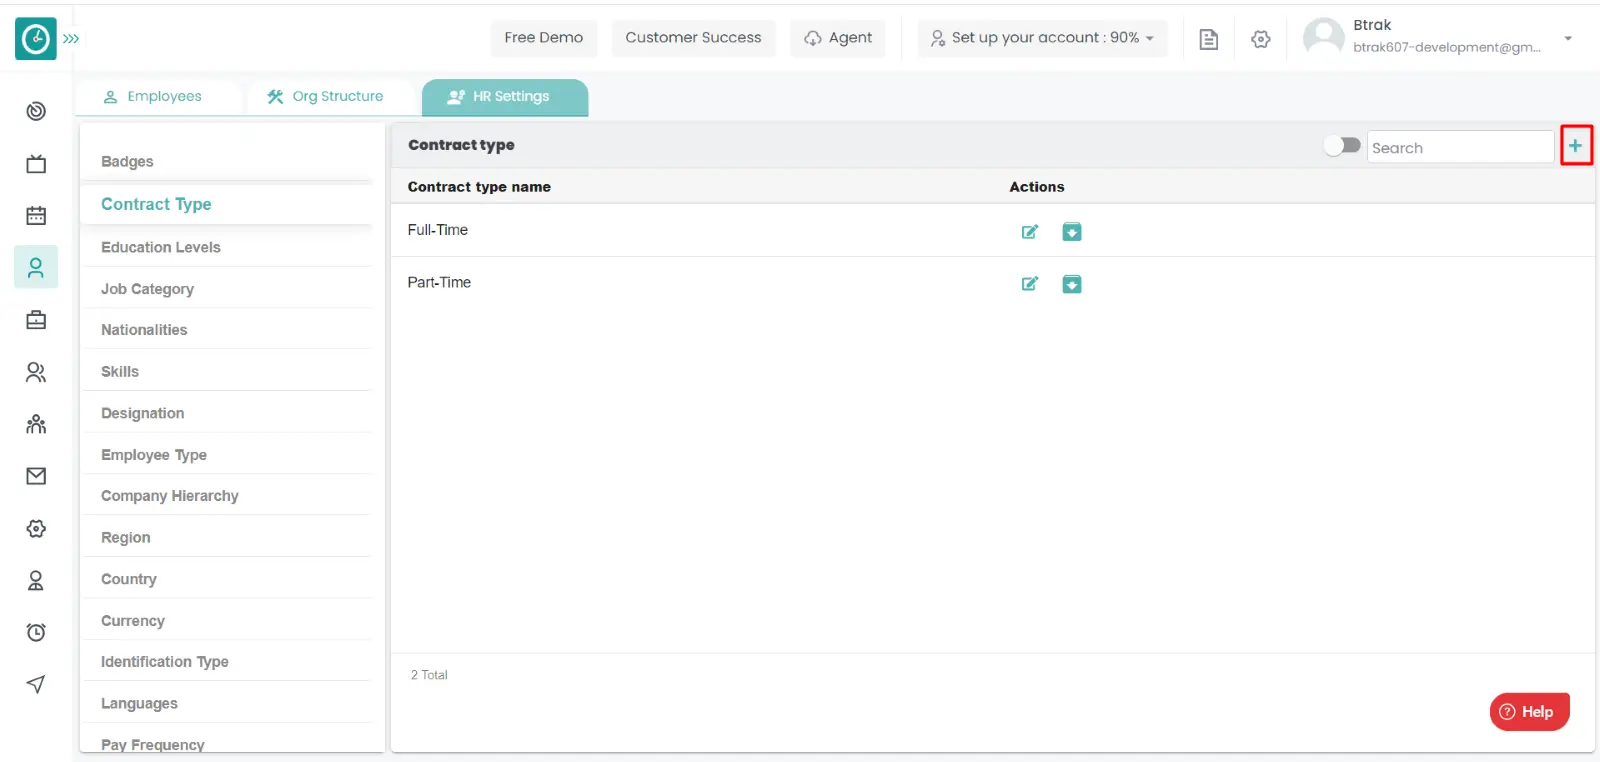
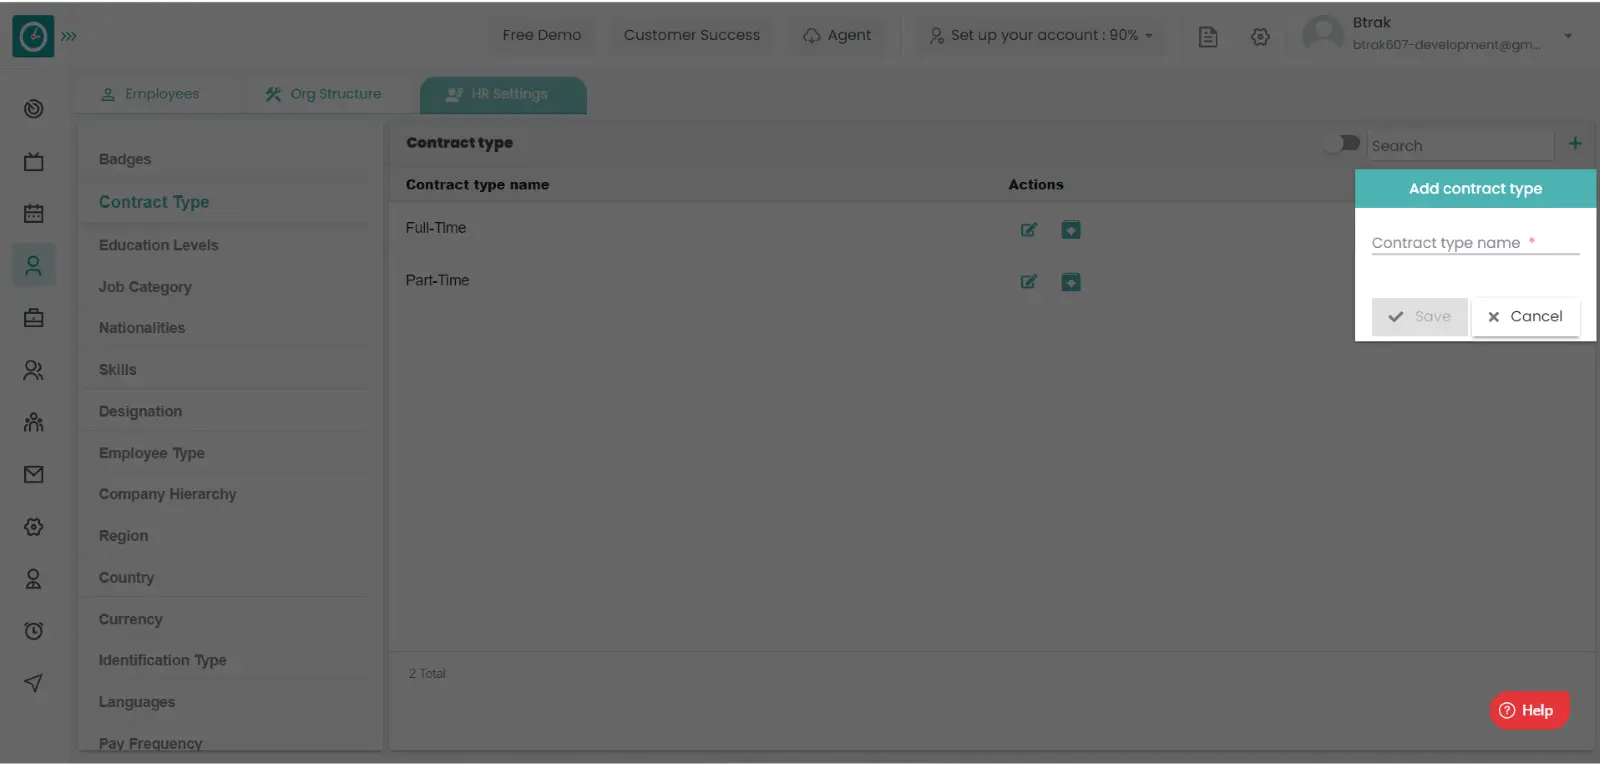
Add new contract type :-
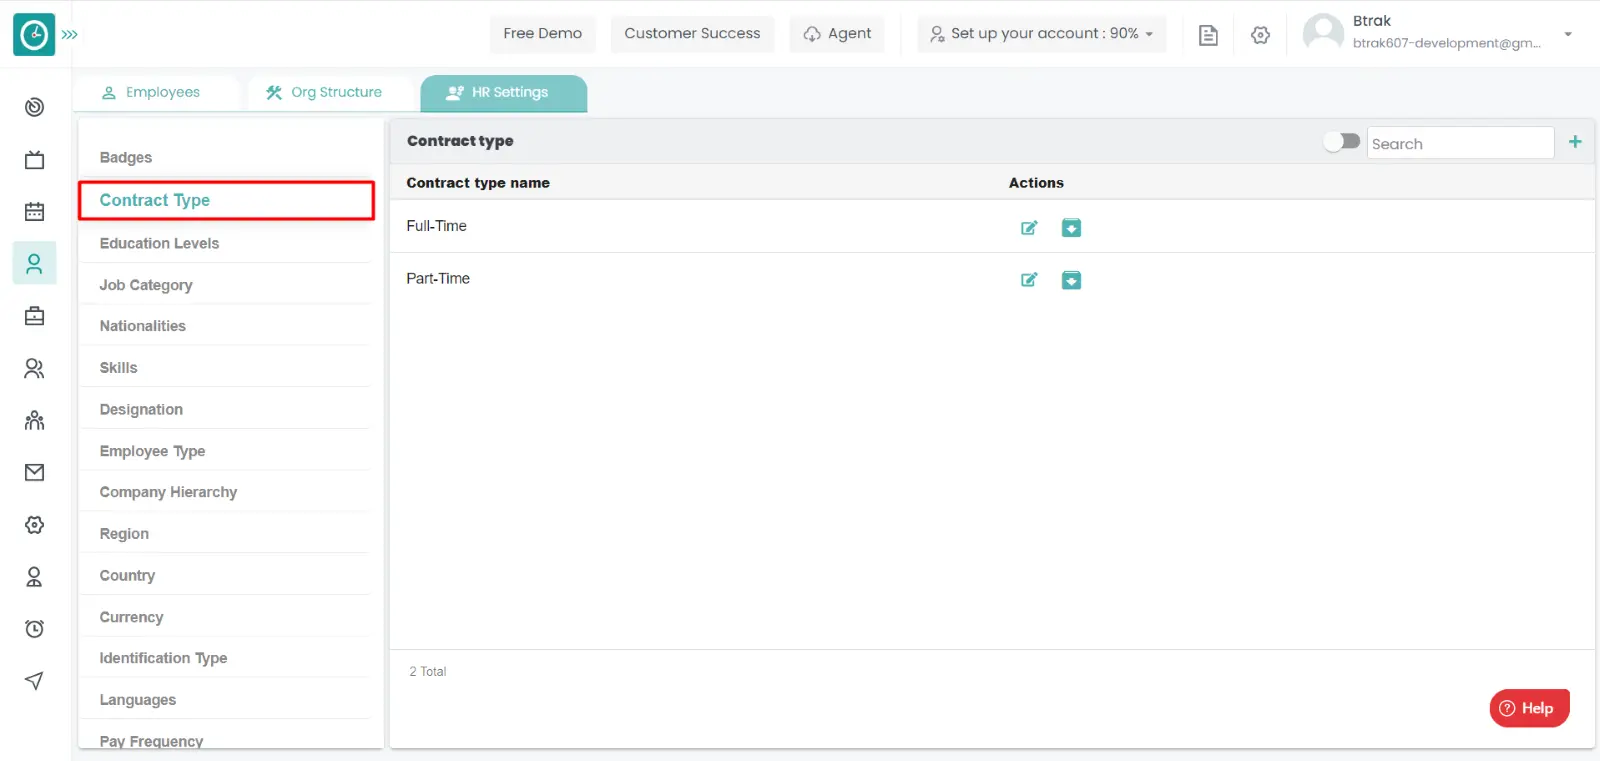
Edit contract type :-

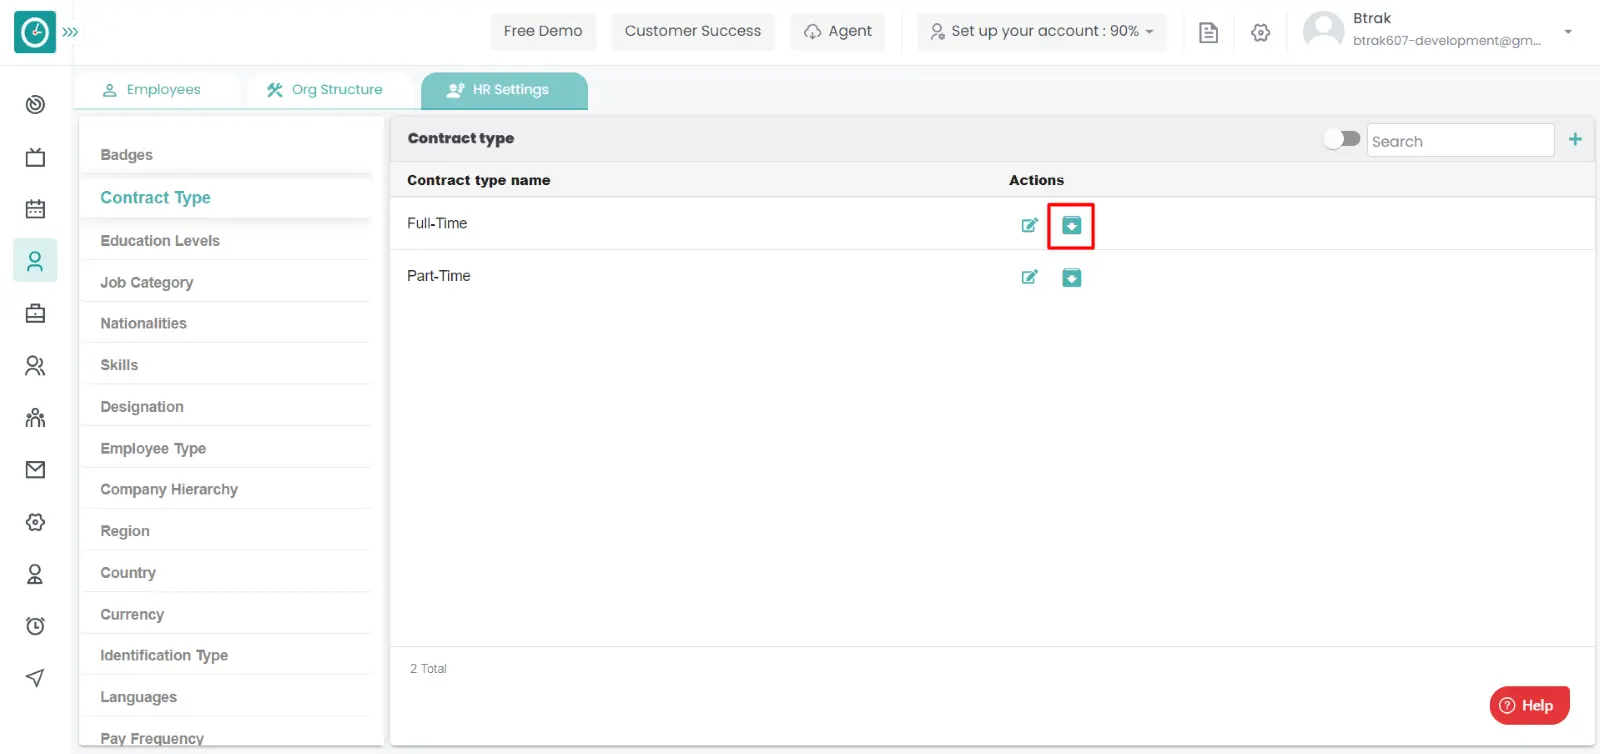
Archive contract type :-

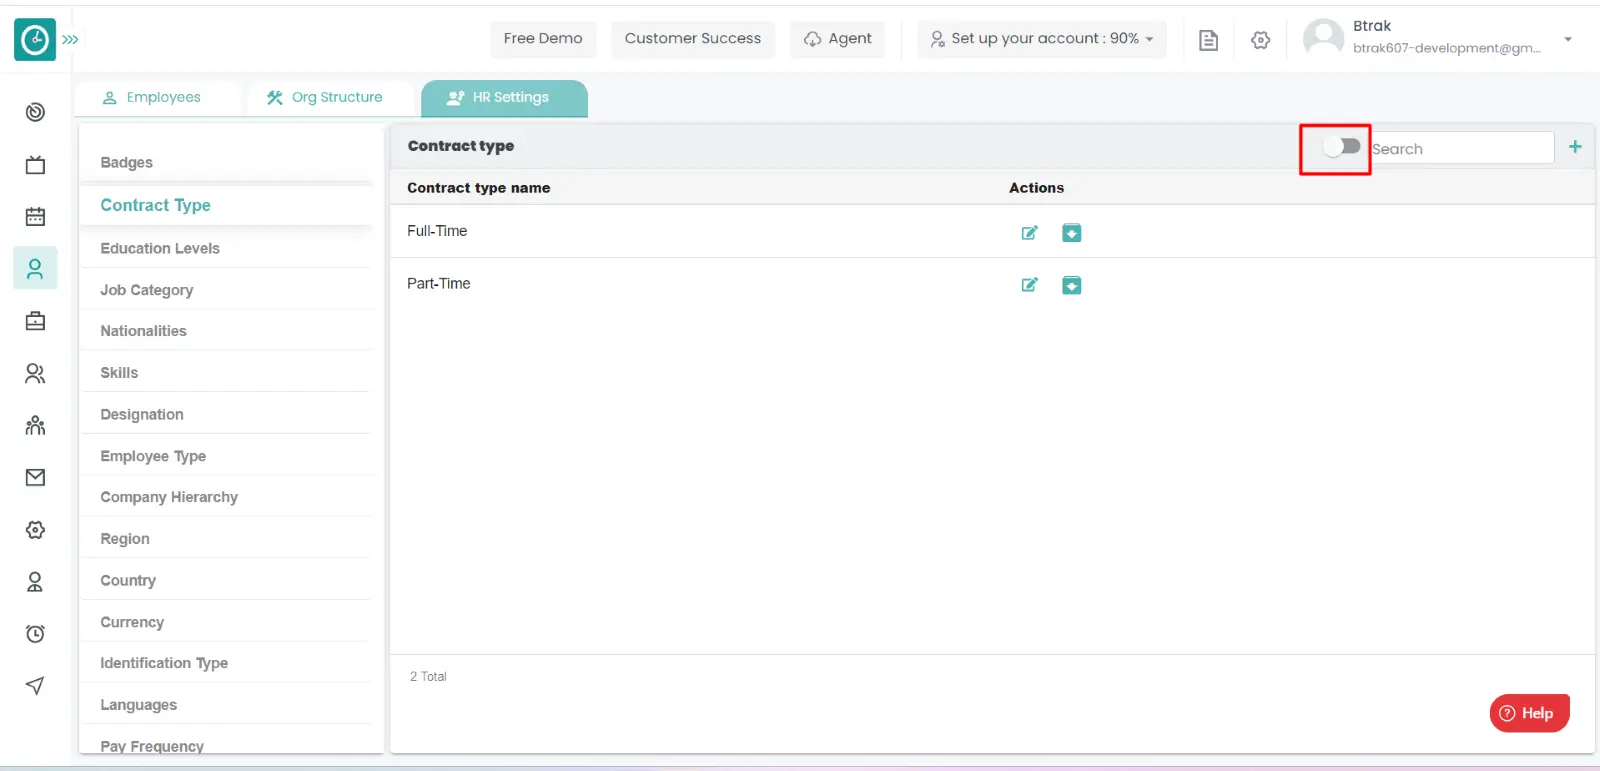
View Archived contract :-
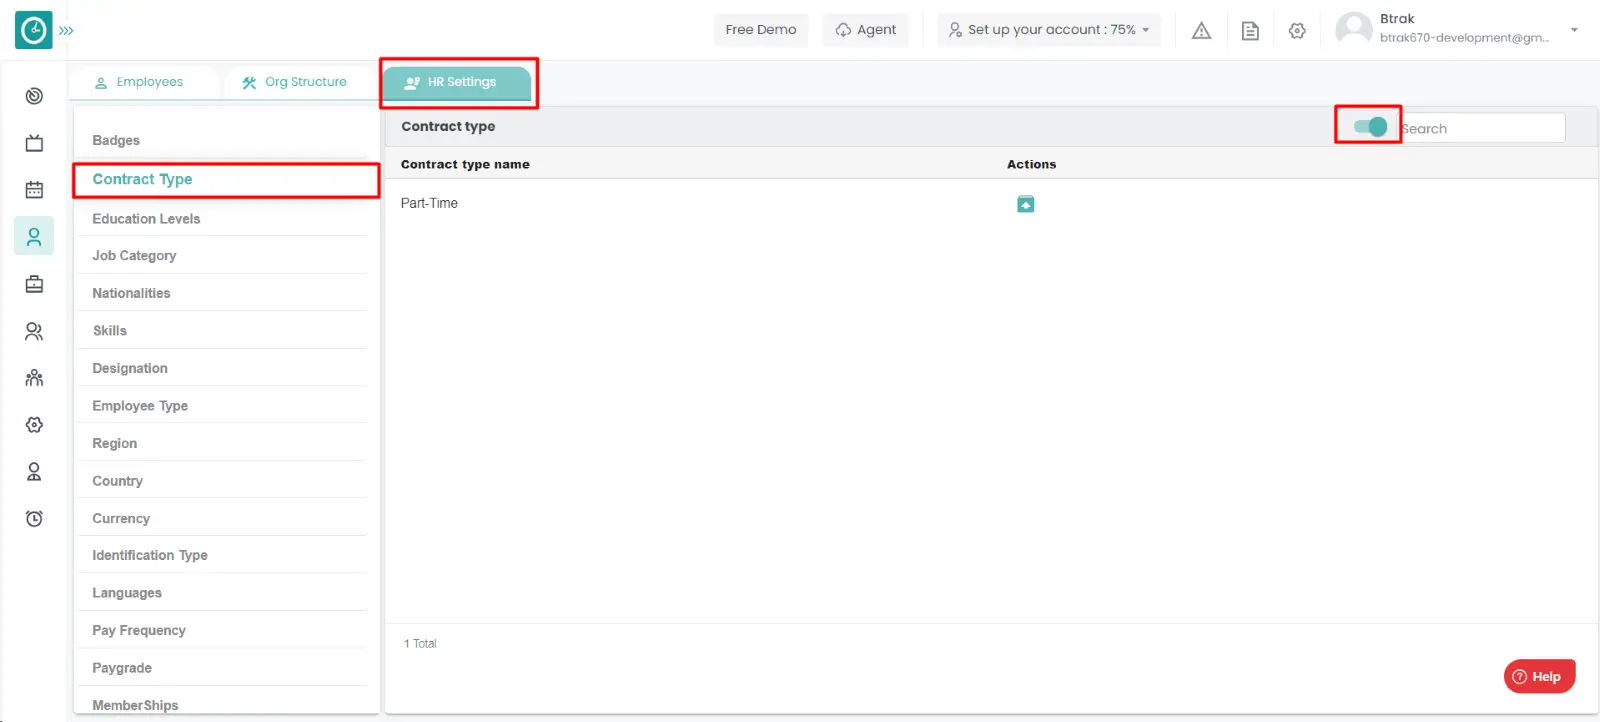
Unarchive contract :-
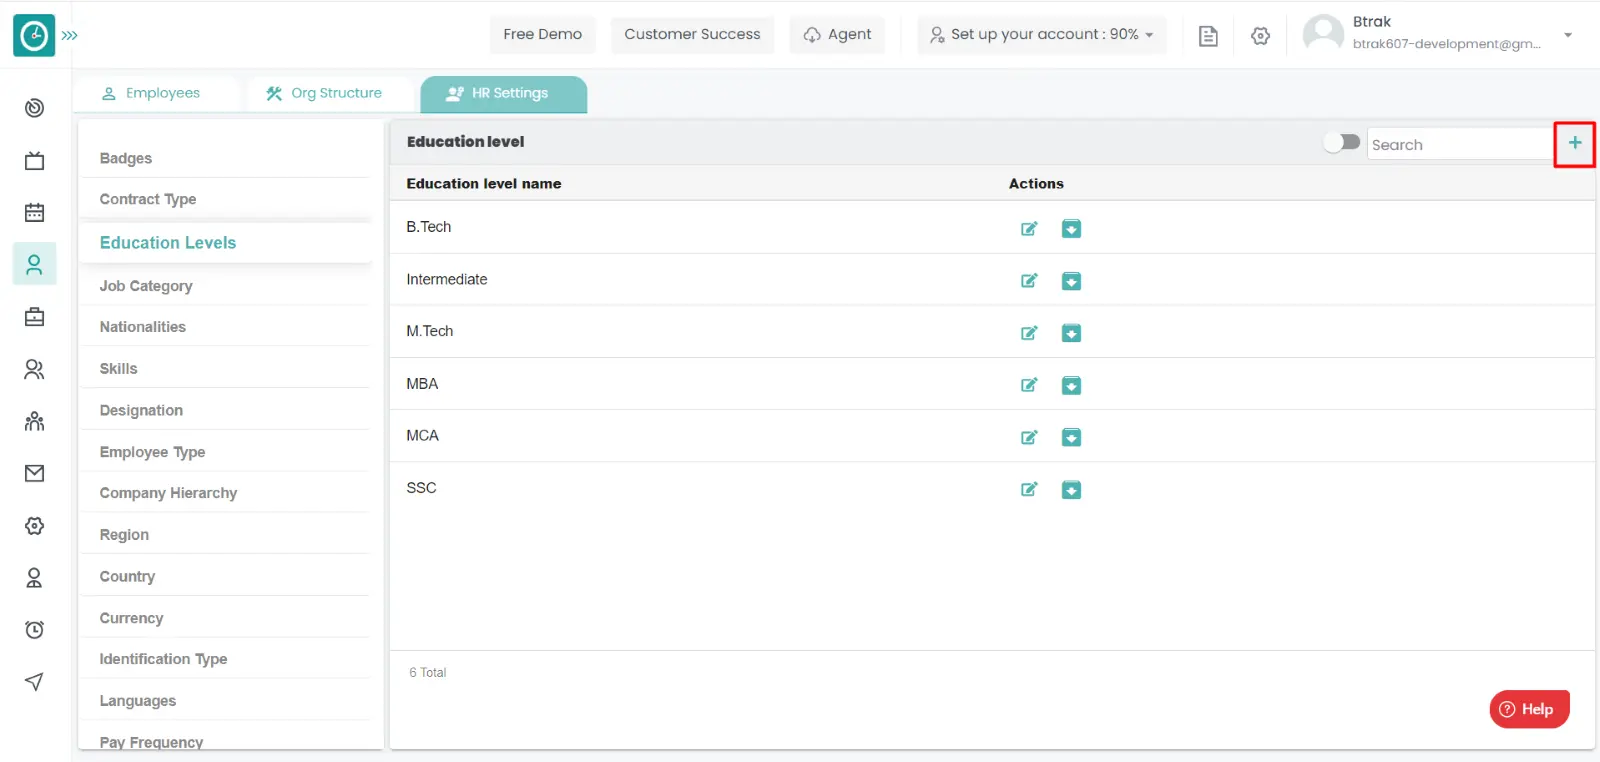
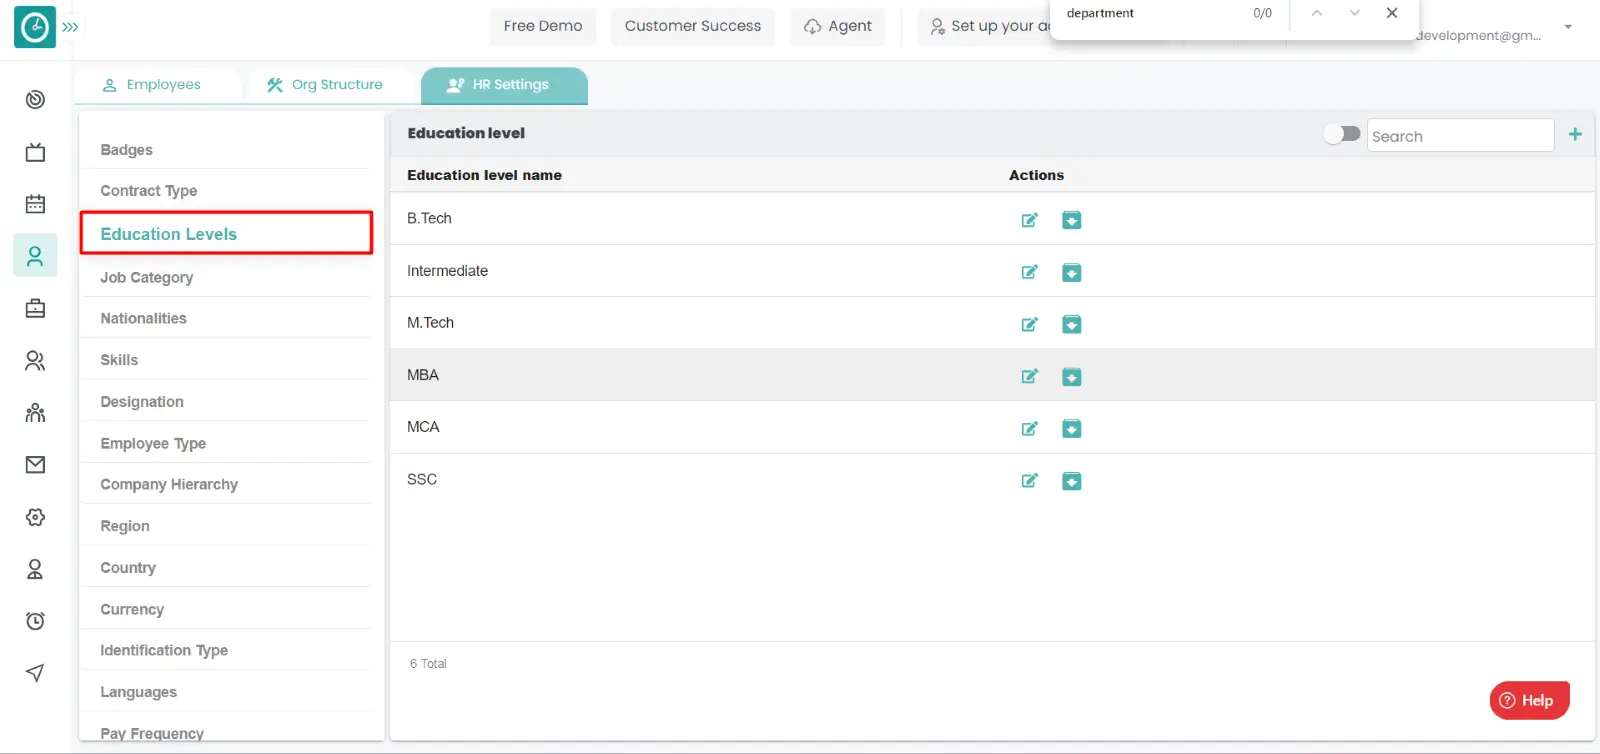
You can access/view the education level of employee in organization.
Navigation: Goto HR => HR Tab => HR settings
If the user is having Super Admin
Permissions, then he can be able to access/view education levels in
organization.
This permission can be configured by following the steps: -
View My Detailed Profile / View My Subordinate Profile / Edit My Subordinate Profile / Manage HR settings,
then select the roles for what you must give the permissions to configure and check them.View My Detailed Profile / View My Subordinate Profile / Edit My Subordinate Profile / Manage HR settings
for the defined roles.
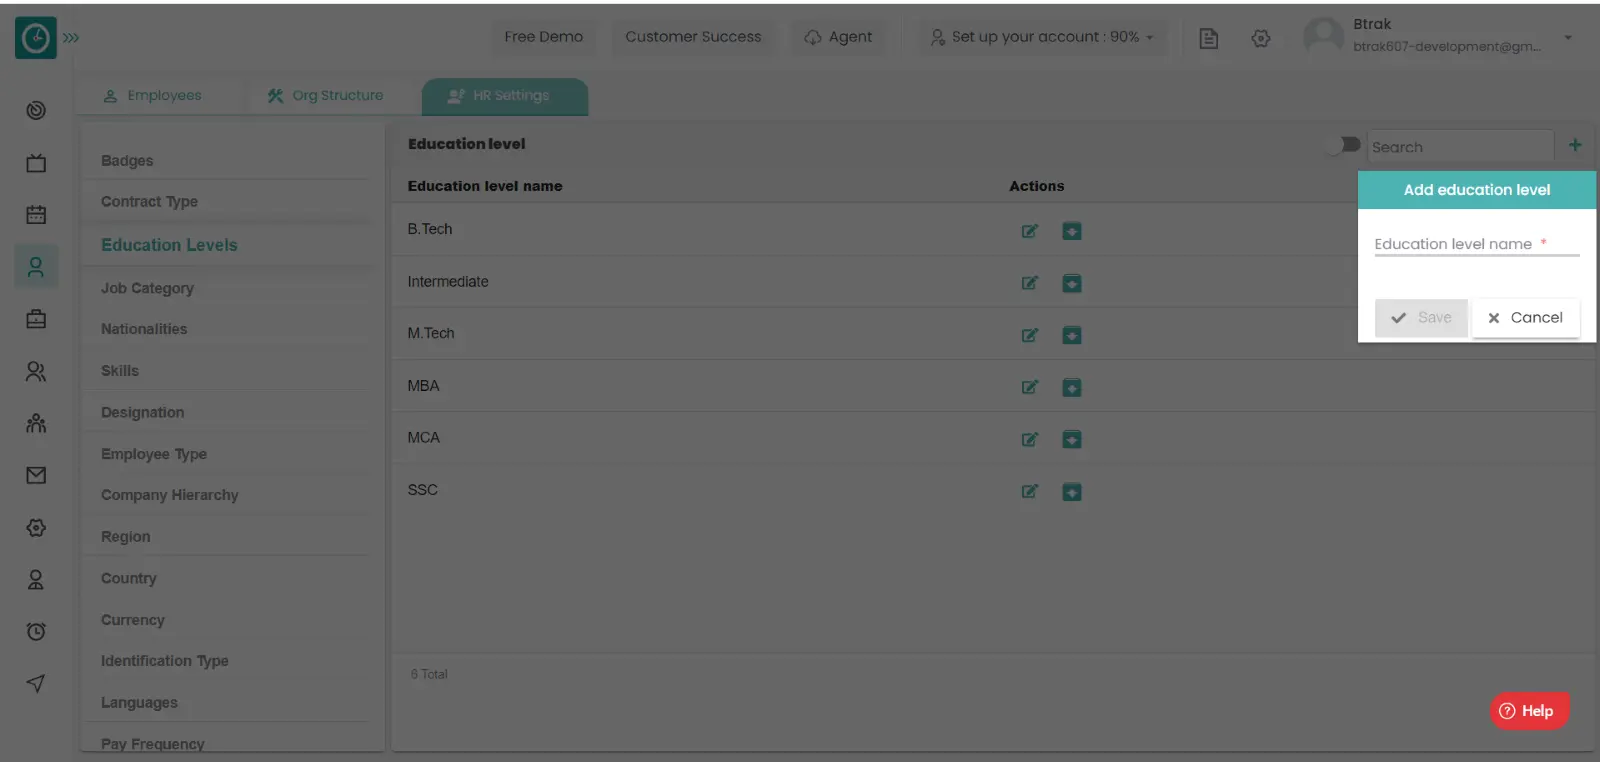
Add new education level :-

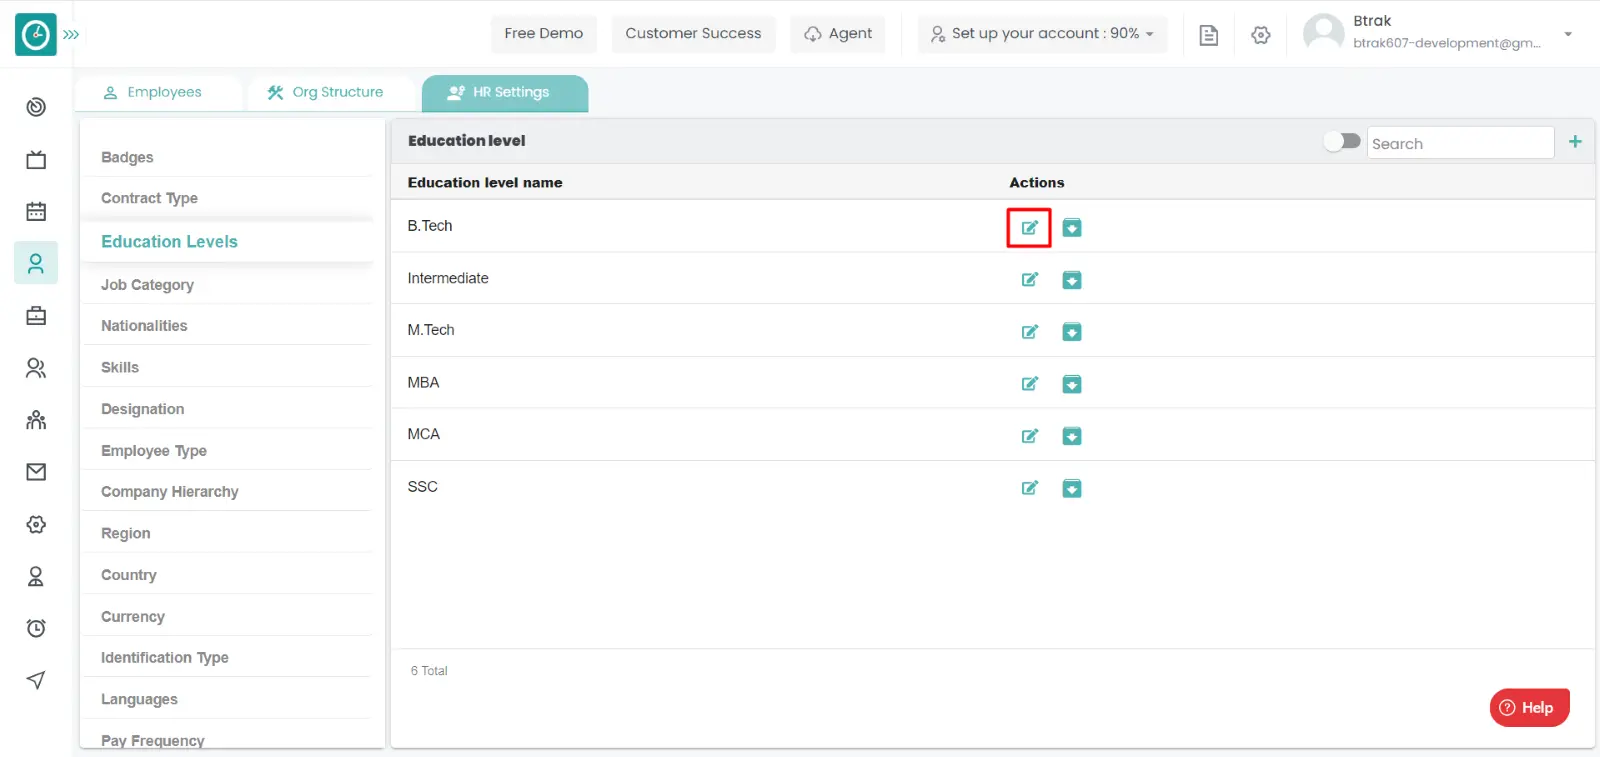
Edit education level :-

Archive education level :-
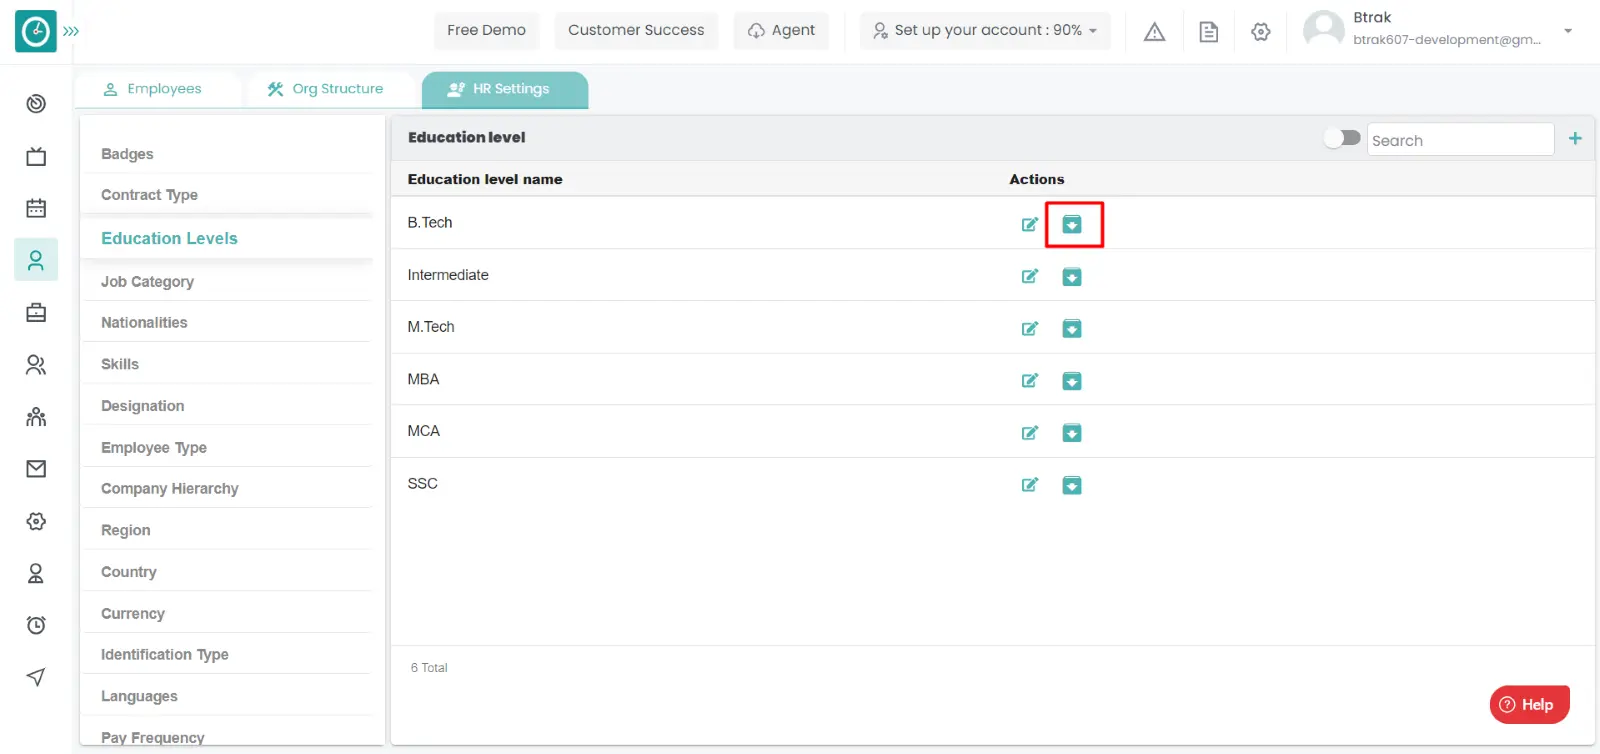

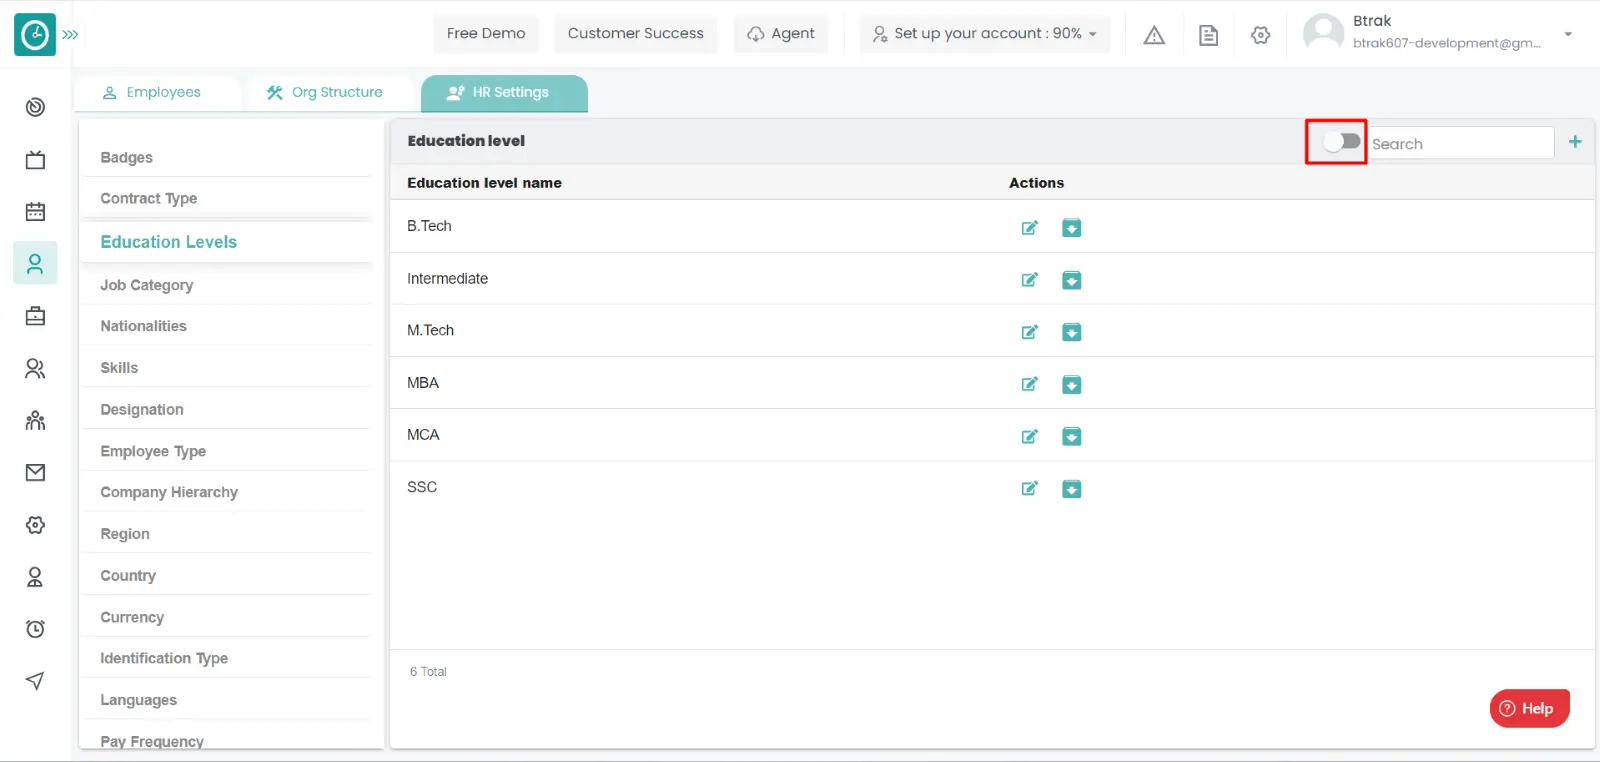
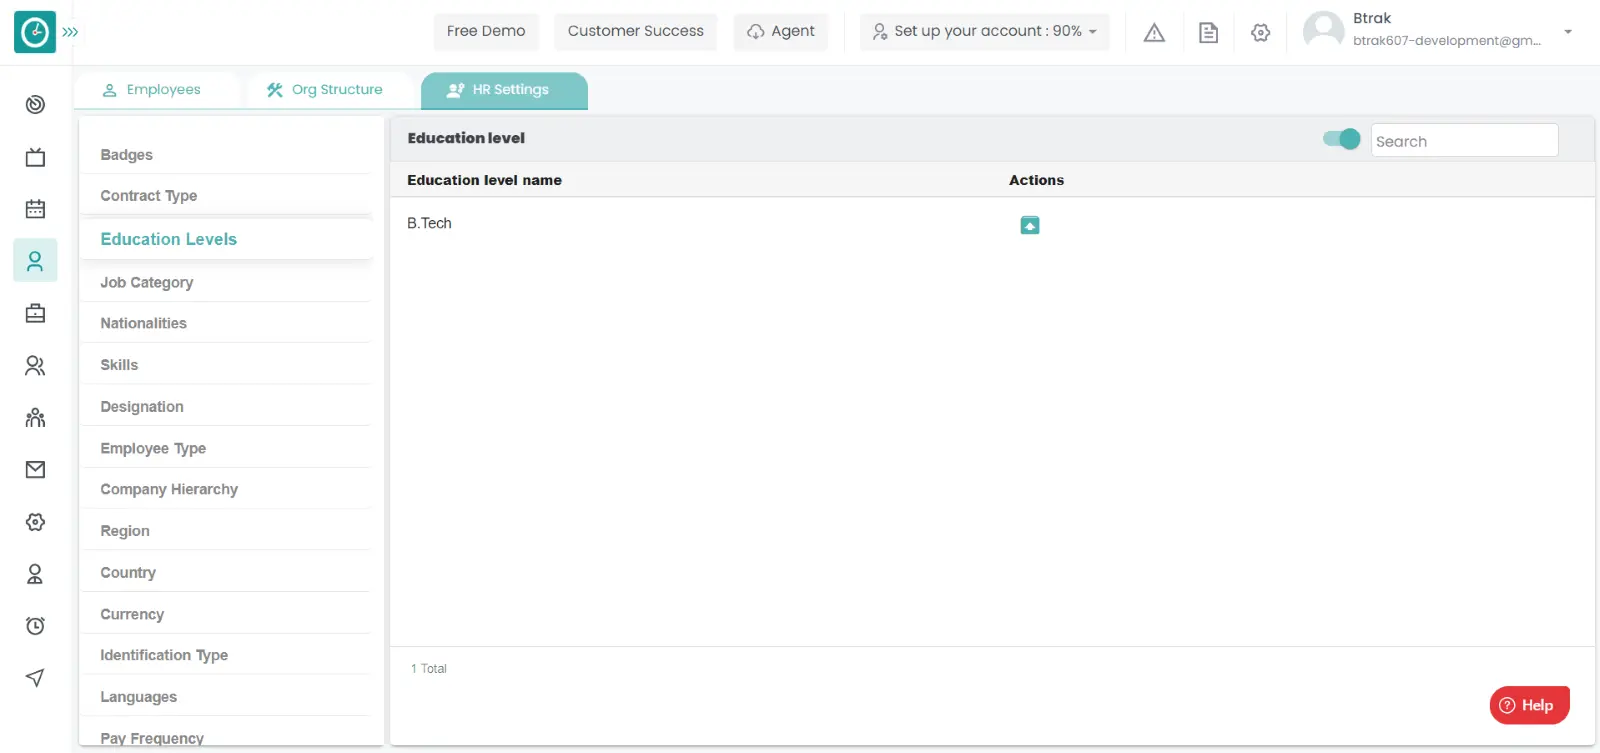
View Archived education level :-
Unarchive education level :-
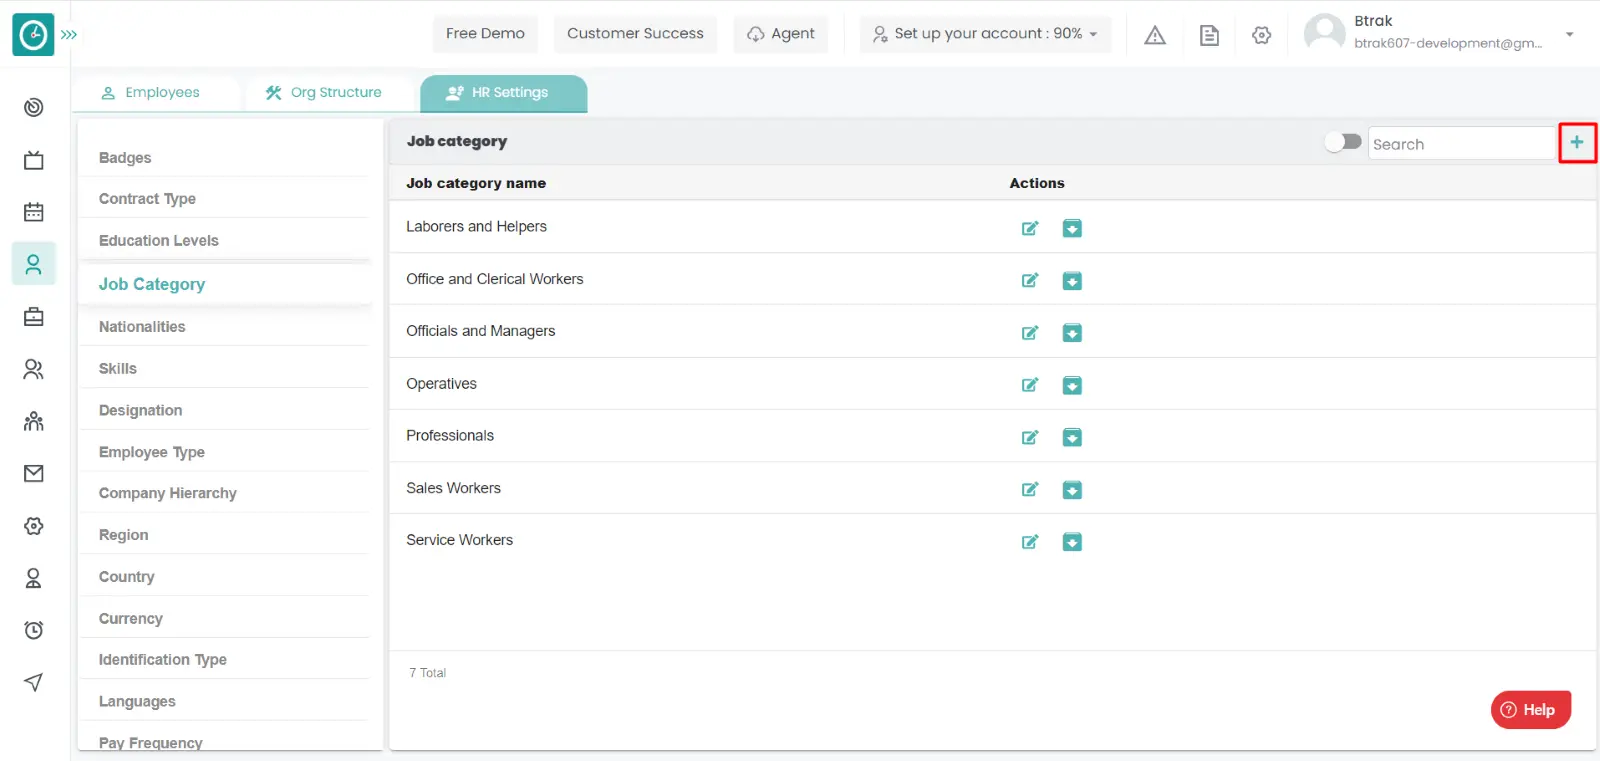
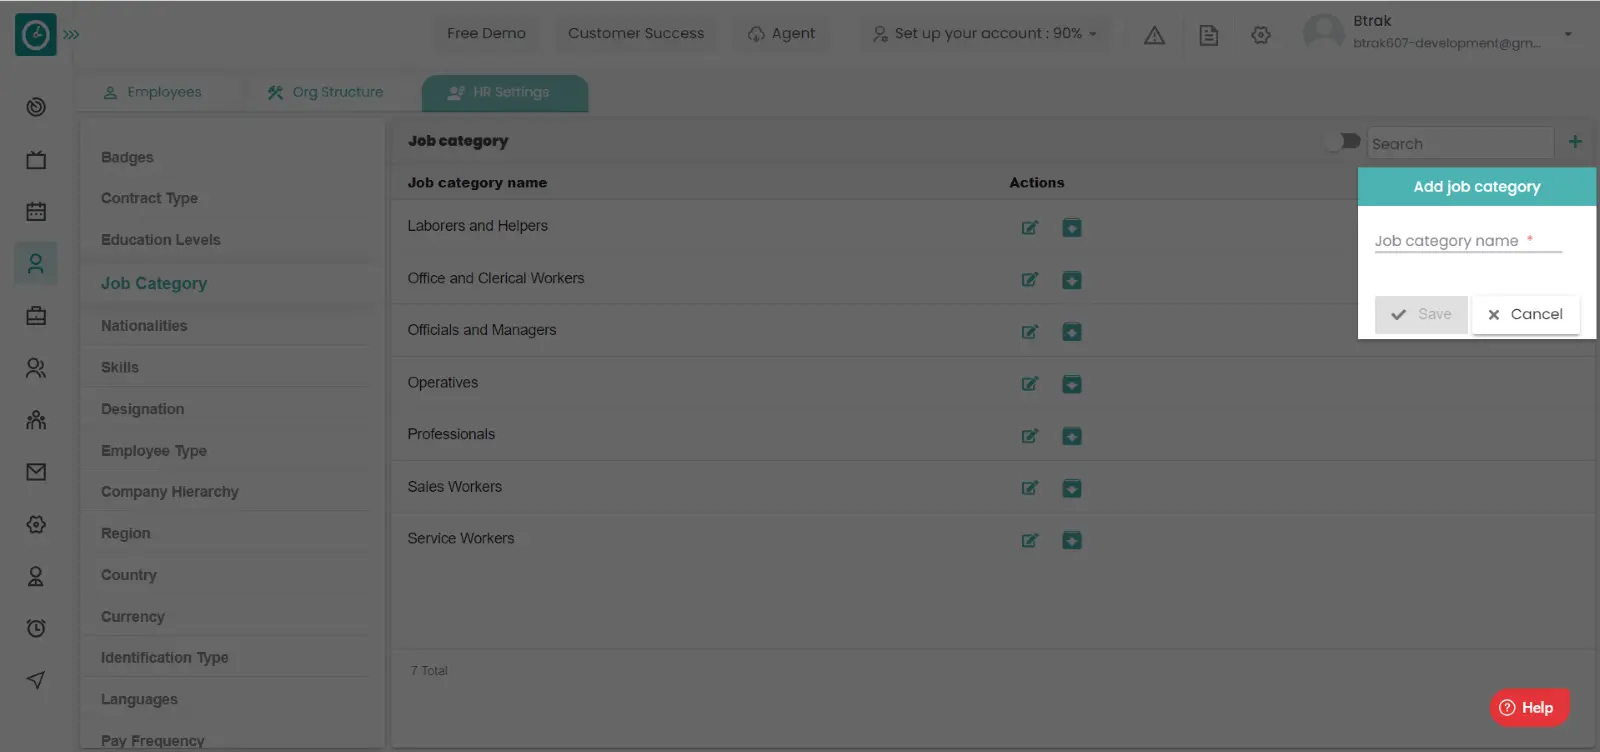
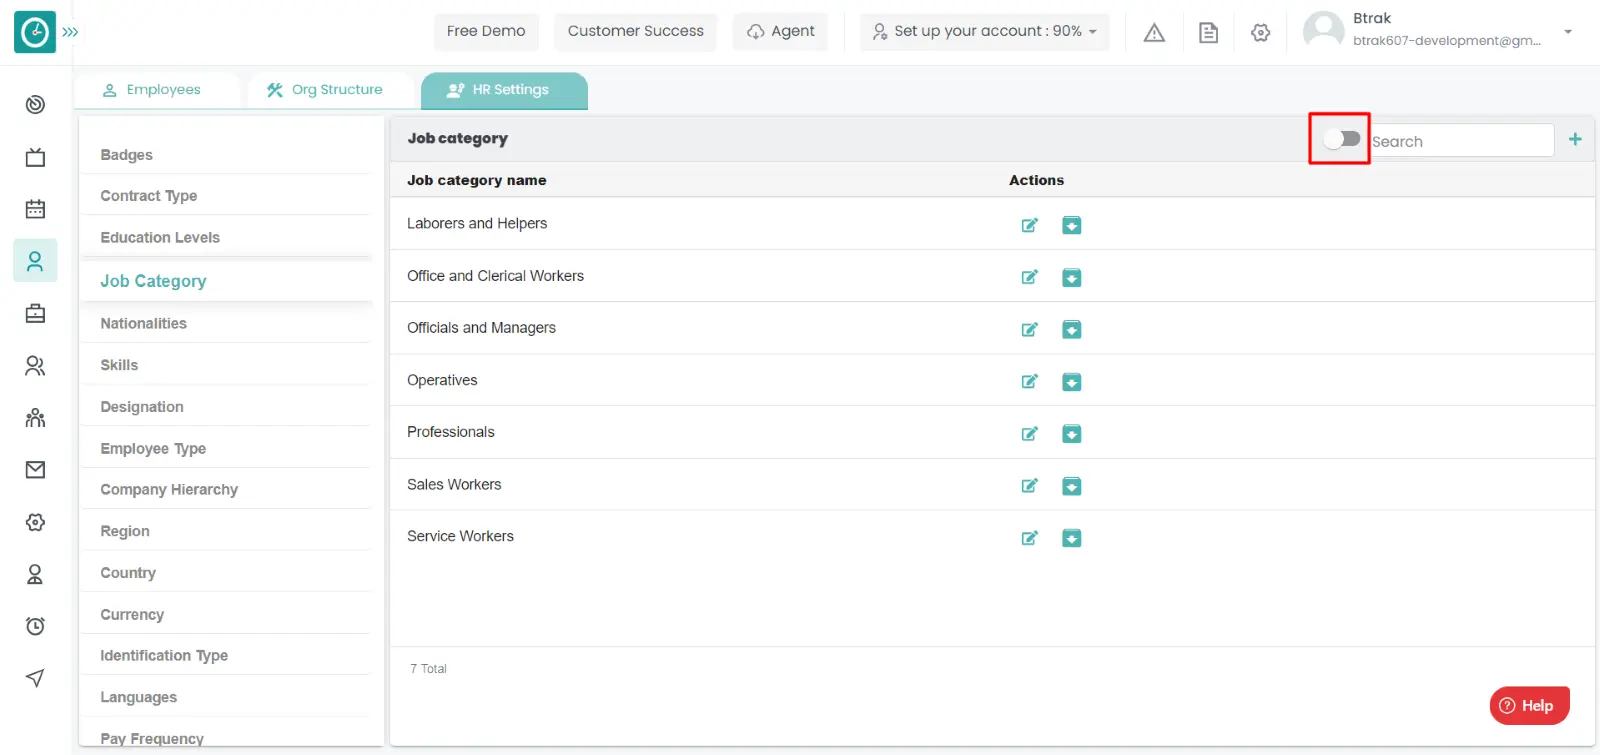
You can access/view the job categories of employee in organization.
Navigation: Goto HR => HR Tab => HR settings
If the user is having Super Admin
Permissions, then he can be able to access/view job categories in organization.
This permission can be configured by following the steps: -
View My Detailed Profile / View My Subordinate Profile / Edit My Subordinate Profile / Manage HR settings,
then select the roles for what you must give the permissions to configure and check them.View My Detailed Profile / View My Subordinate Profile / Edit My Subordinate Profile / Manage HR settings
for the defined roles.
Add new job category :-

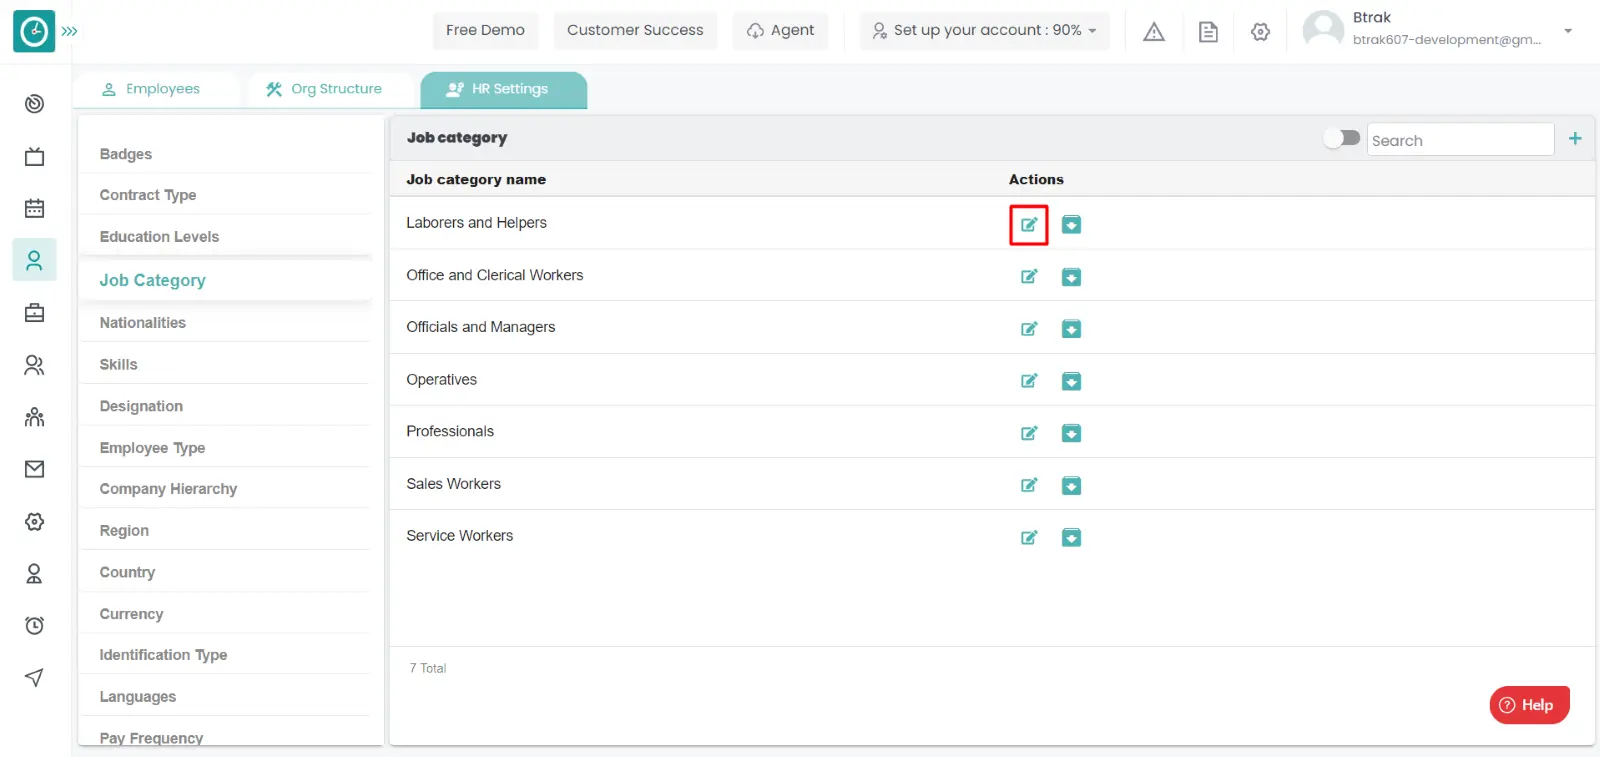
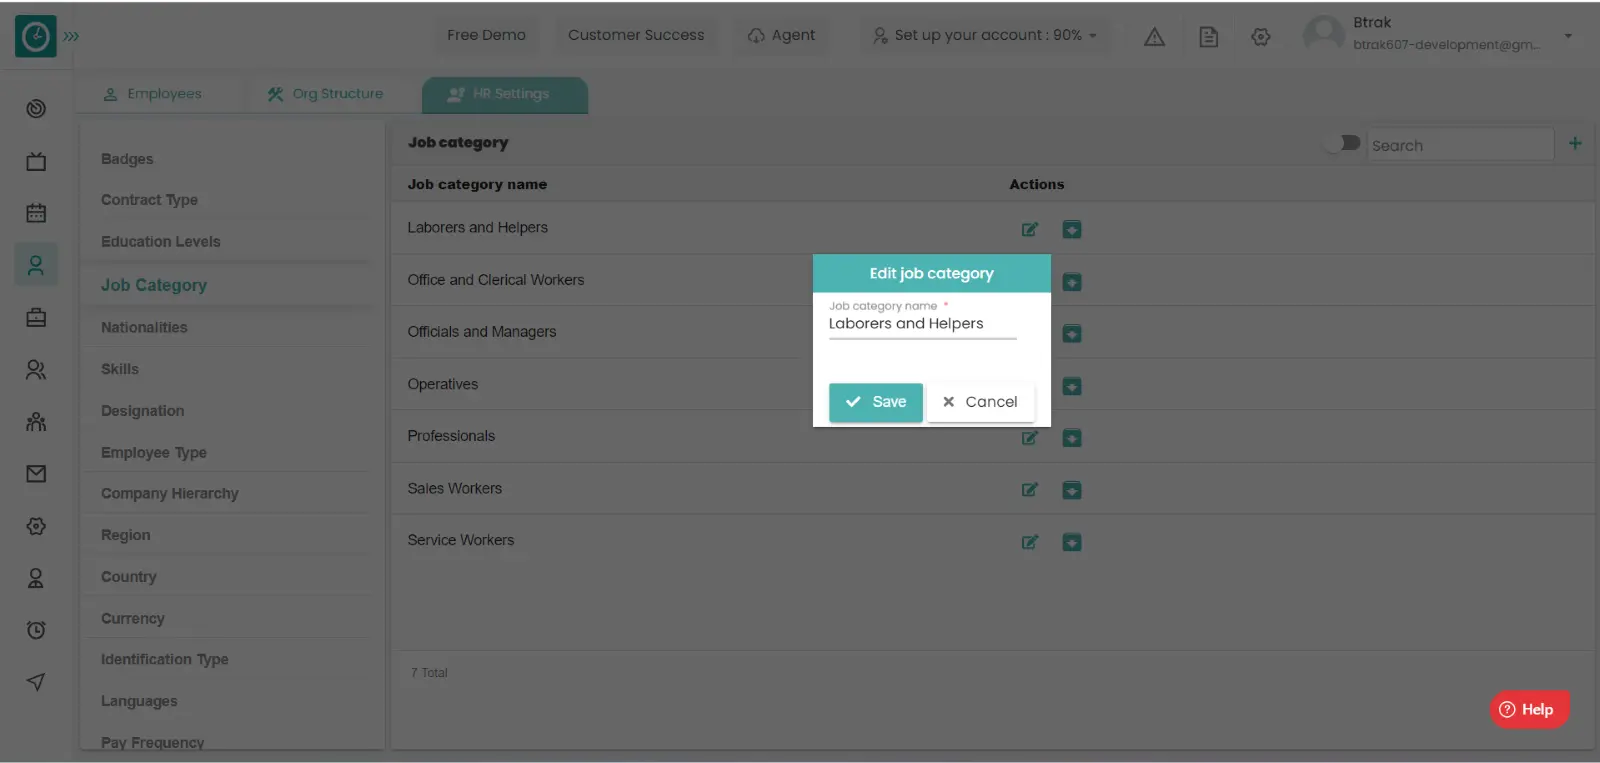
Edit job category :-
Archive job category :-
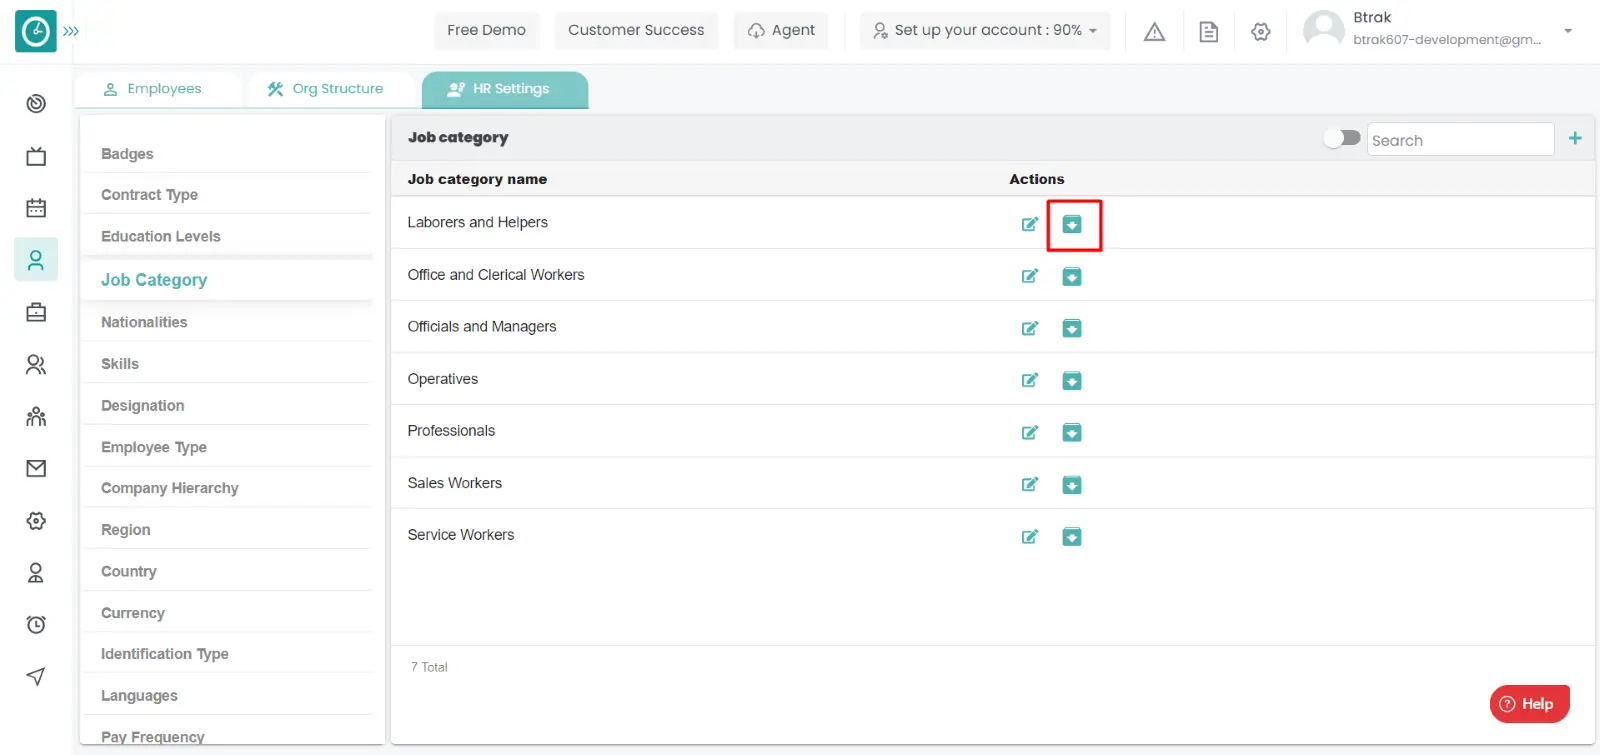

View Archived job category :-
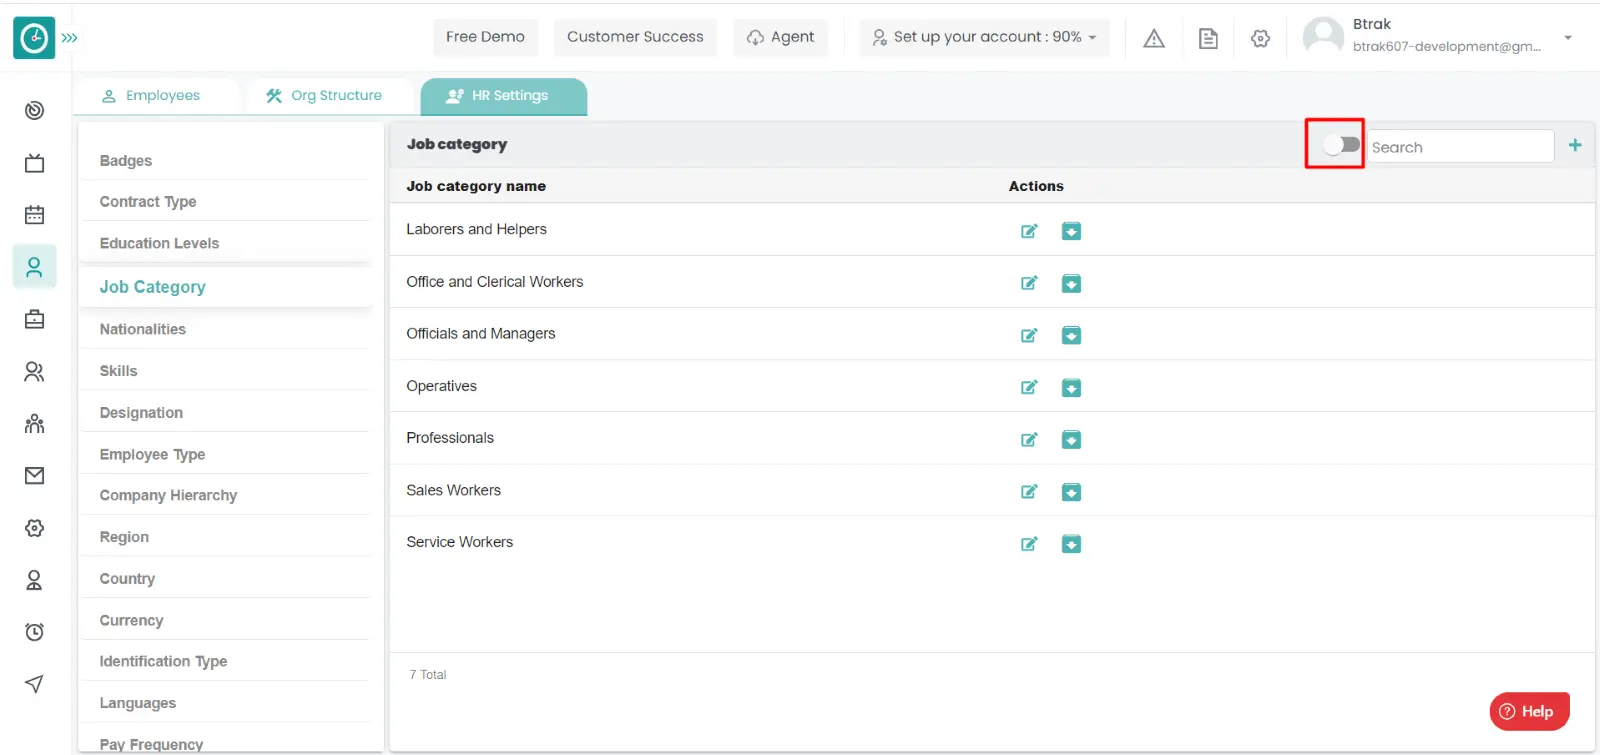
Unarchive job category :-
You can access/view the nationalities of employee in organization.
Navigation: Goto HR => HR Tab => HR settings
If the user is having Super Admin
Permissions, then he can be able to access/view nationalities in organization.
This permission can be configured by following the steps: -
View My Detailed Profile / View My Subordinate Profile / Edit My Subordinate Profile / Manage HR settings,
then select the roles for what you must give the permissions to configure and check them.View My Detailed Profile / View My Subordinate Profile / Edit My Subordinate Profile / Manage HR settings
for the defined roles.
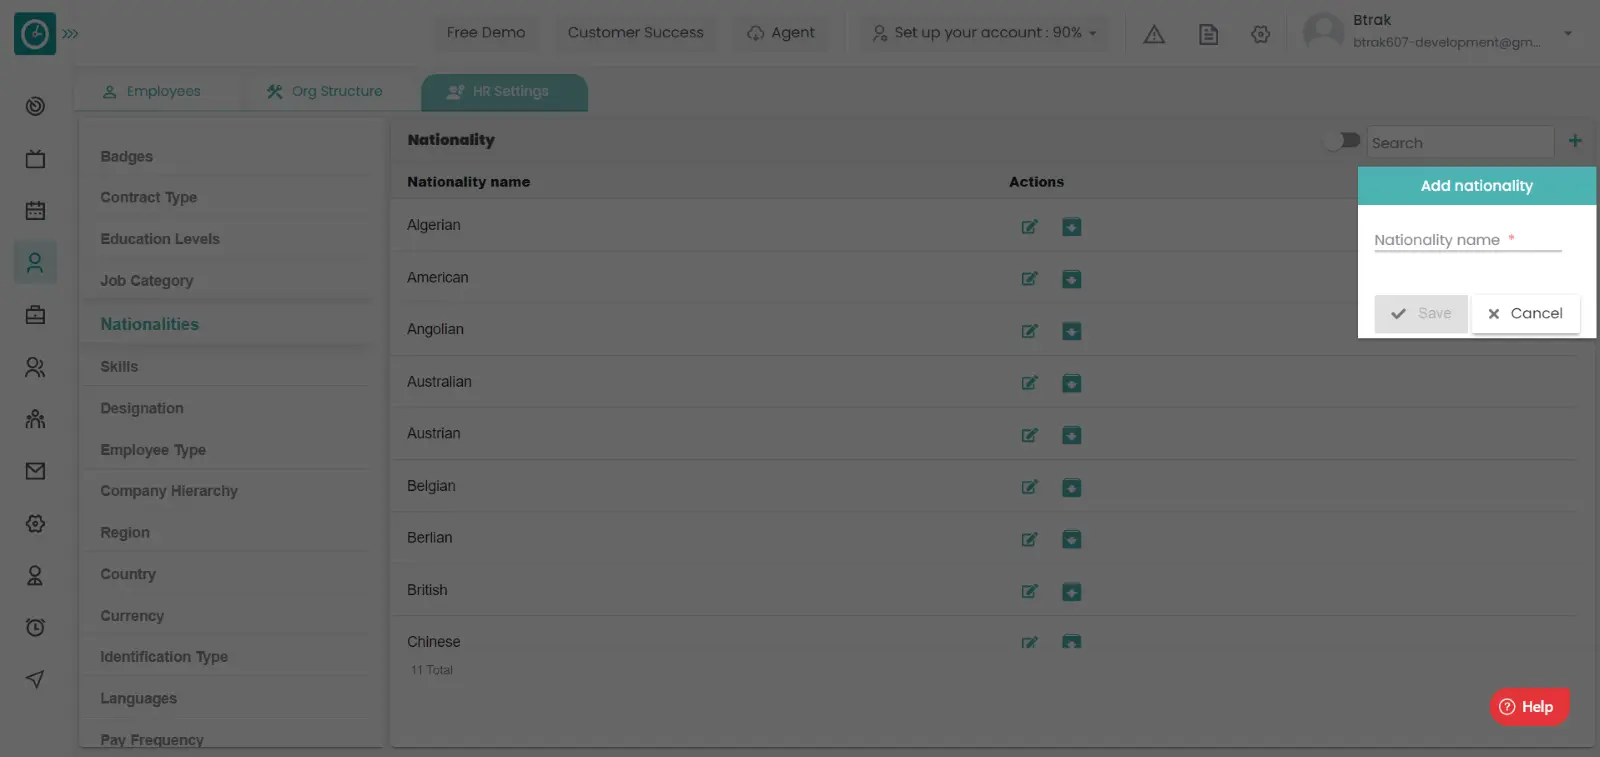
Add new nationality
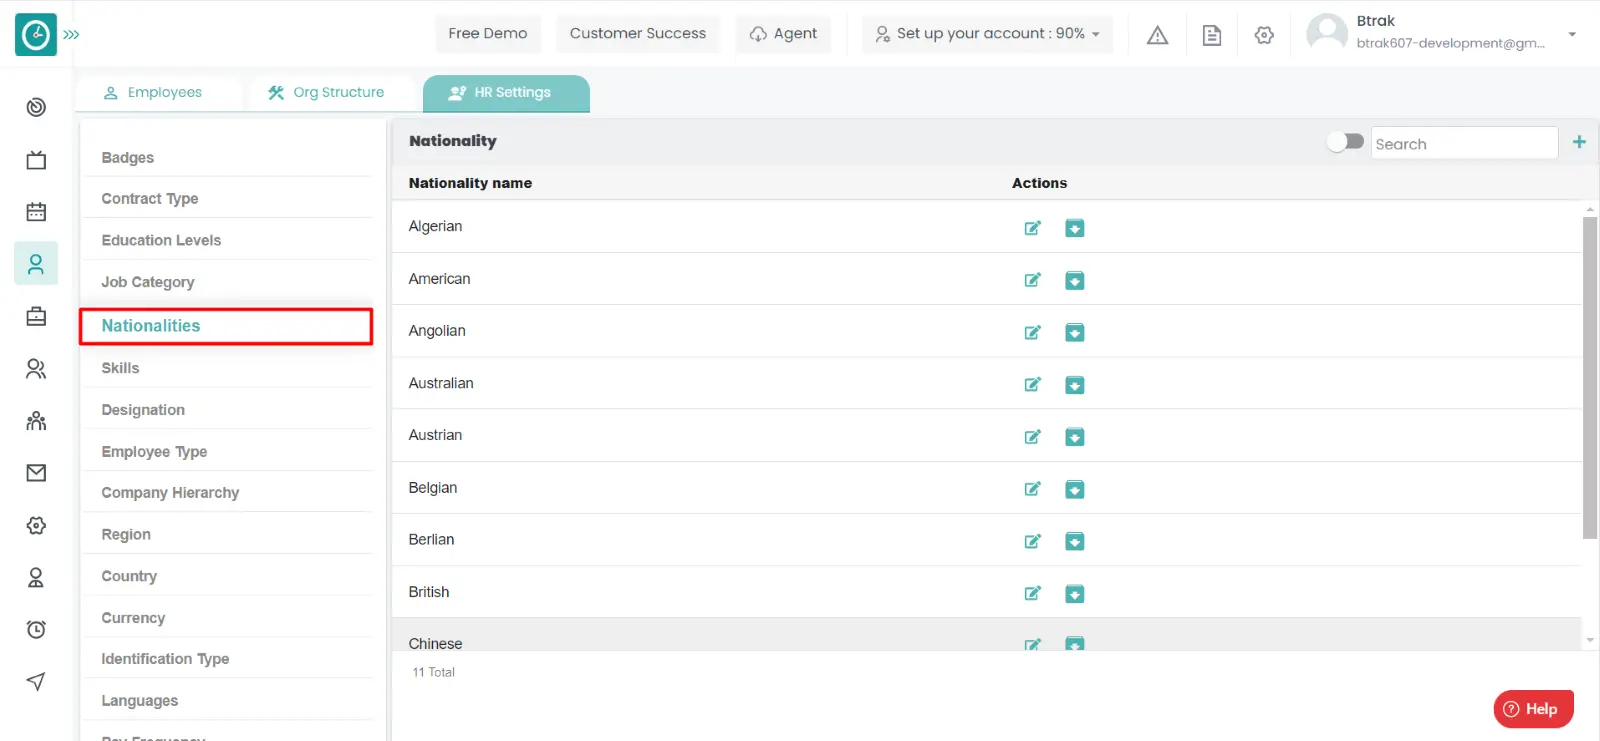
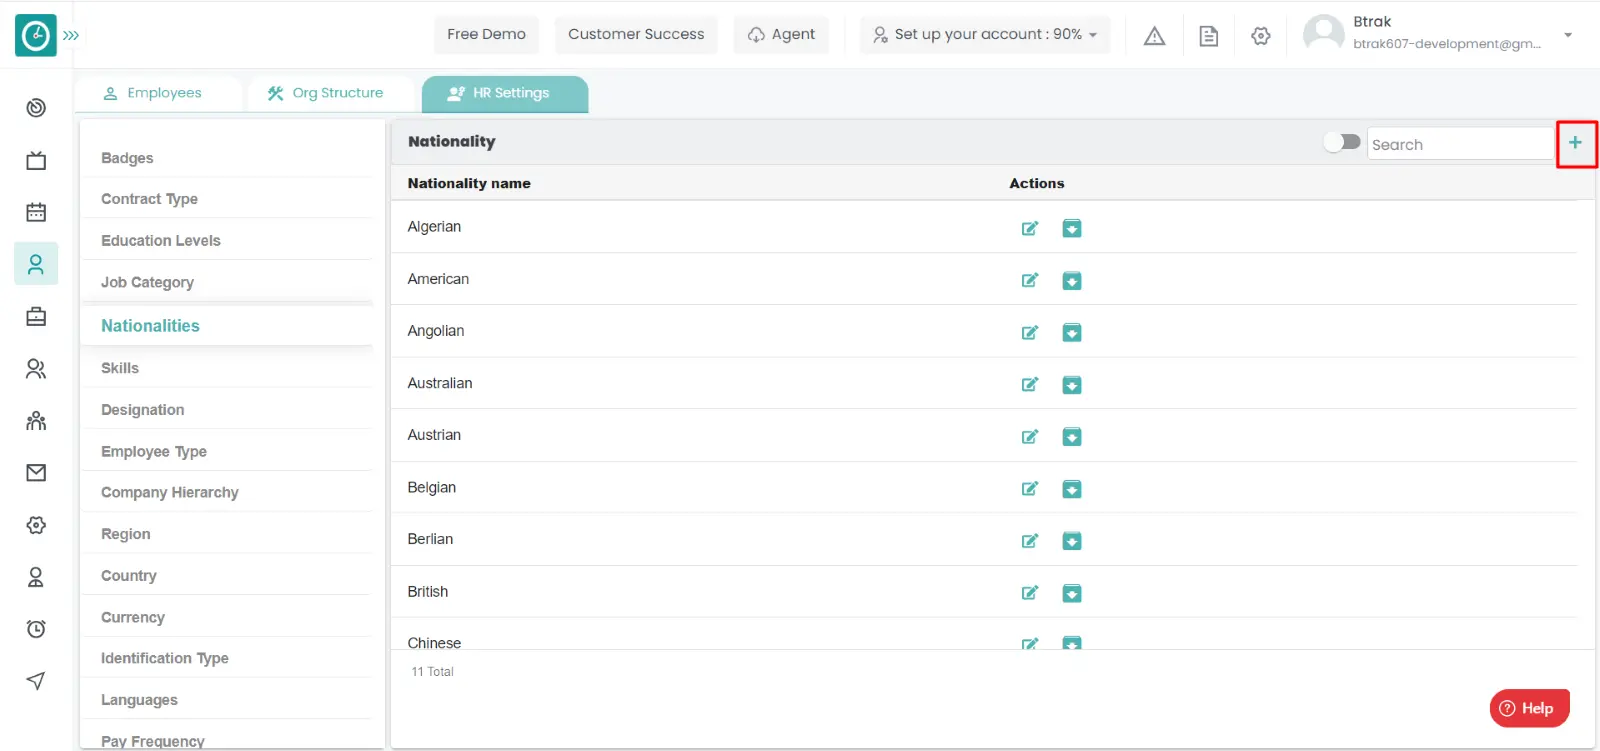
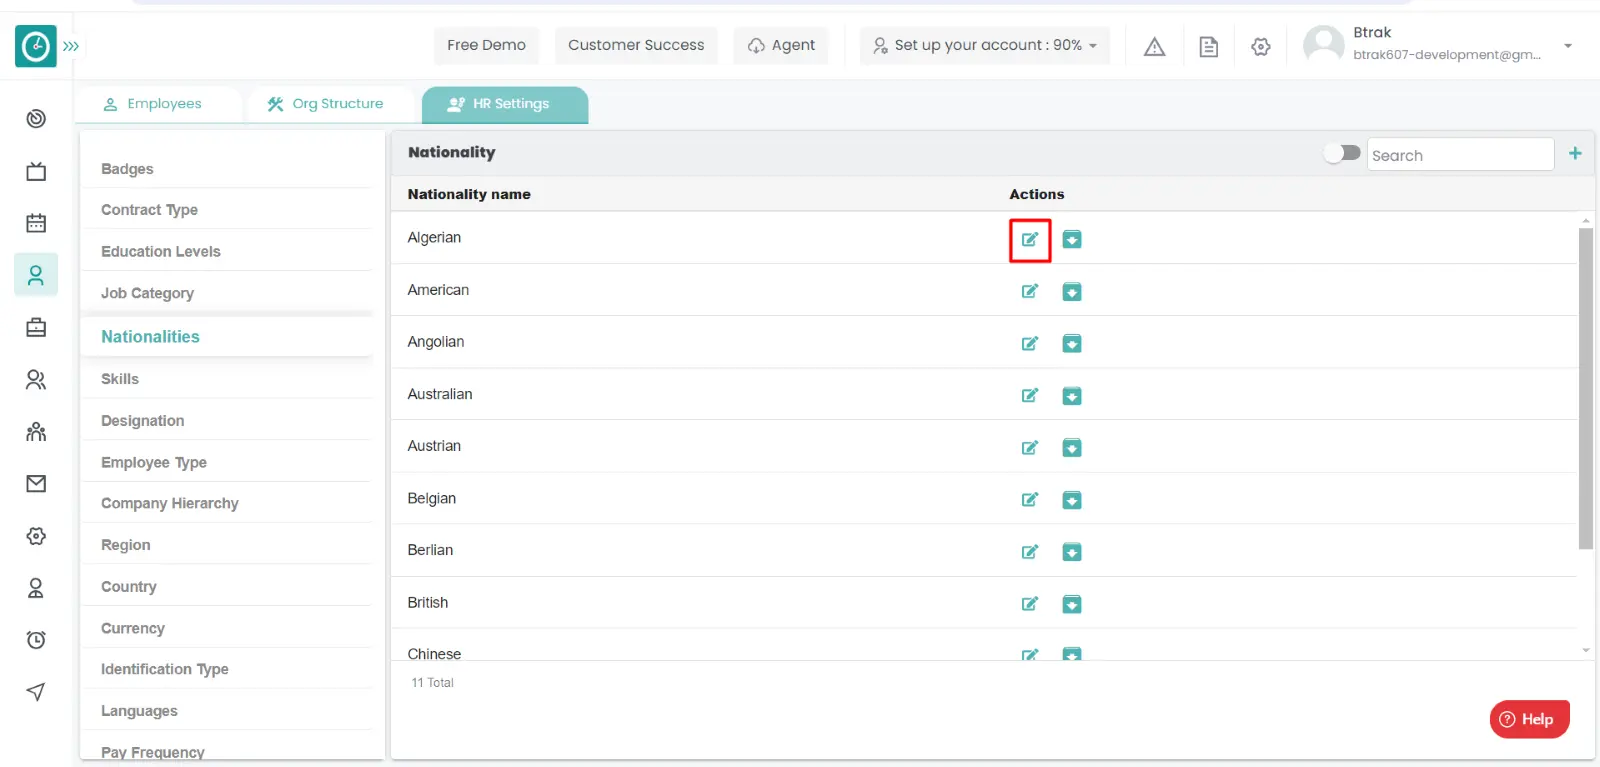
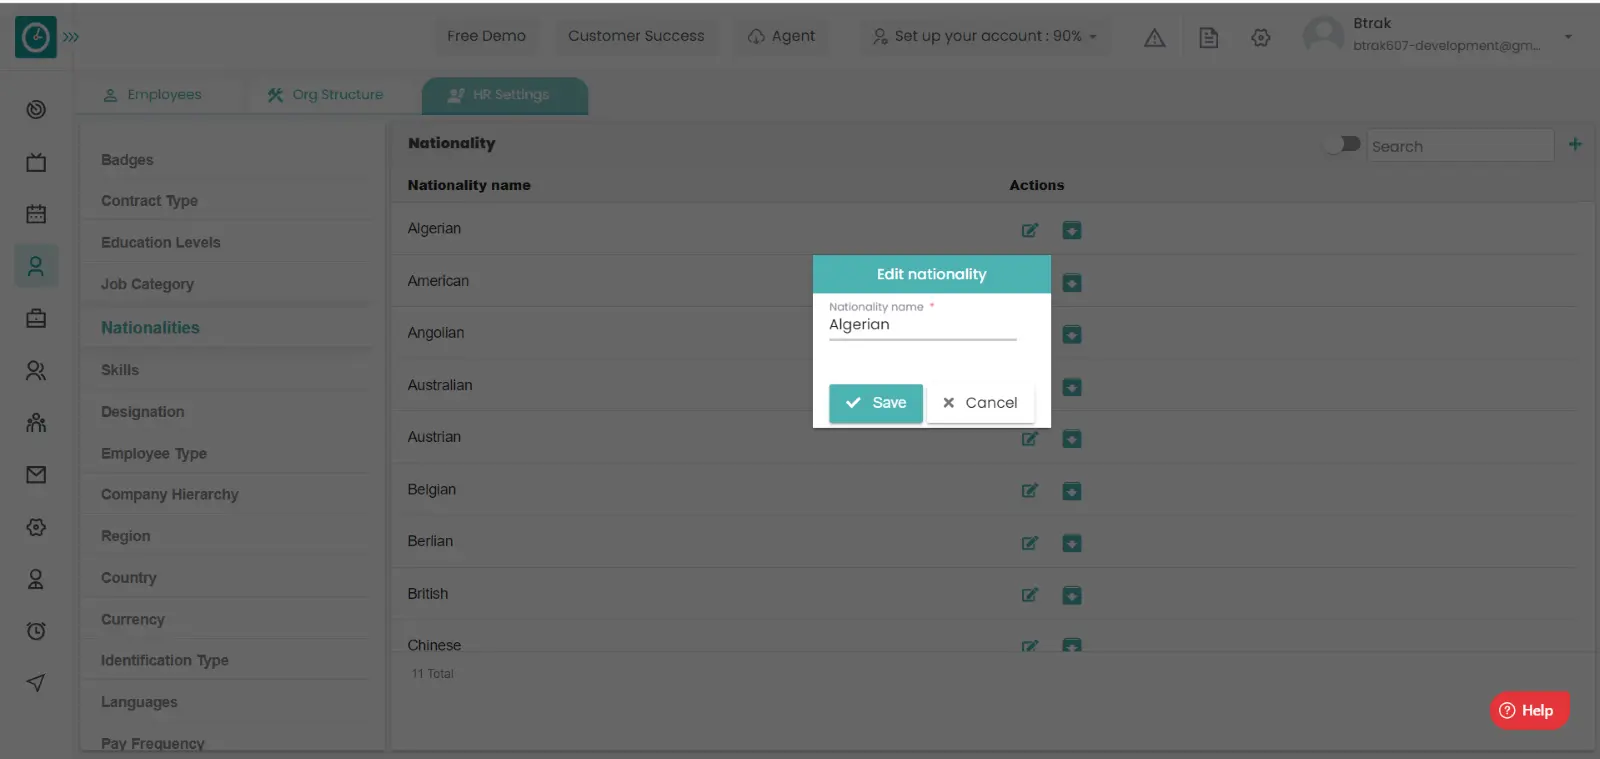
Edit nationality :-
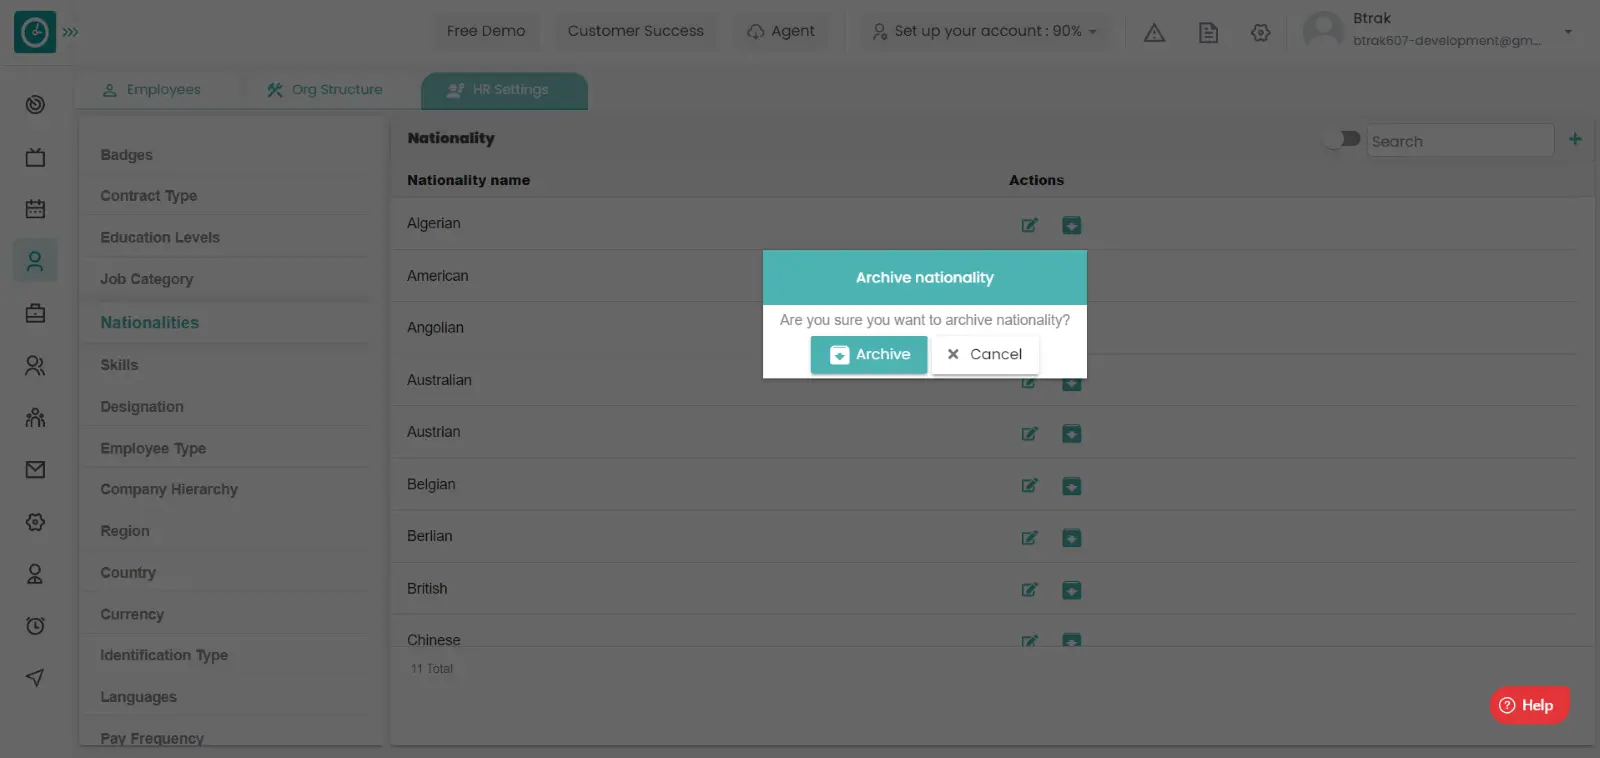
Archive nationality :-

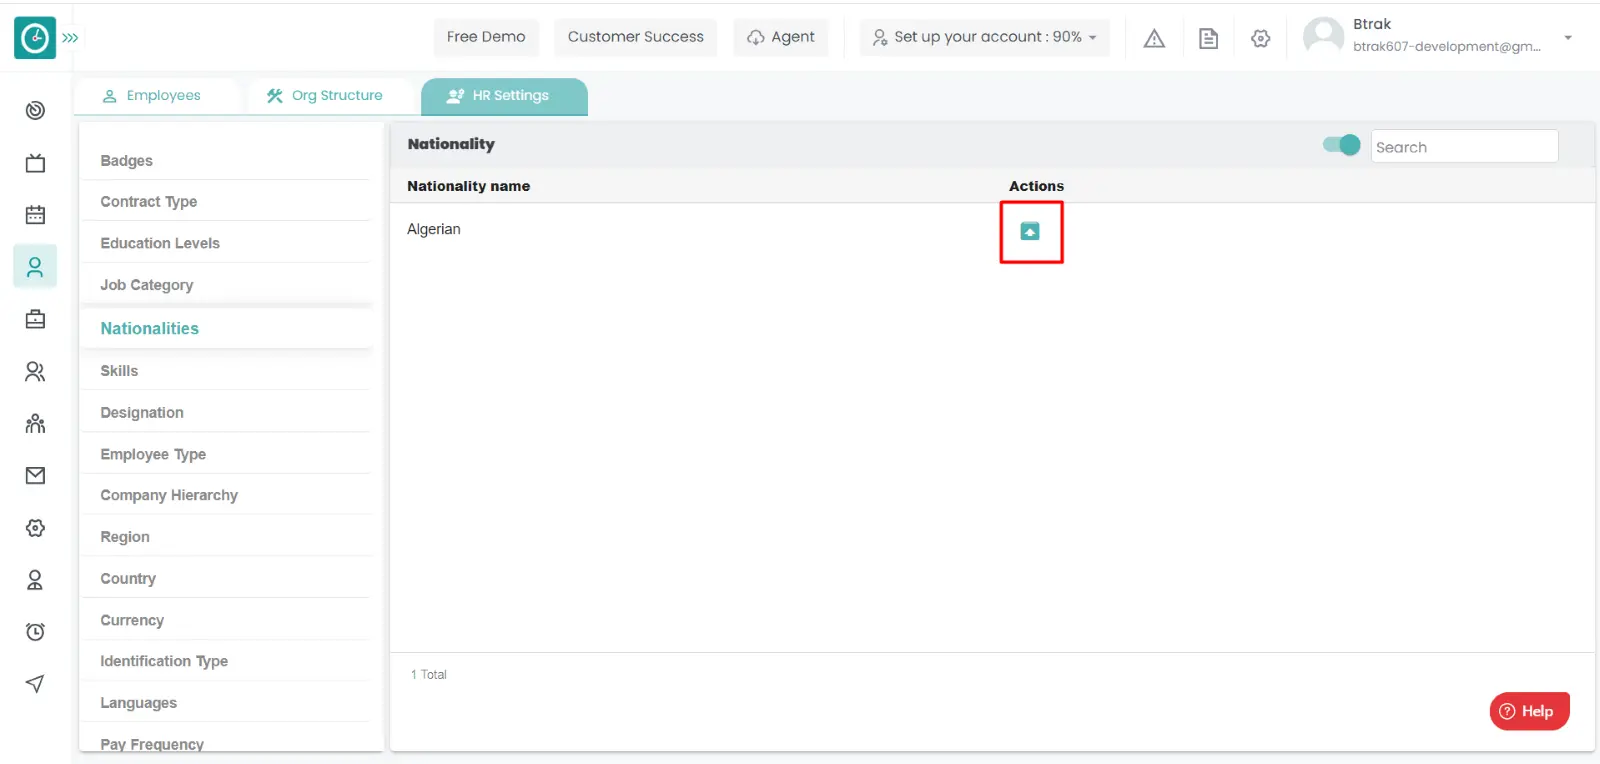
View Archived nationality :-
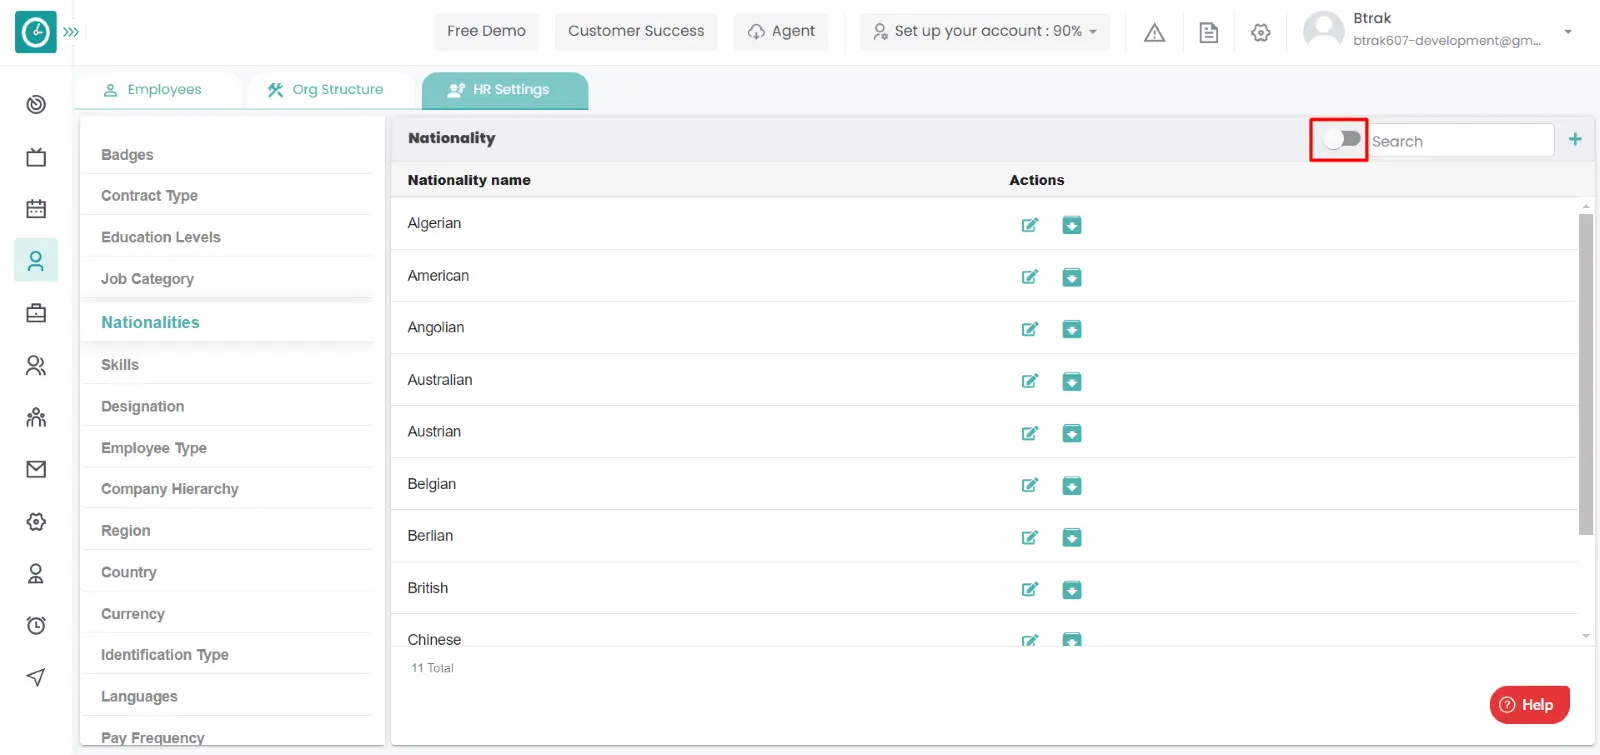
Unarchive nationality :-

You can access/view the skills of employee in organization.
Navigation: Goto HR => HR Tab => HR settings
If the user is having Super Admin
Permissions, then he can be able to access/view skills in organization.
This permission can be configured by following the steps: -
View My Detailed Profile / View My Subordinate Profile / Edit My Subordinate Profile / Manage HR settings,
then select the roles for what you must give the permissions to configure and check them.View My Detailed Profile / View My Subordinate Profile / Edit My Subordinate Profile / Manage HR settings
for the defined roles.
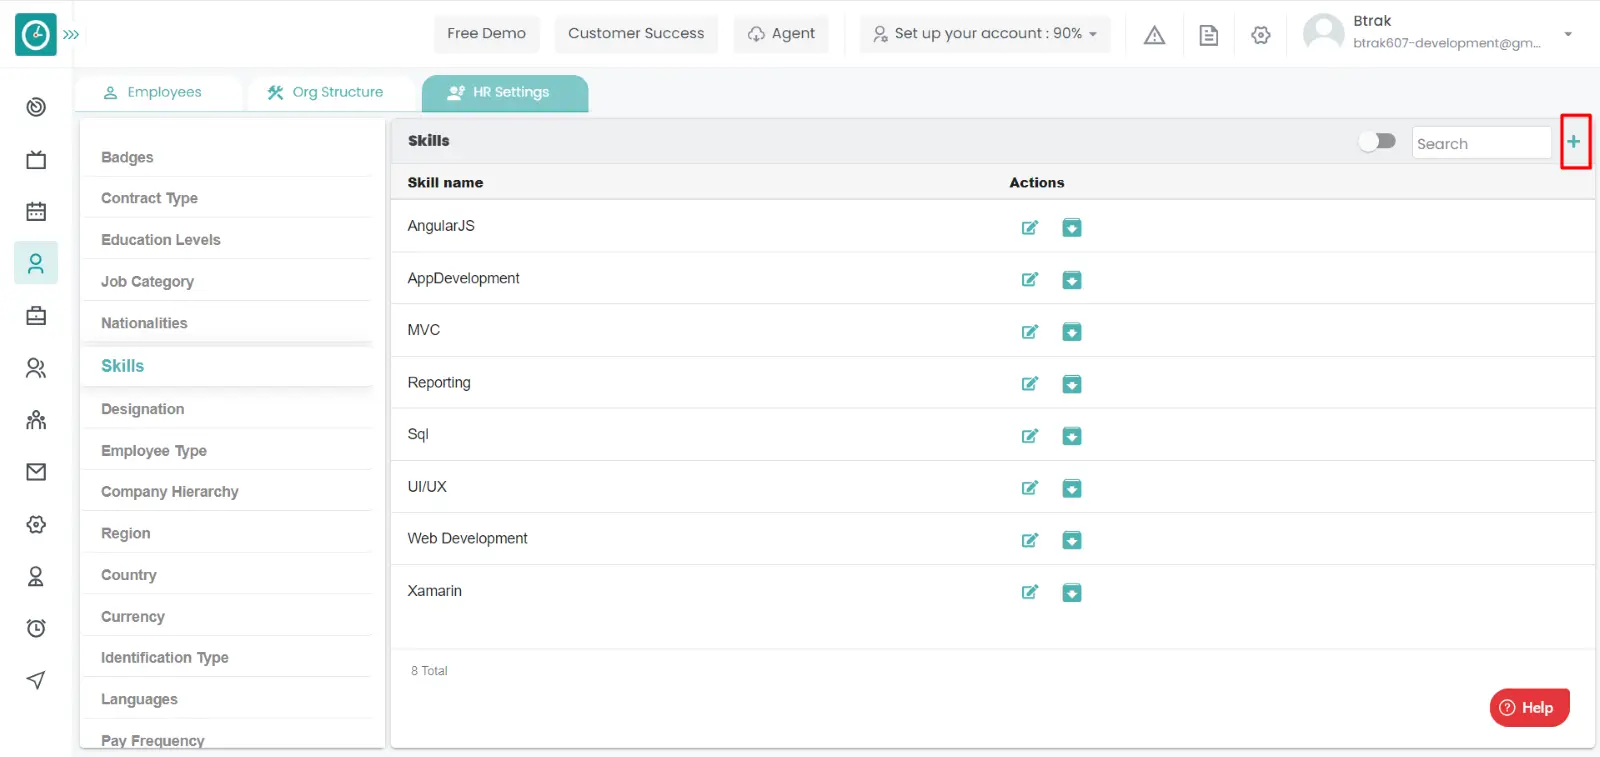
Add new skill :-
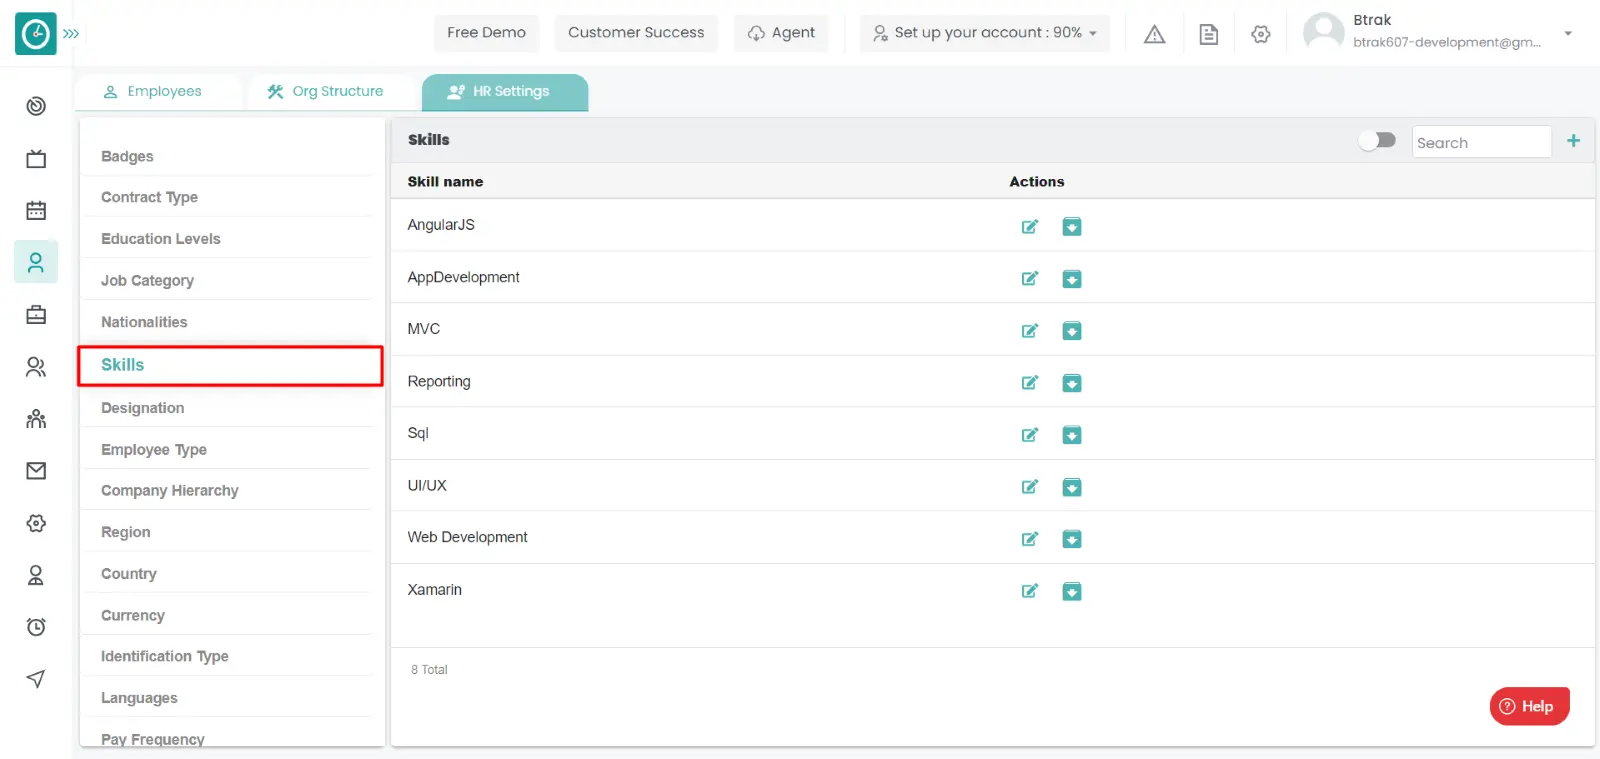

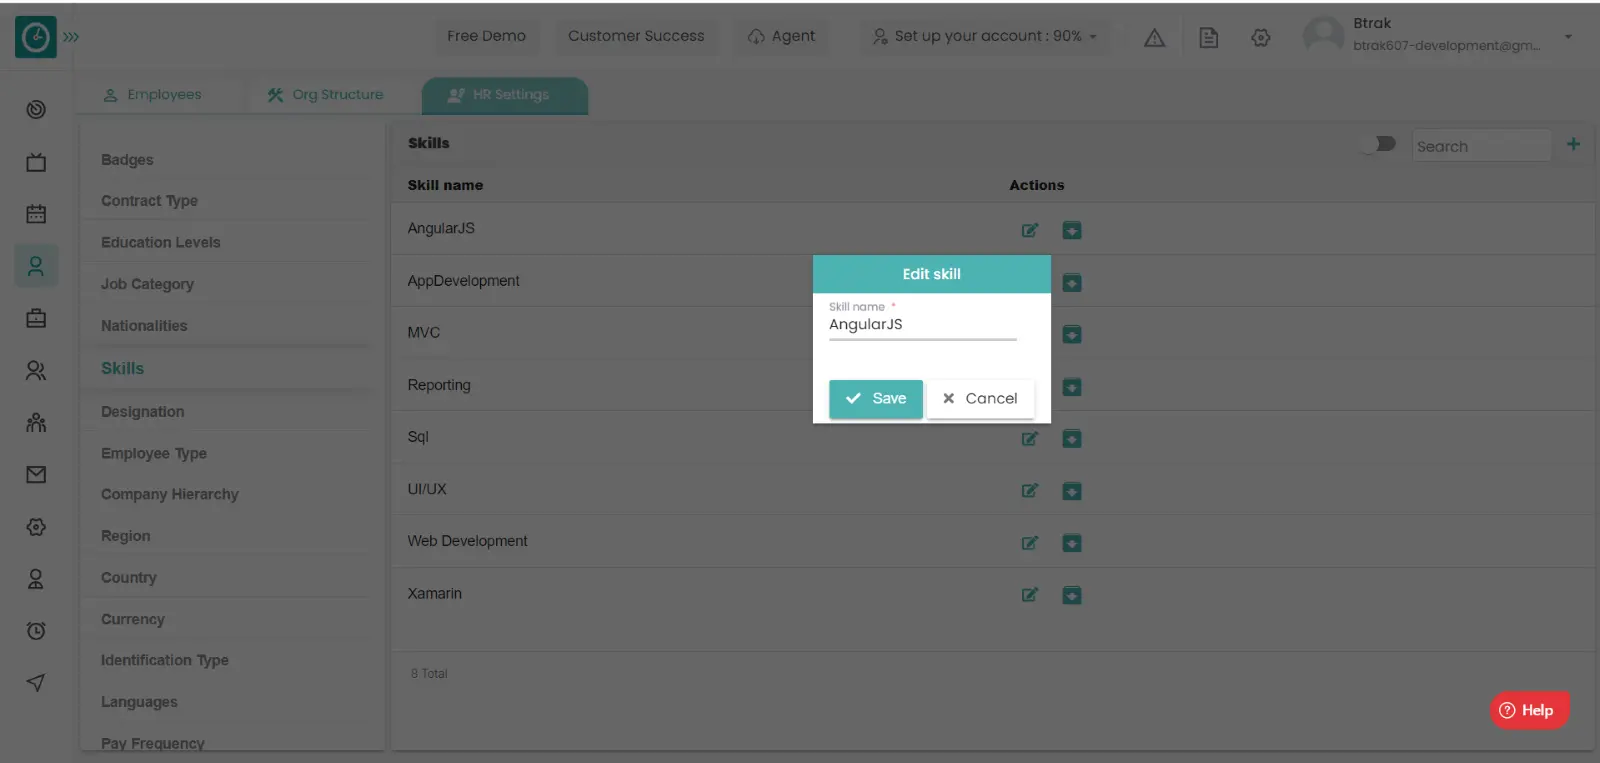
Edit skill :-

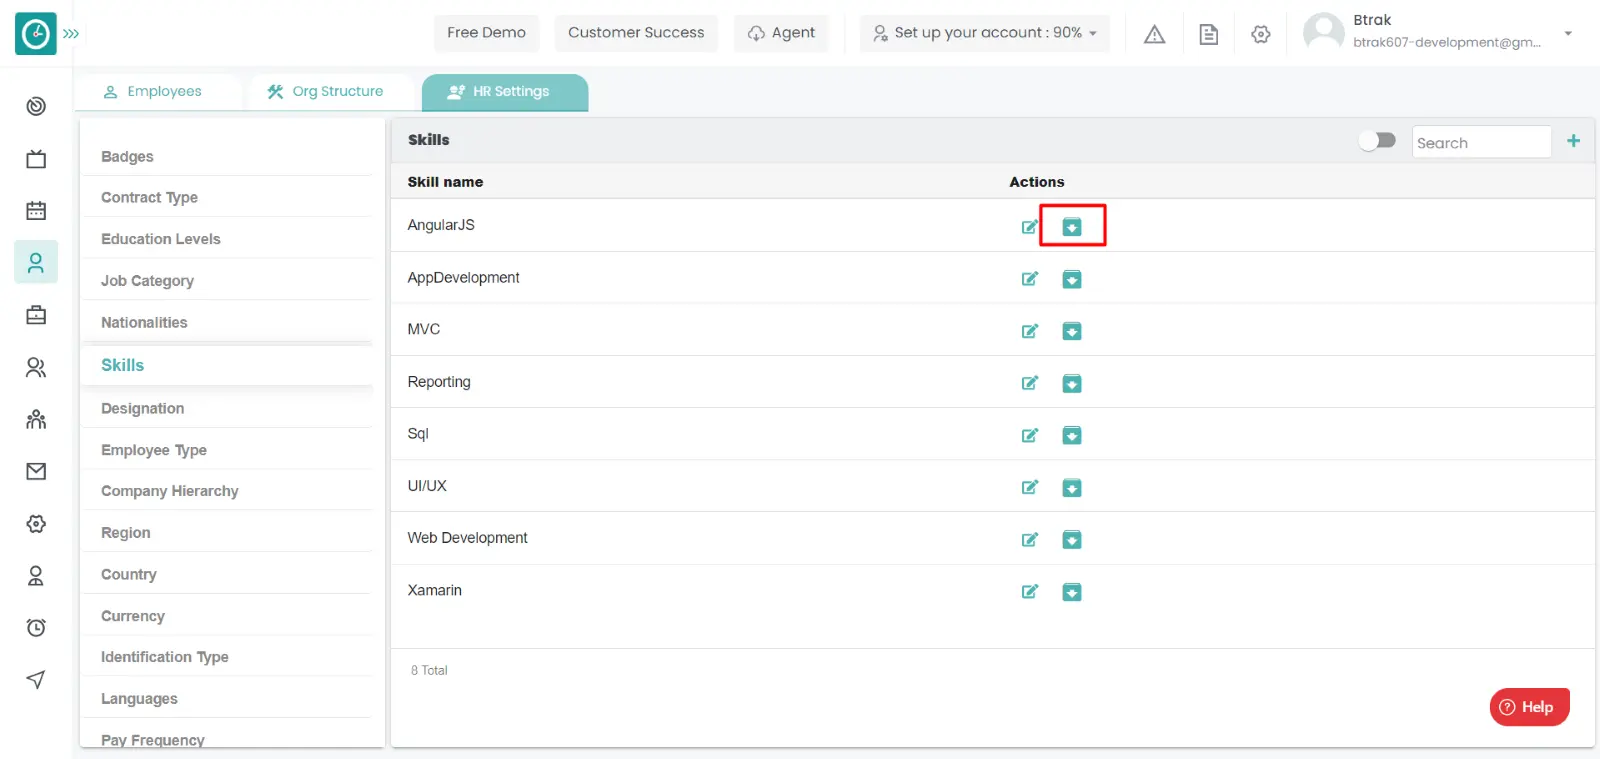
Archive skill :-

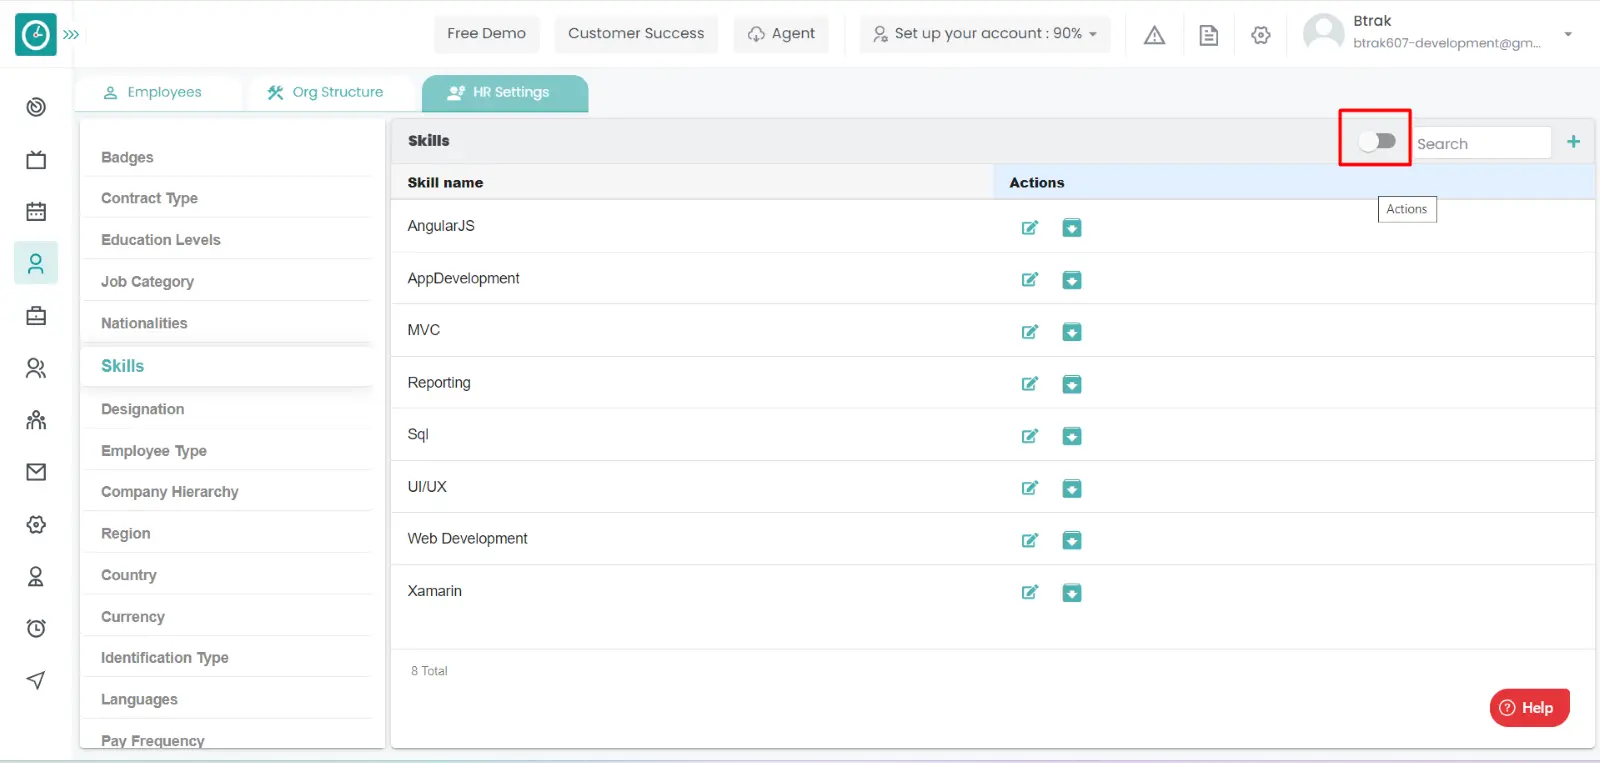
View Archived skill :-
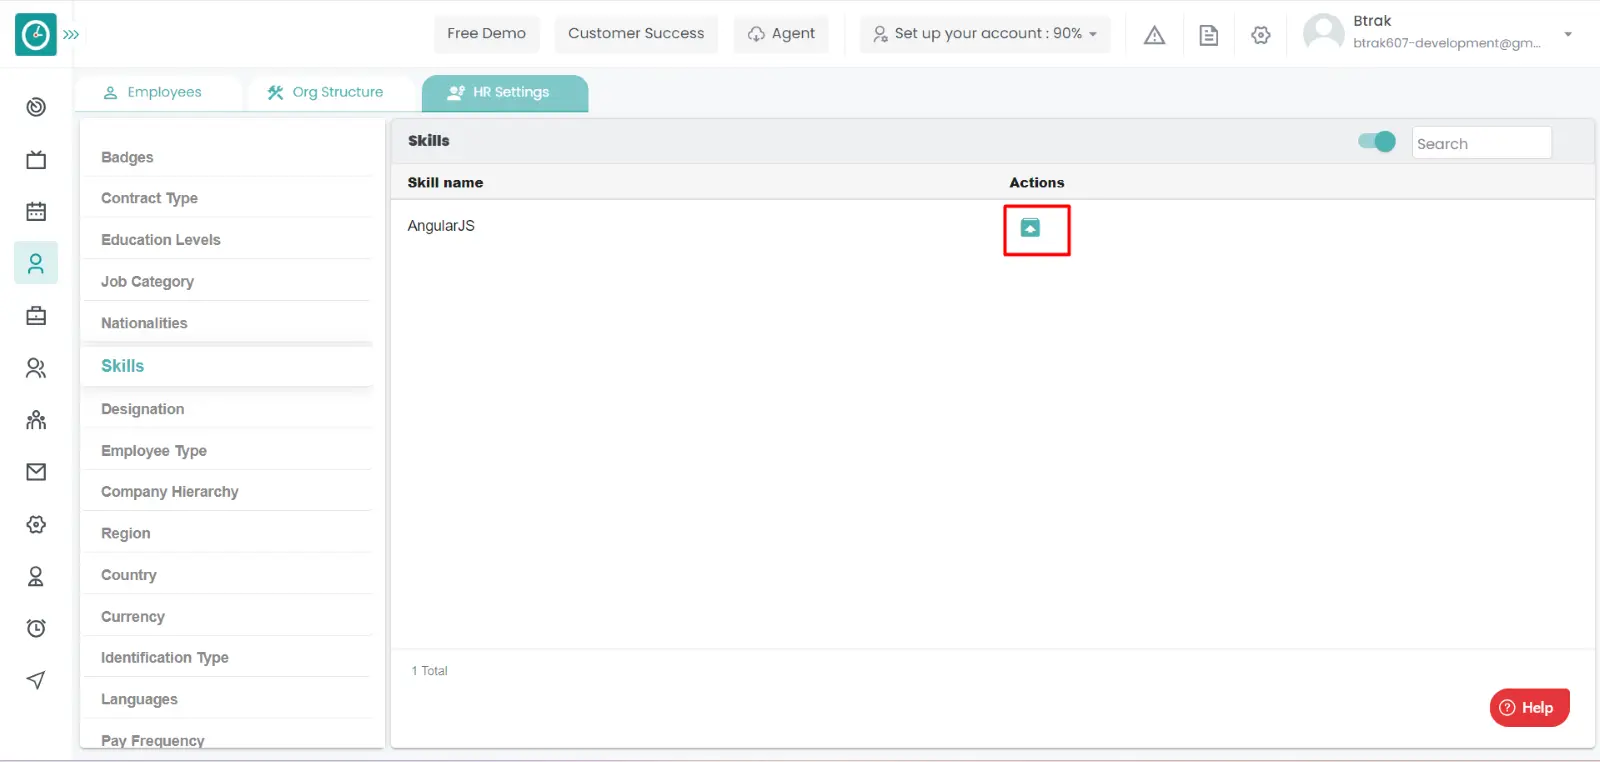
Unarchive skill :-

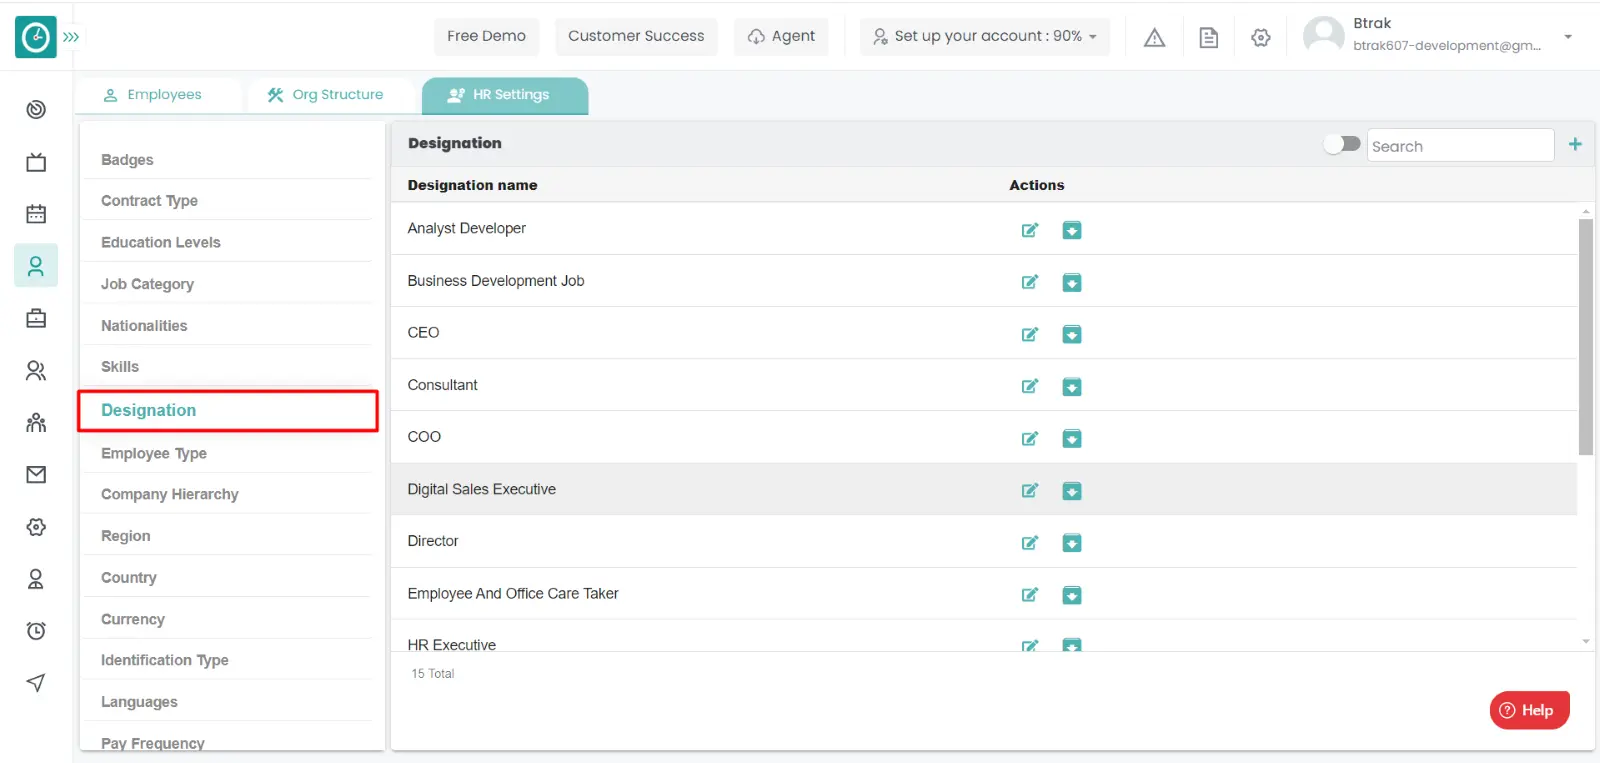
You can access/view the designations of employee in organization.
Navigation: Goto HR => HR Tab => HR settings
If the user is having Super Admin
Permissions, then he can be able to access/view designations in organization.
This permission can be configured by following the steps: -
View My Detailed Profile / View My Subordinate Profile / Edit My Subordinate Profile / Manage HR settings,
then select the roles for what you must give the permissions to configure and check them.View My Detailed Profile / View My Subordinate Profile / Edit My Subordinate Profile / Manage HR settings
for the defined roles.
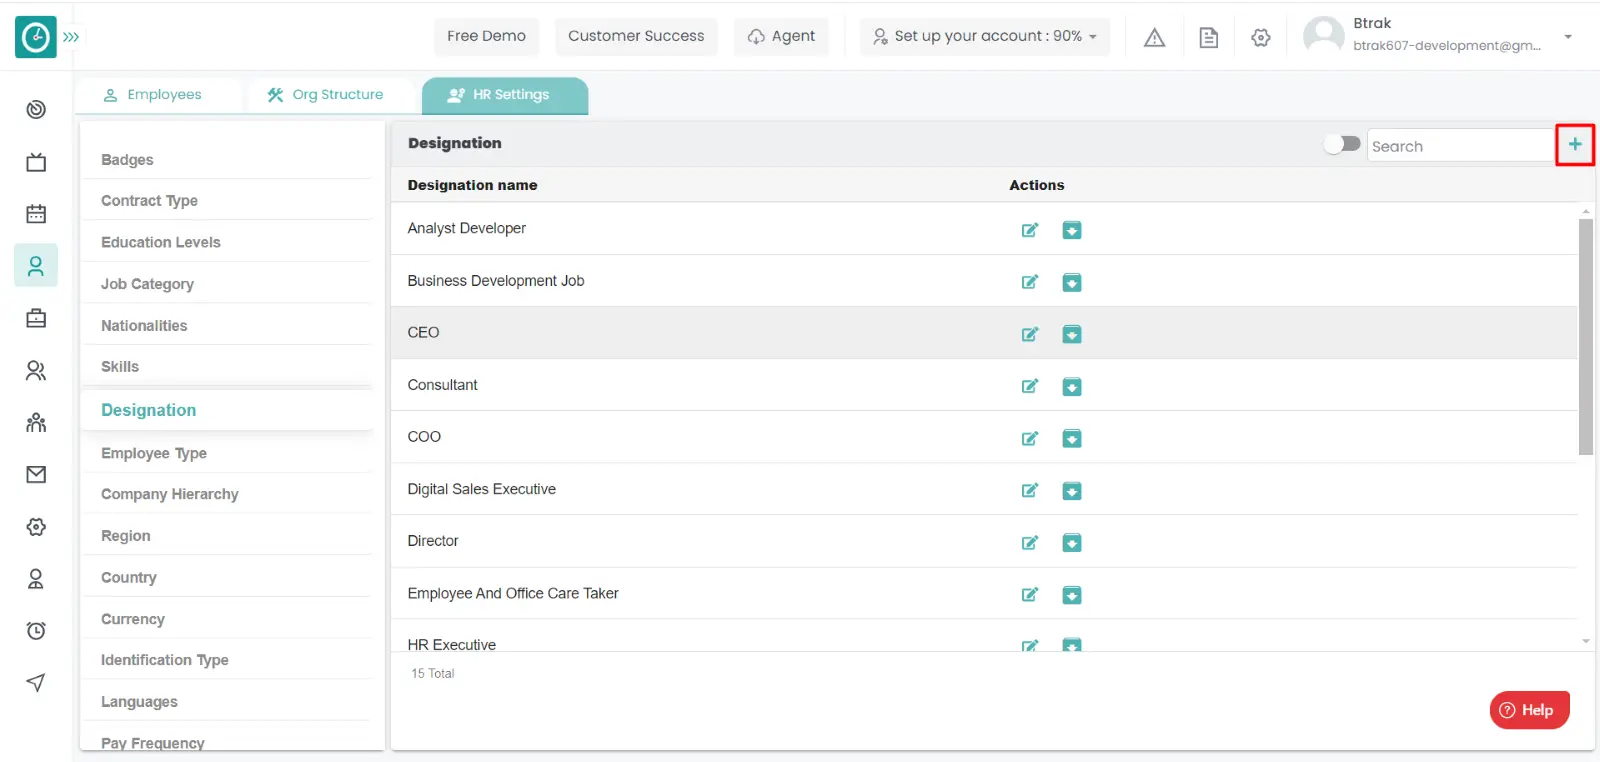
Add new designation

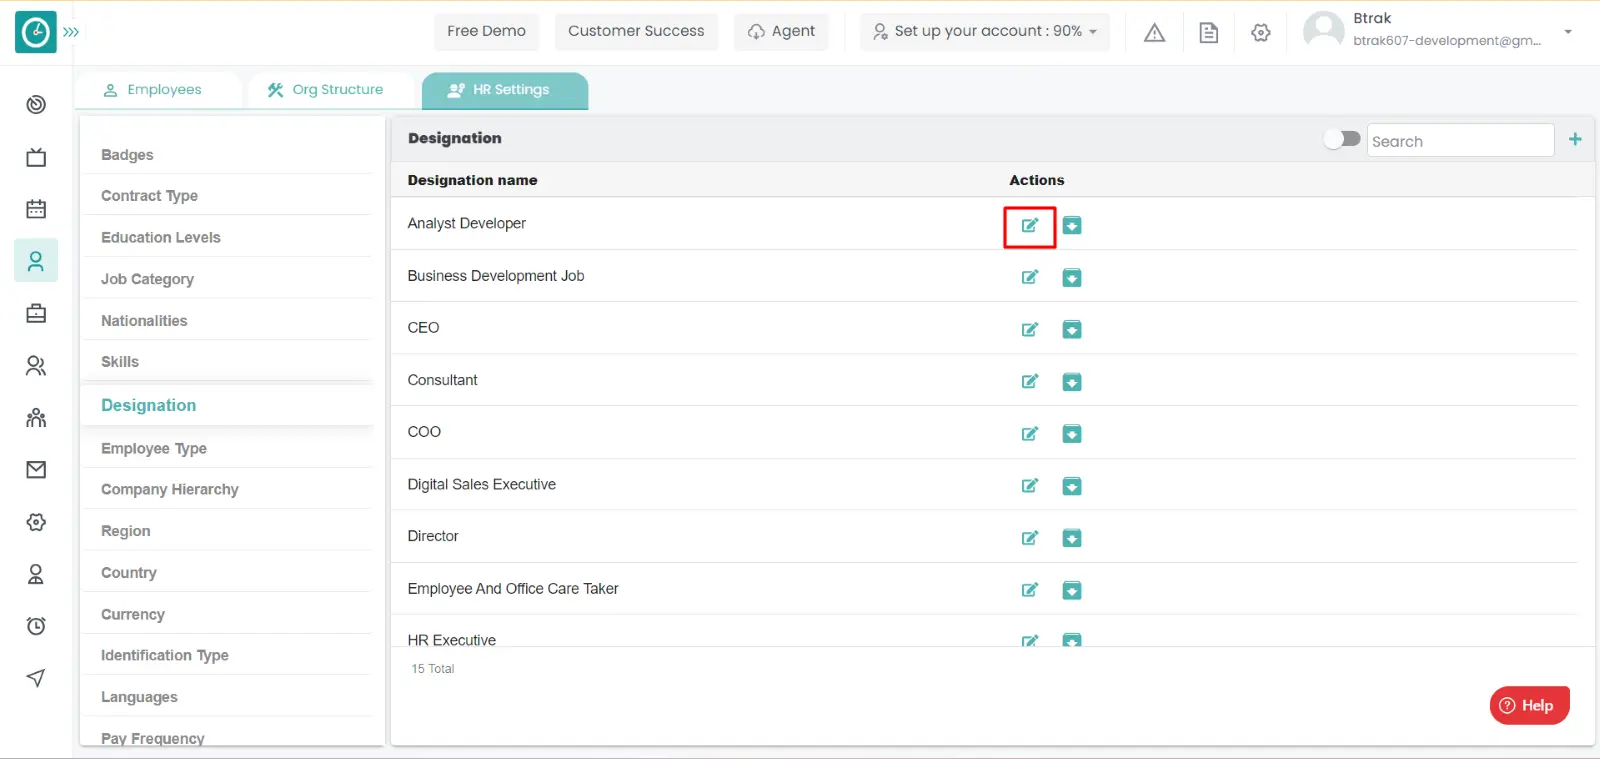
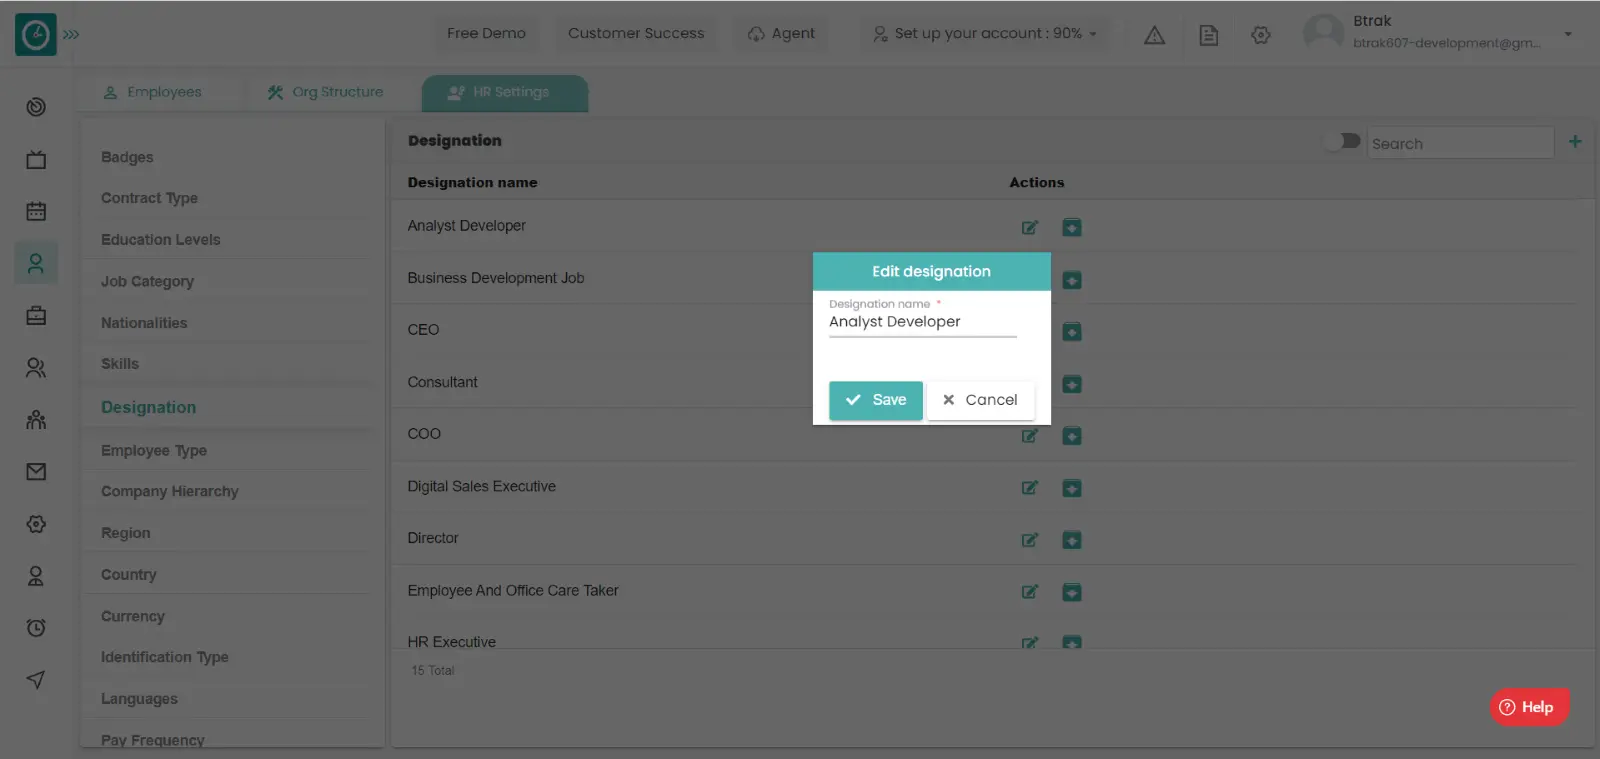
Edit designation :-
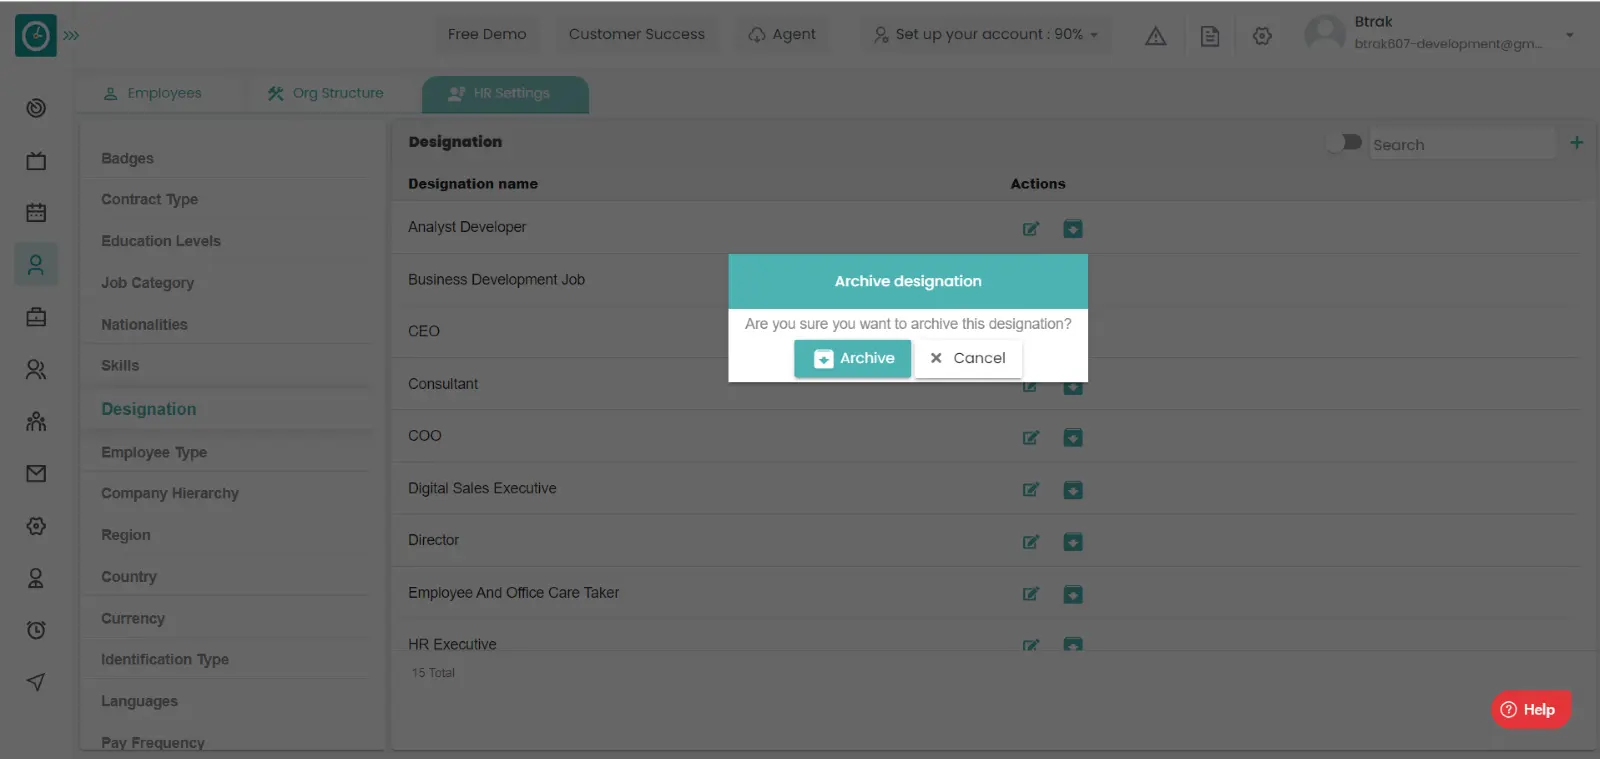
Archive designation :-

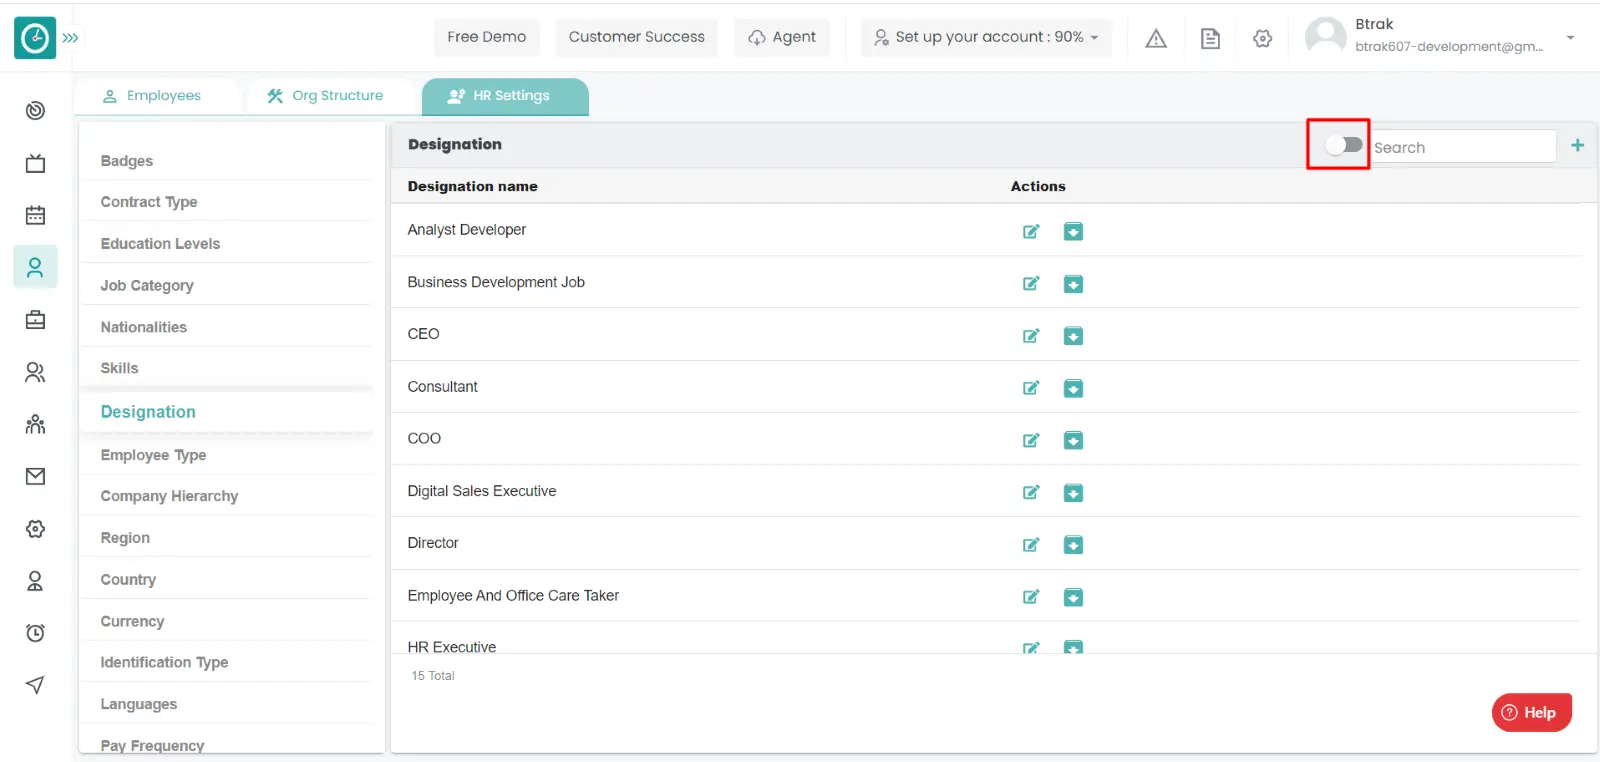
View Archived designation :-
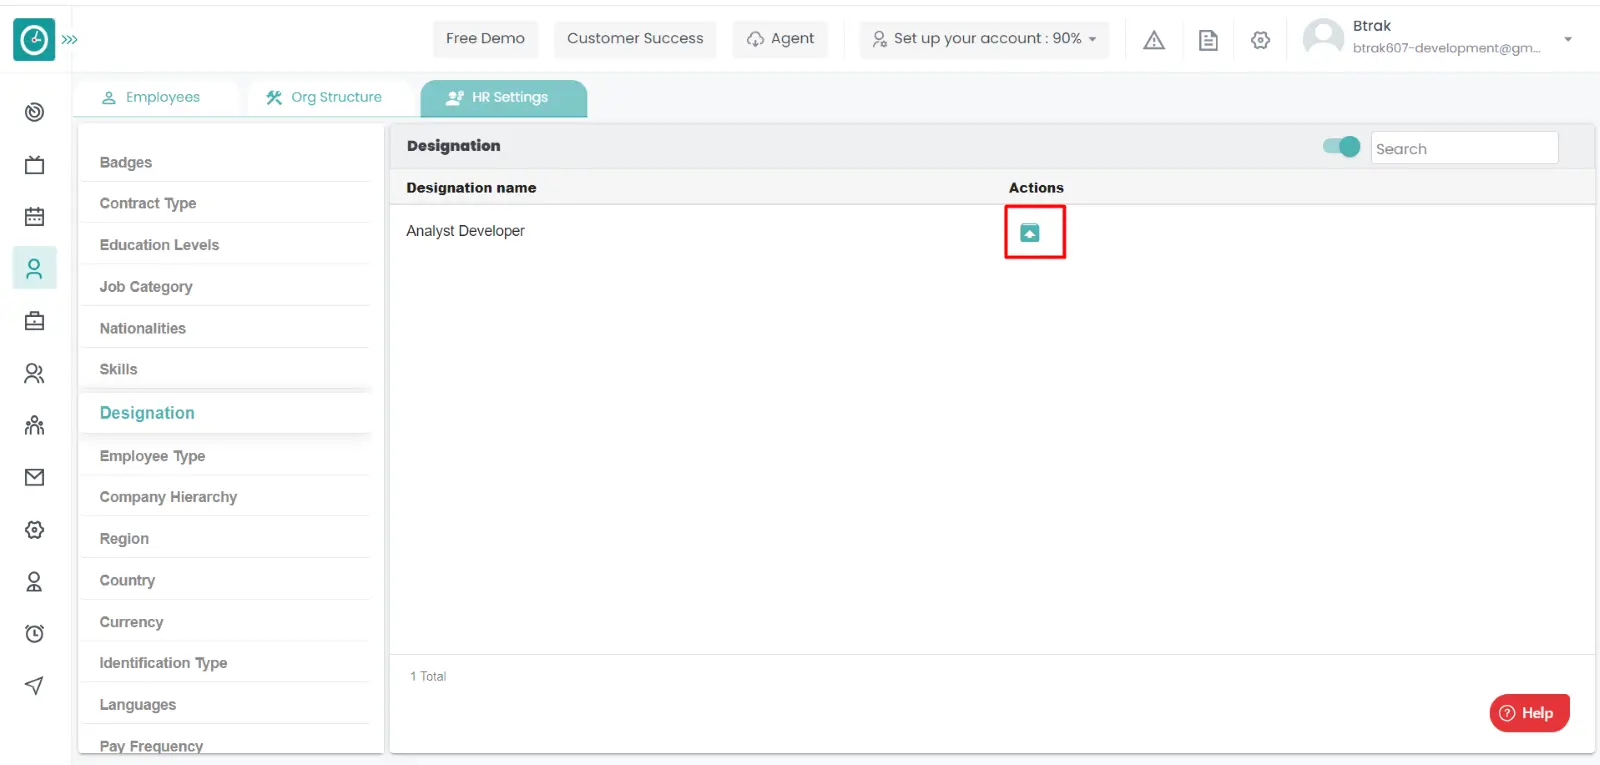
Unarchive designations :-
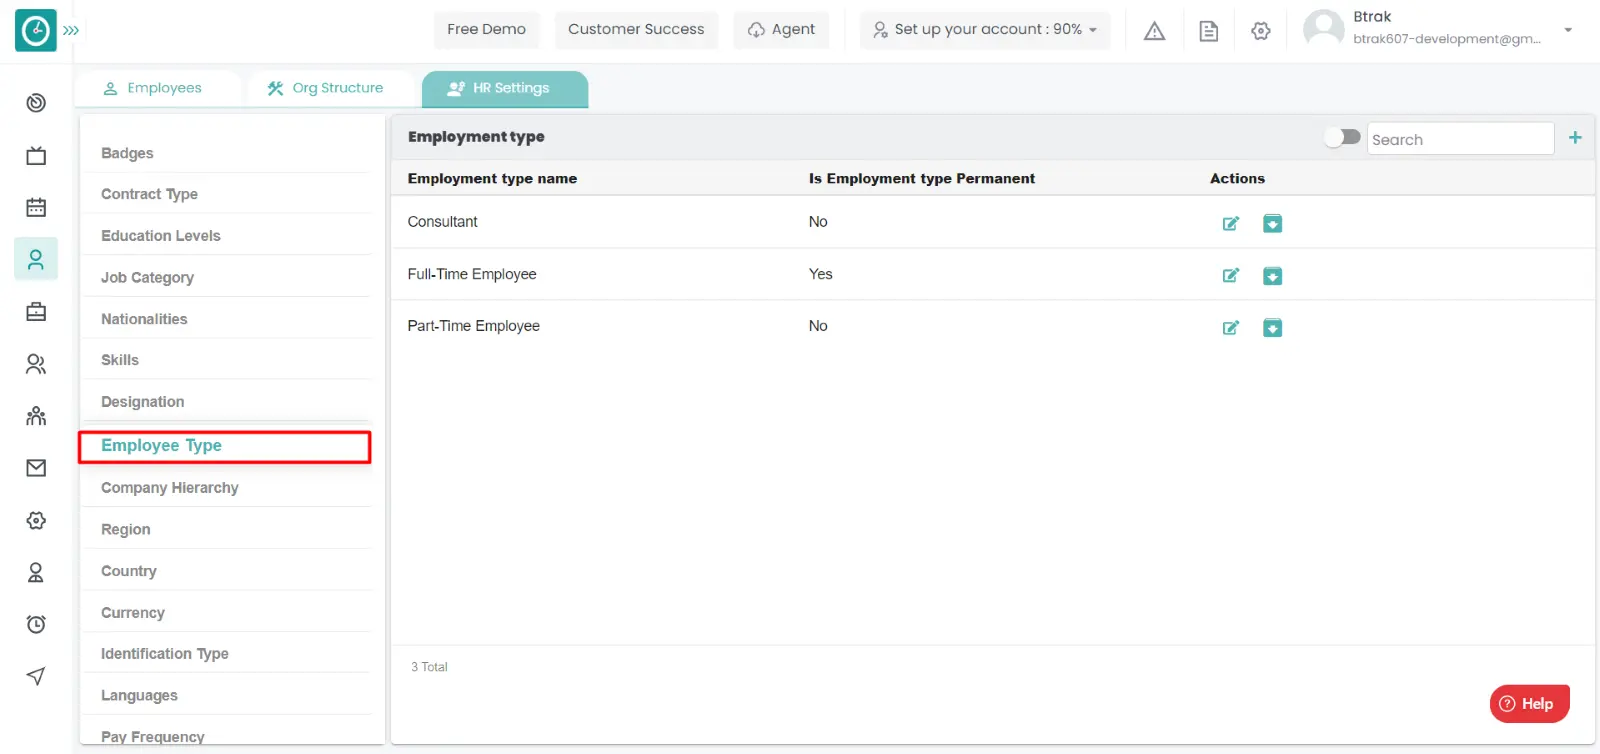
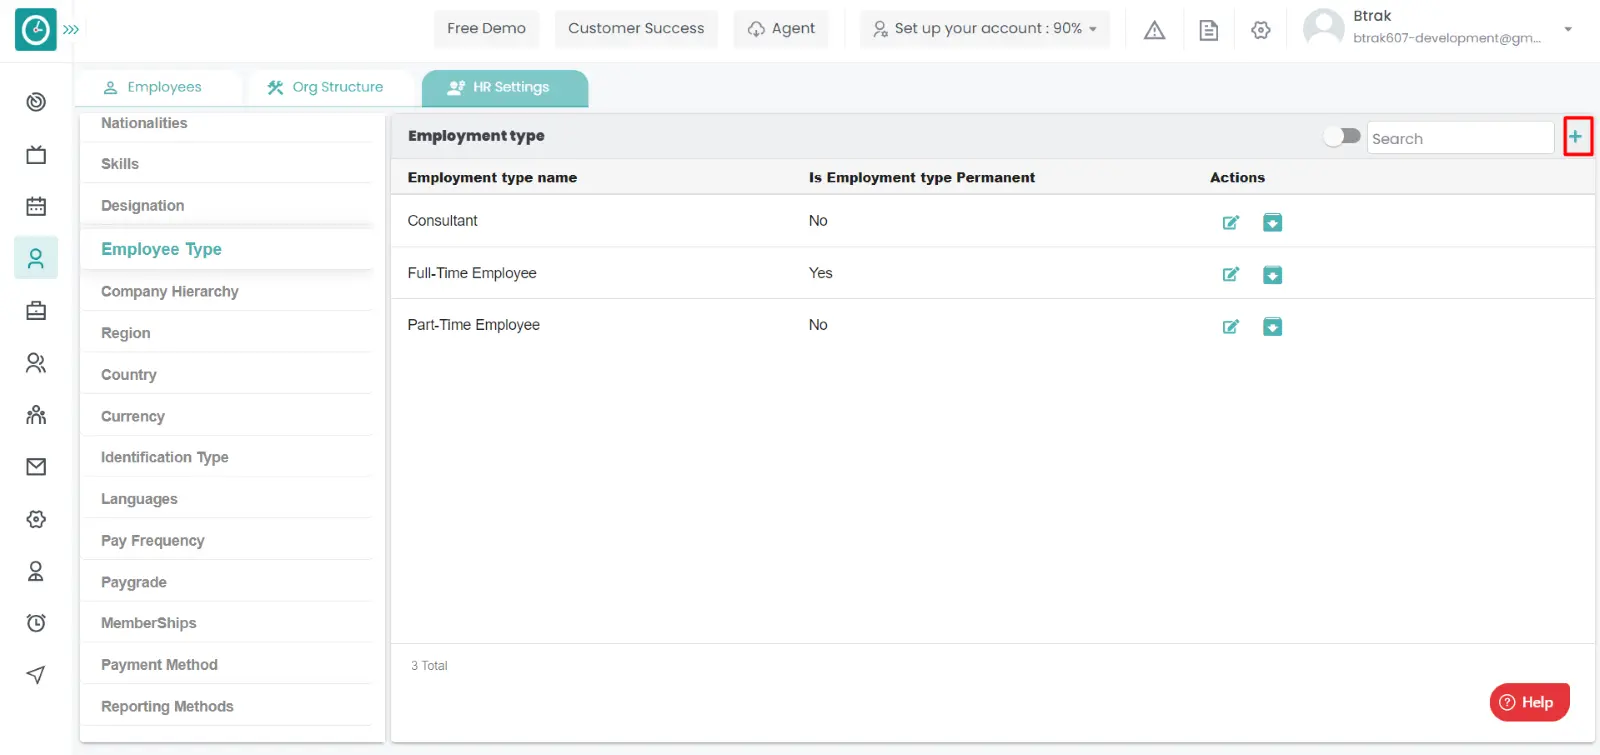
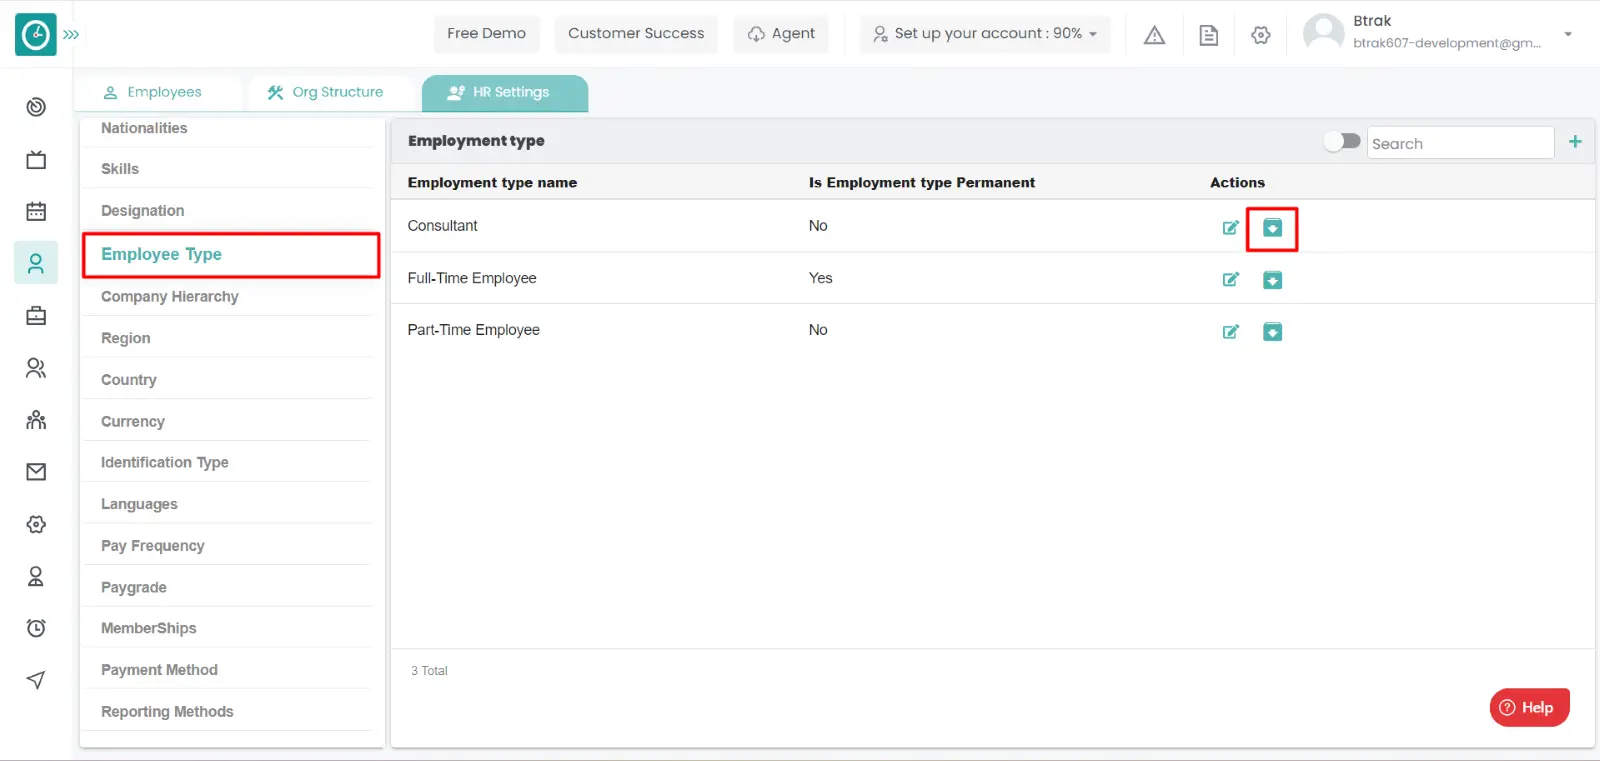
You can access/view the employee type of employee in organization.
Navigation: Goto HR => HR Tab => HR settings
If the user is having Super Admin
Permissions, then he can be able to access/view employee type in organization.
This permission can be configured by following the steps: -
View My Detailed Profile / View My Subordinate Profile / Edit My Subordinate Profile / Manage HR settings,
then select the roles for what you must give the permissions to configure and check them.View My Detailed Profile / View My Subordinate Profile / Edit My Subordinate Profile / Manage HR settings
for the defined roles.
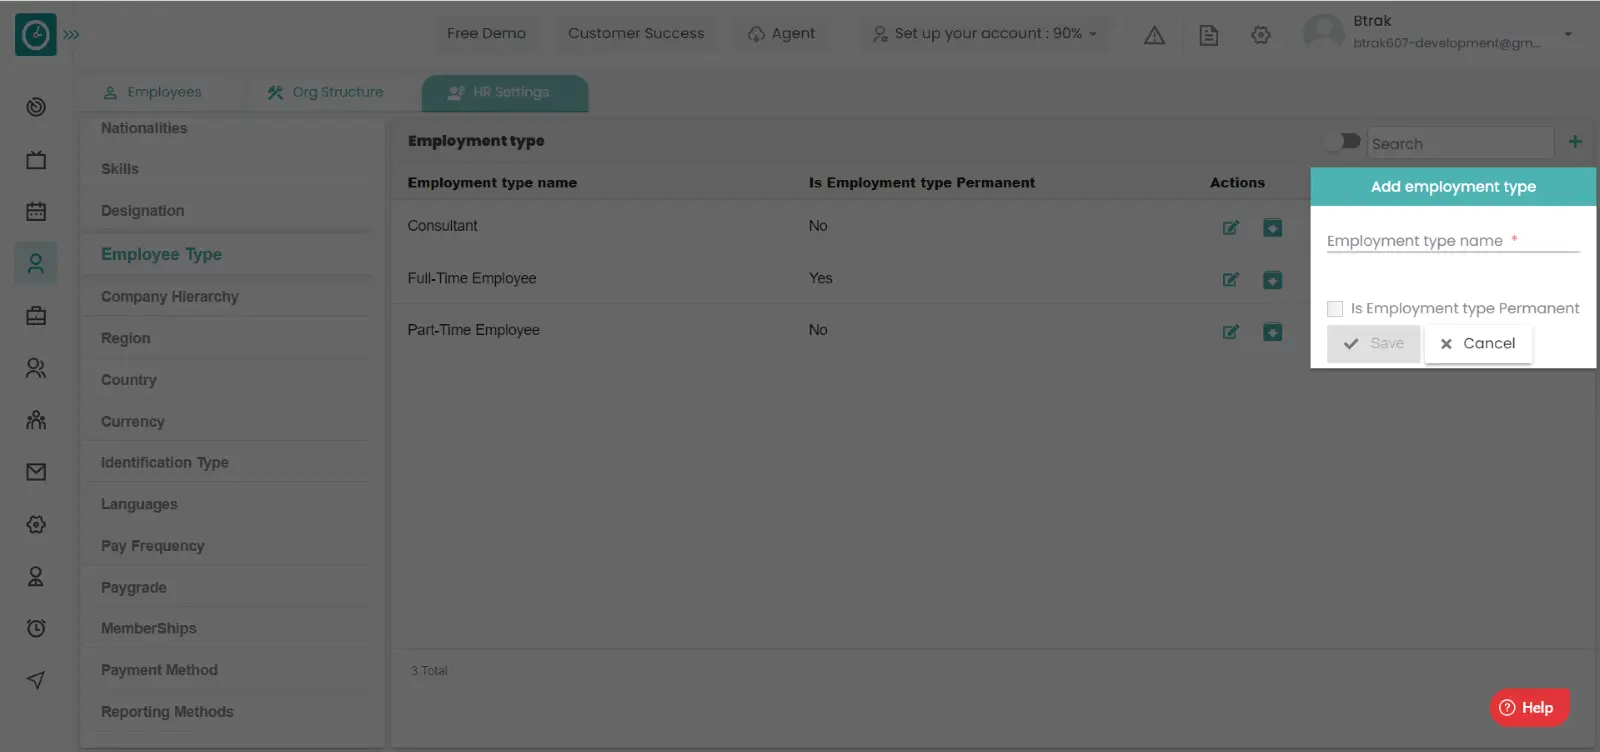
Add new employee type :-
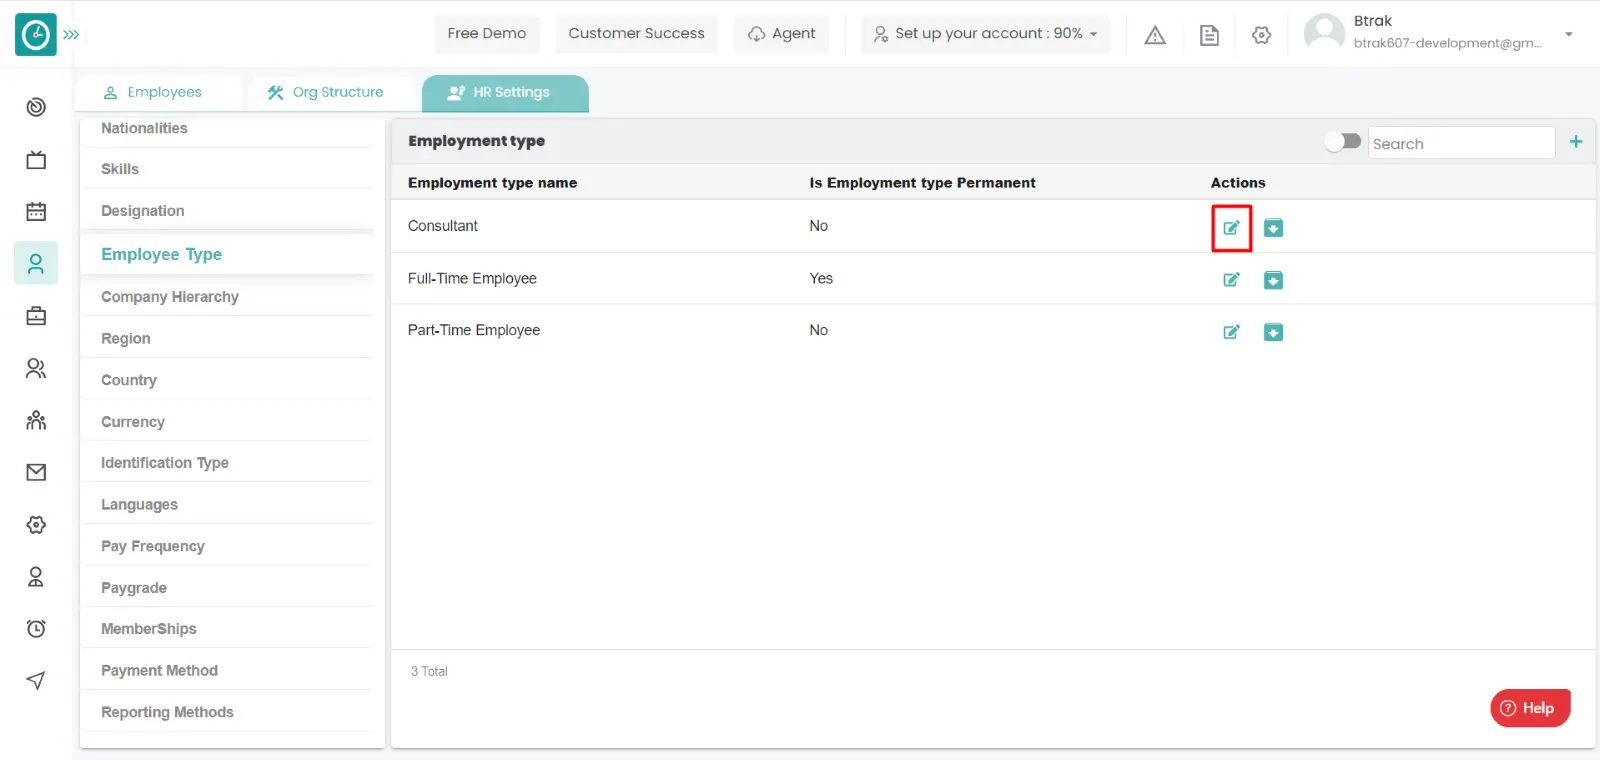
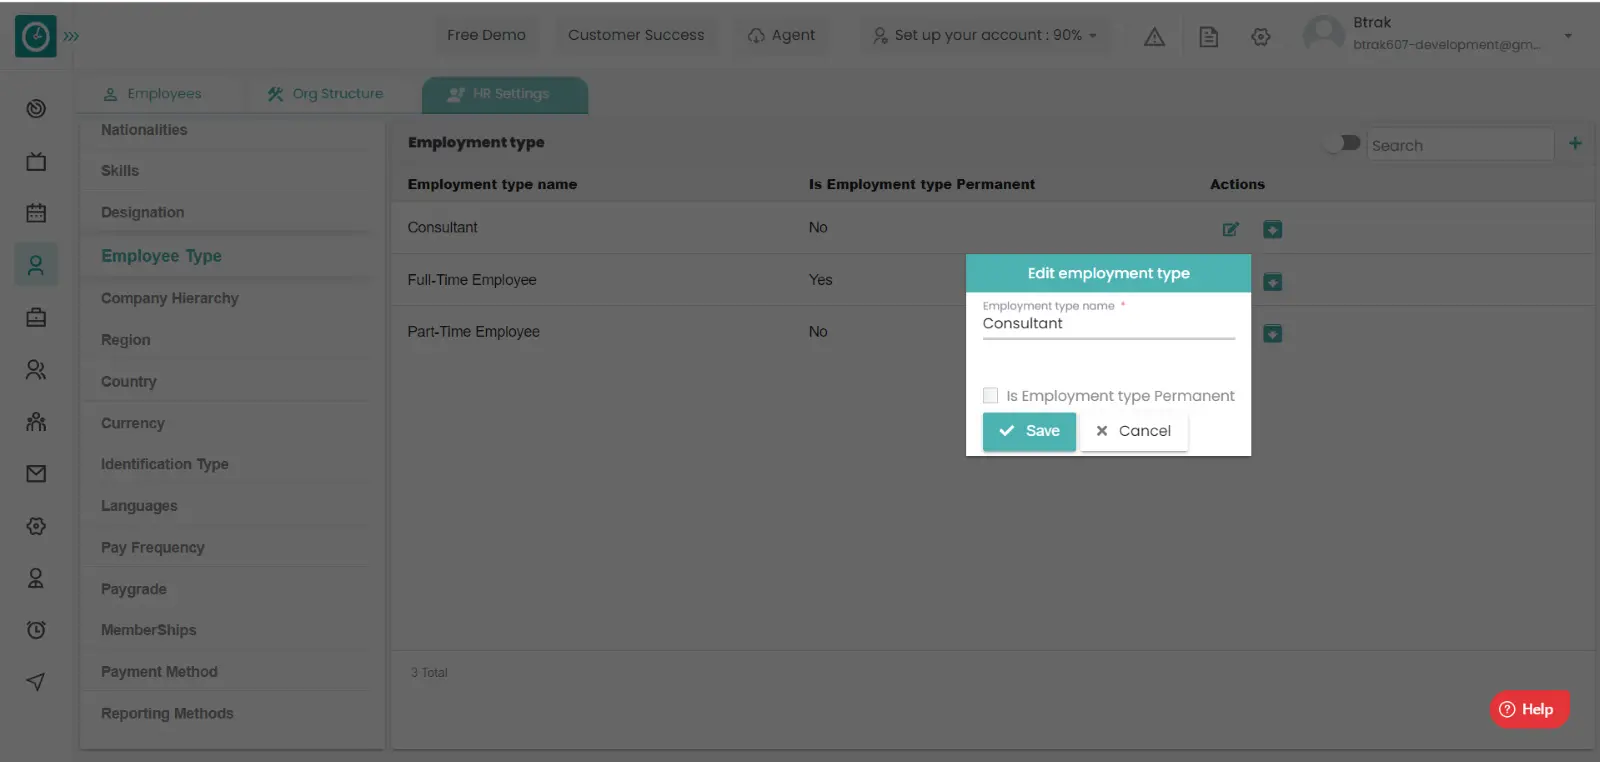
Edit employee type :-
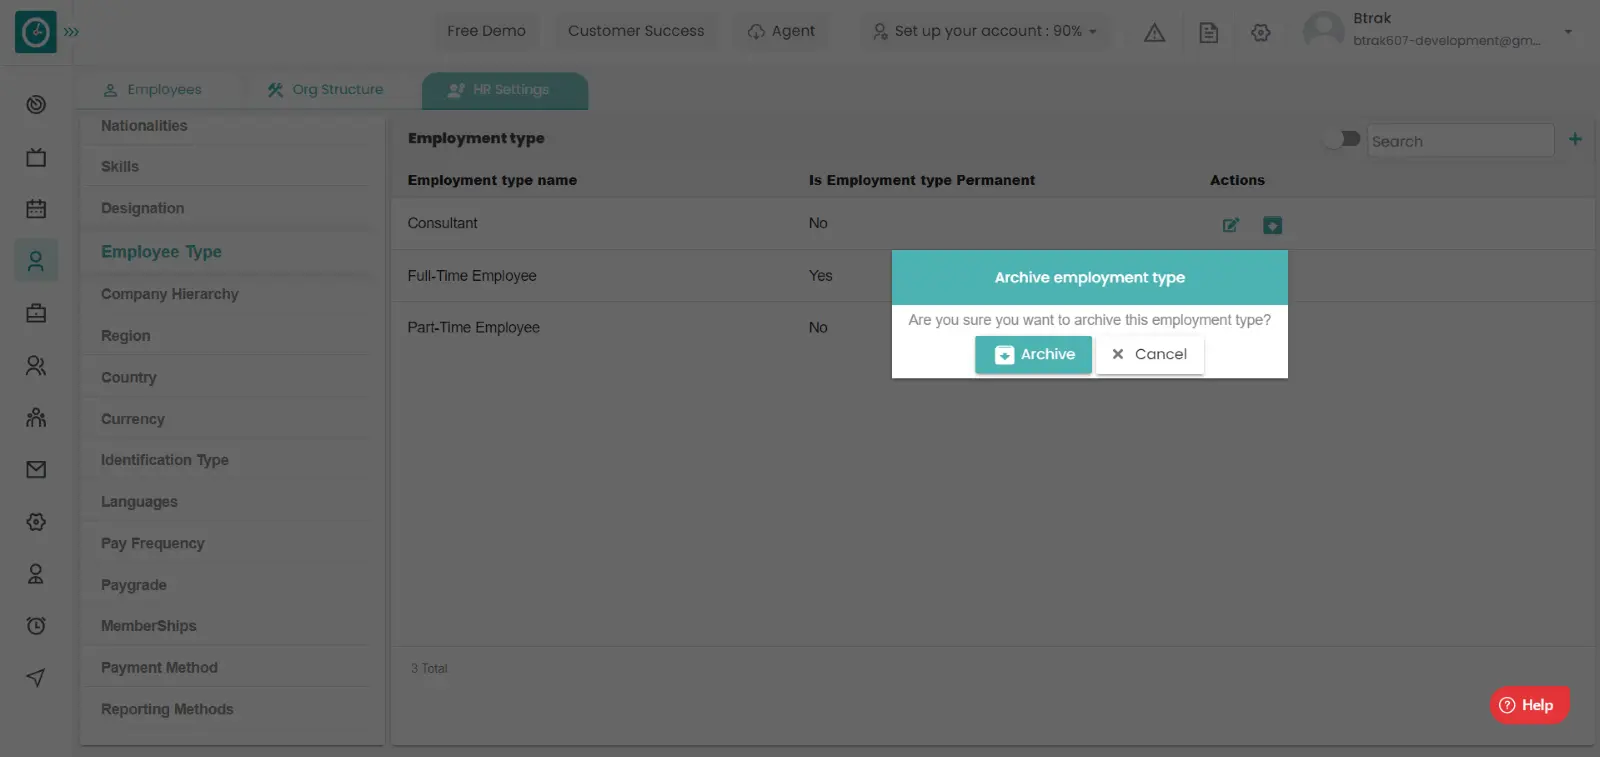
Archive employee type :-
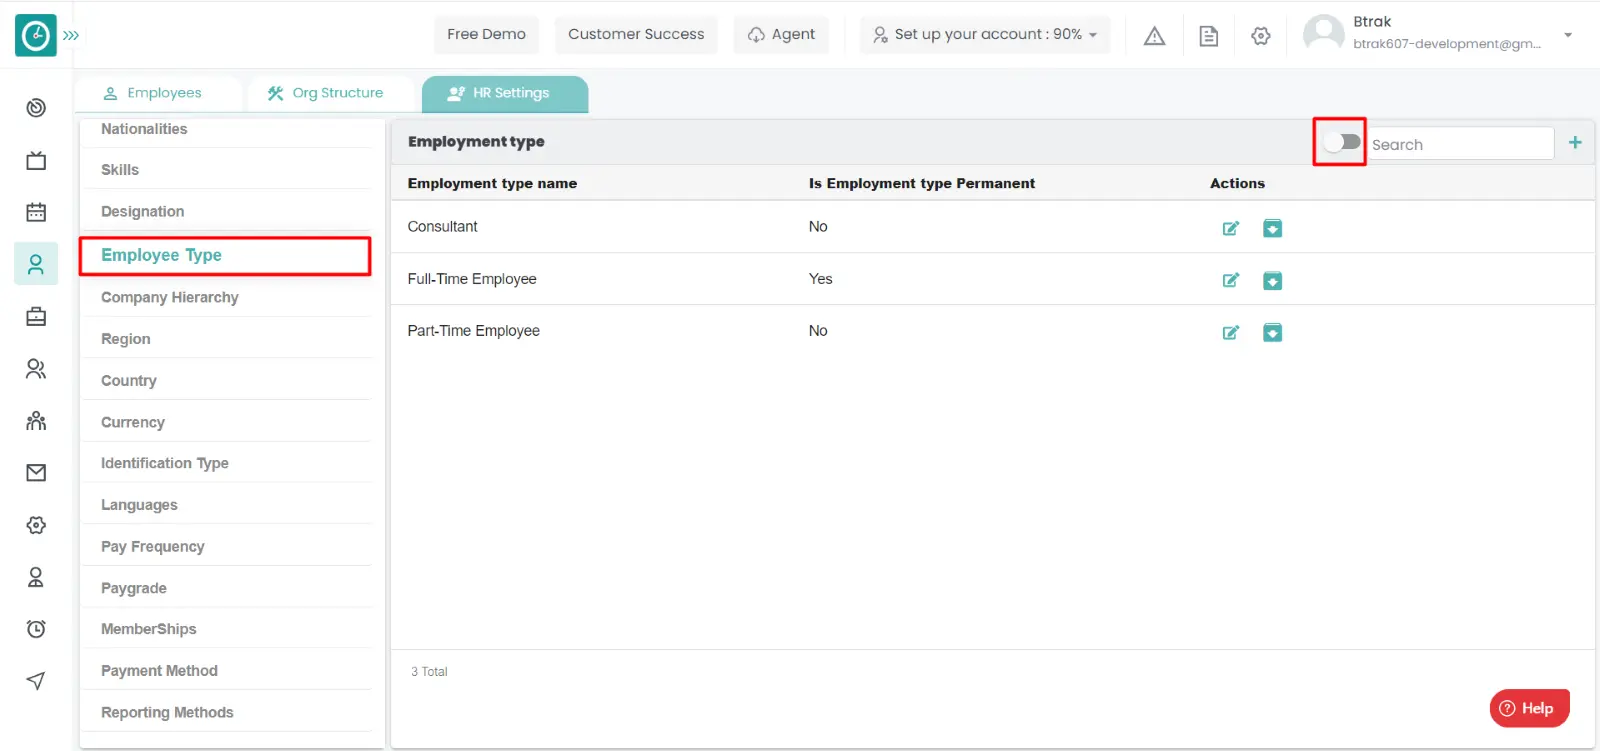
View Archived employee type :-
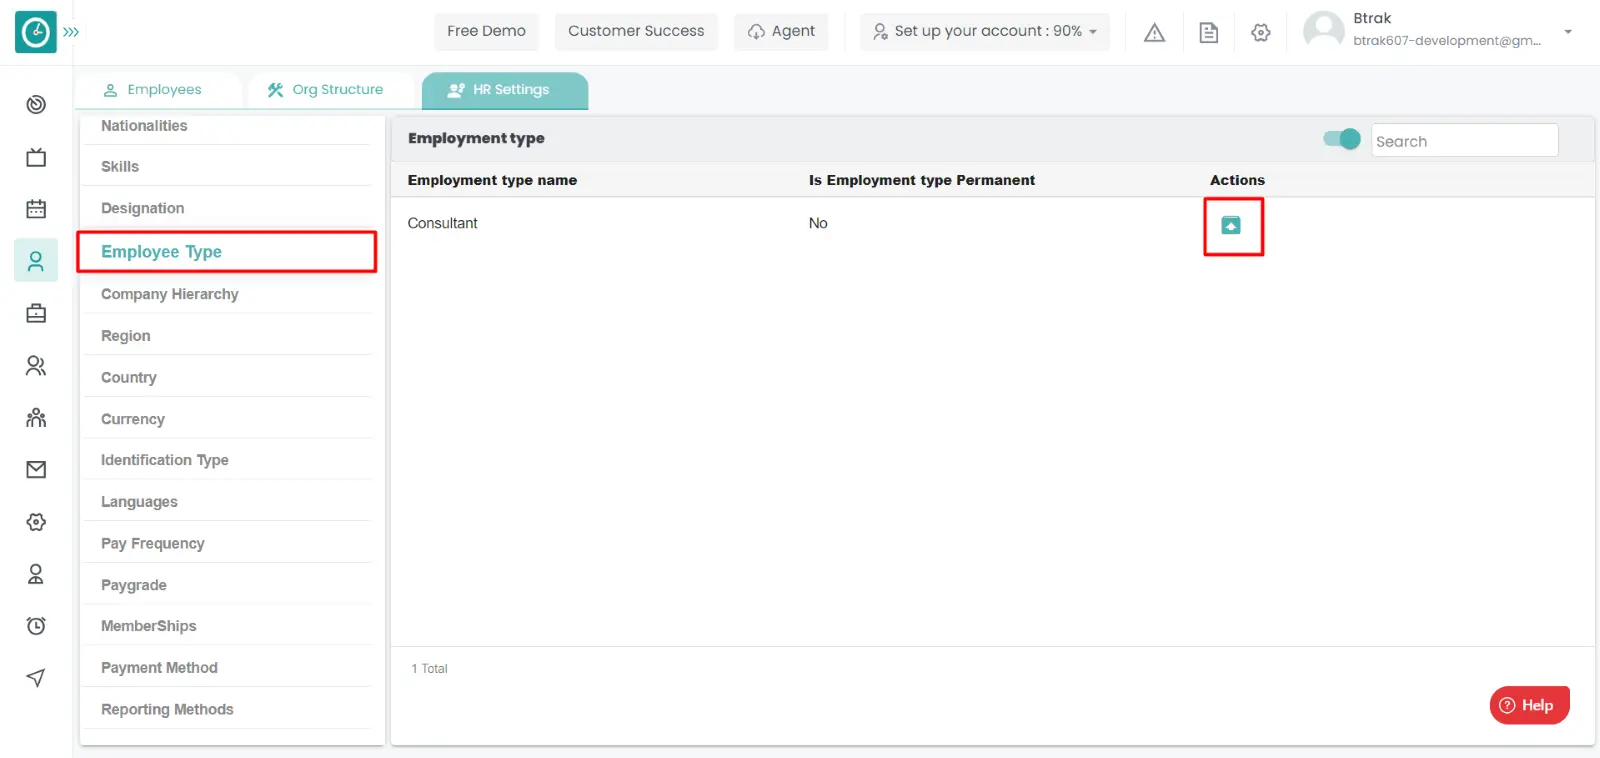
Unarchive employee type :-
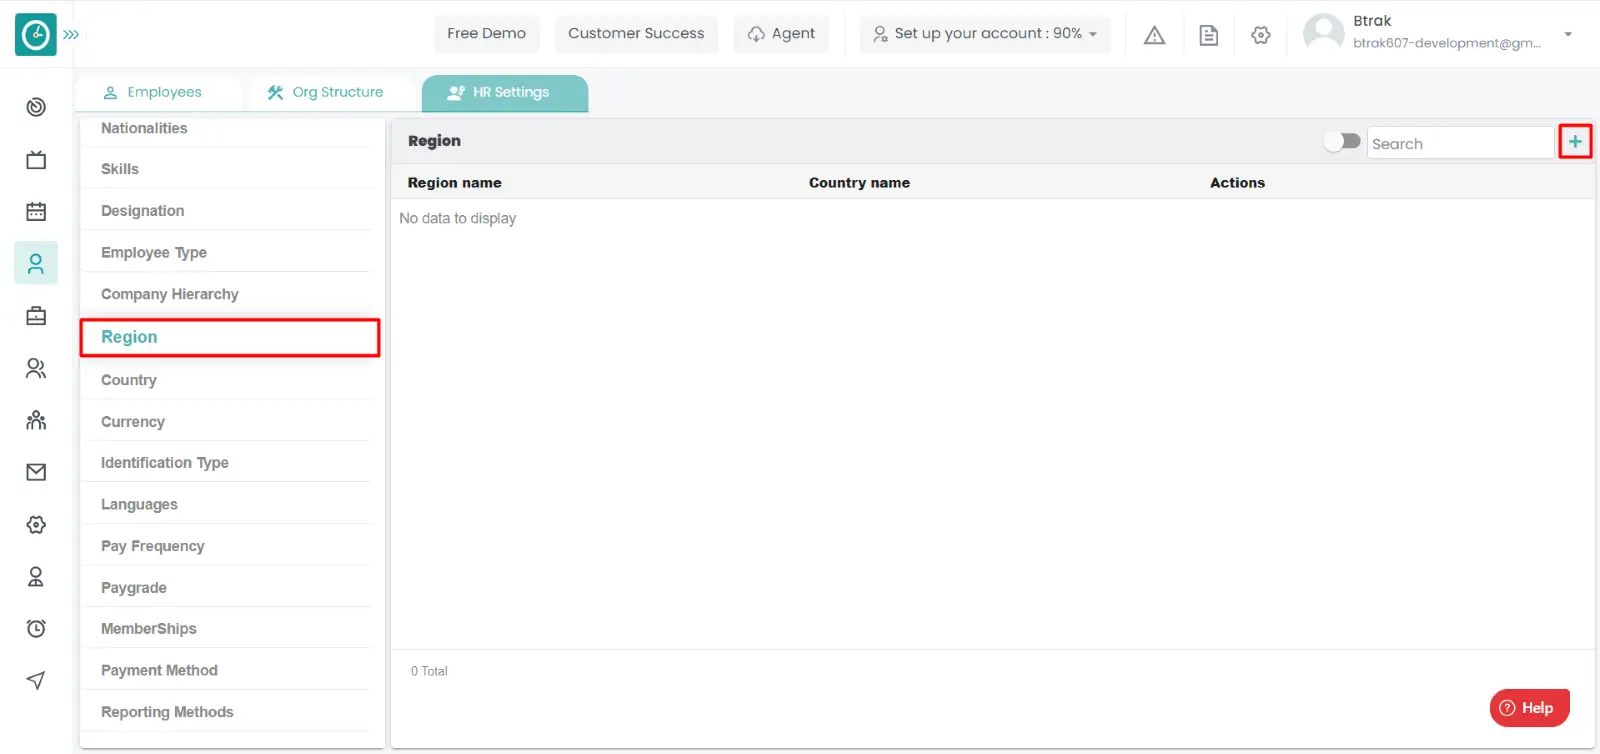
You can access/view the region of employee in organization.
Navigation: Goto HR => HR Tab => HR settings
If the user is having Super Admin
Permissions, then he can be able to access/view region in organization.
This permission can be configured by following the steps: -
View My Detailed Profile / View My Subordinate Profile / Edit My Subordinate Profile / Manage HR settings,
then select the roles for what you must give the permissions to configure and check them.View My Detailed Profile / View My Subordinate Profile / Edit My Subordinate Profile / Manage HR settings
for the defined roles.
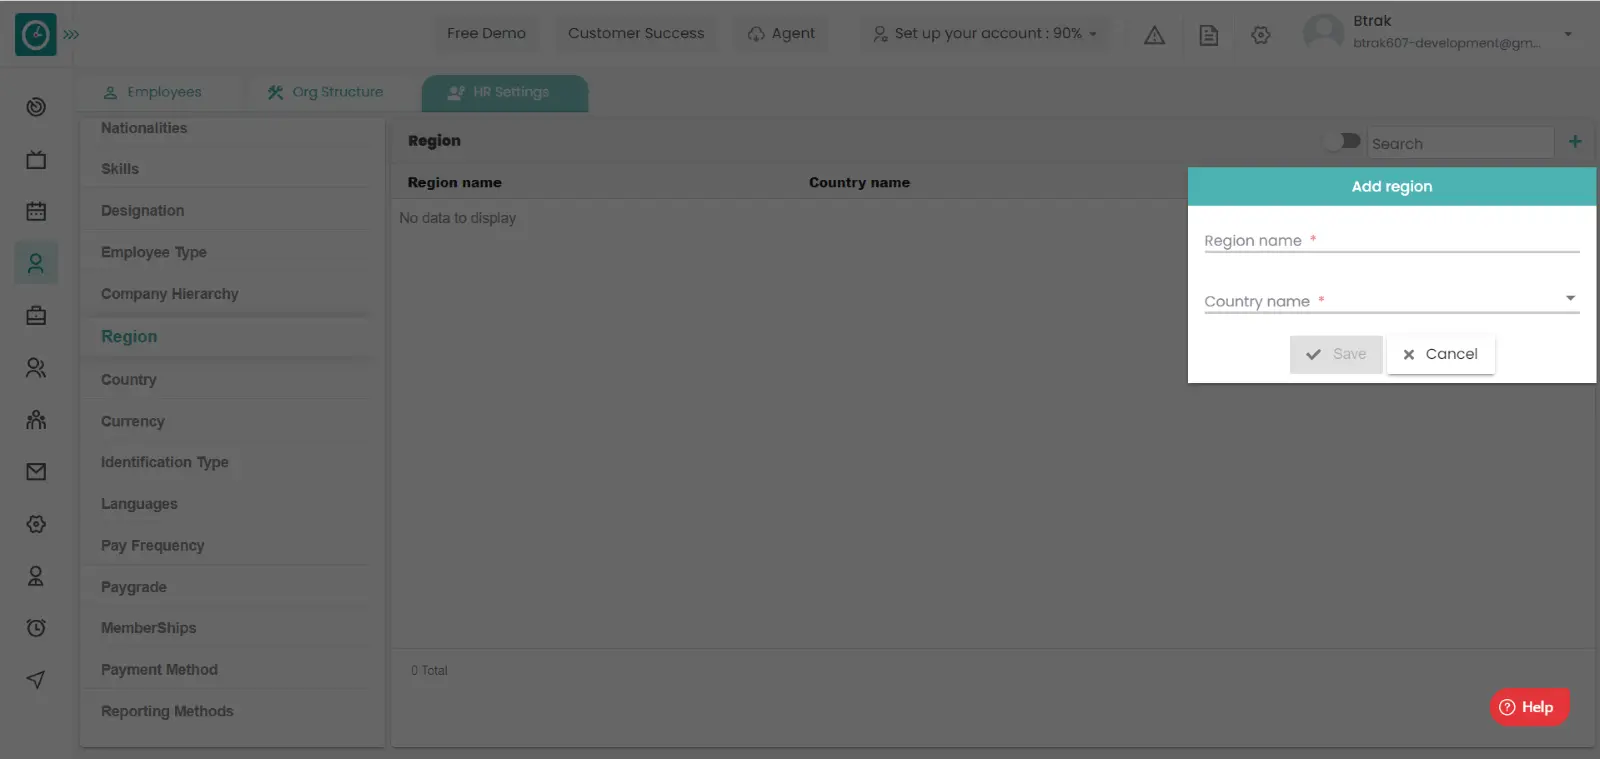
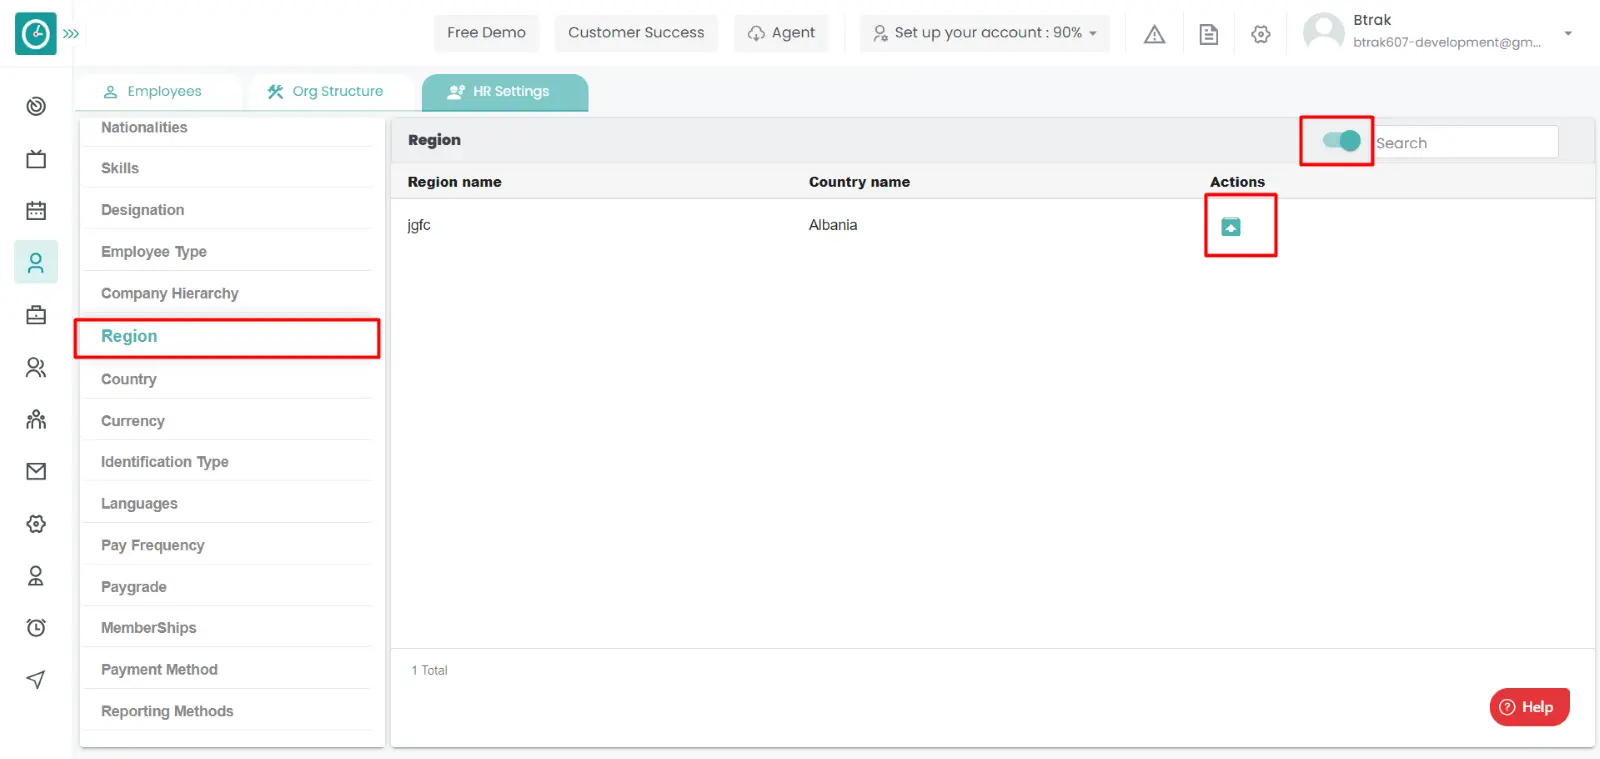
Add new region :-
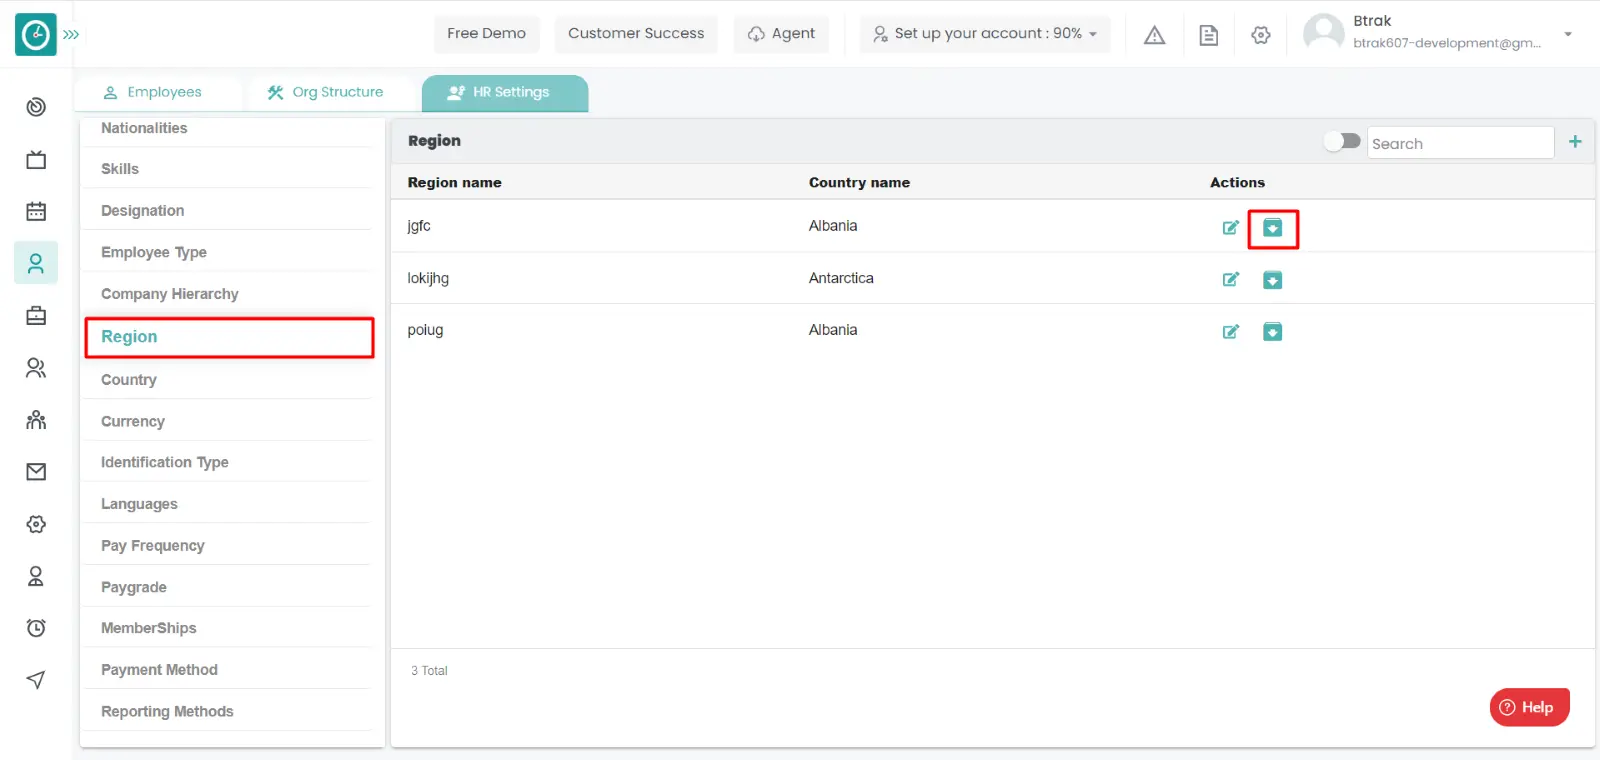
Edit region :-


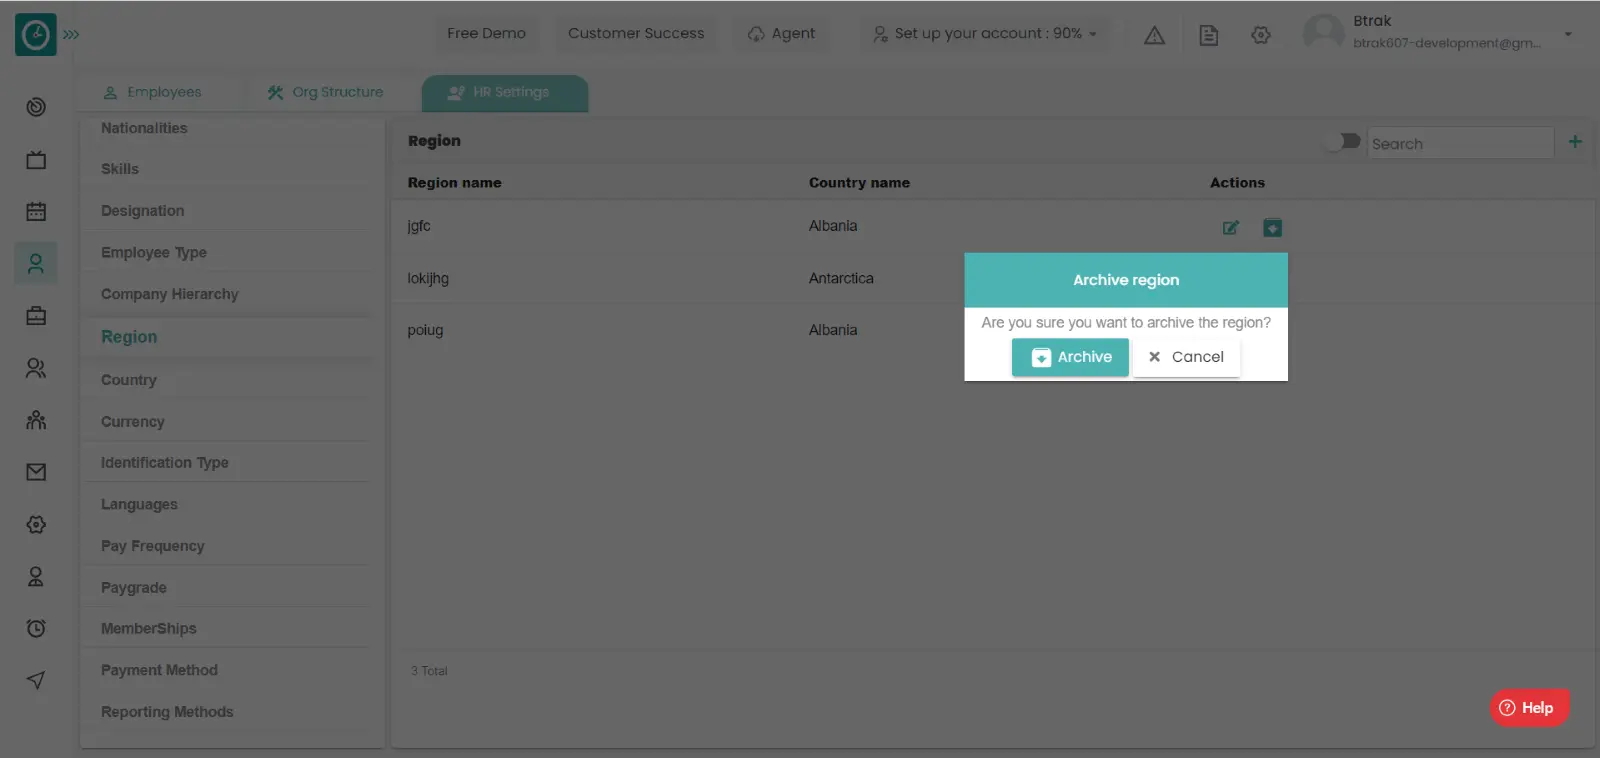
Archive region :-
View Archived region :-
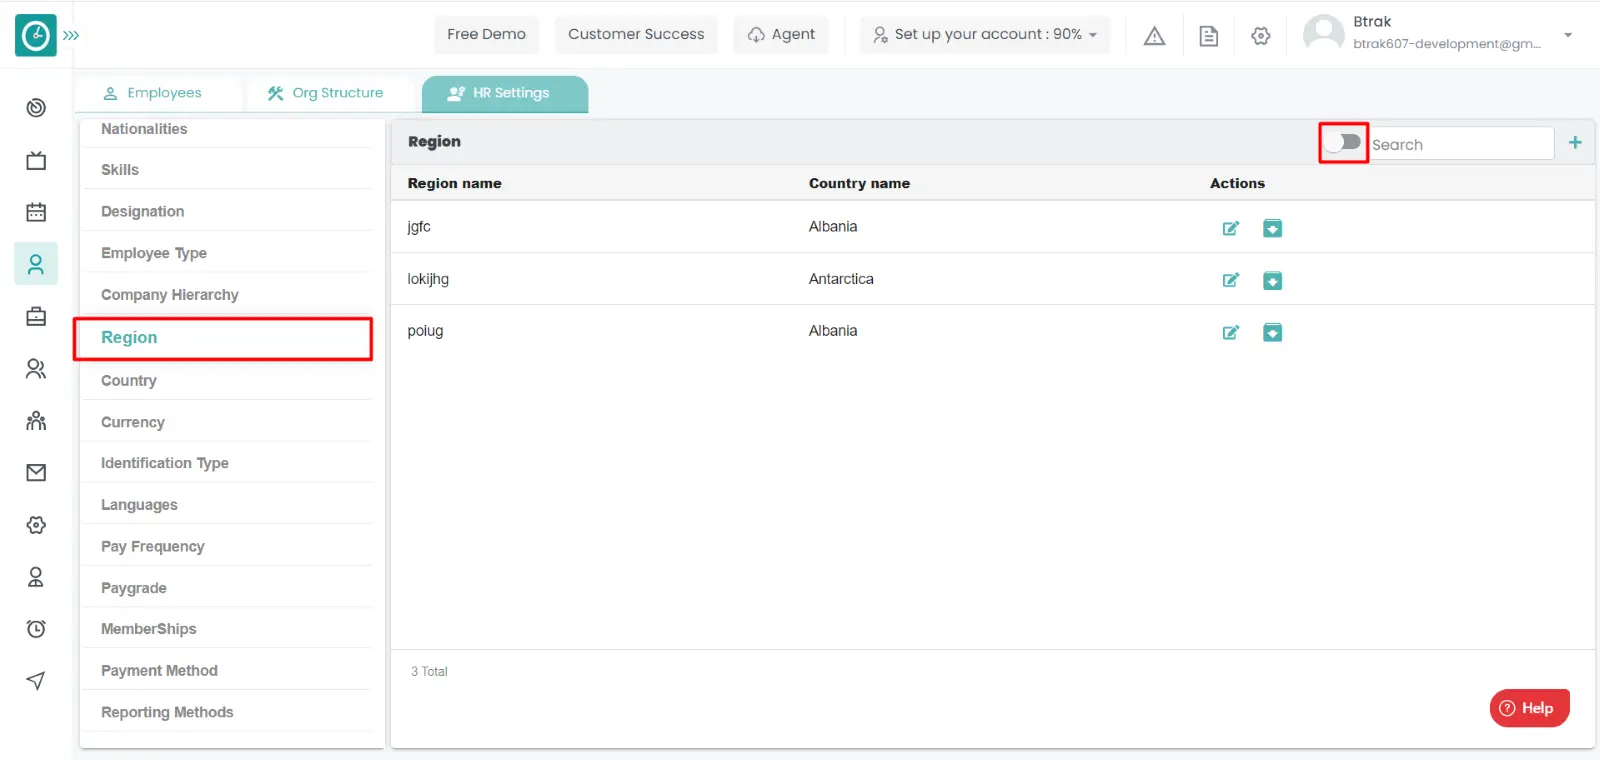
Unarchive region :-
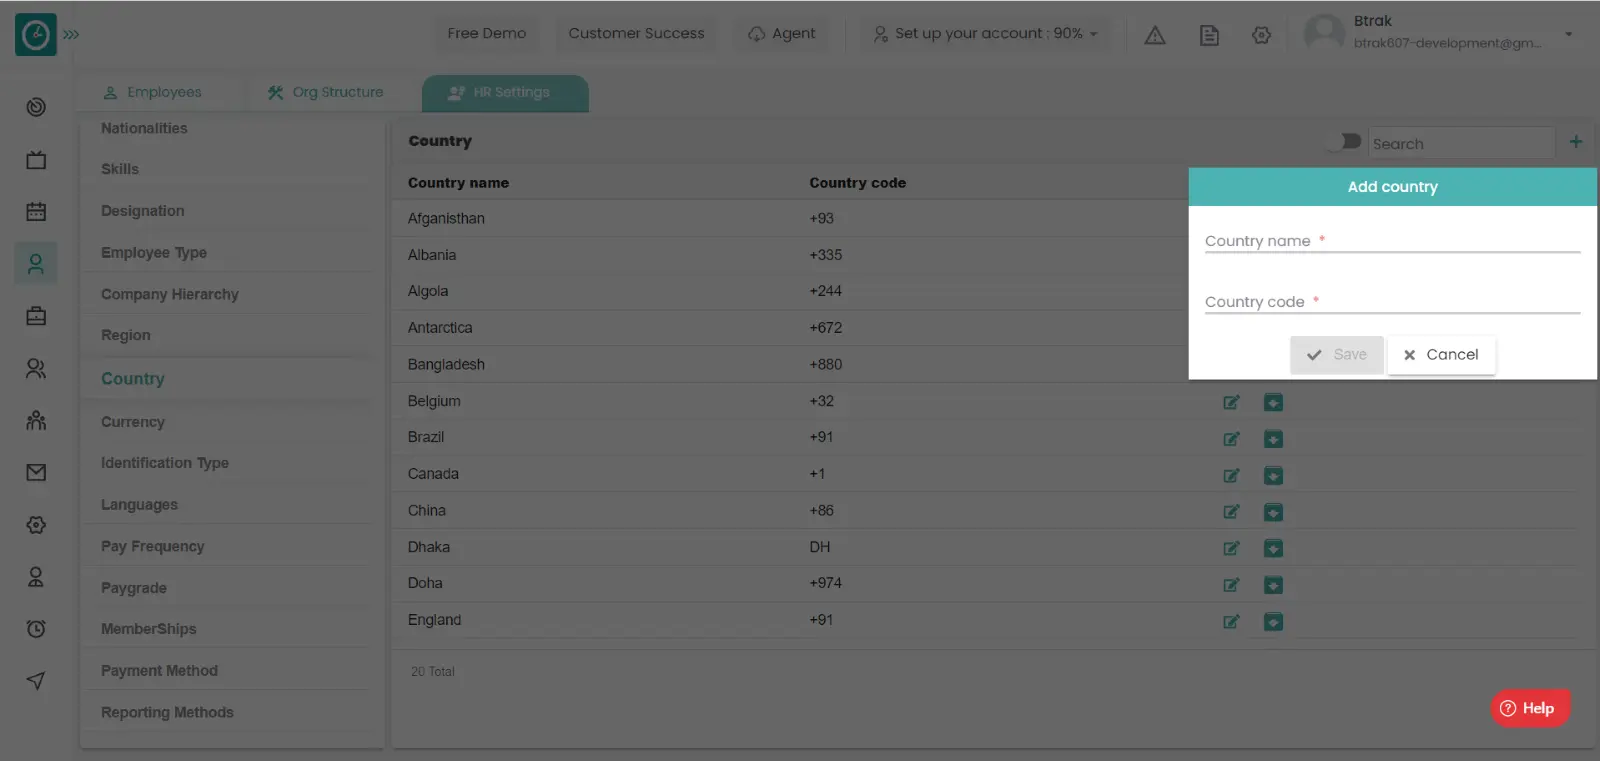
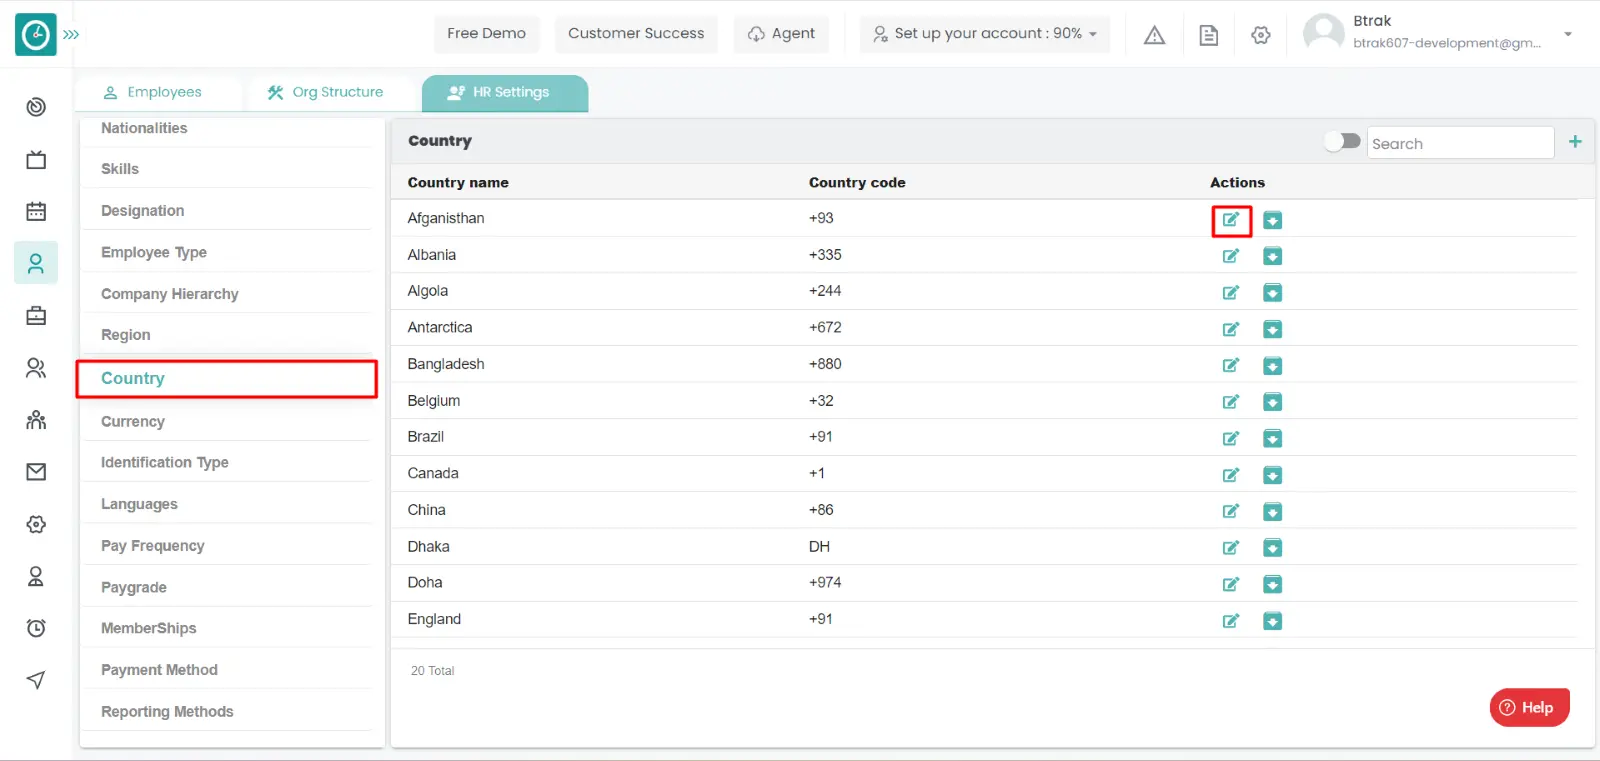
You can access/view the country of employee in organization.
Navigation: Goto HR => HR Tab => HR settings
If the user is having Super Admin
Permissions, then he can be able to access/view region in organization.
This permission can be configured by following the steps: -
View My Detailed Profile / View My Subordinate Profile / Edit My Subordinate Profile / Manage HR settings,
then select the roles for what you must give the permissions to configure and check them.View My Detailed Profile / View My Subordinate Profile / Edit My Subordinate Profile / Manage HR settings
for the defined roles.
Add new country :-
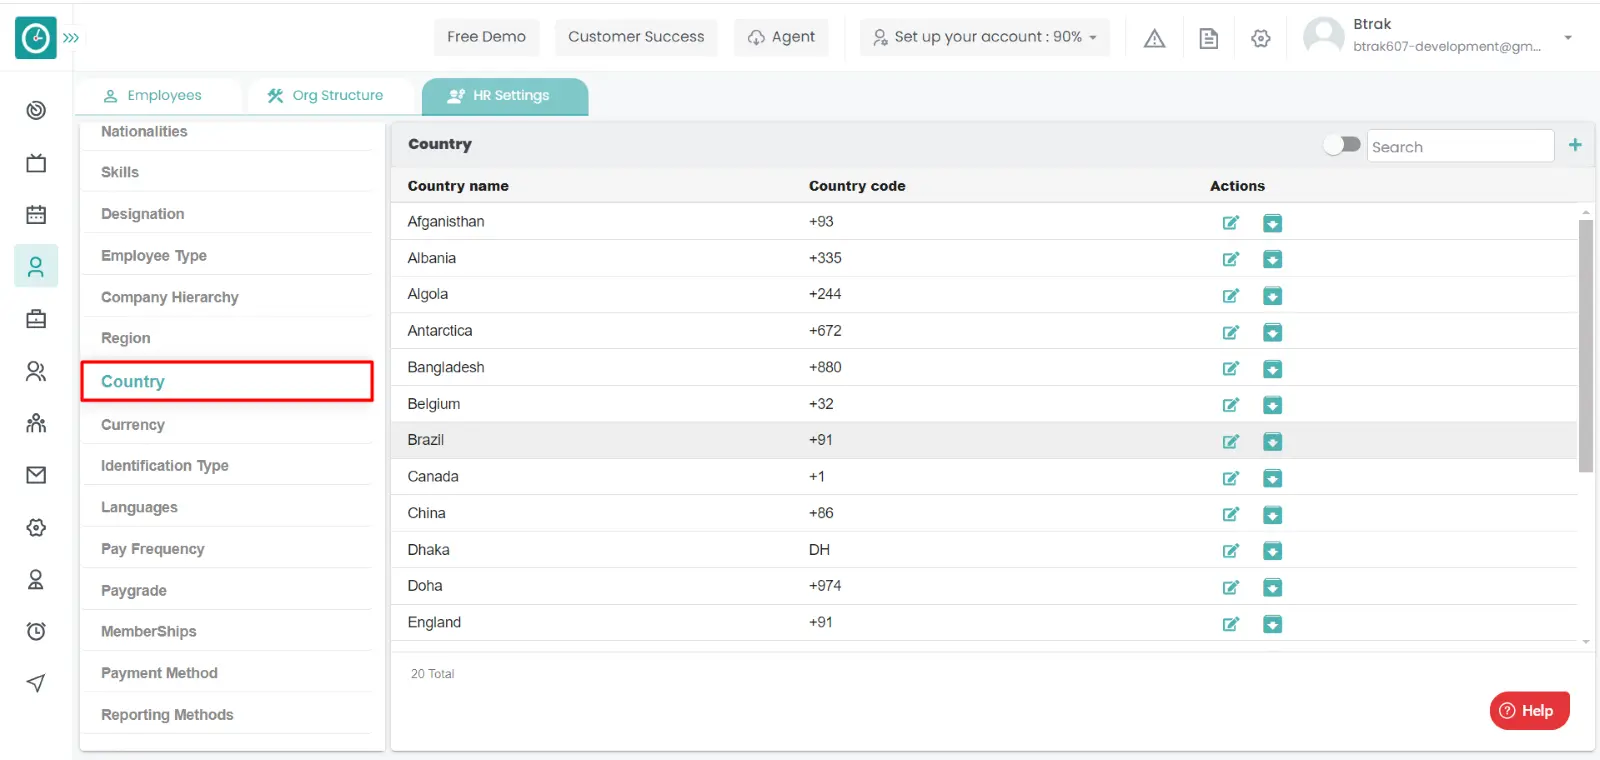
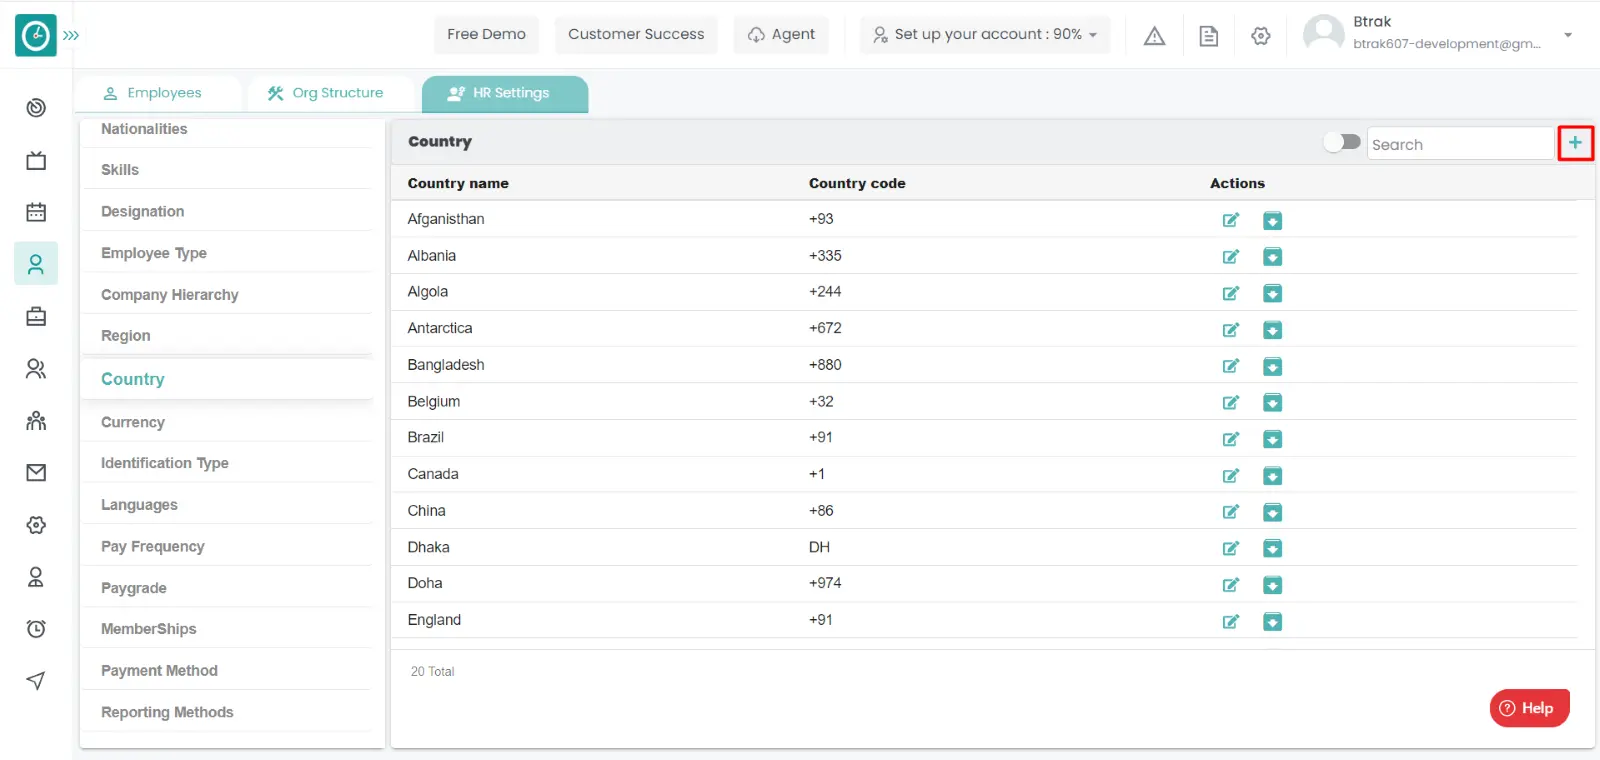
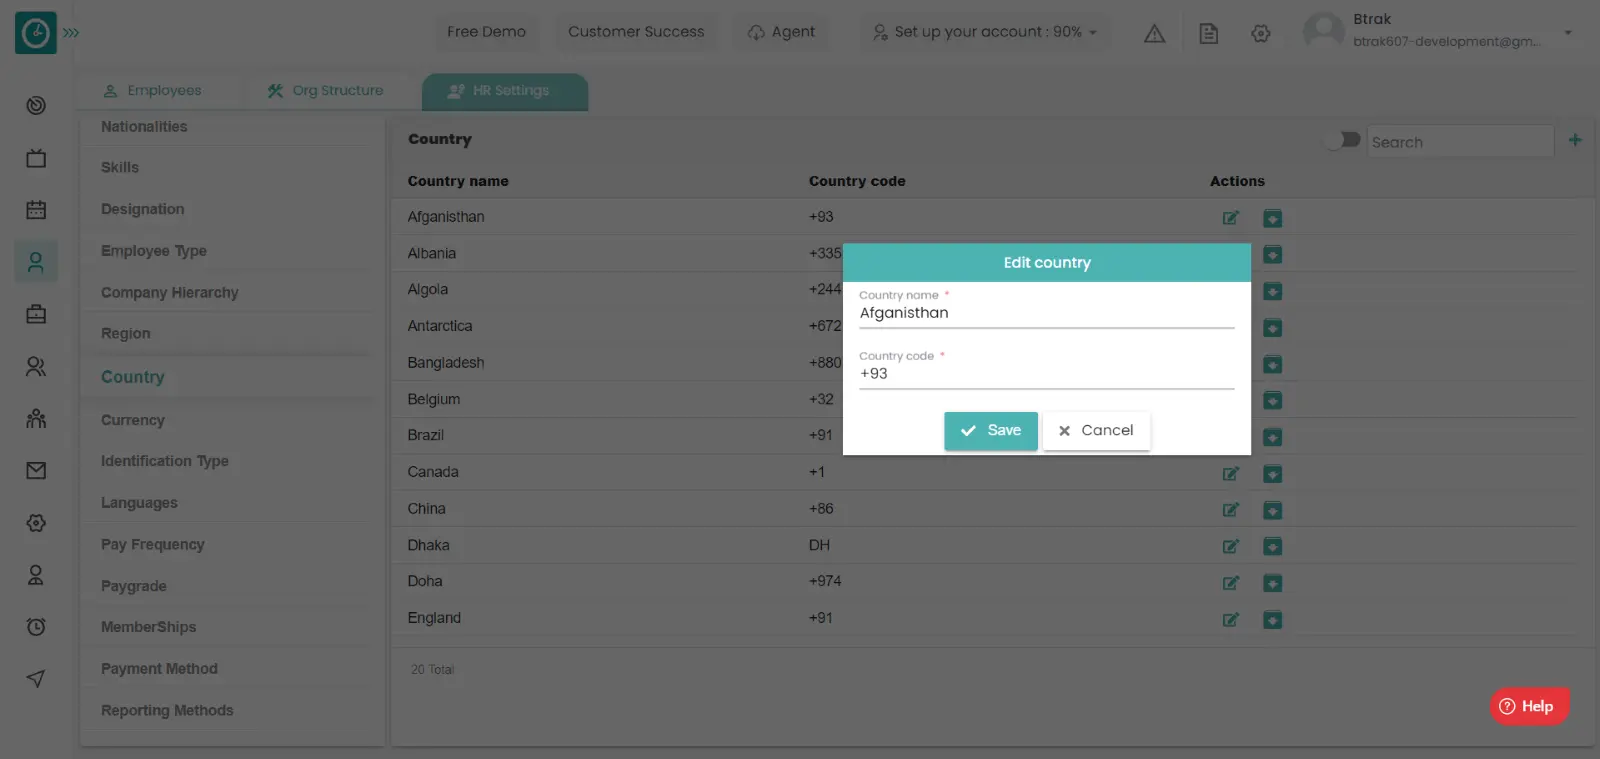
Edit country :-
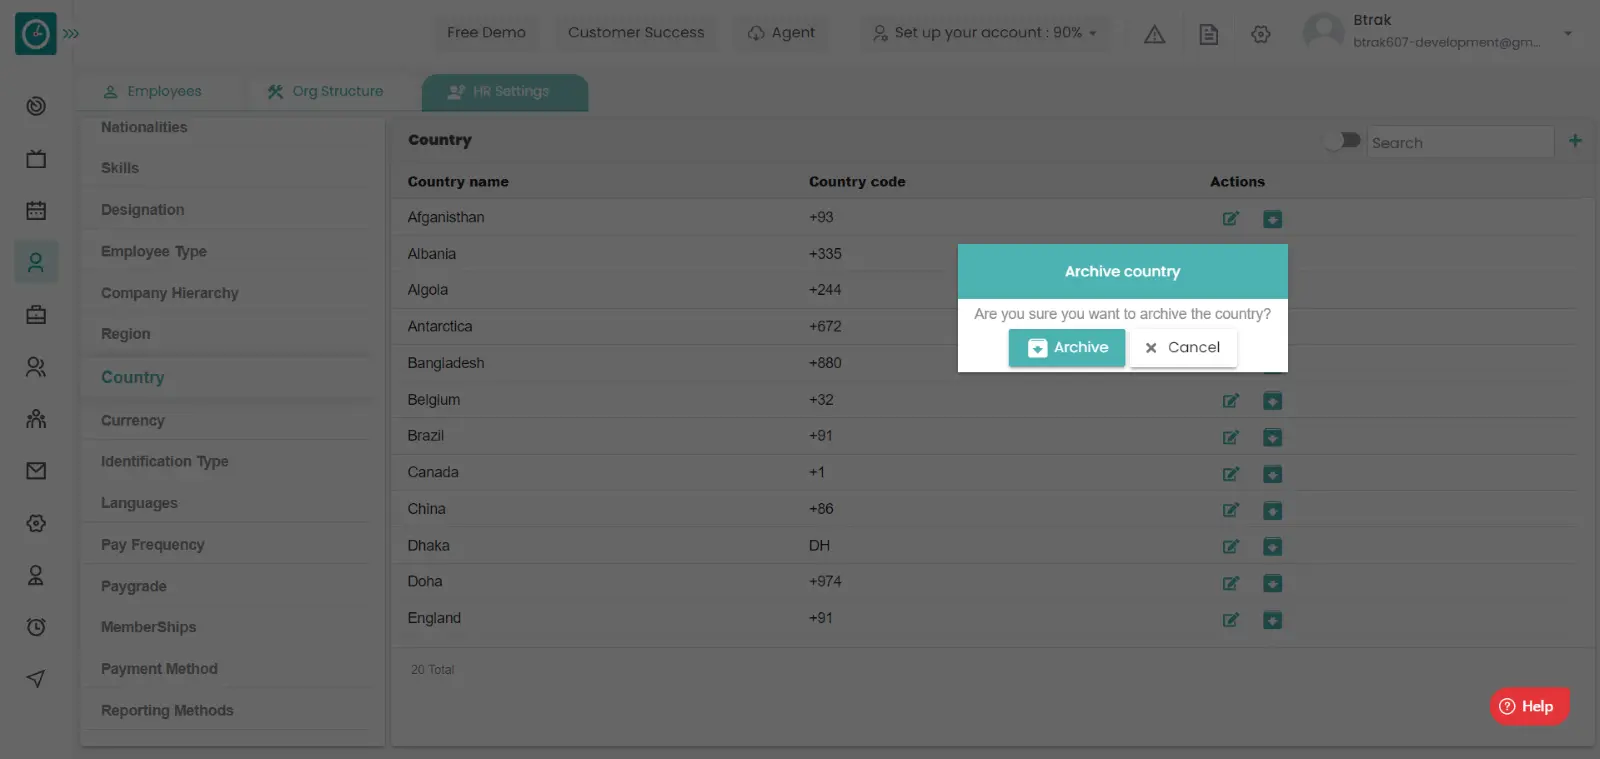
Archive country :-
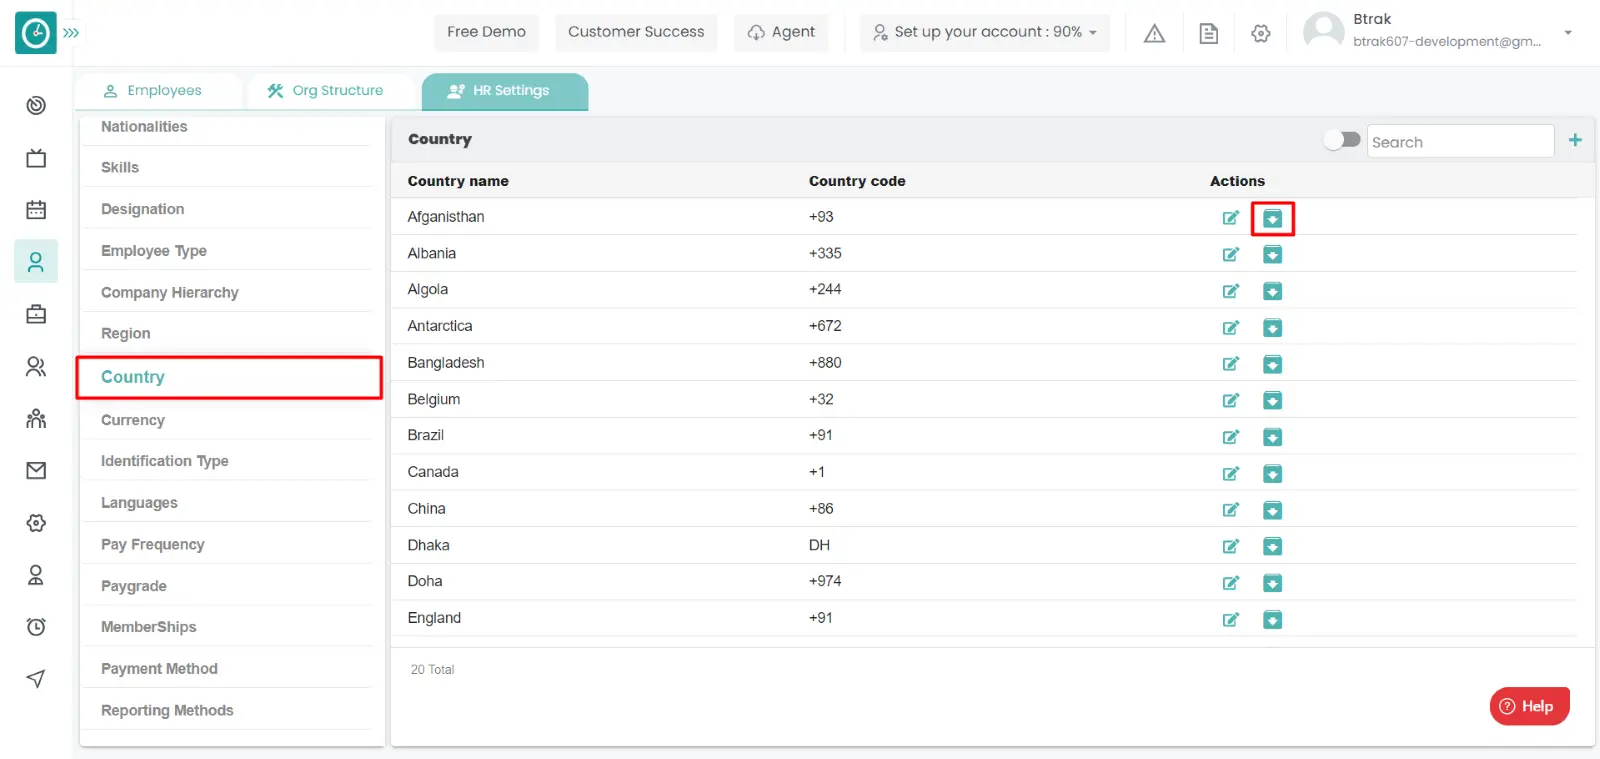
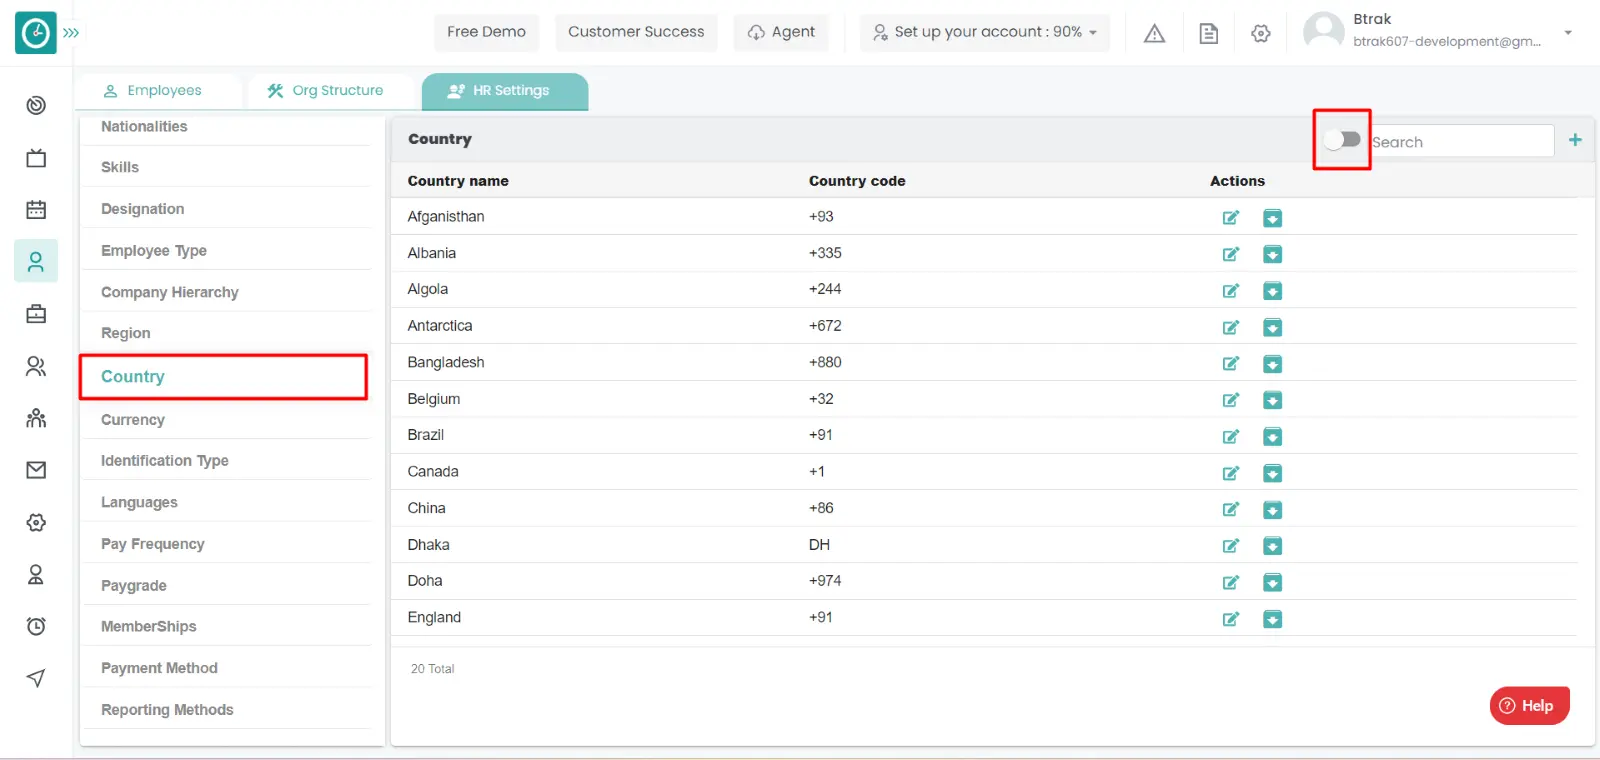
View Archived country :-
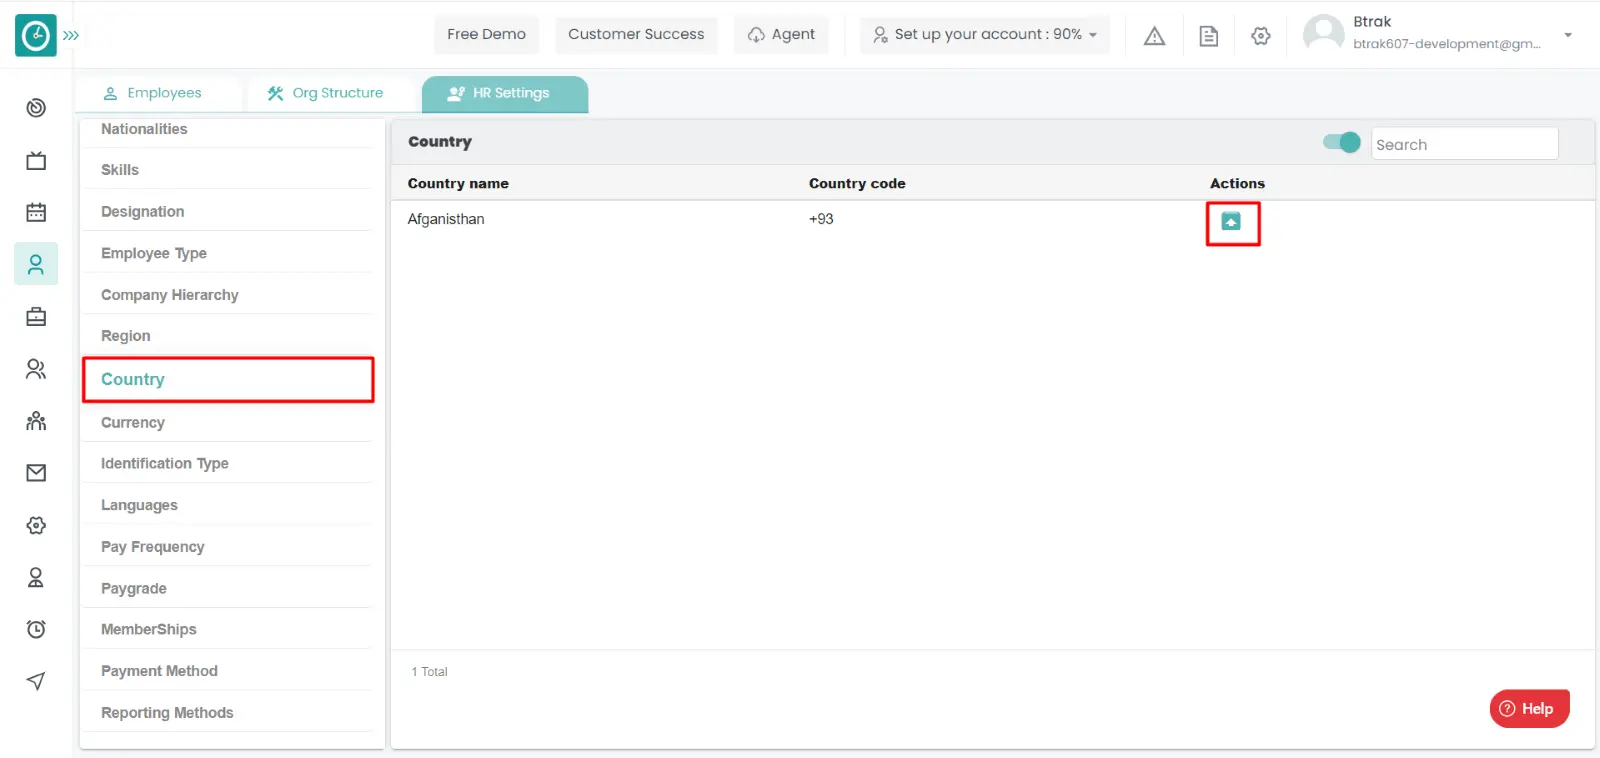
Unarchive country :-
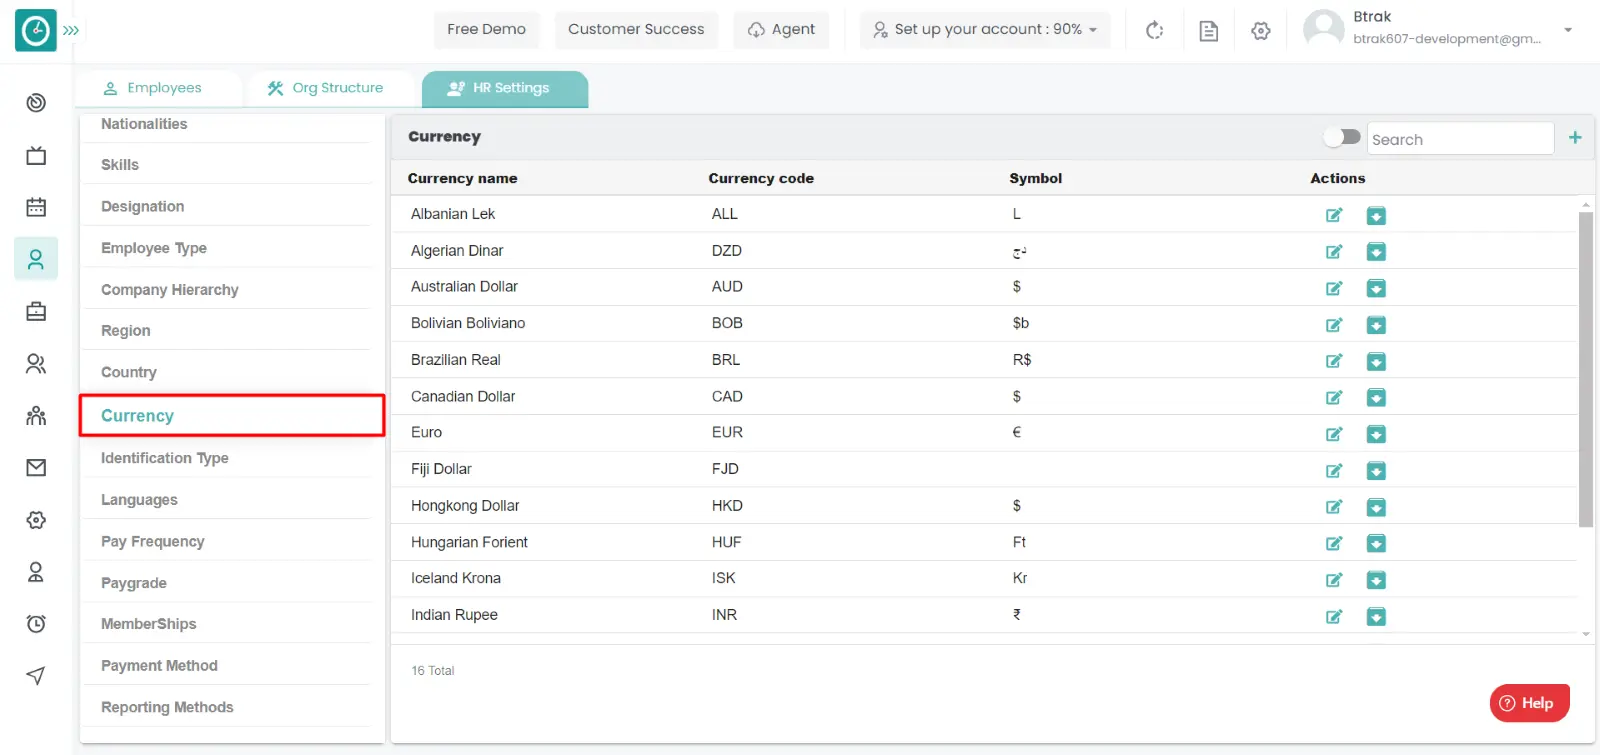
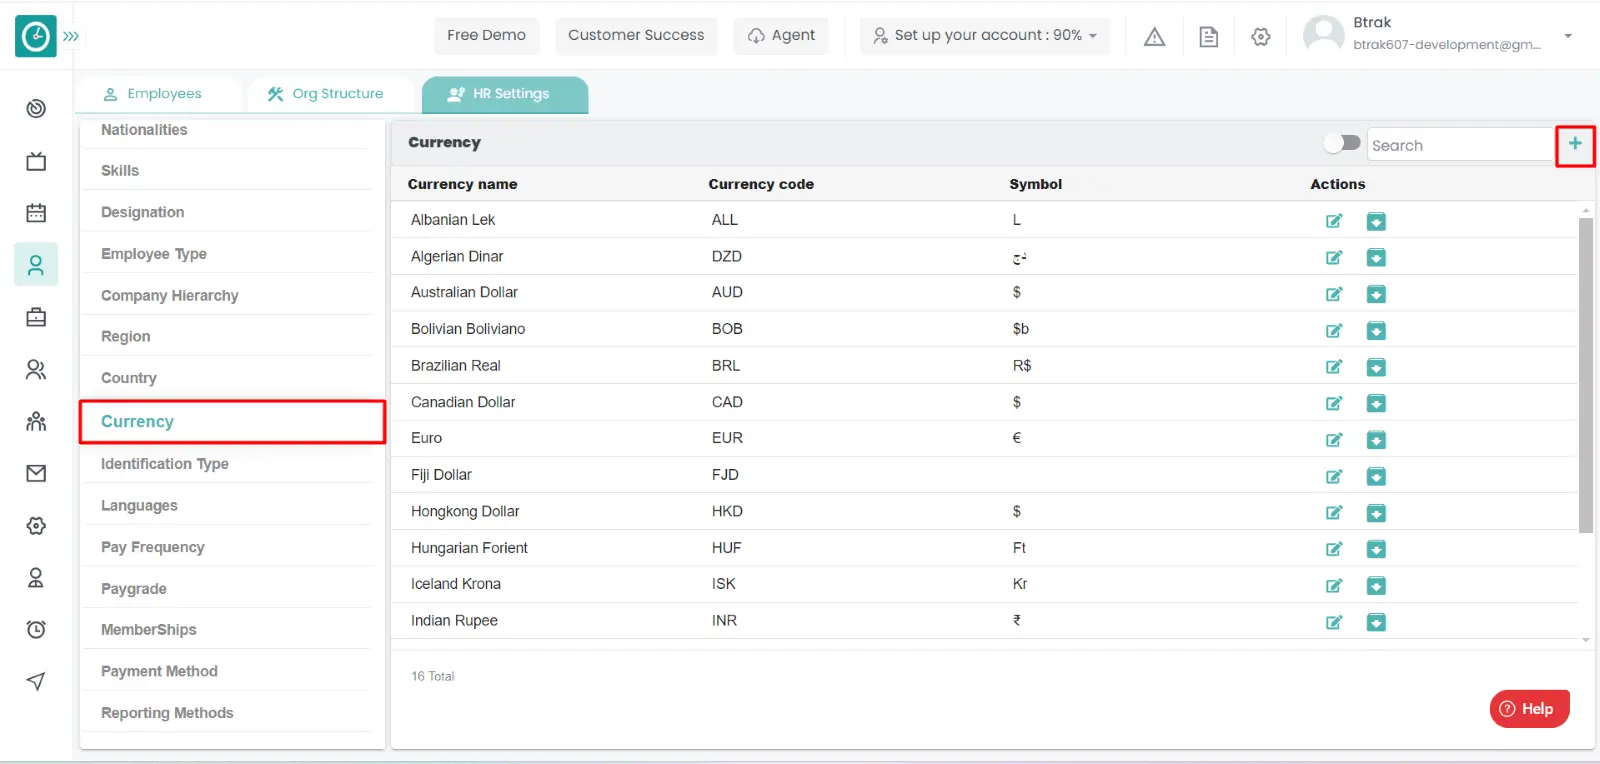
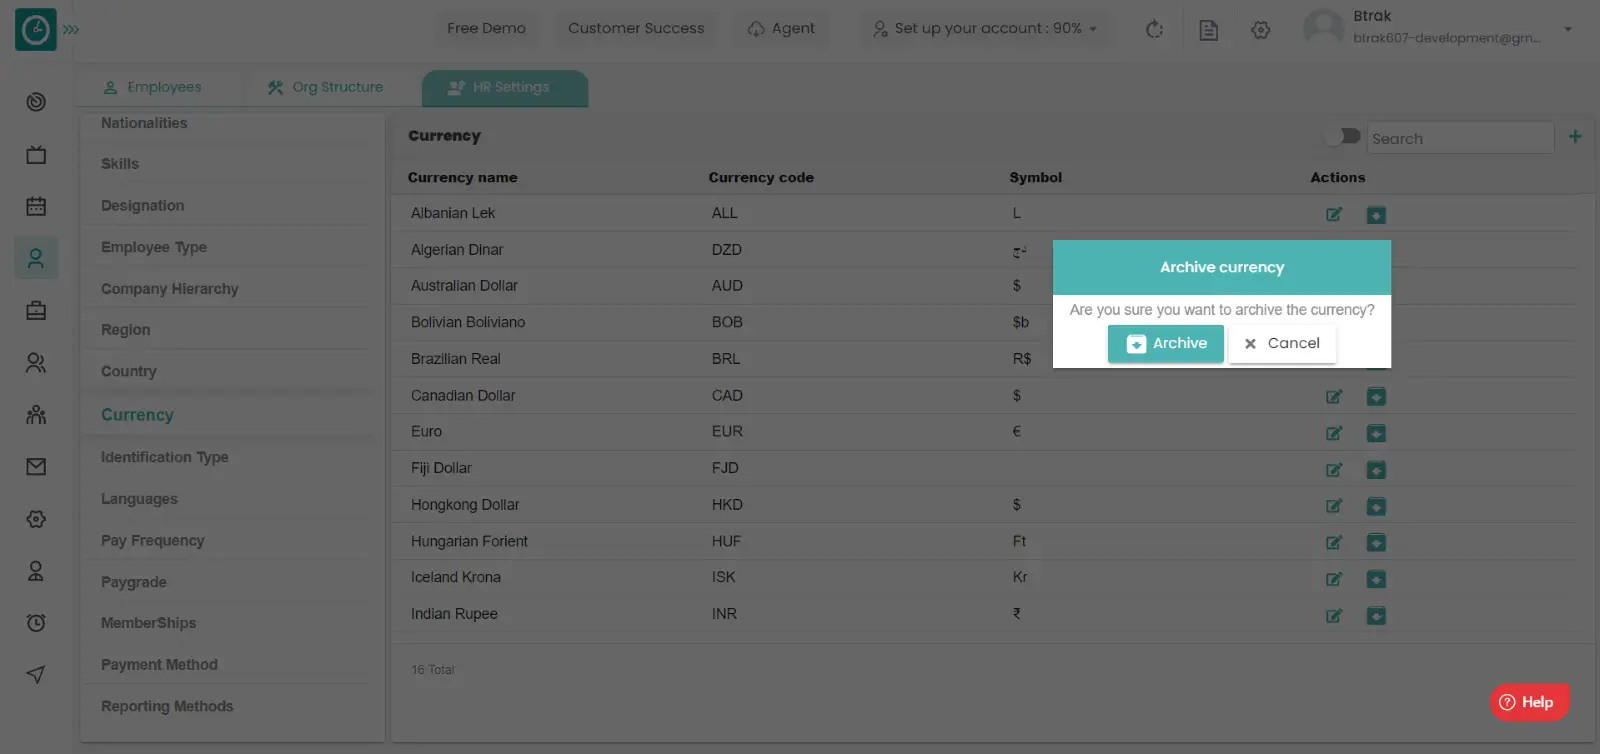
You can access/view the currency of employee in organization.
Navigation: Goto HR => HR Tab => HR settings
If the user is having Super Admin
Permissions, then he can be able to access/view currency in organization.
This permission can be configured by following the steps: -
View My Detailed Profile / View My Subordinate Profile / Edit My Subordinate Profile / Manage HR settings,
then select the roles for what you must give the permissions to configure and check them.View My Detailed Profile / View My Subordinate Profile / Edit My Subordinate Profile / Manage HR settings
for the defined roles.
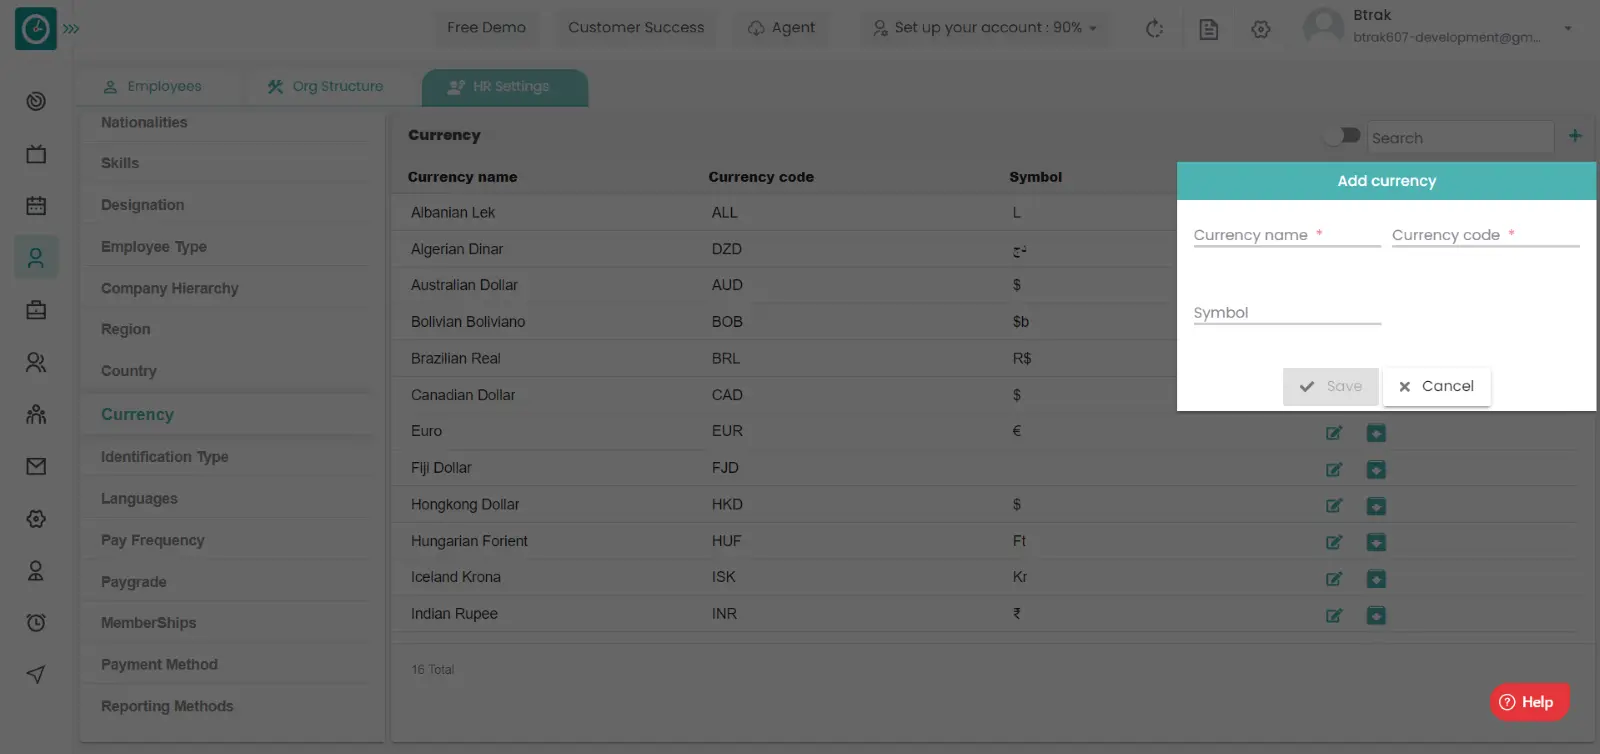
Add new currency :-
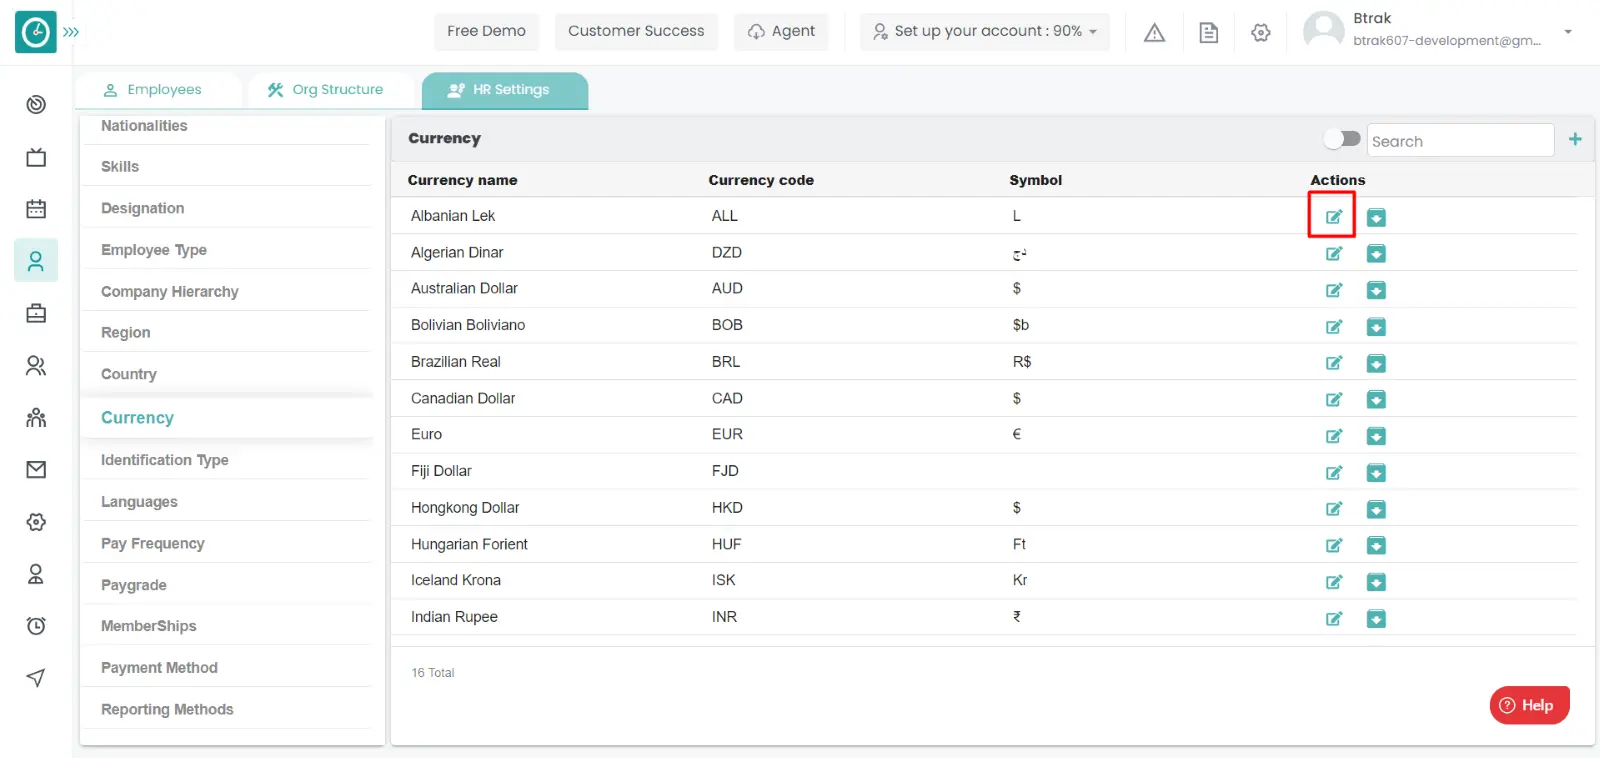
Edit currency :-


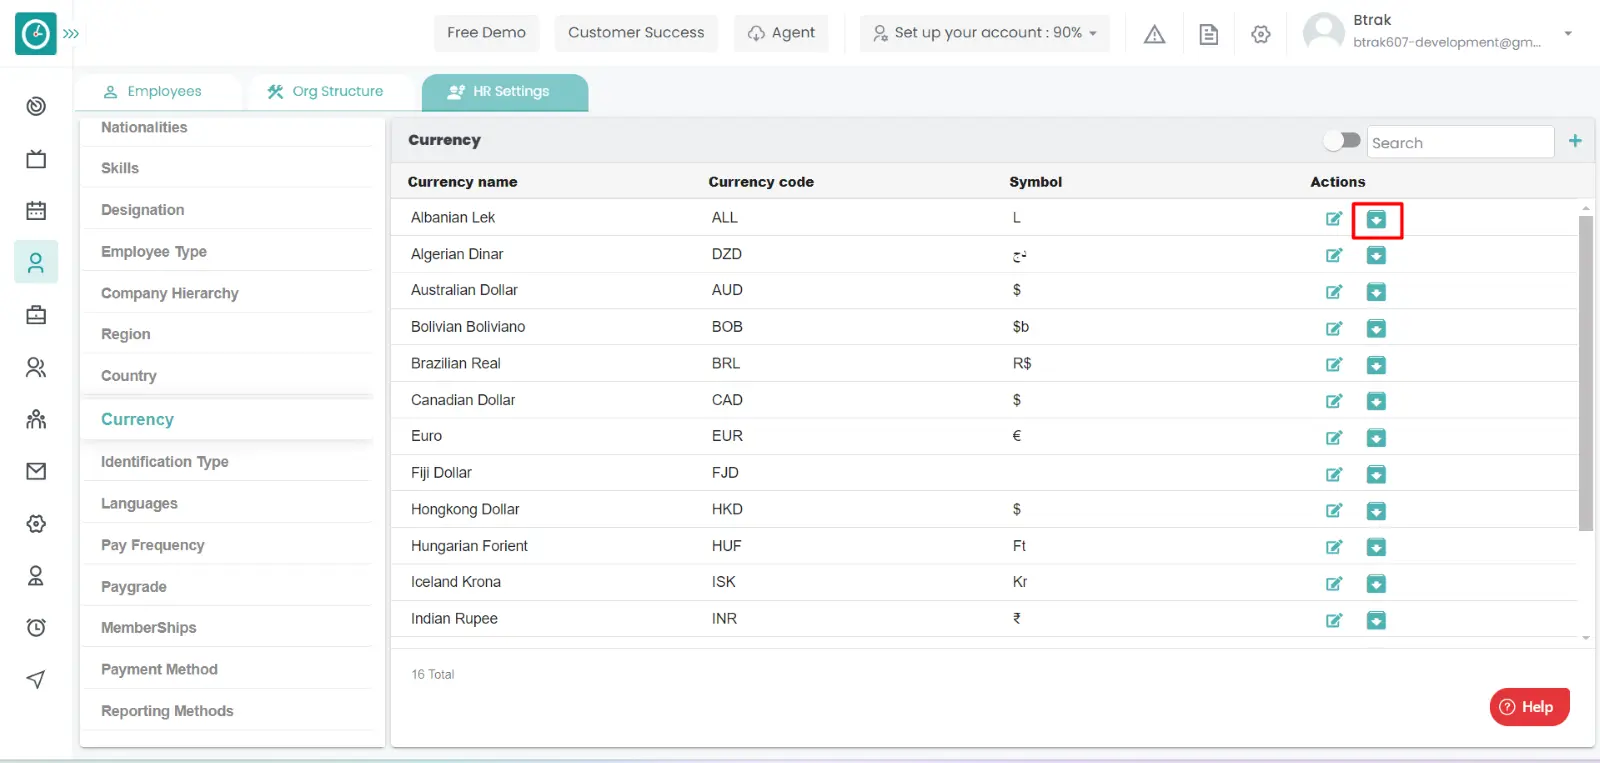
Archive currency :-
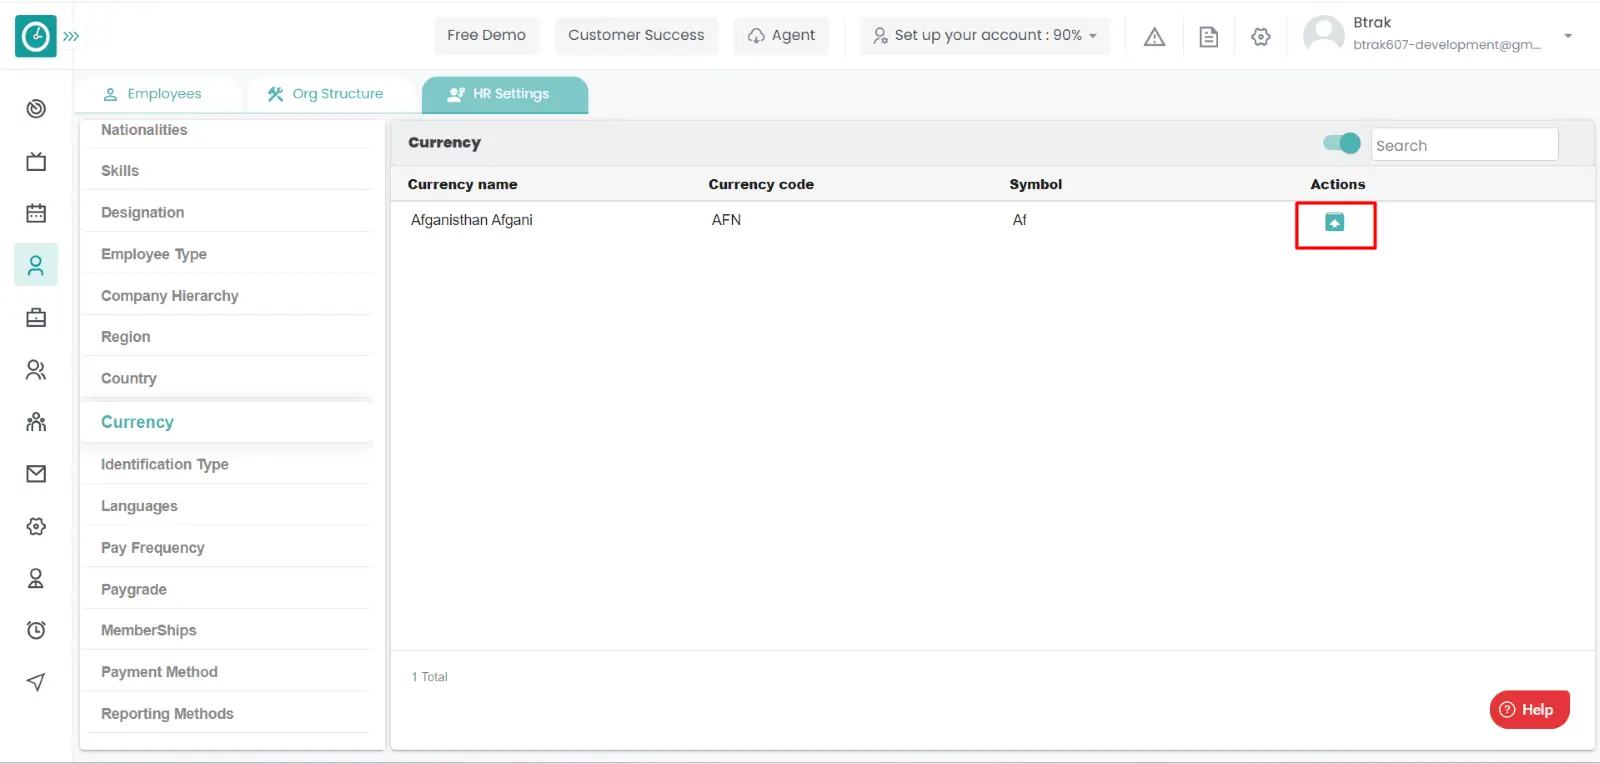
View Archived currency :-
Unarchive currency :-
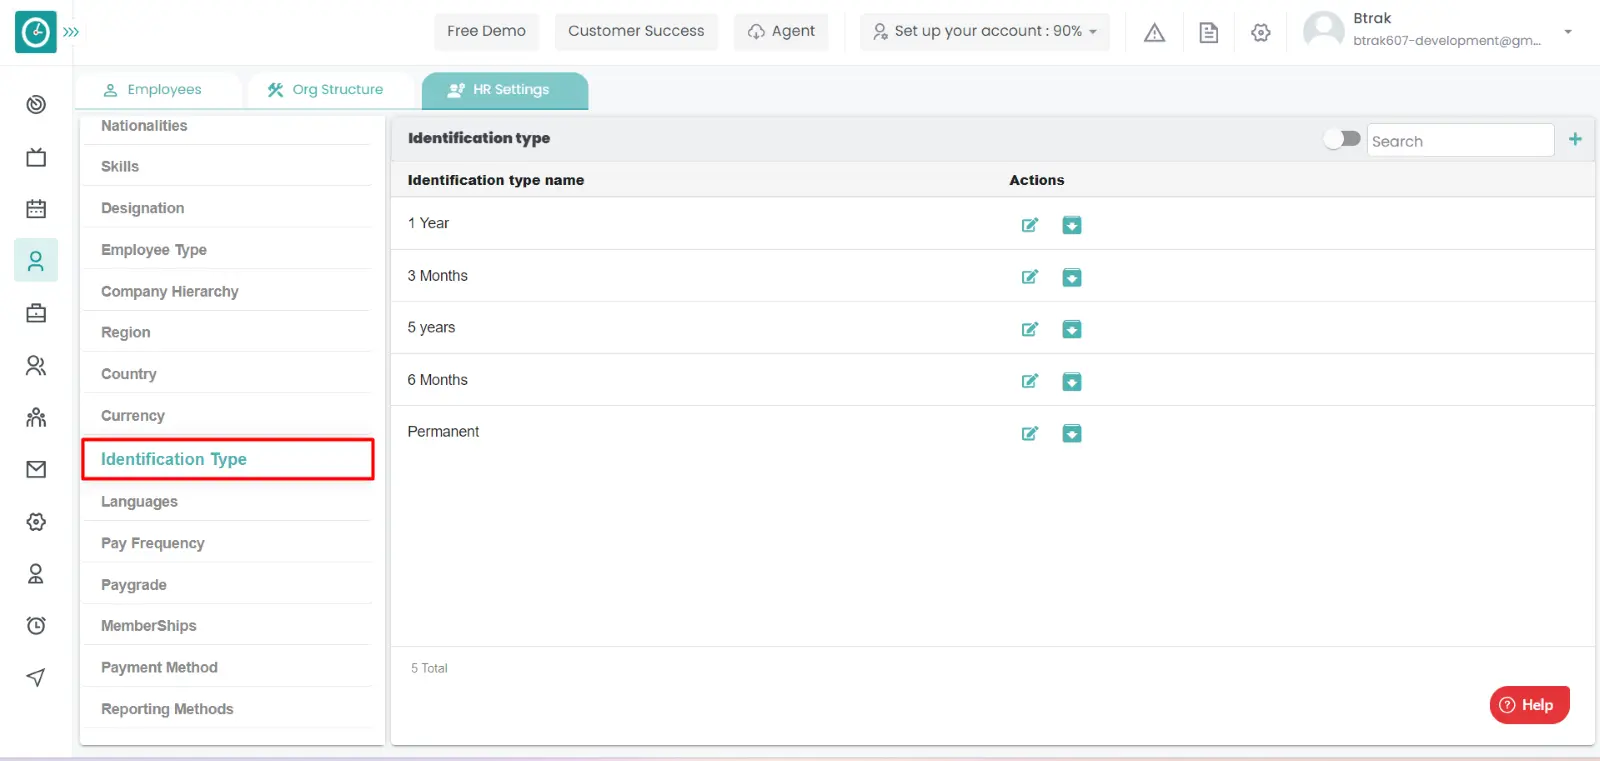
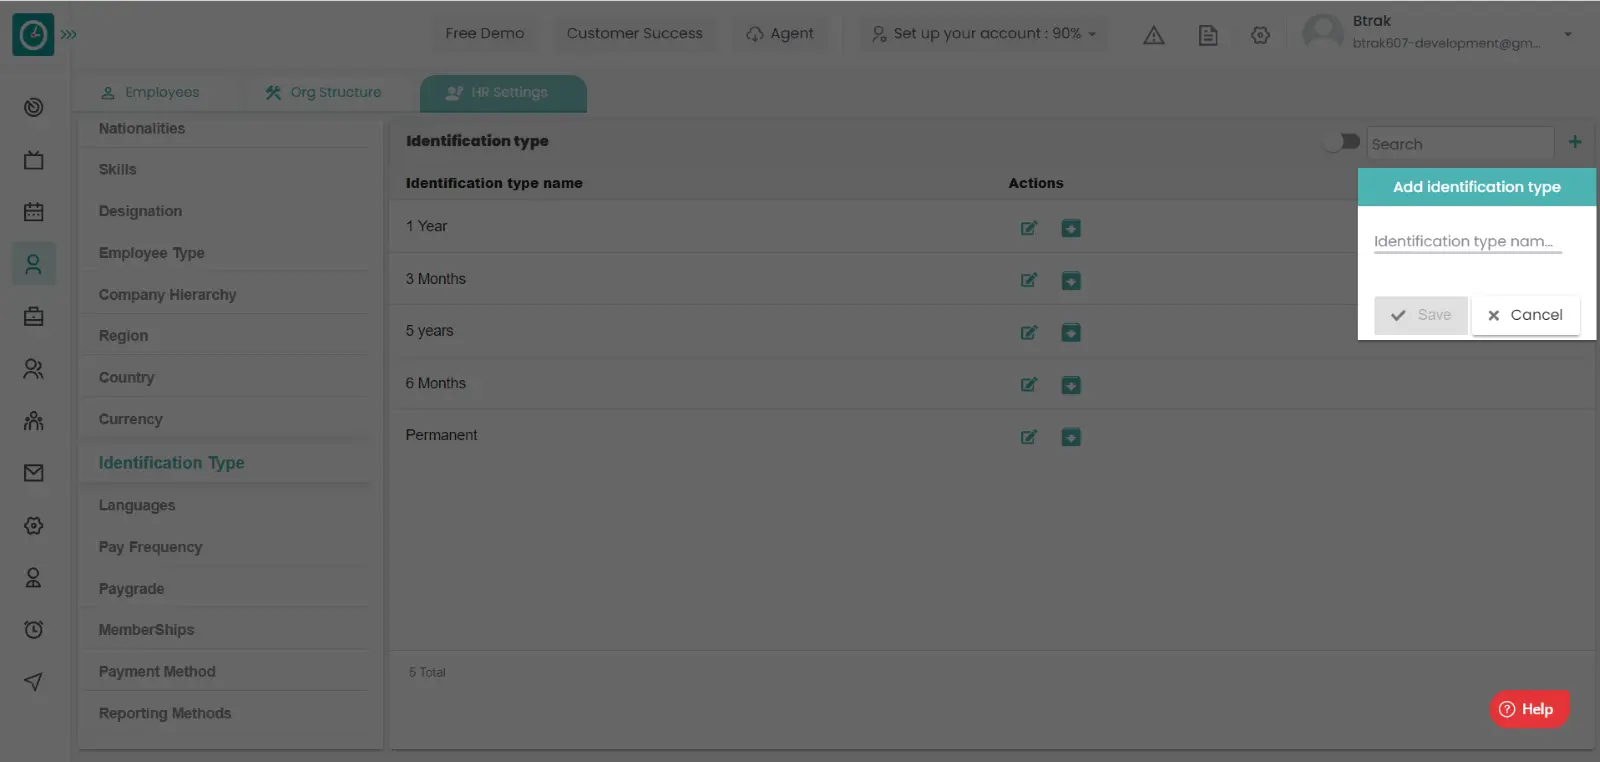
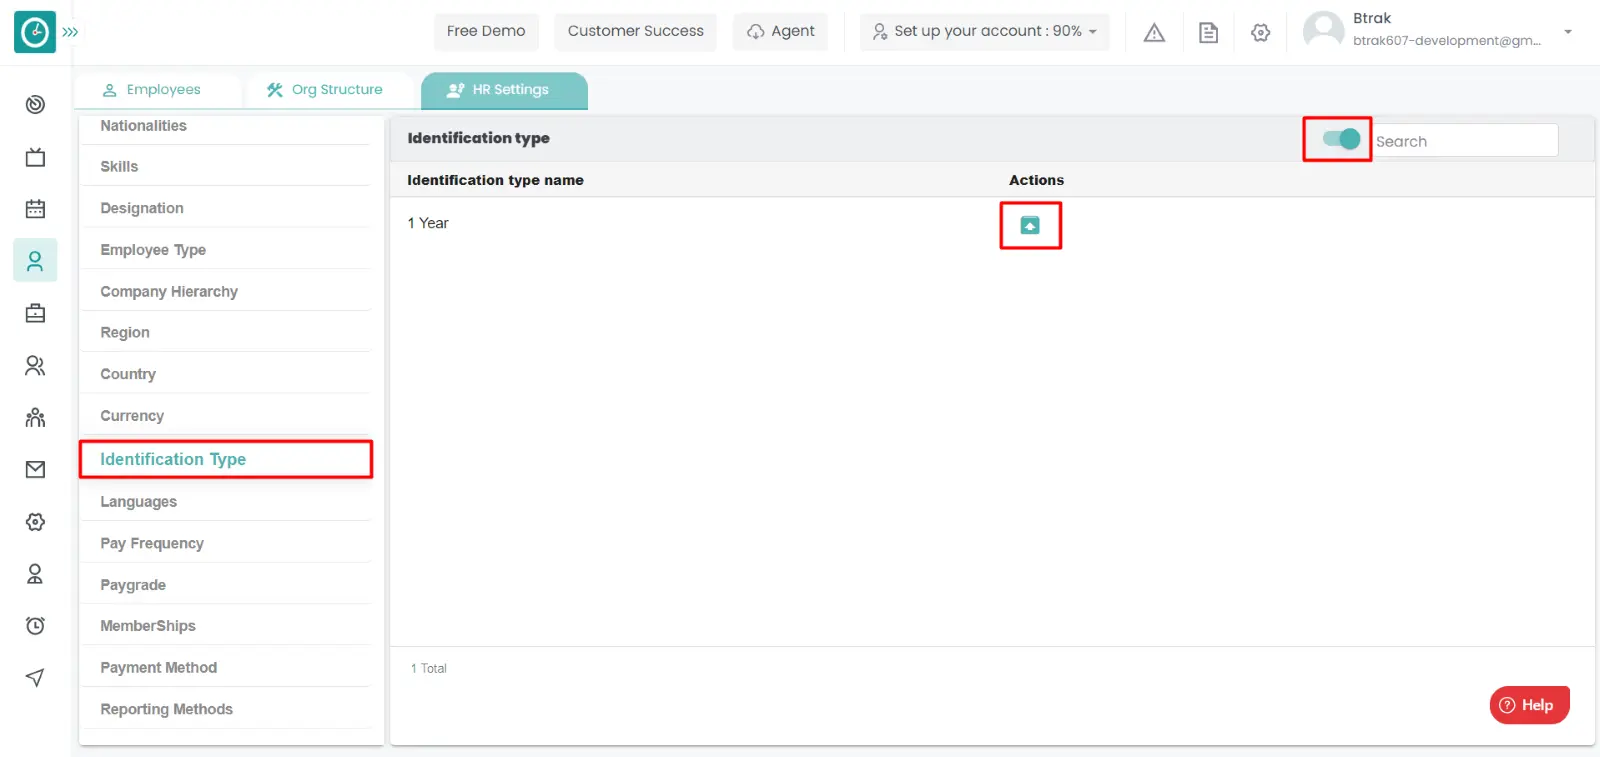
You can access/view the identification type of employee in organization.
Navigation: Goto HR => HR Tab => HR settings
If the user is having Super Admin
Permissions, then he can be able to access/view identification type in
organization.
This permission can be configured by following the steps: -
View My Detailed Profile / View My Subordinate Profile / Manage HR settings,
then select the roles for what you must give the permissions to configure and check them.View My Detailed Profile / View My Subordinate Profile / Manage HR settings
for the defined roles.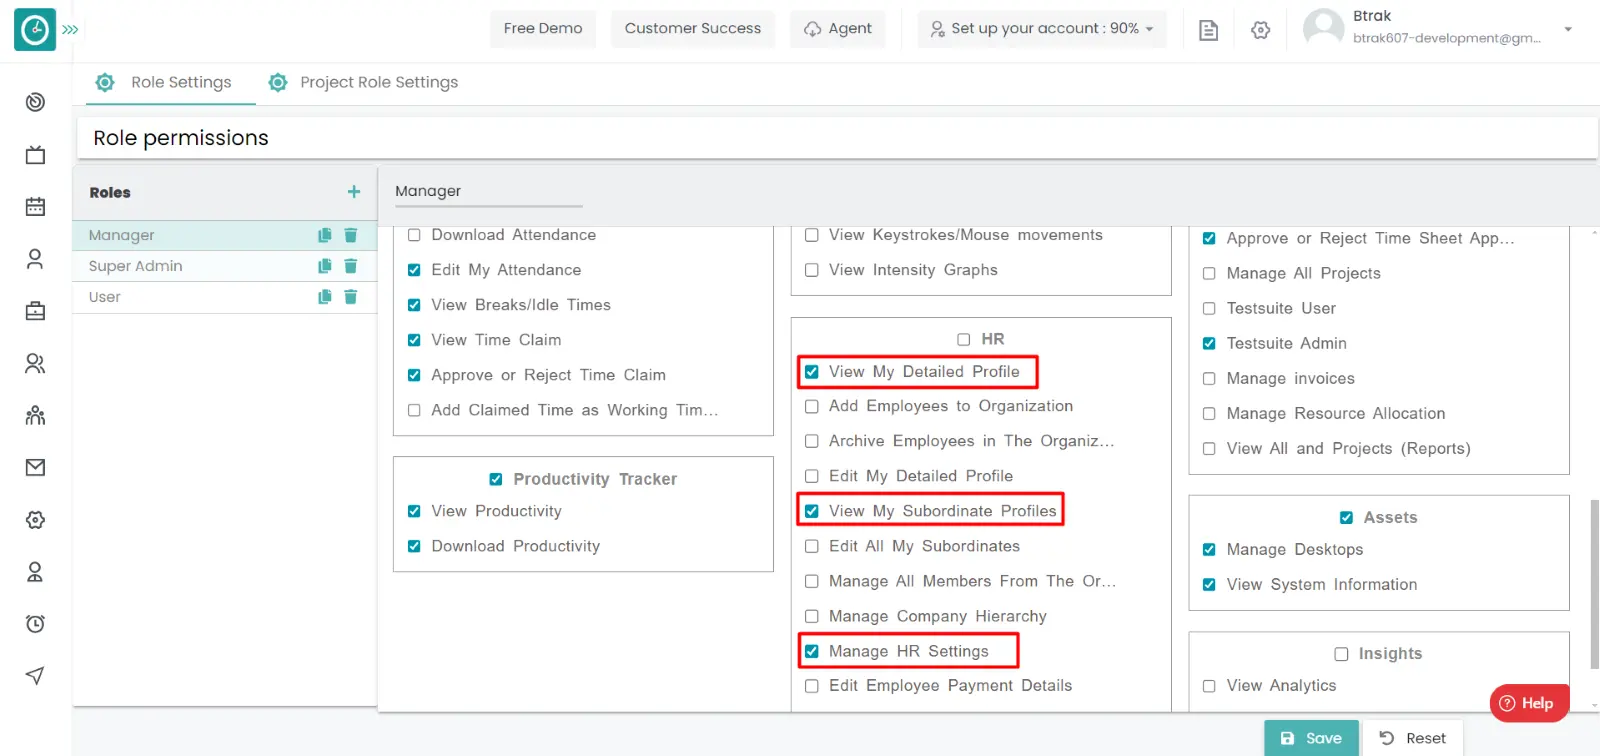
Add new Identification Type :-

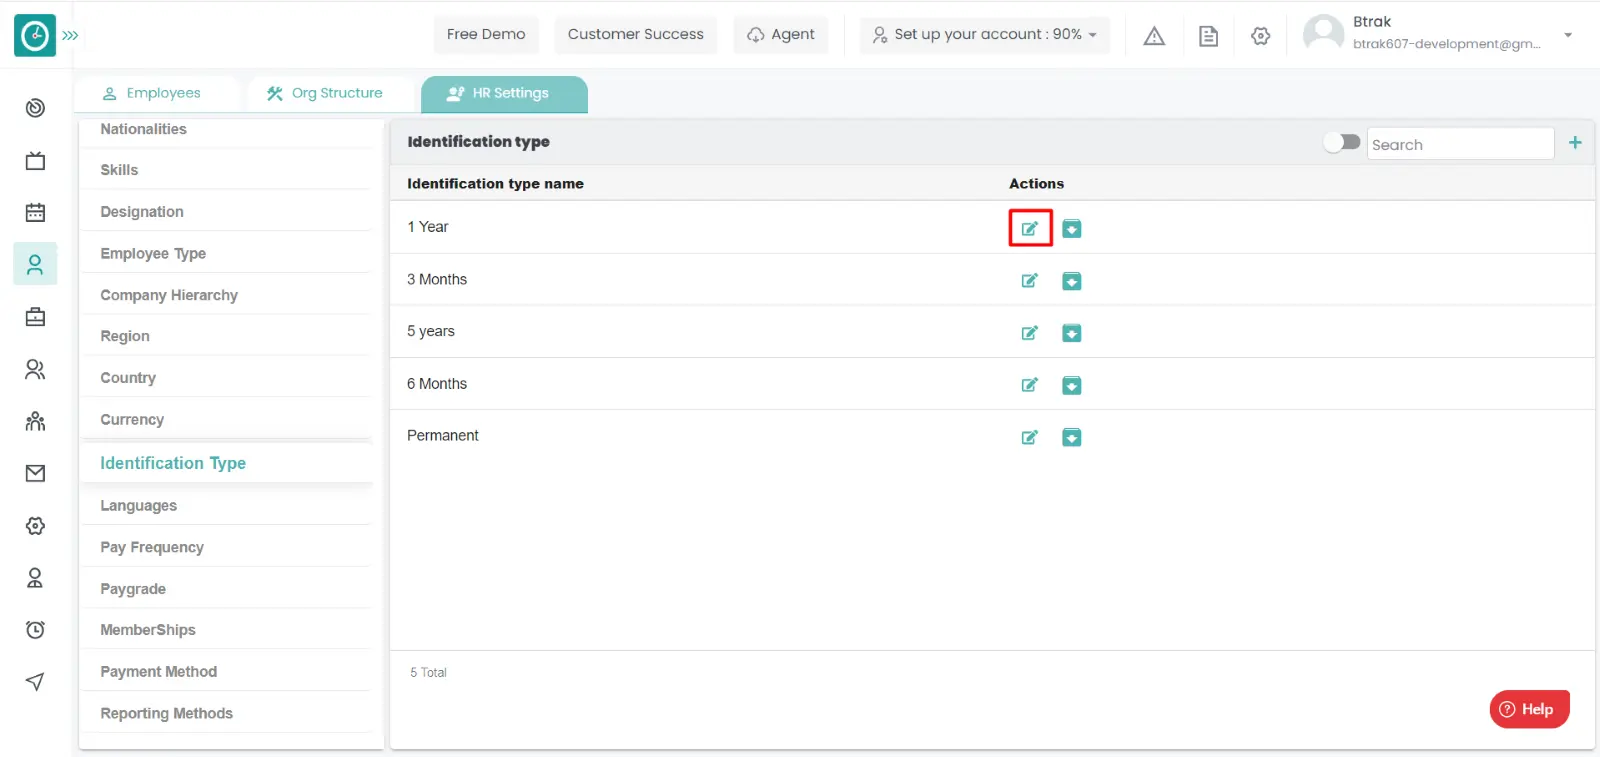
Edit identification type :-

Archive identification type :-
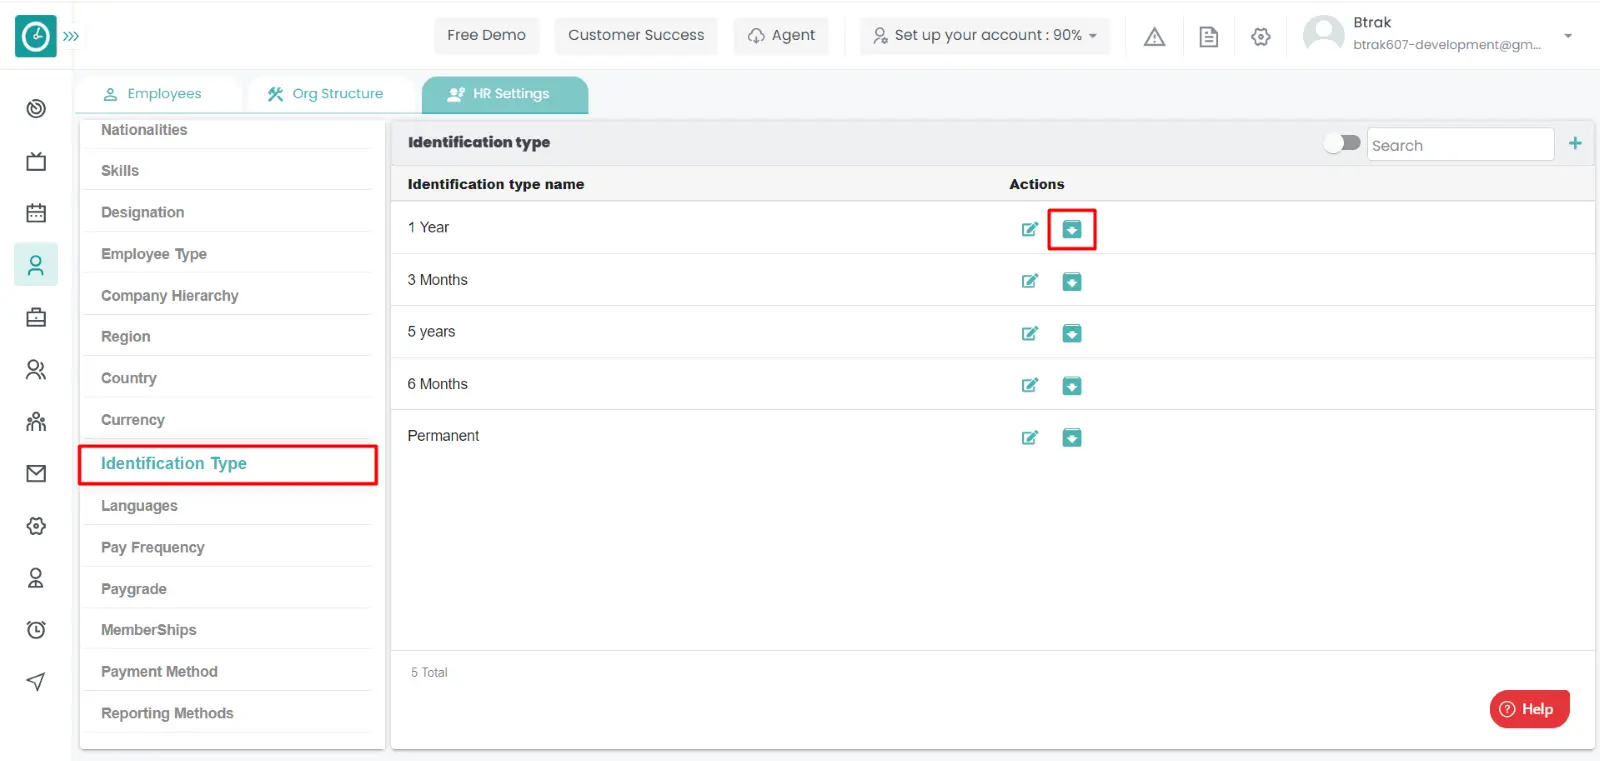

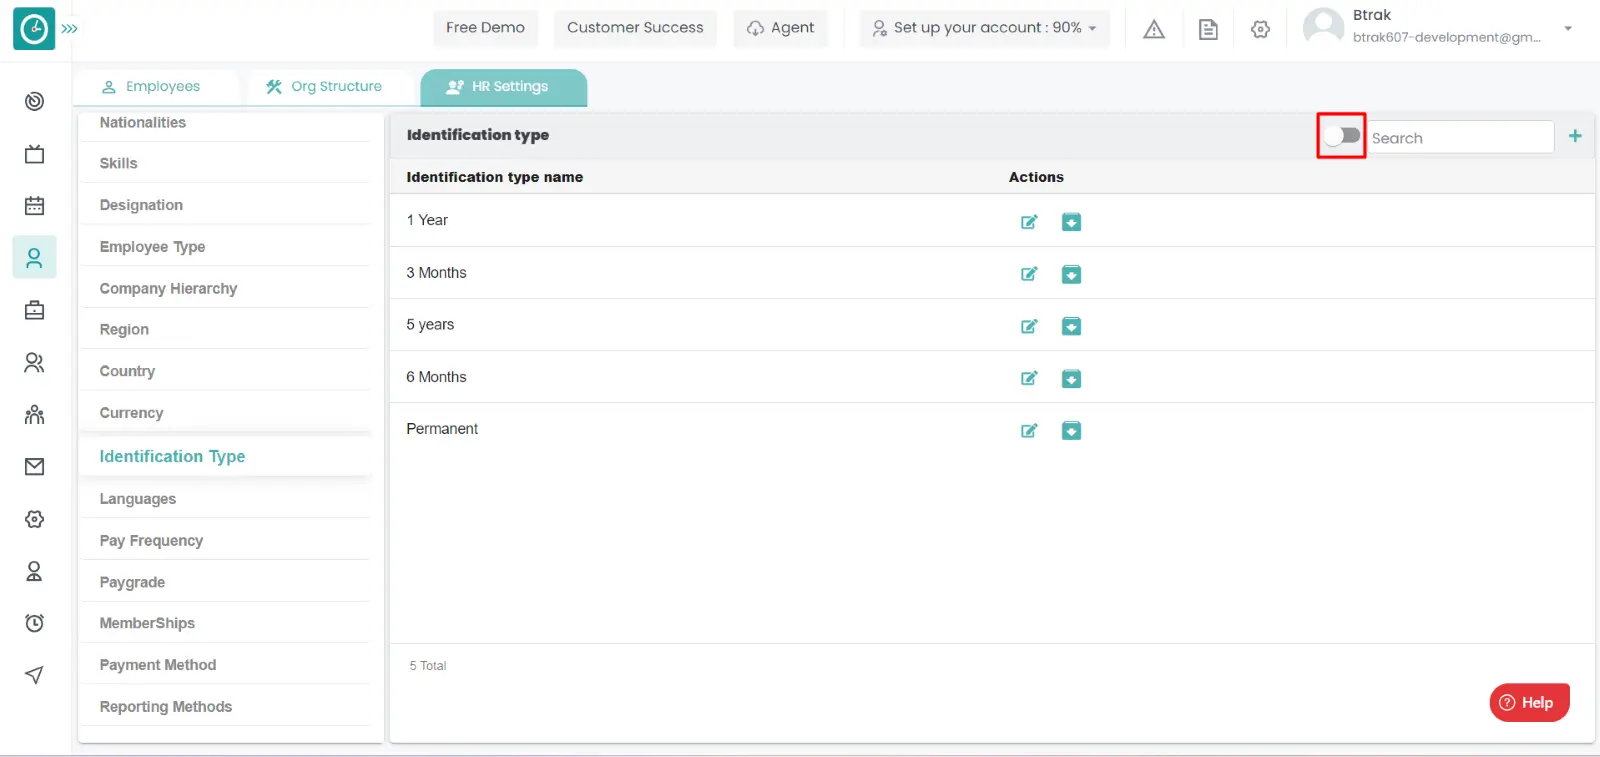
View Archived identification type :-
Unarchive identification type :-
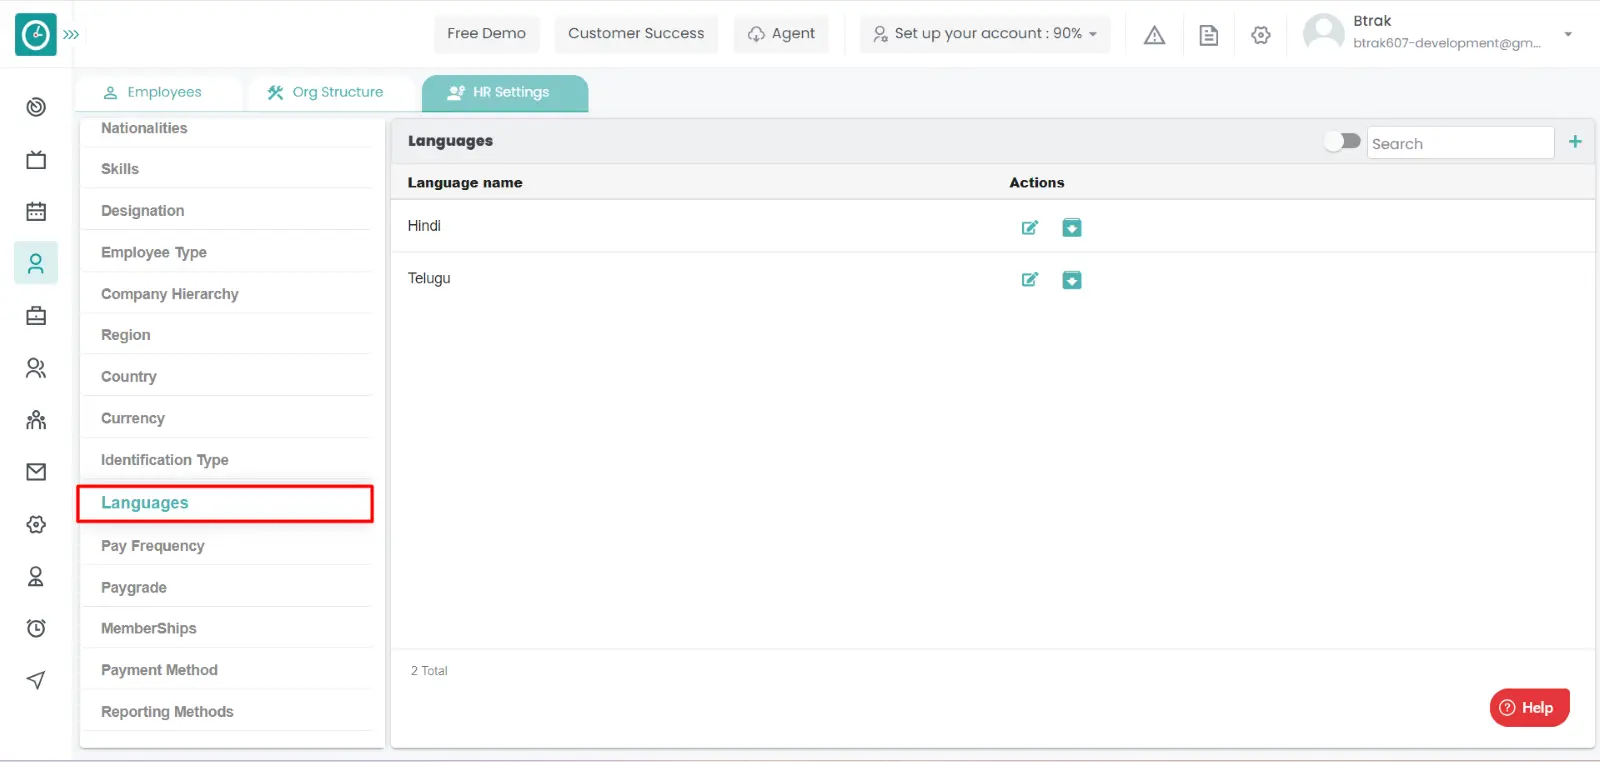
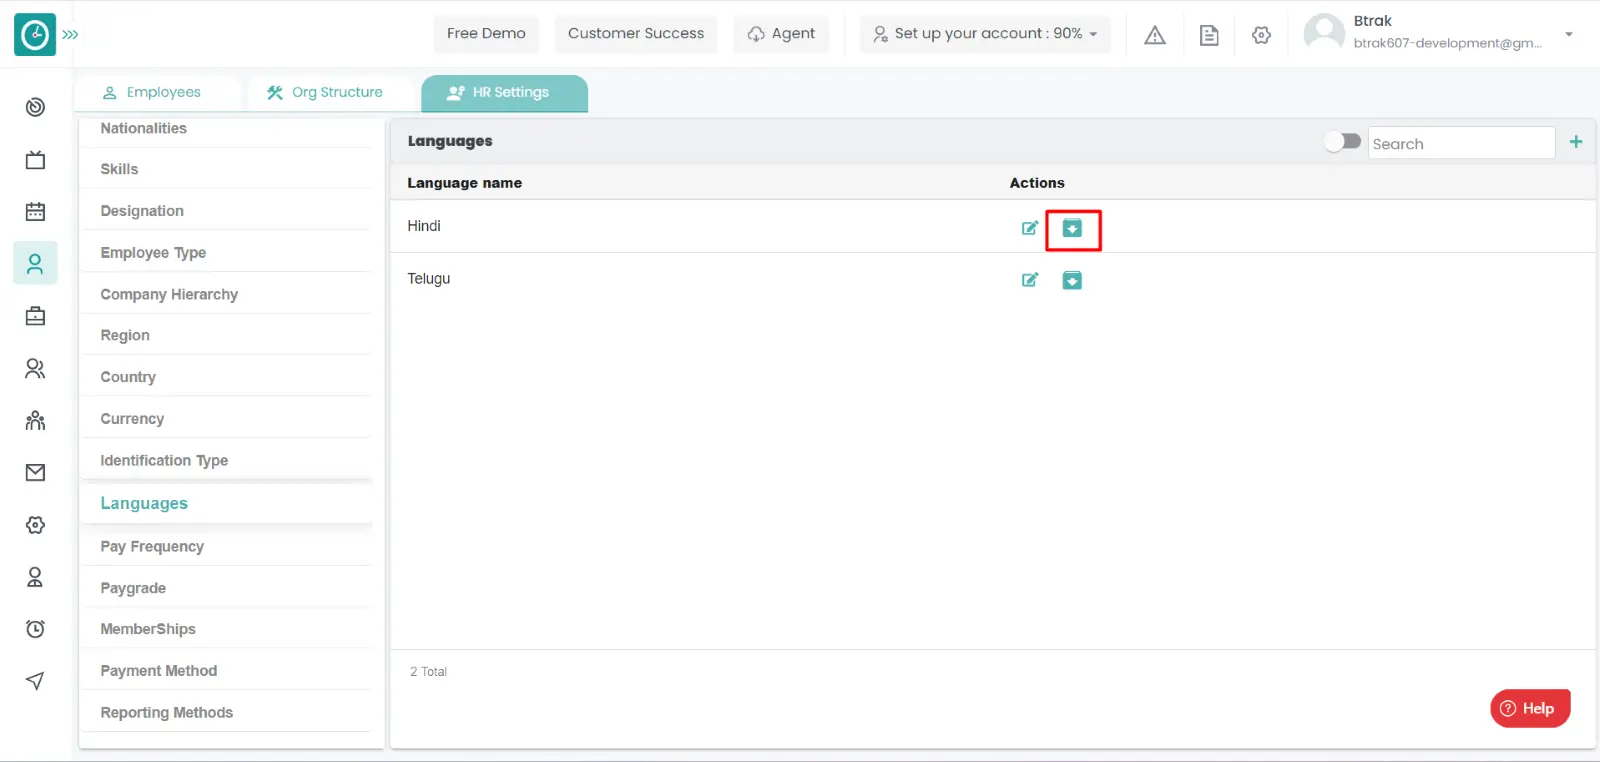
You can access/view the language of employee in organization.
Navigation: Goto HR => HR Tab => HR settings
If the user is having Super Admin
Permissions, then he can be able to access/view language in organization.
This permission can be configured by following the steps: -
View My Detailed Profile / View My Subordinate Profile / Edit My Subordinate Profile / Manage HR settings,
then select the roles for what you must give the permissions to configure and check them.View My Detailed Profile / View My Subordinate Profile / Edit My Subordinate Profile / Manage HR settings
for the defined roles.
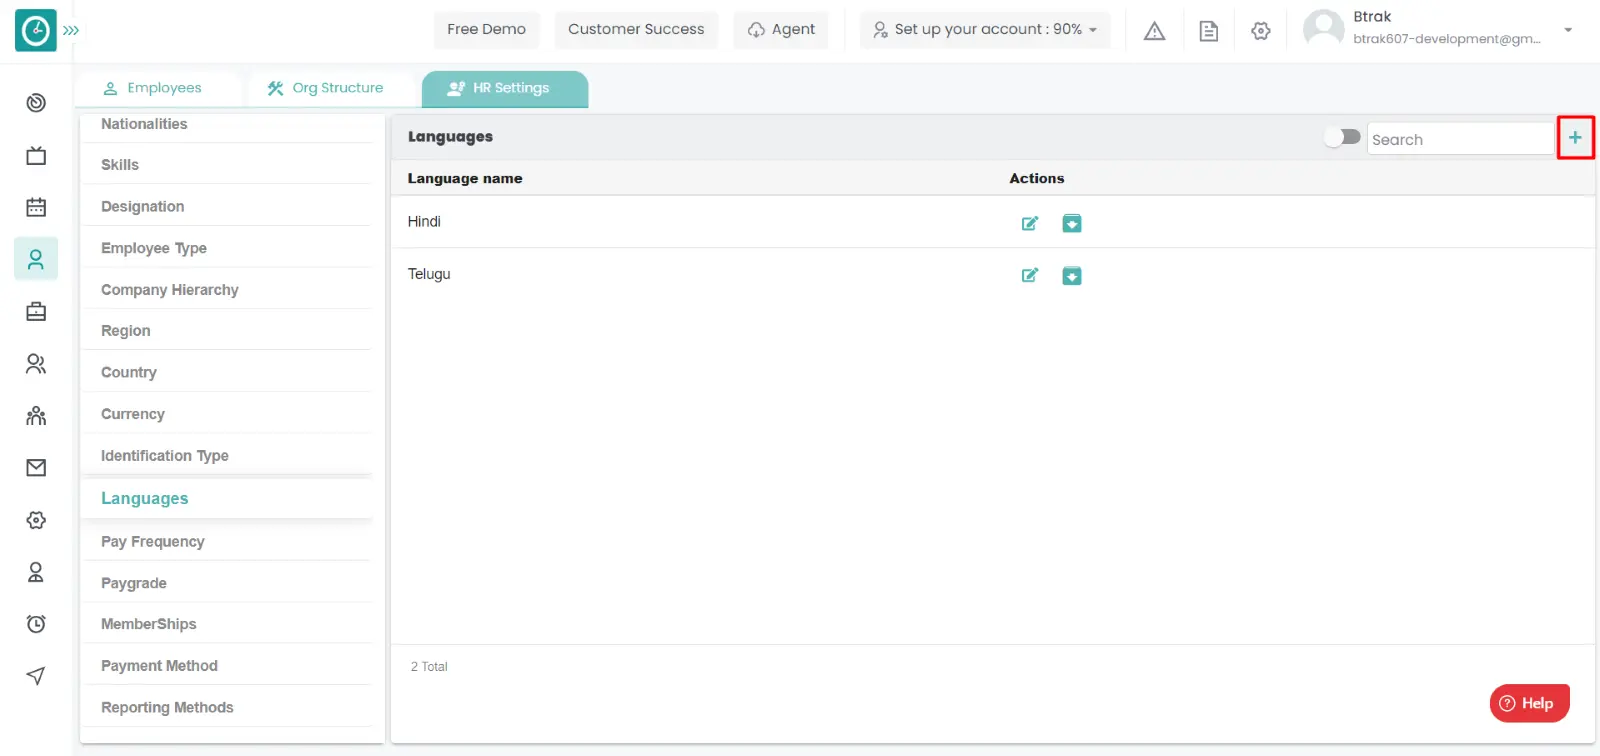
Add new language :-

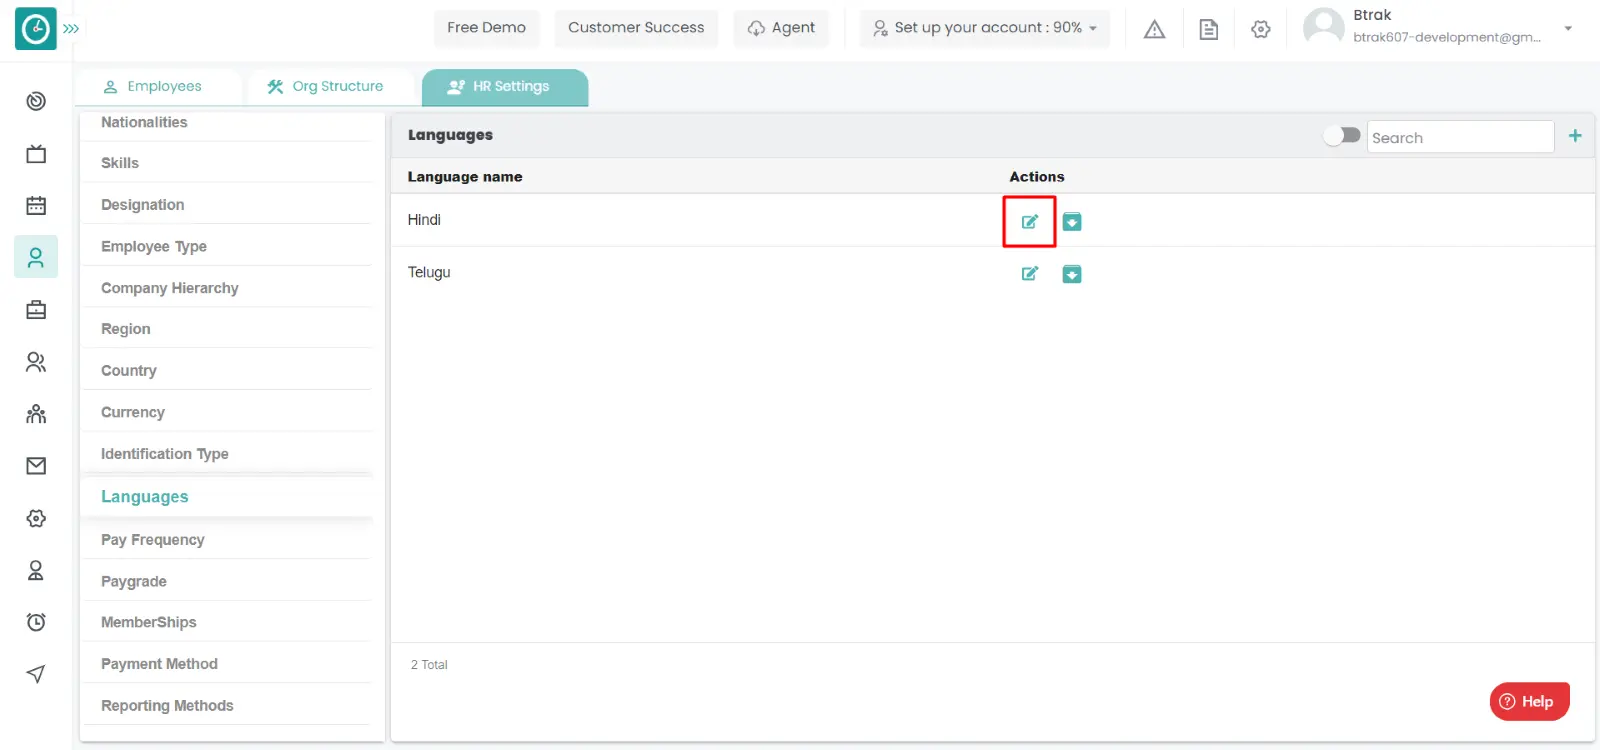
Edit language :-

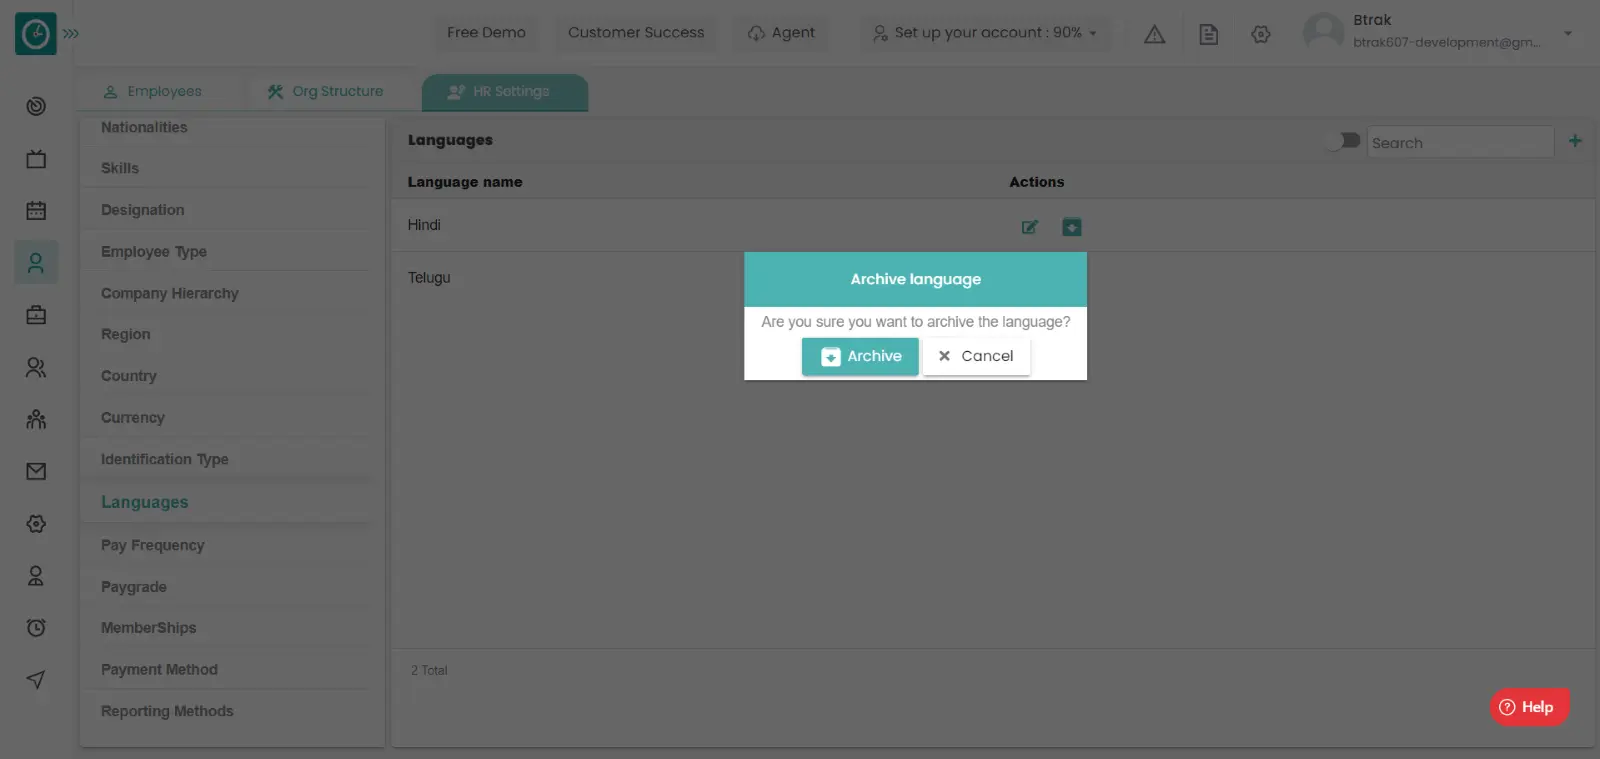
Archive language :-
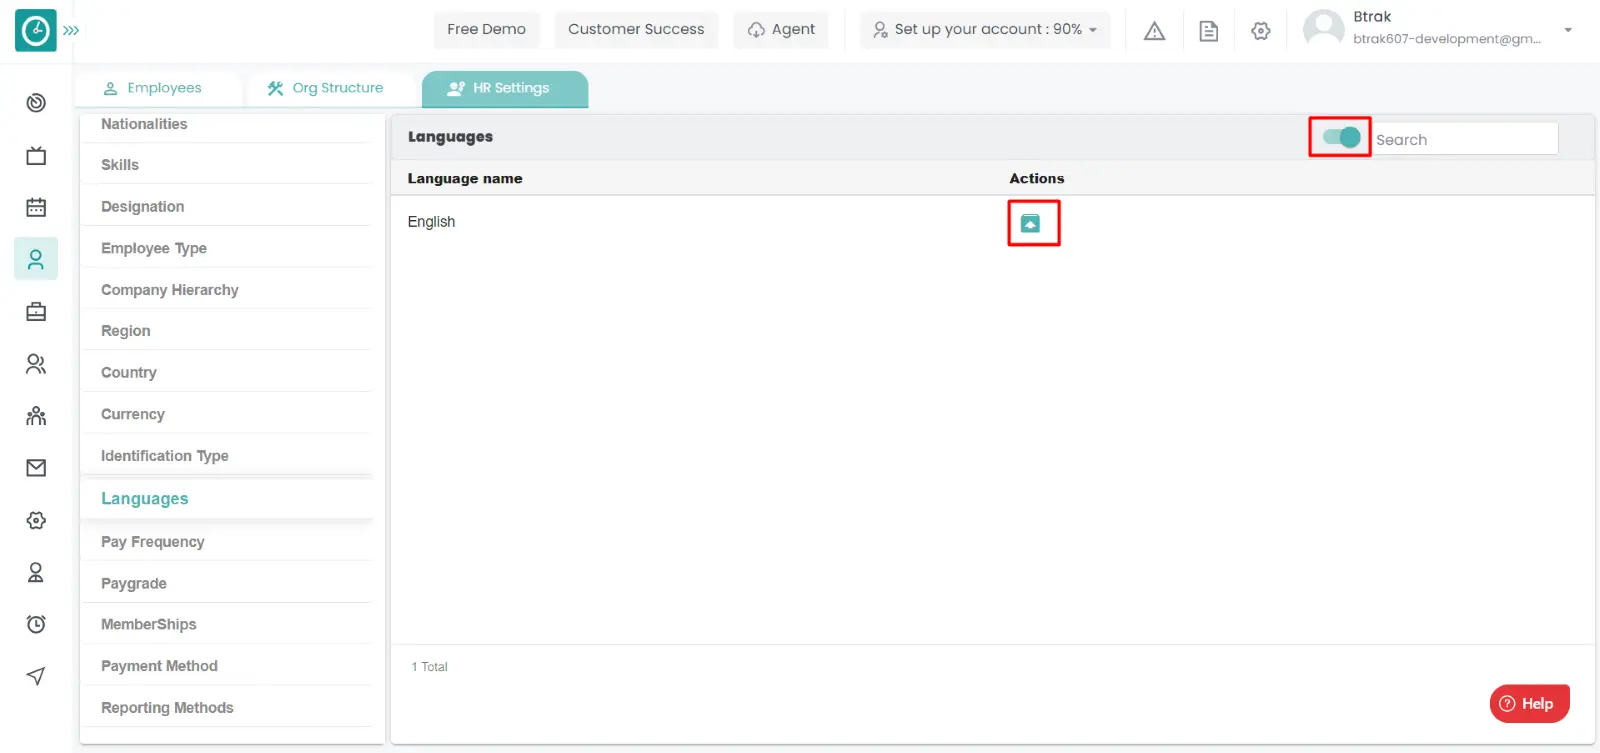
View Archived language :-

Unarchive language :-
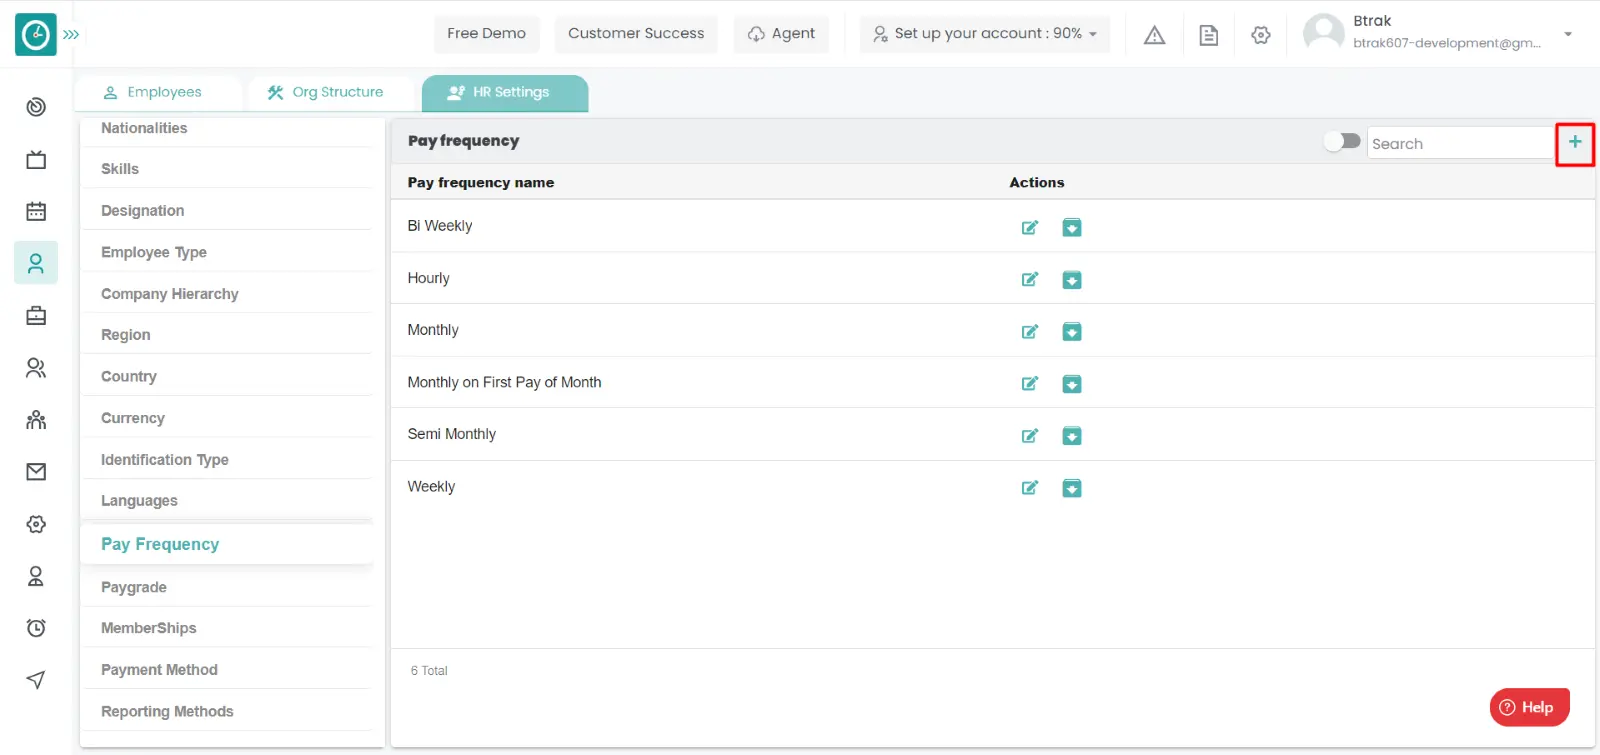
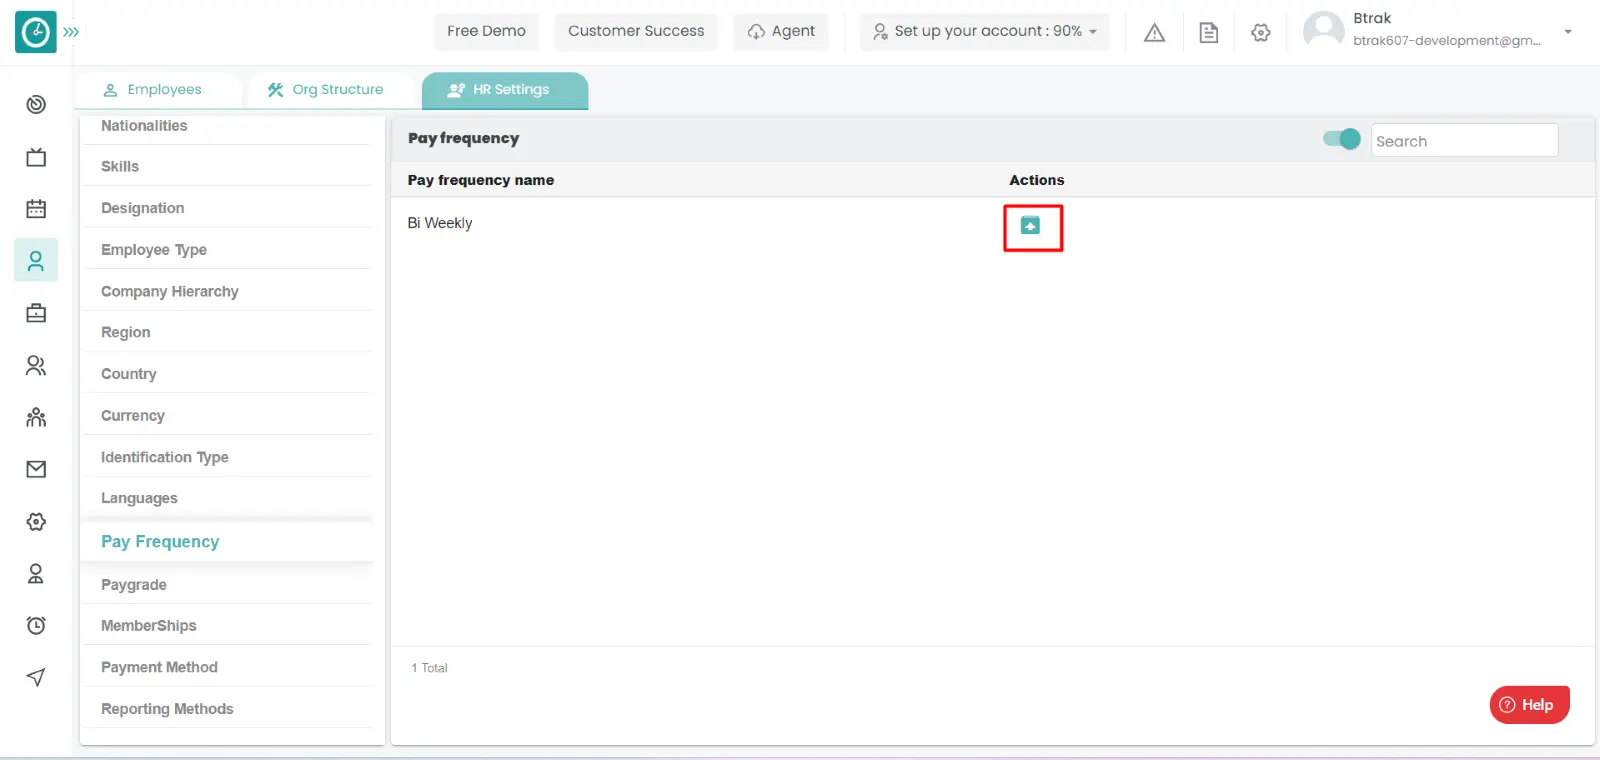
You can access/view the pay frequency of employee in organization.
Navigation: Goto HR => HR Tab => HR settings
If the user is having Super Admin
Permissions, then he can be able to access/view pay frequency in organization.
This permission can be configured by following the steps: -
View My Detailed Profile / View My Subordinate Profile / Edit My Subordinate Profile / Manage HR settings,
then select the roles for what you must give the permissions to configure and check them.View My Detailed Profile / View My Subordinate Profile / Edit My Subordinate Profile / Manage HR settings
for the defined roles.
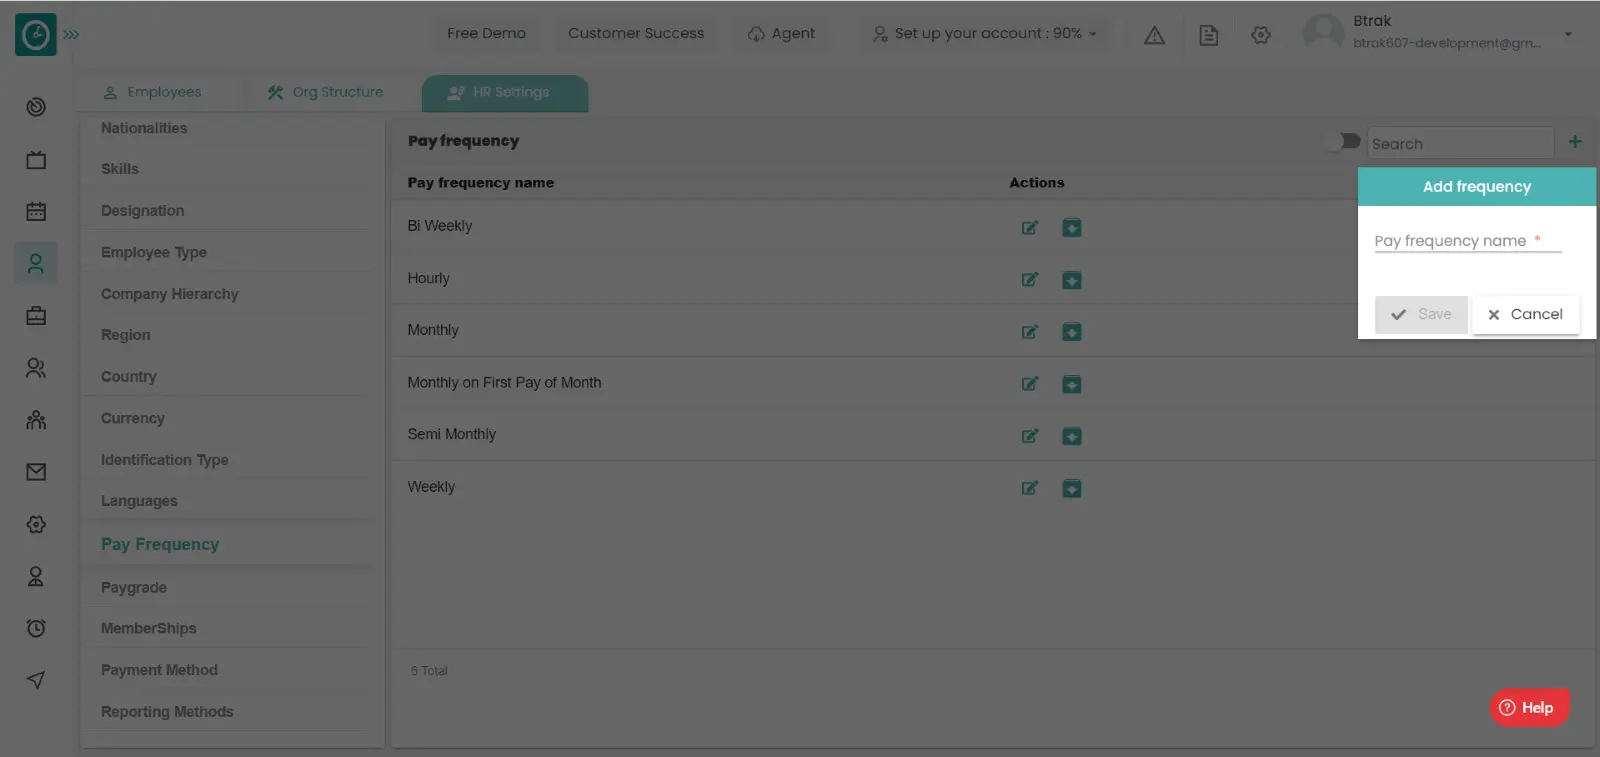
Add new pay frequency :-

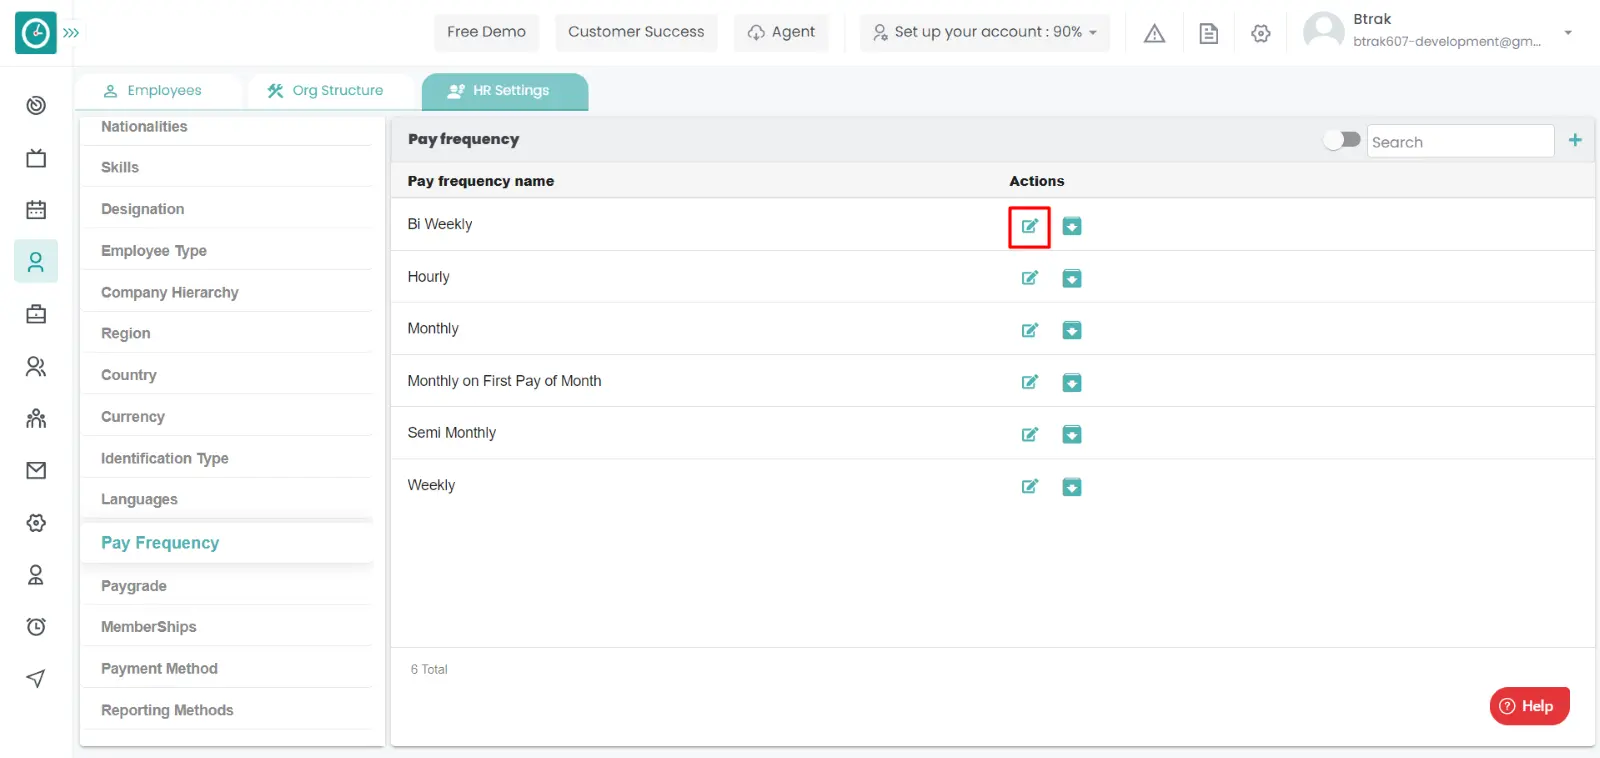
Edit frequency :-

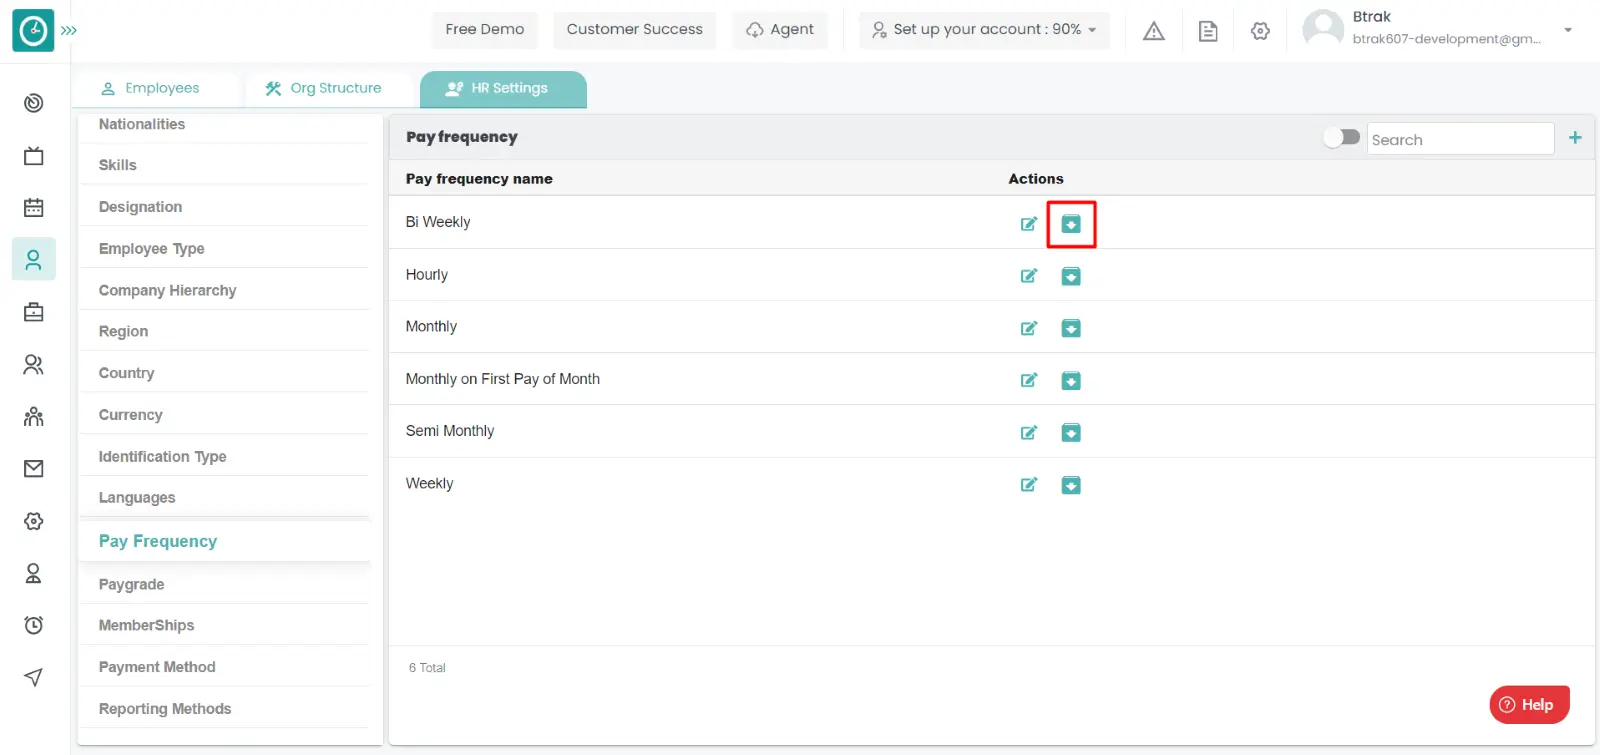
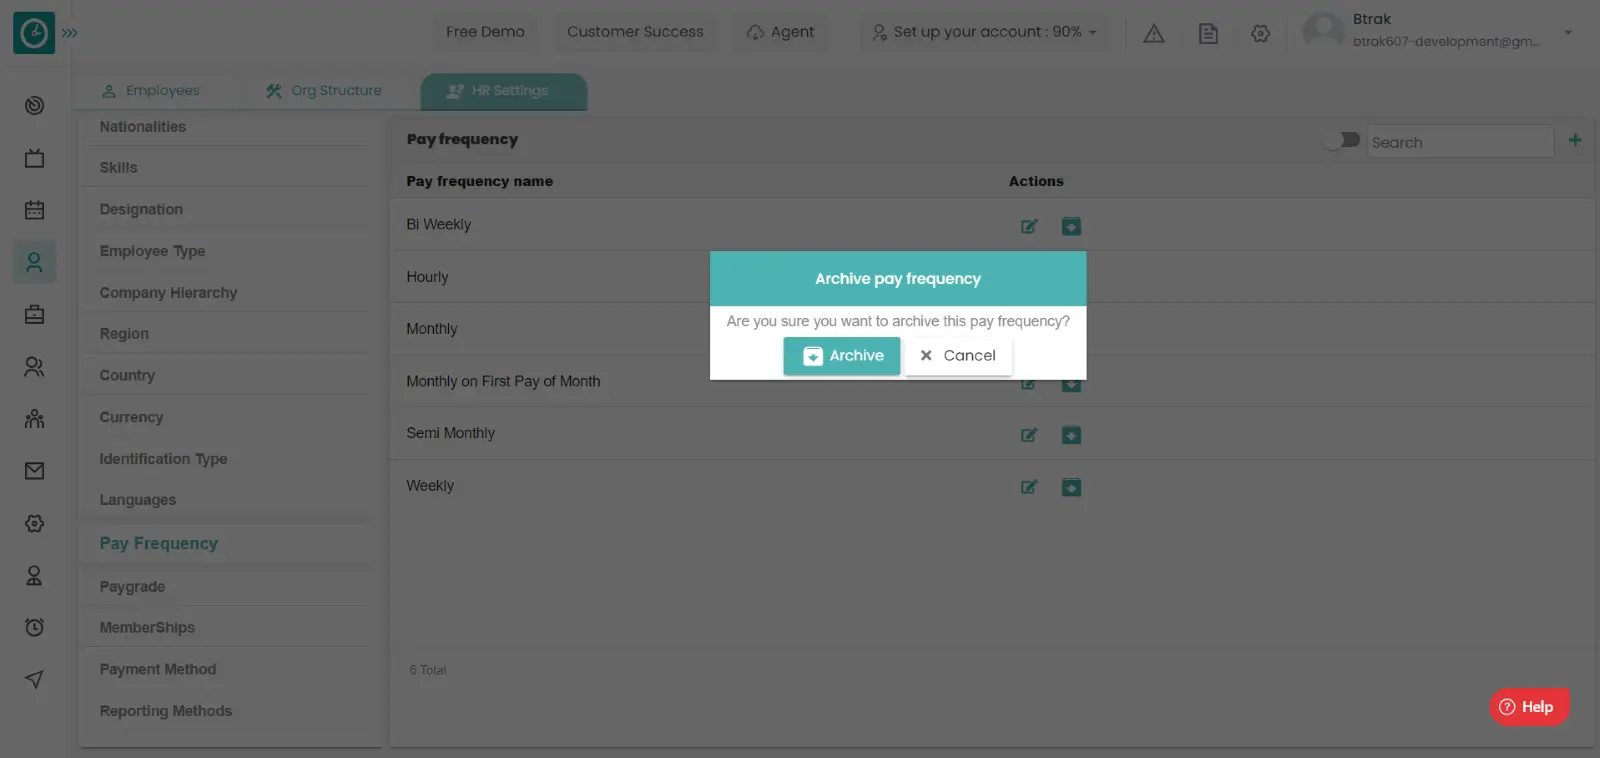
Archive frequency :-
View Archived frequency :-
Unarchive frequency :-
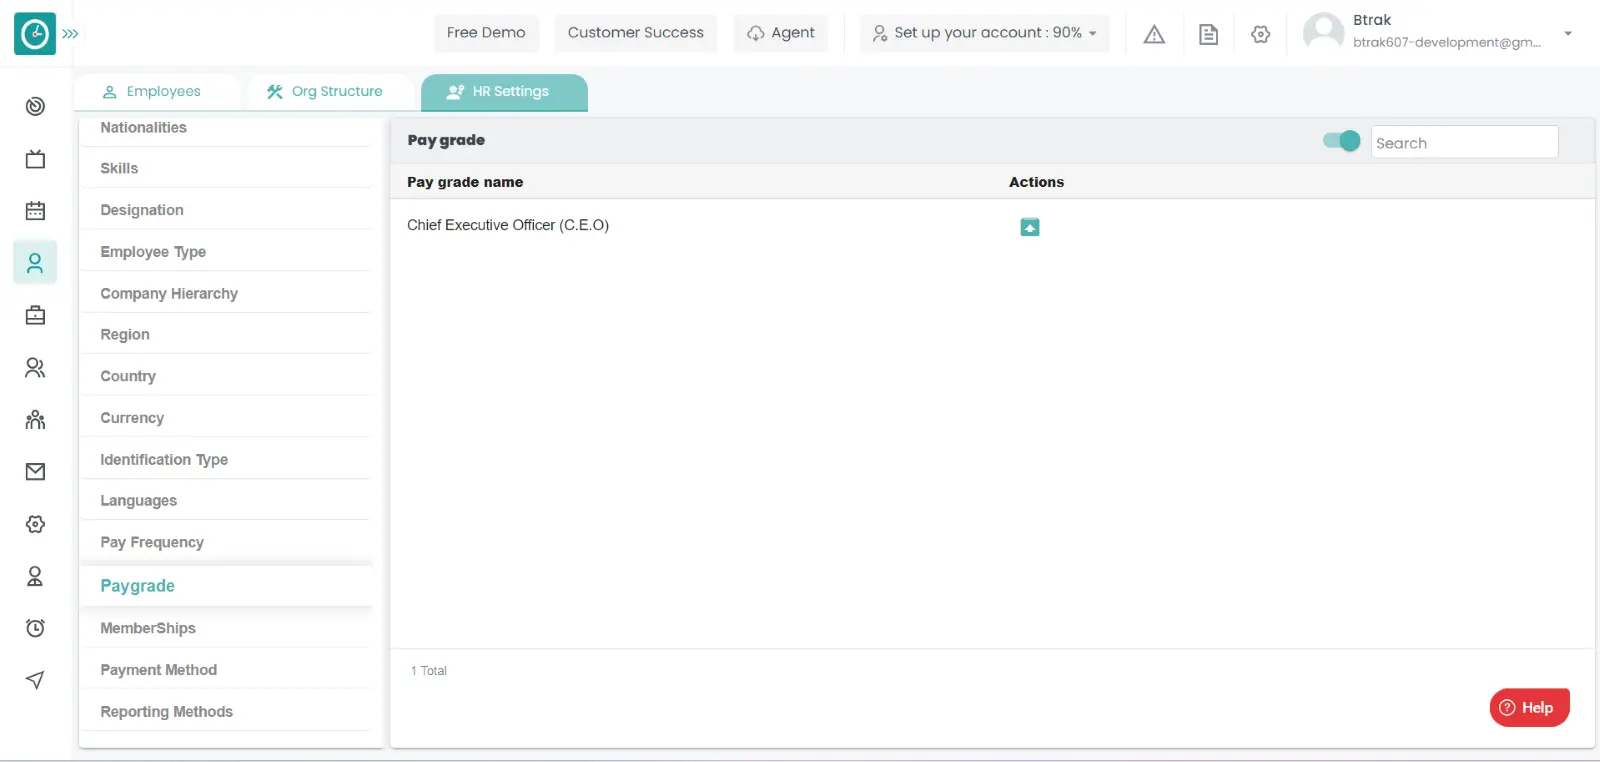
You can access/view the pay grade of employee in organization.
Navigation: Goto HR => HR Tab => HR settings
If the user is having Super Admin
Permissions, then he can be able to access/view pay grade in organization.
This permission can be configured by following the steps: -
View My Detailed Profile / View My Subordinate Profile / Edit My Subordinate Profile / Manage HR settings,
then select the roles for what you must give the permissions to configure and check them.View My Detailed Profile / View My Subordinate Profile / Edit My Subordinate Profile / Manage HR settings
for the defined roles.
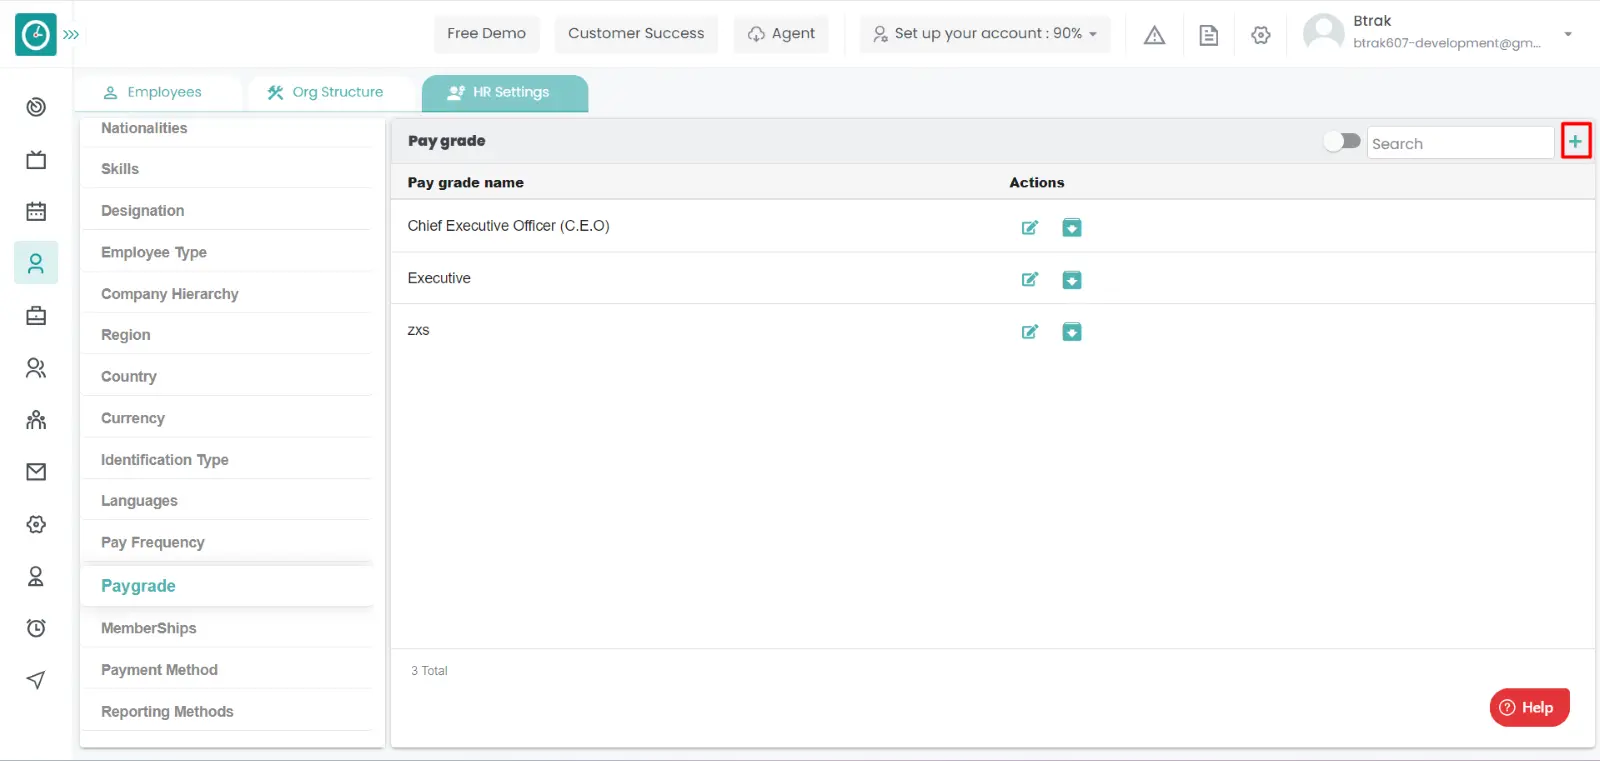
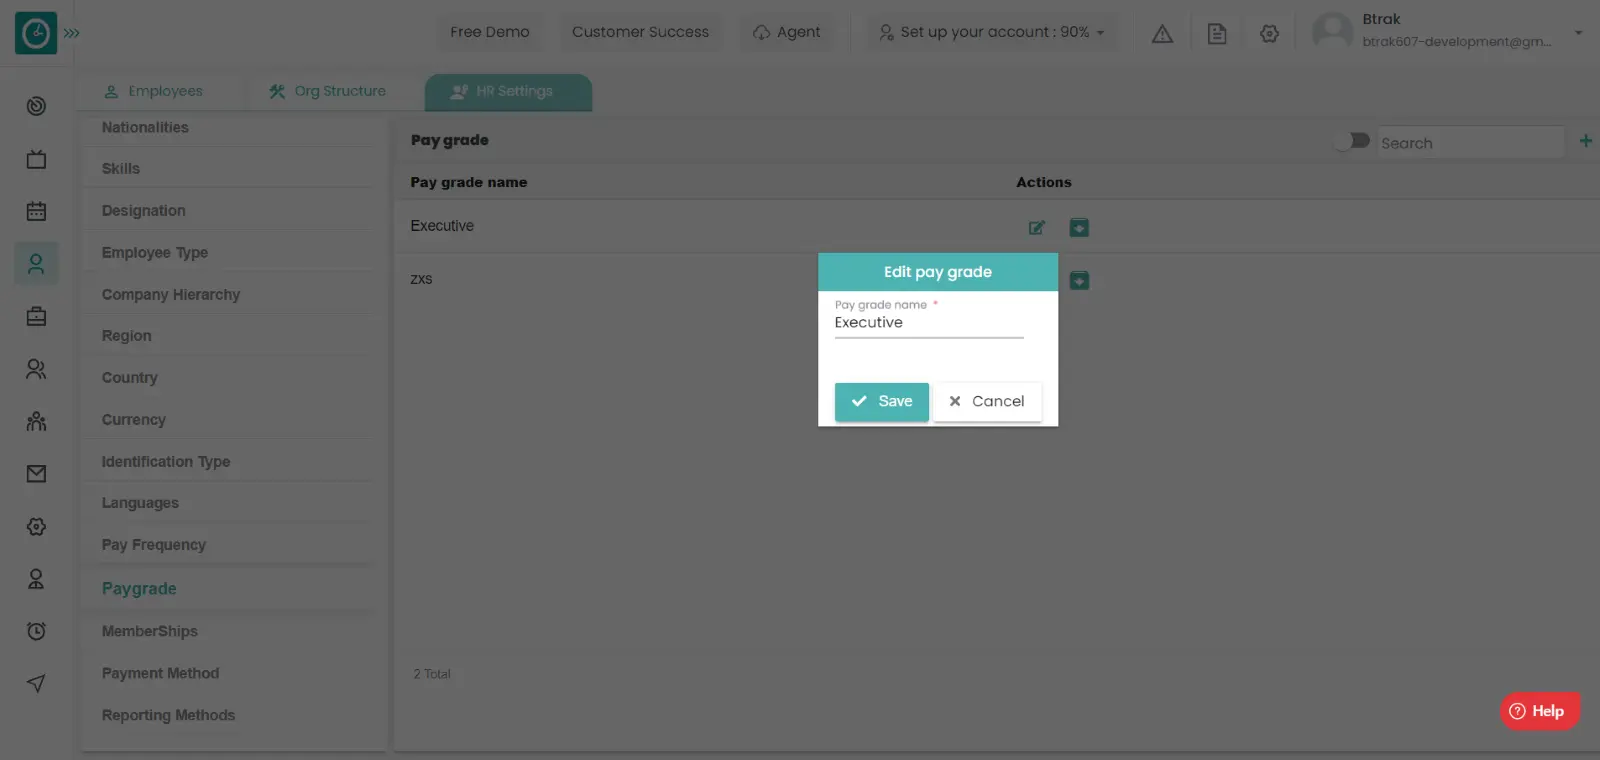
Add new pay grade :-
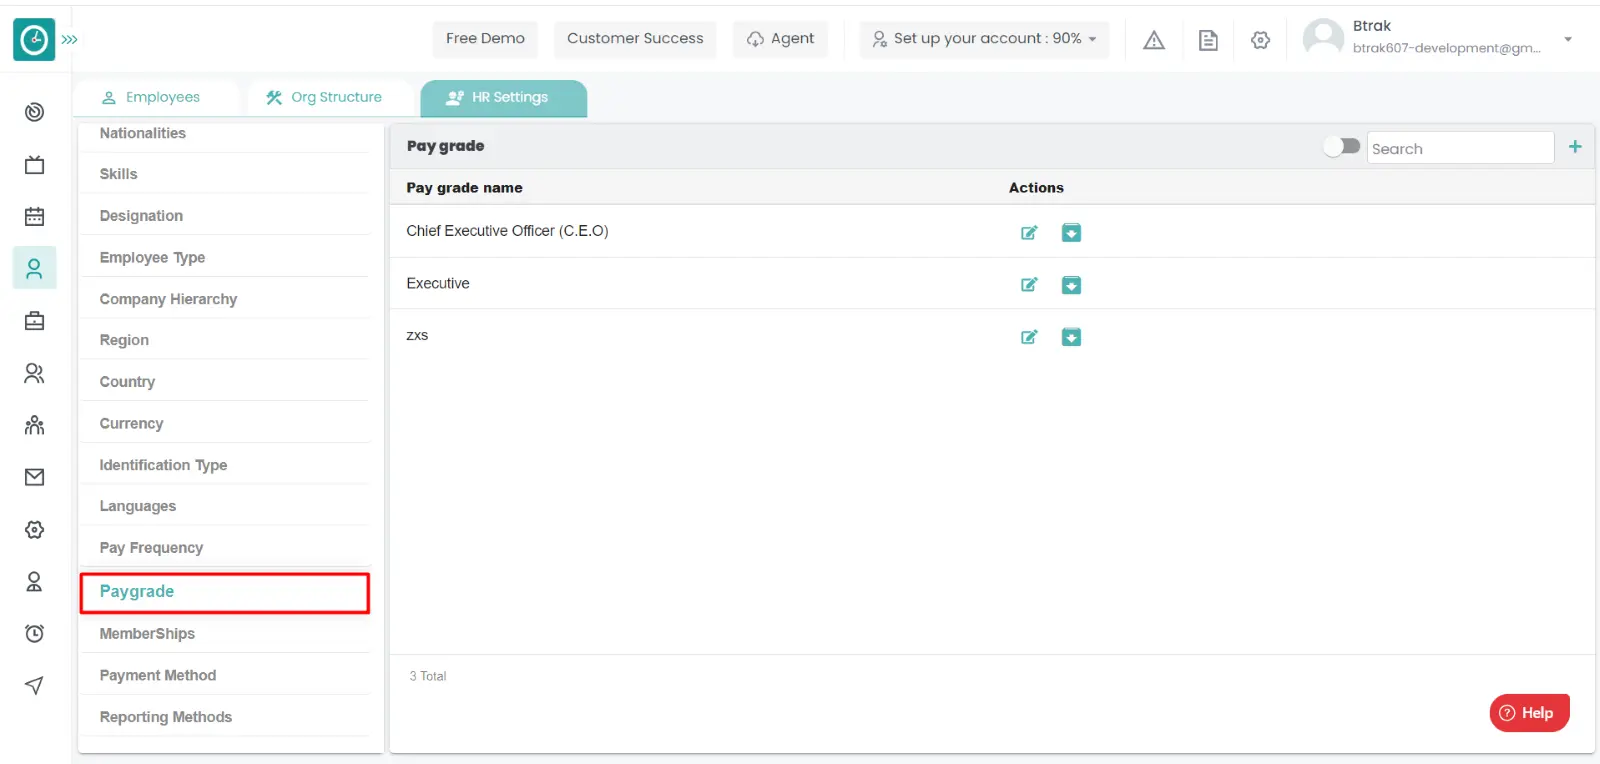

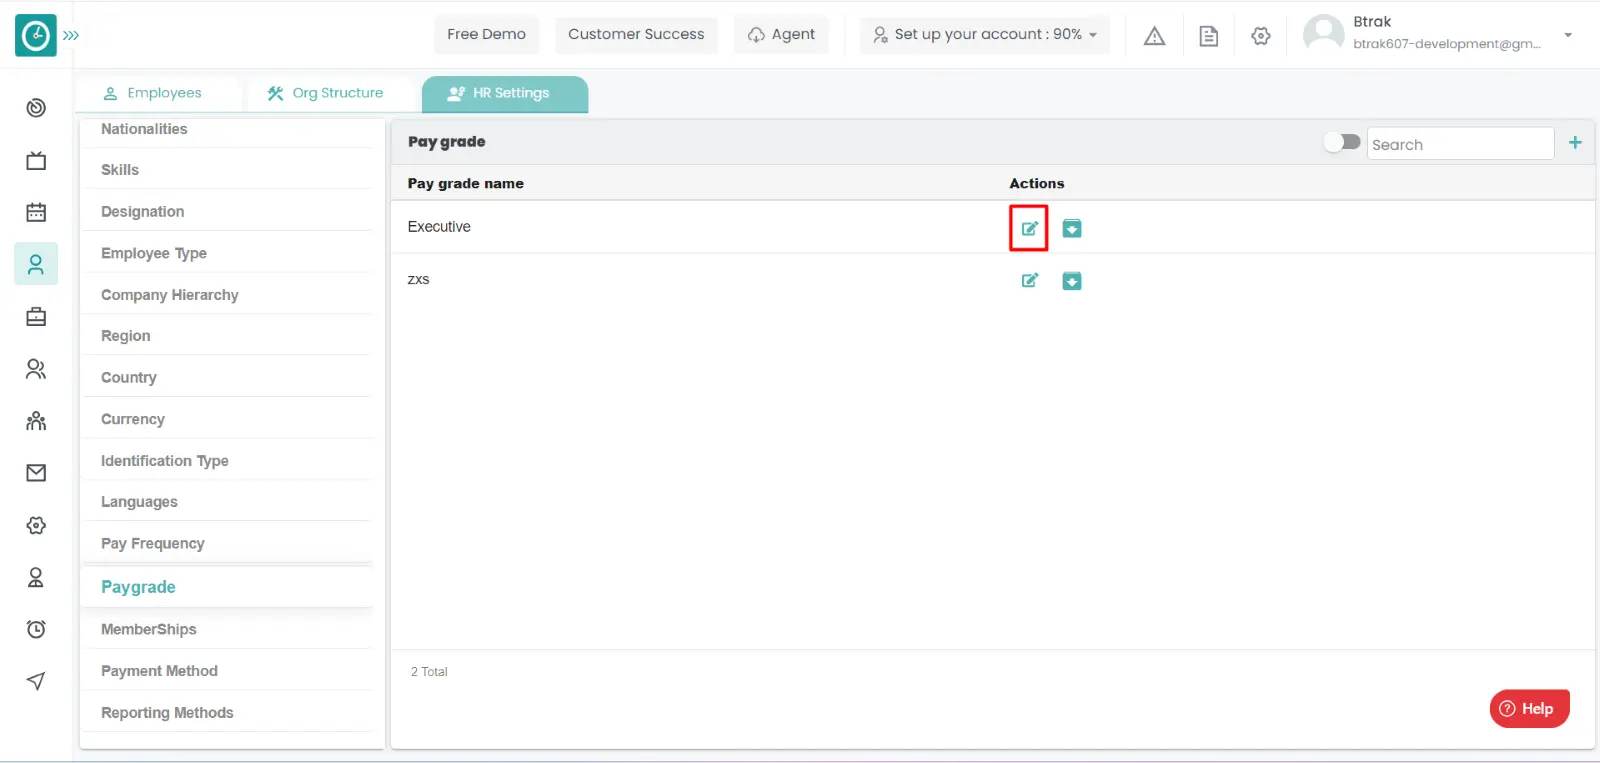
Edit pay grade :-
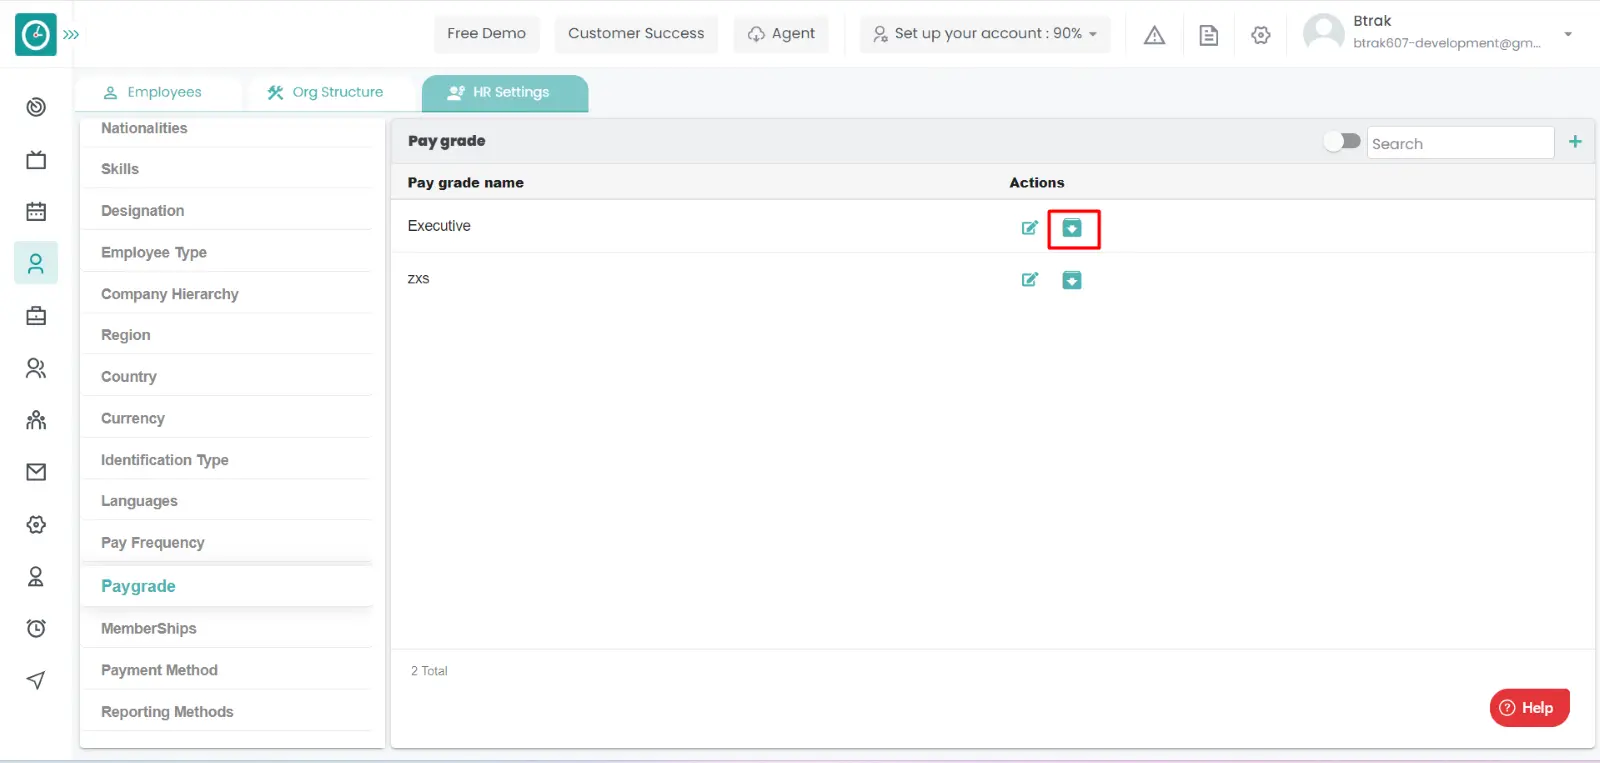
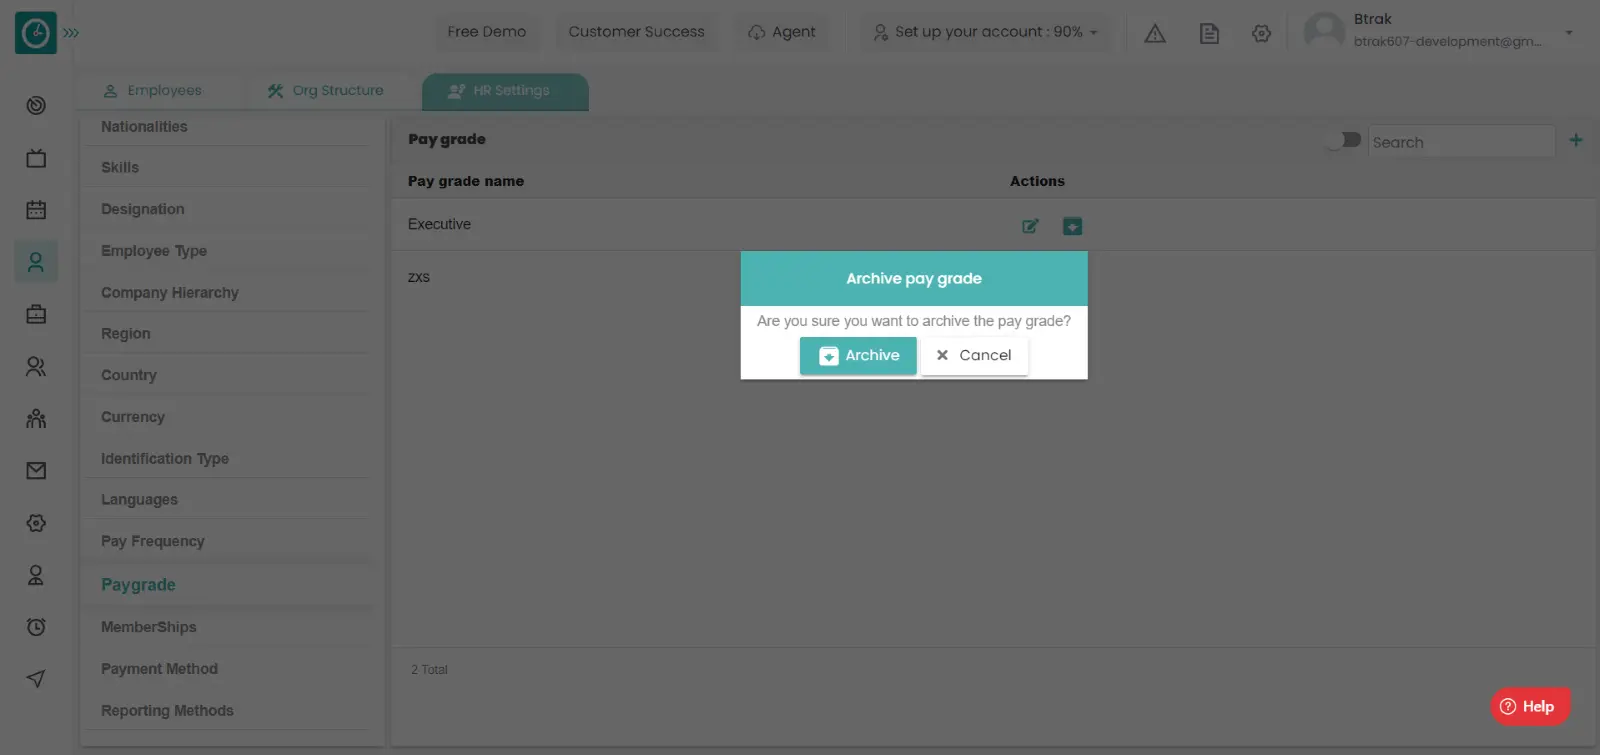
Archive pay grade :-
View Archived pay grade :-
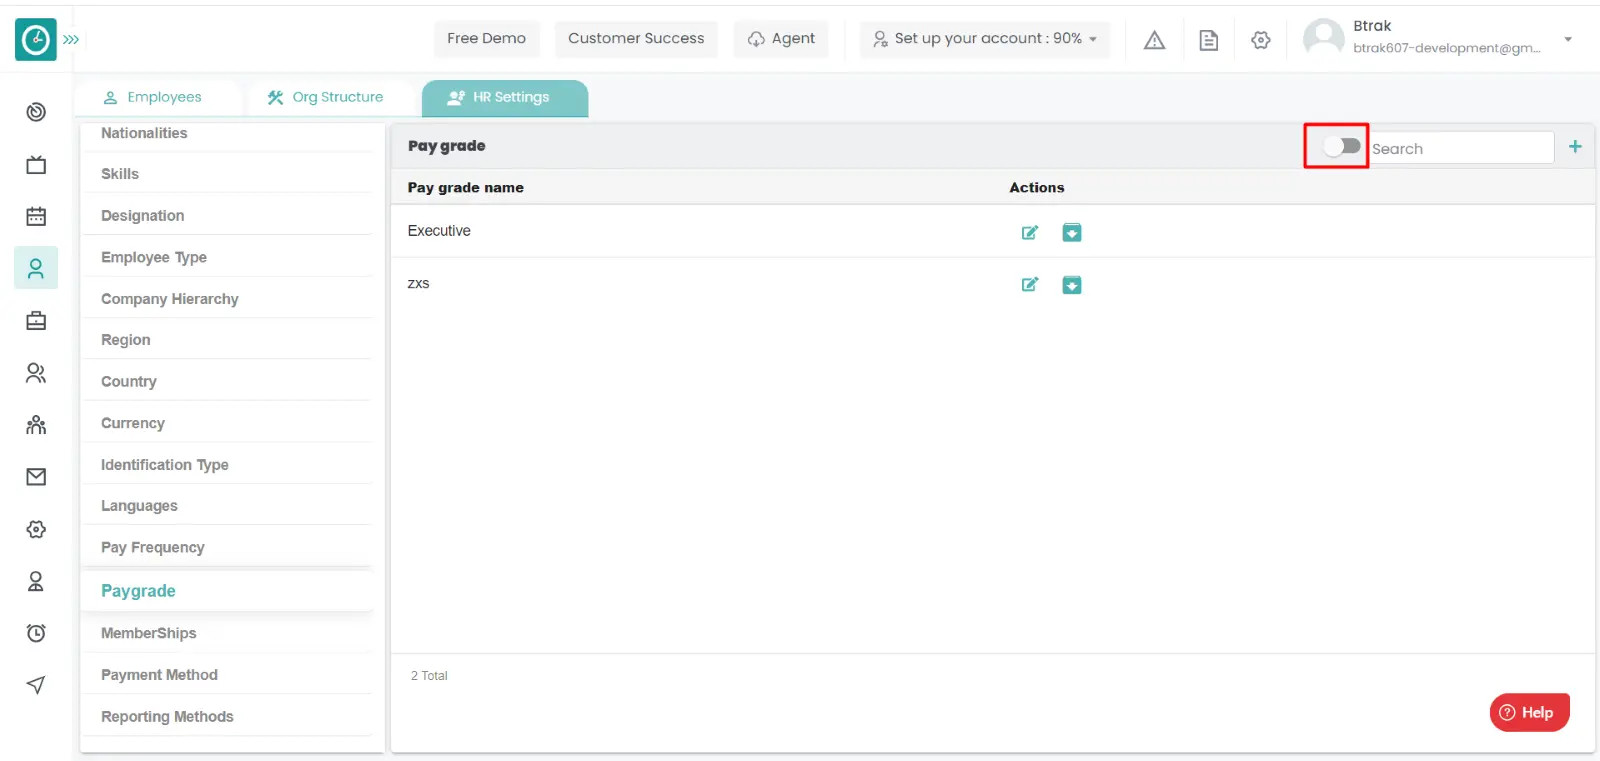
Unarchive pay grade :-
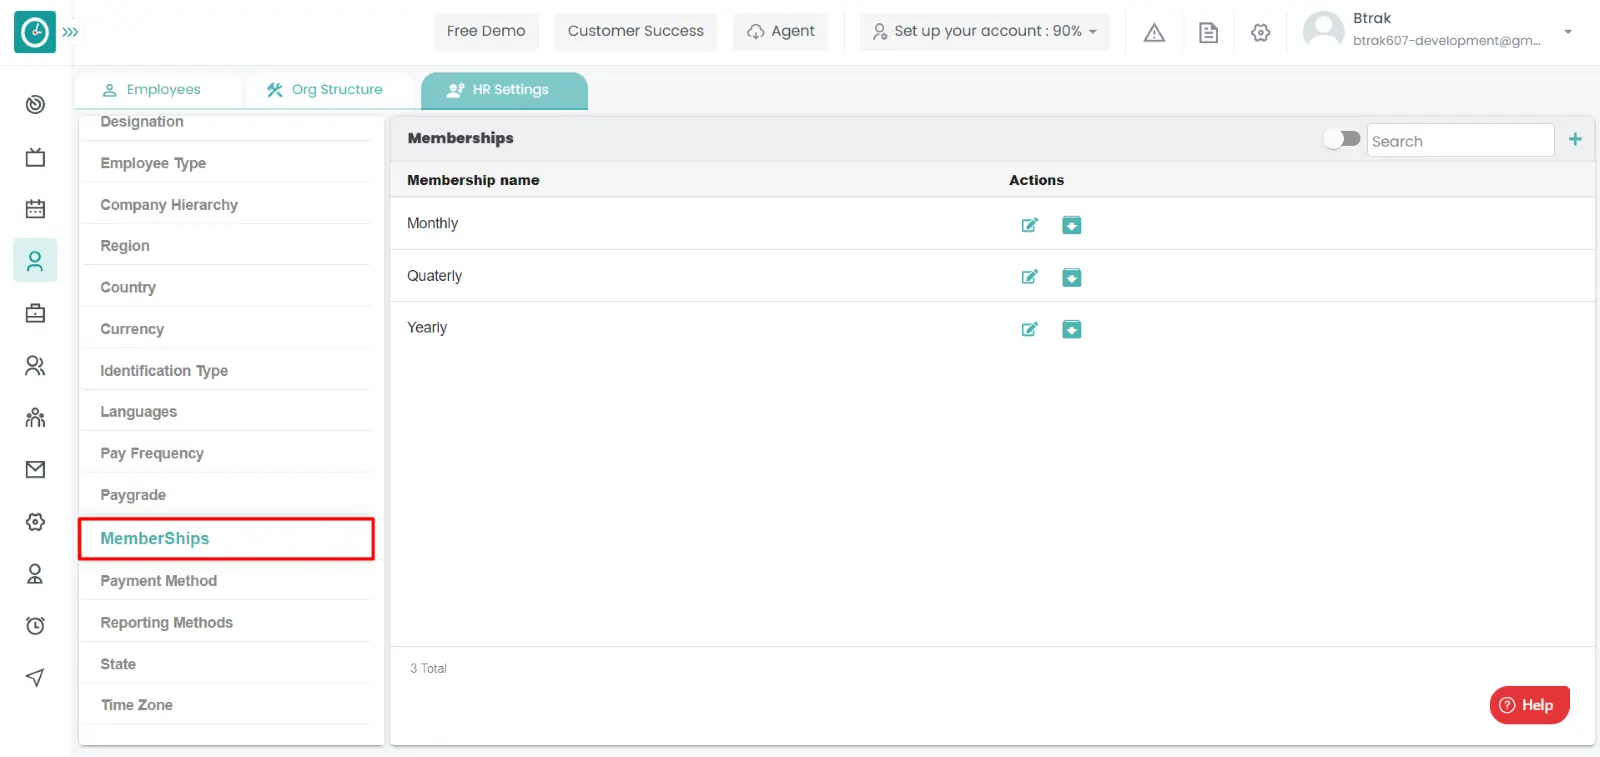
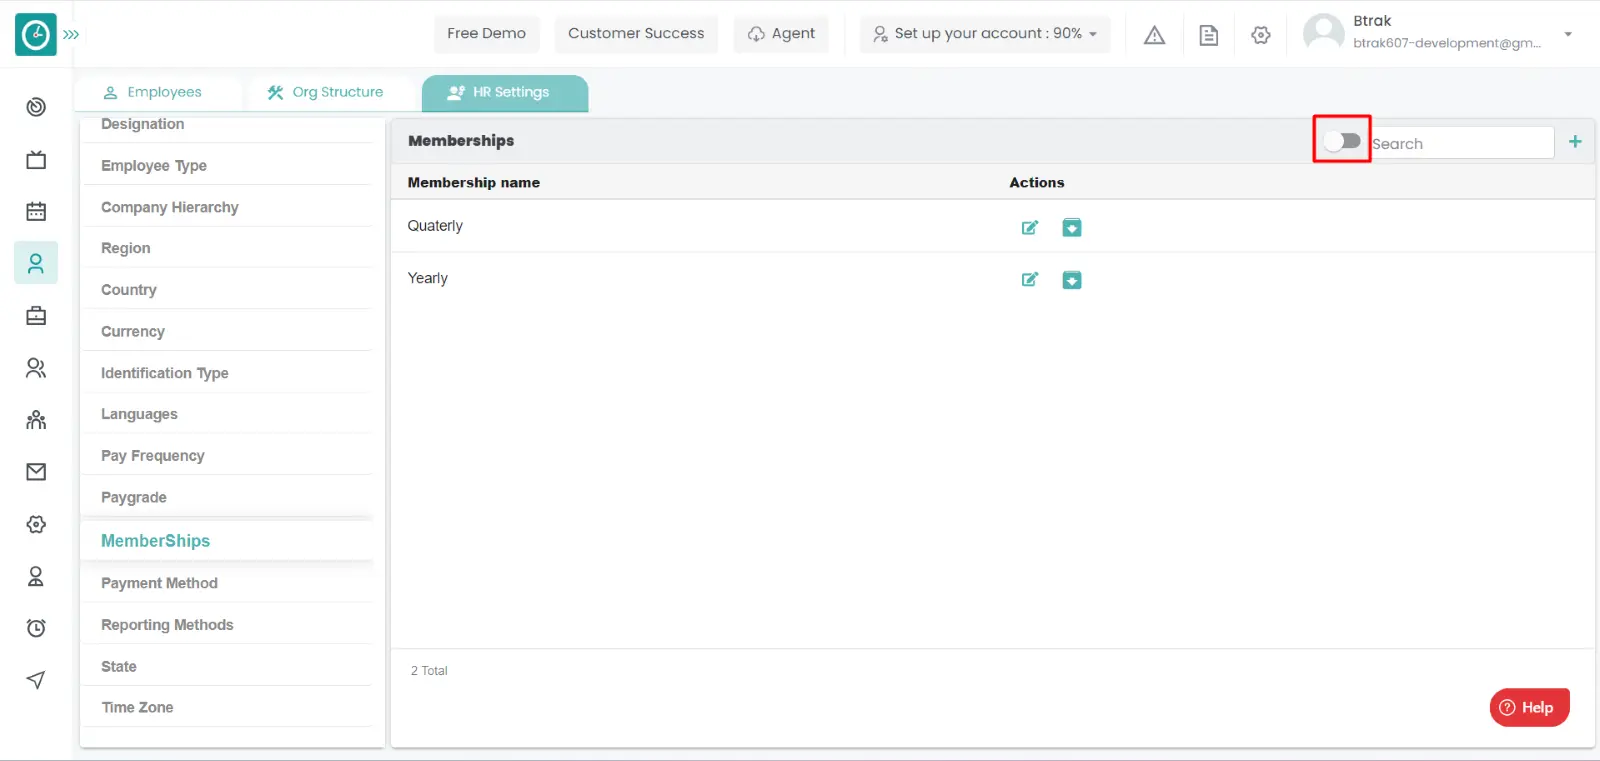
You can access/view the membership of employee in organization.
Navigation: Goto HR => HR Tab => HR settings
If the user is having Super Admin
Permissions, then he can be able to access/view membership in organization.
This permission can be configured by following the steps: -
View My Detailed Profile / View My Subordinate Profile / Edit My Subordinate Profile / Manage HR settings,
then select the roles for what you must give the permissions to configure and check them.View My Detailed Profile / View My Subordinate Profile / Edit My Subordinate Profile / Manage HR settings
for the defined roles.
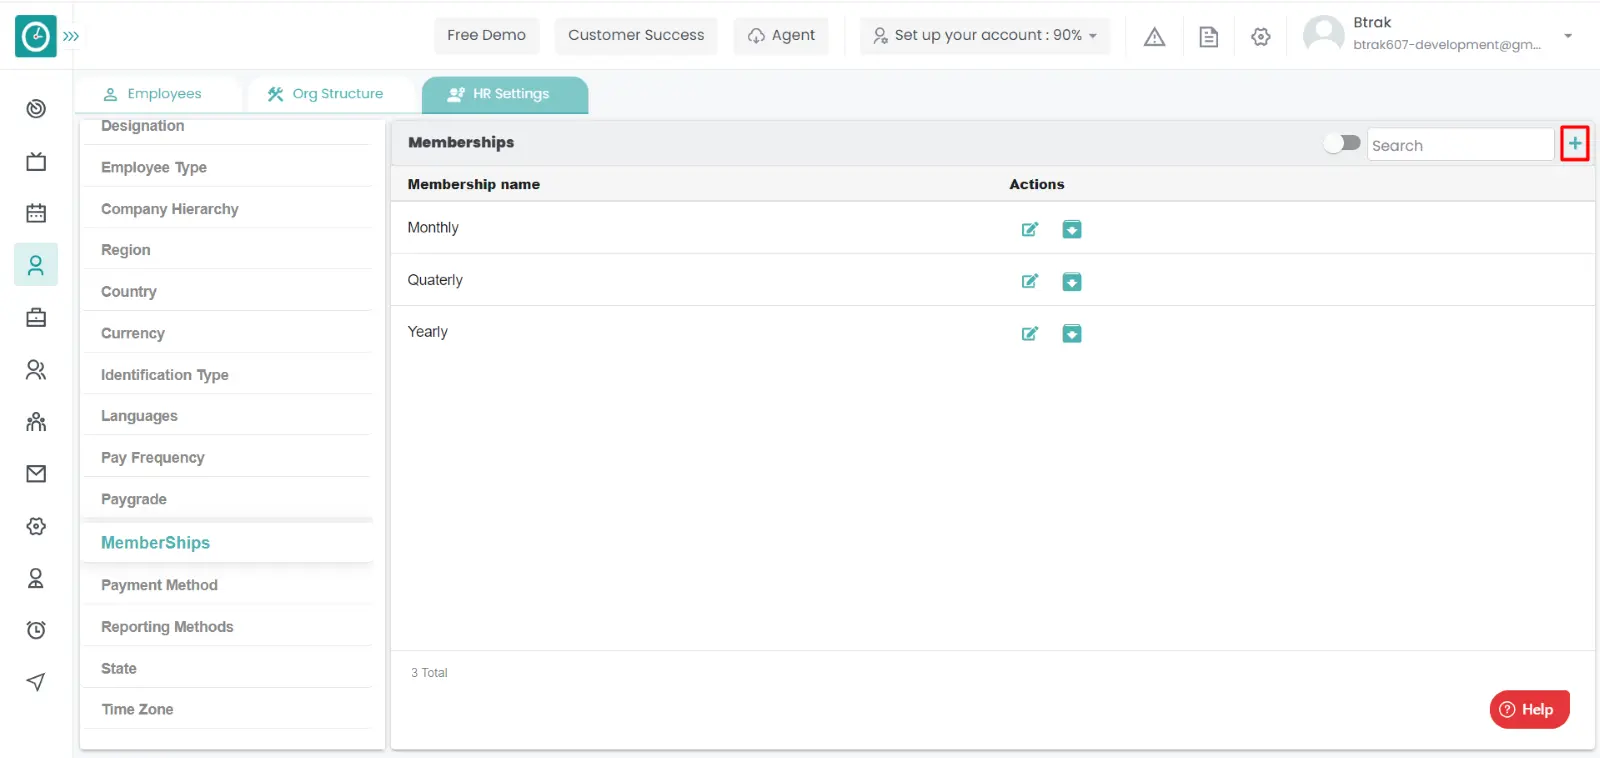
Add new membership :-

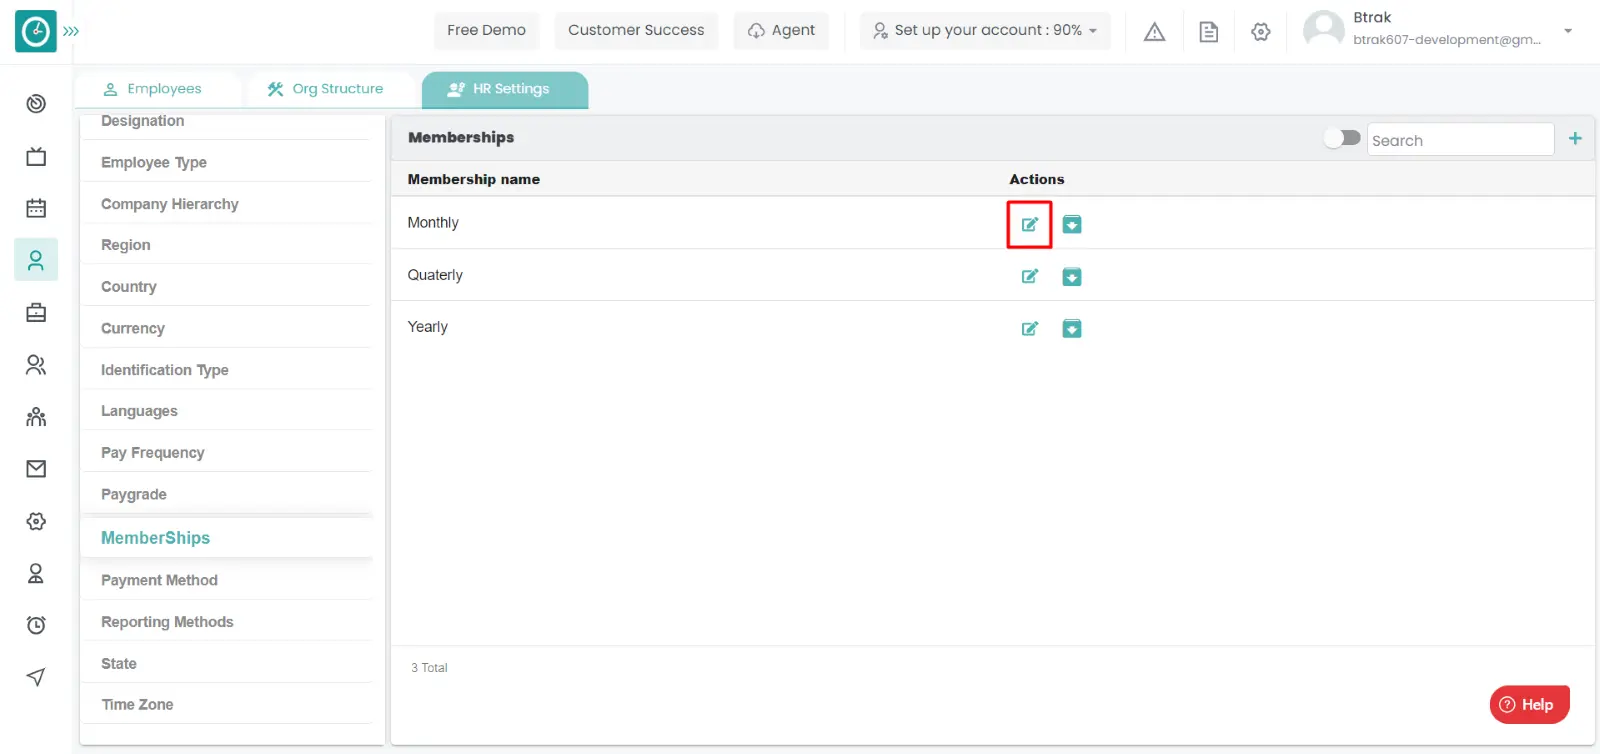
Edit membership :-

Archive membership :-
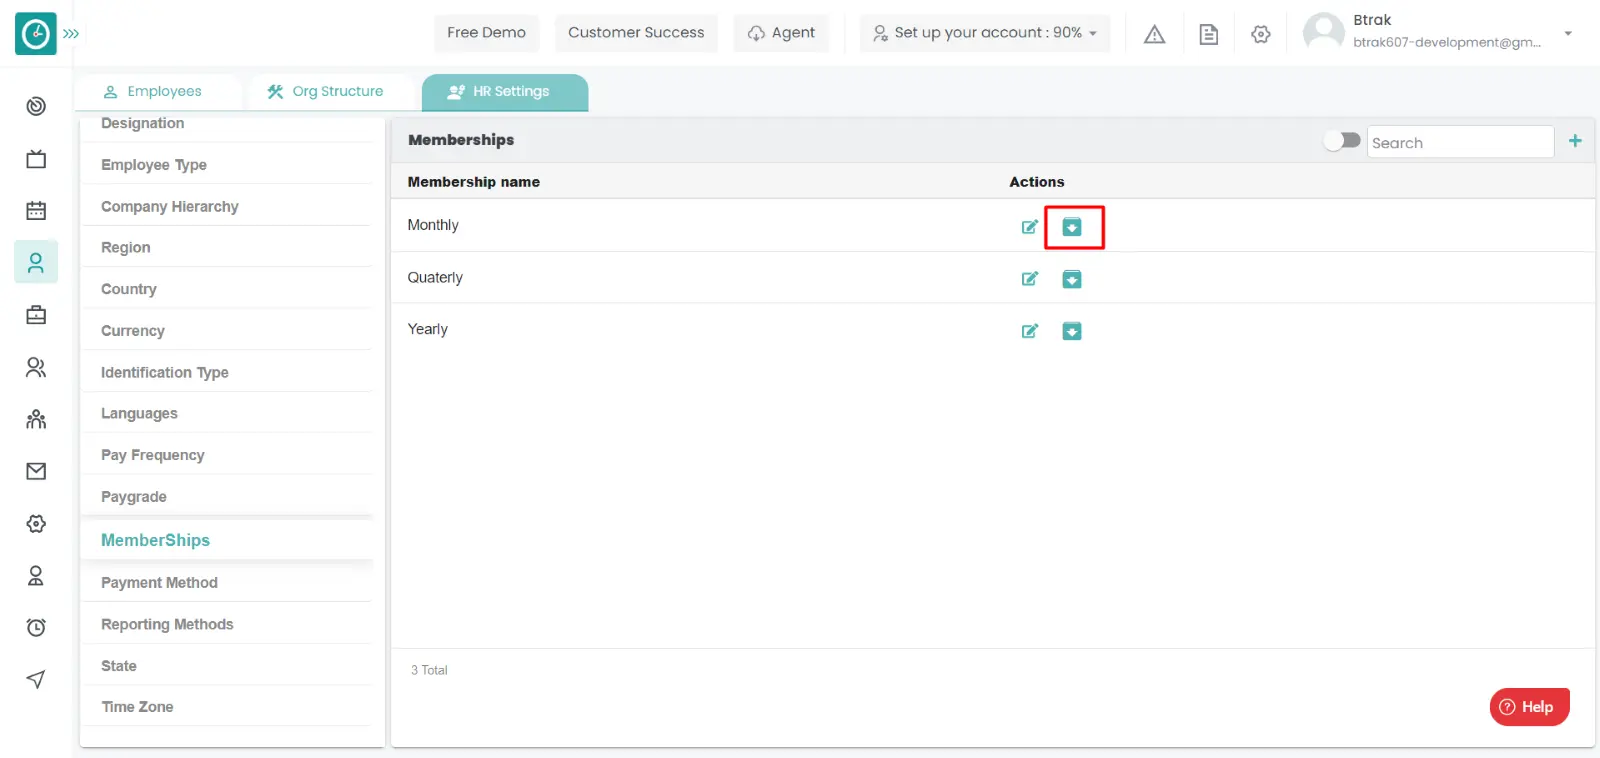

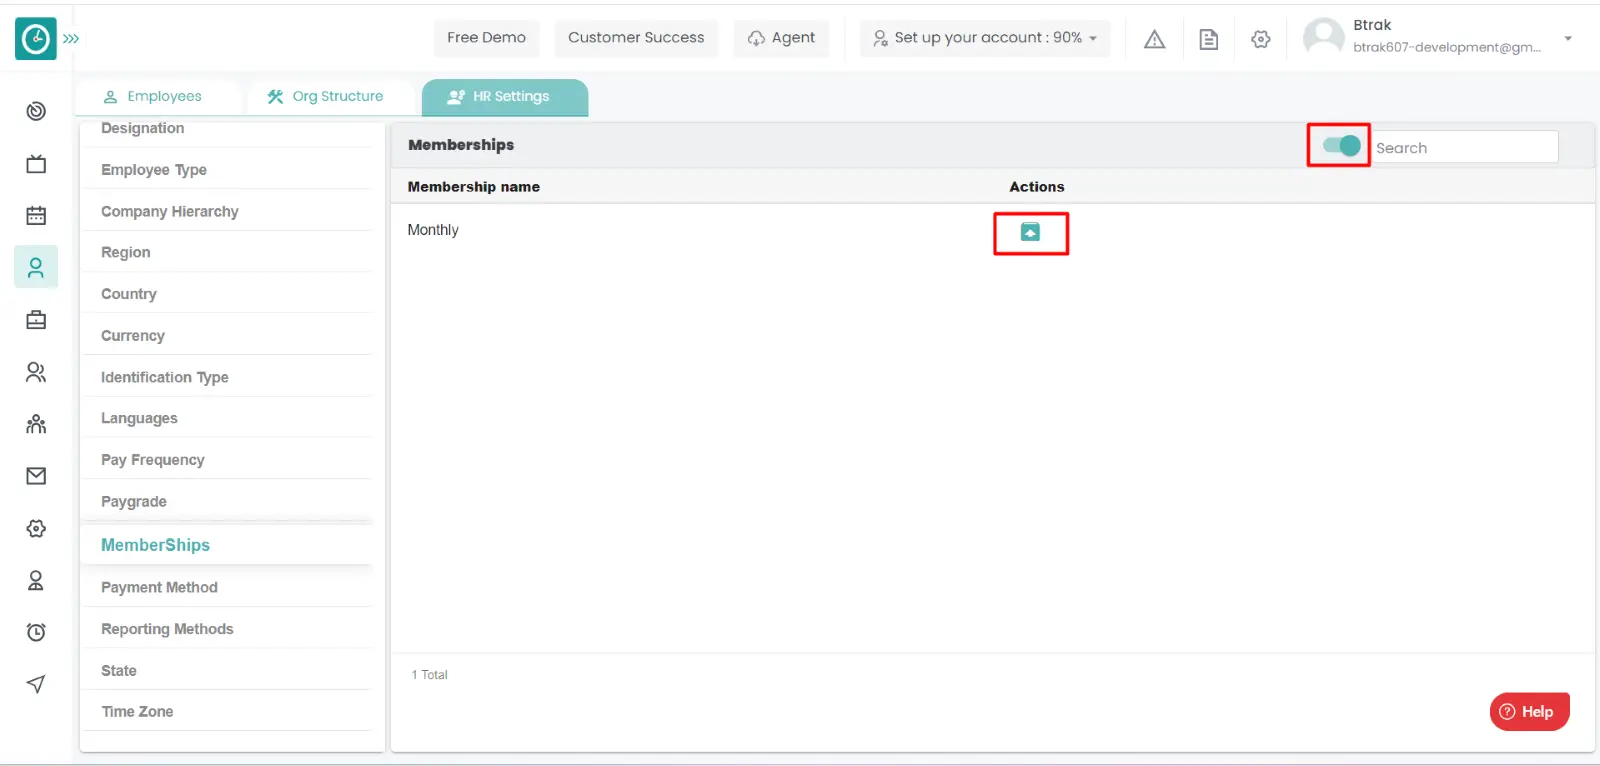
View Archived membership :-
Unarchive membership :-
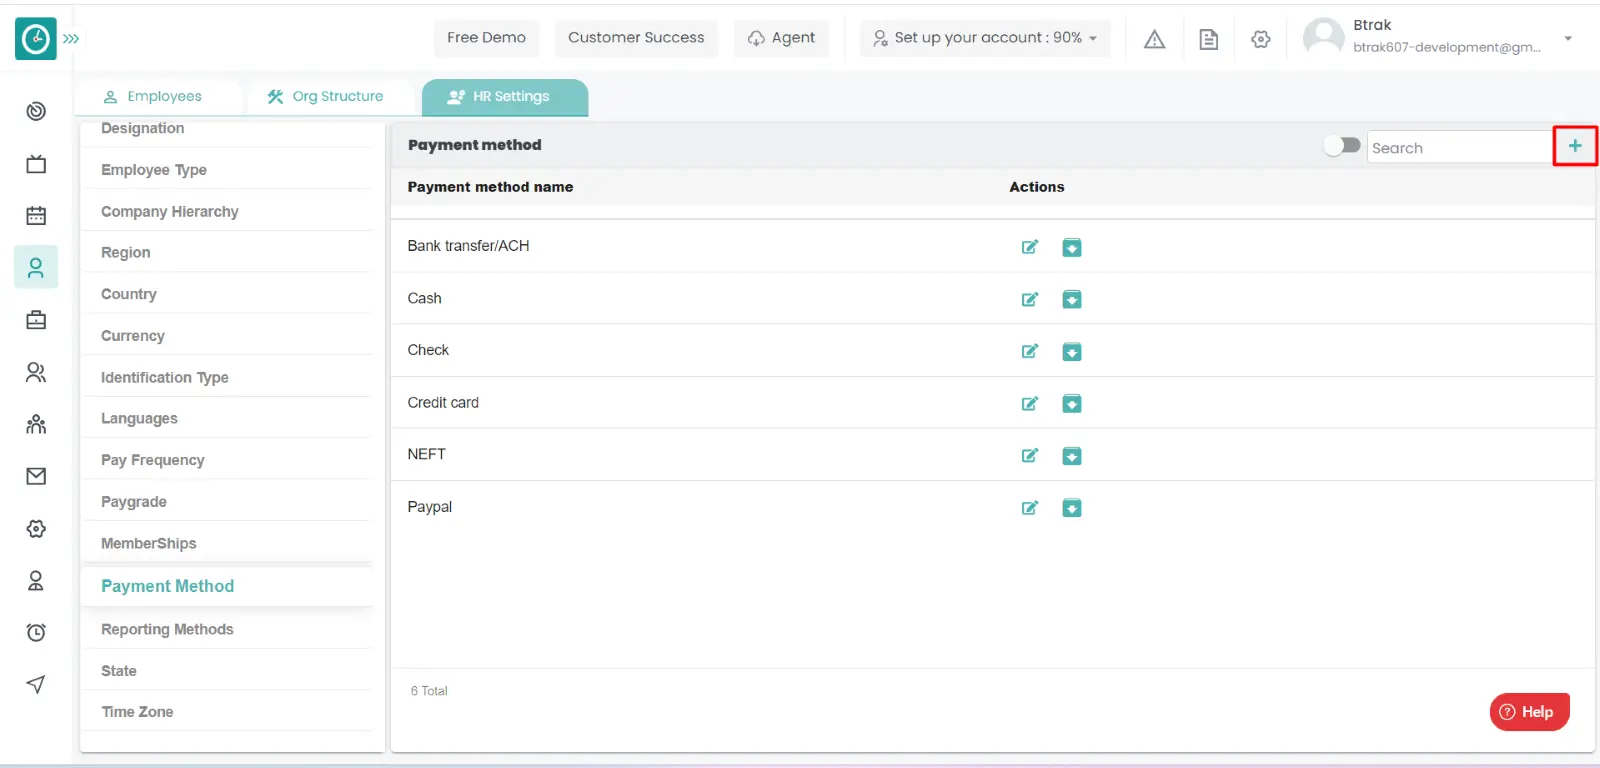
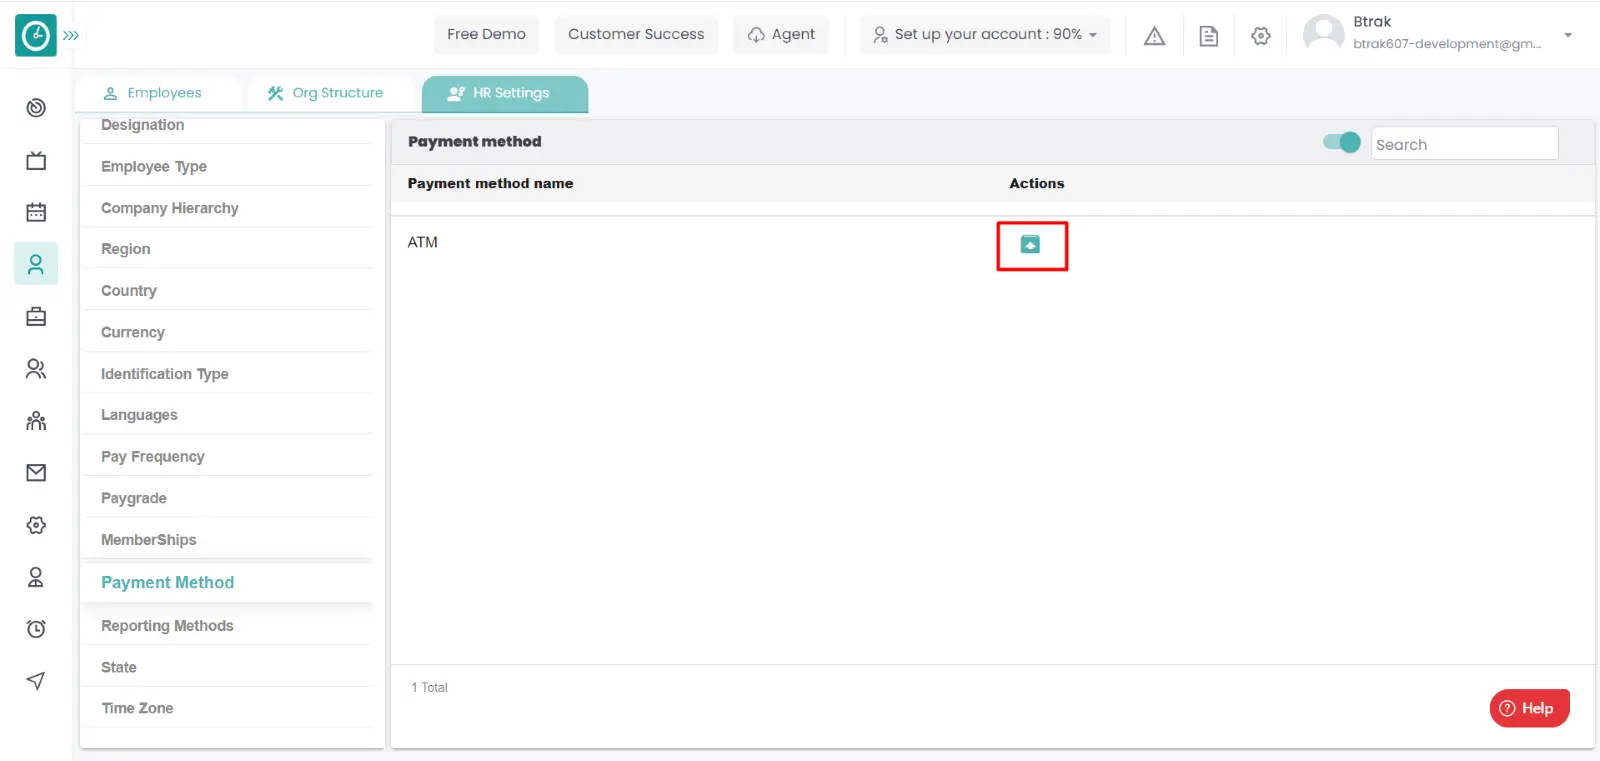
You can access/view the payment method of employee in organization.
Navigation: Goto HR => HR Tab => HR settings
If the user is having Super Admin
Permissions, then he can be able to access/view reporting method in
organization.
This permission can be configured by following the steps: -
View My Detailed Profile / View My Subordinate Profile / Edit My Subordinate Profile / Manage HR settings,
then select the roles for what you must give the permissions to configure and check them.View My Detailed Profile / View My Subordinate Profile / Edit My Subordinate Profile / Manage HR settings
for the defined roles.
Add new Payment method :-
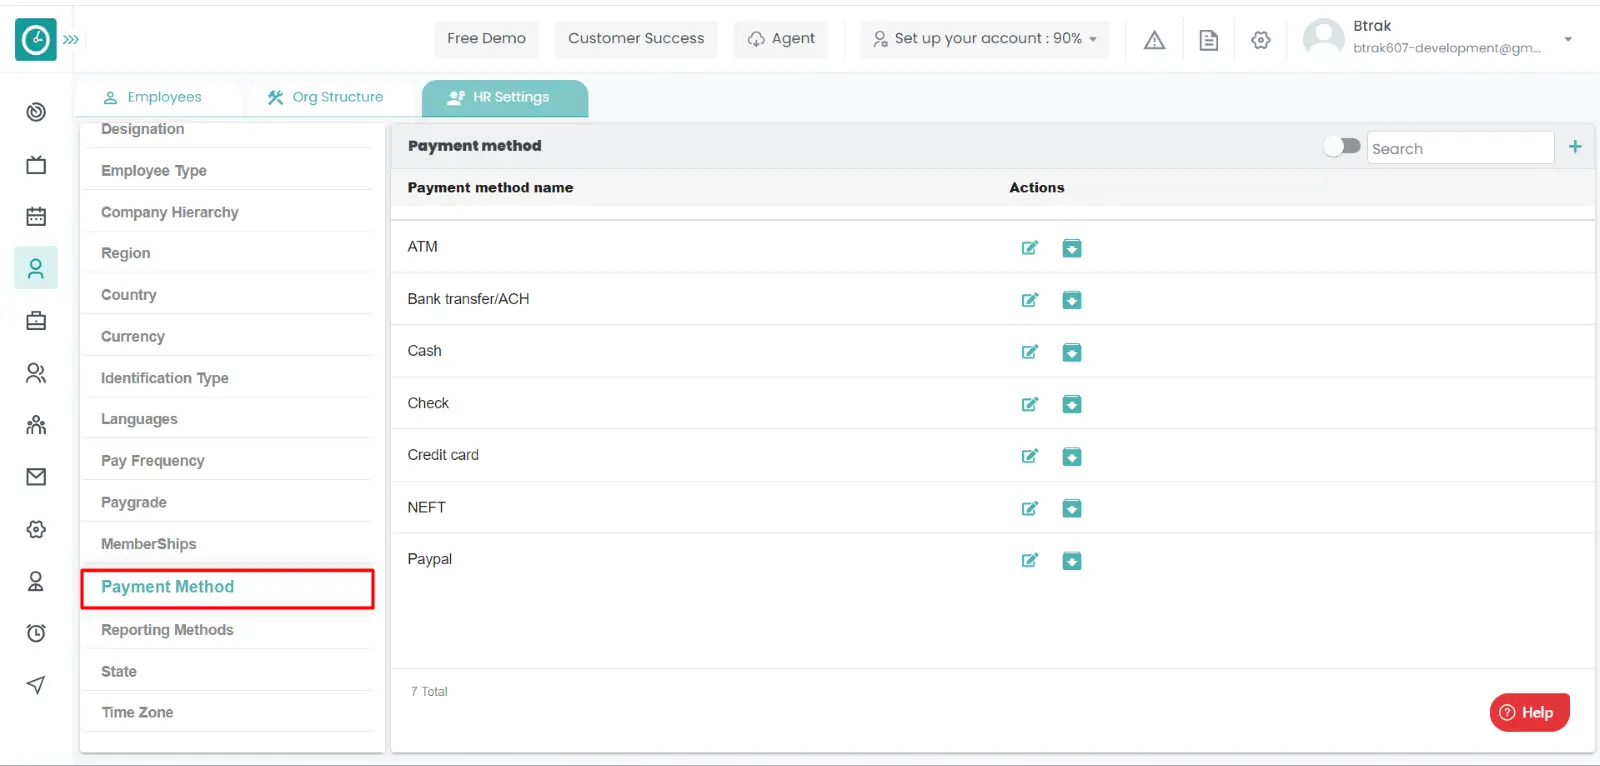

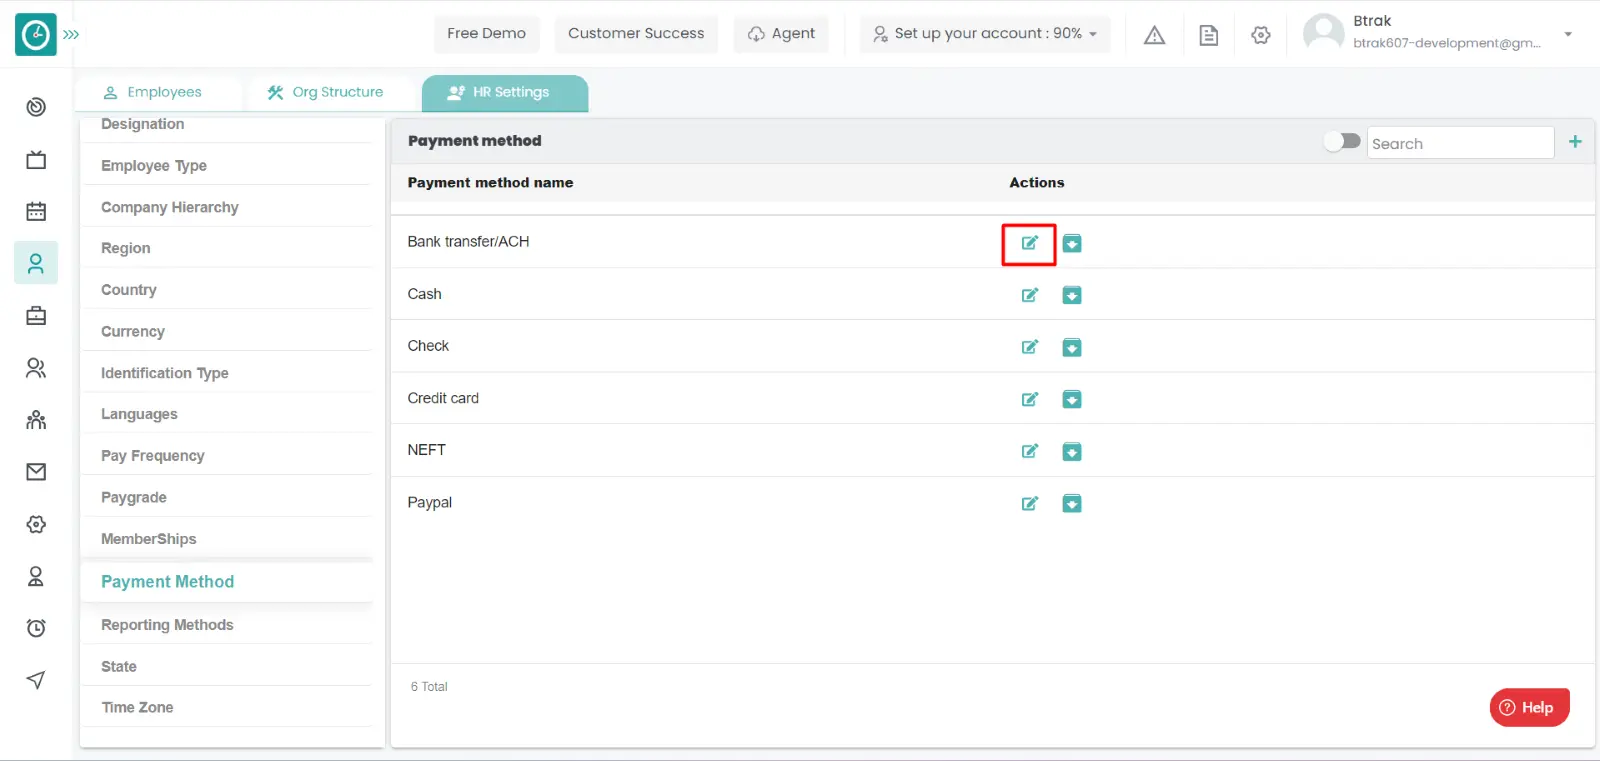
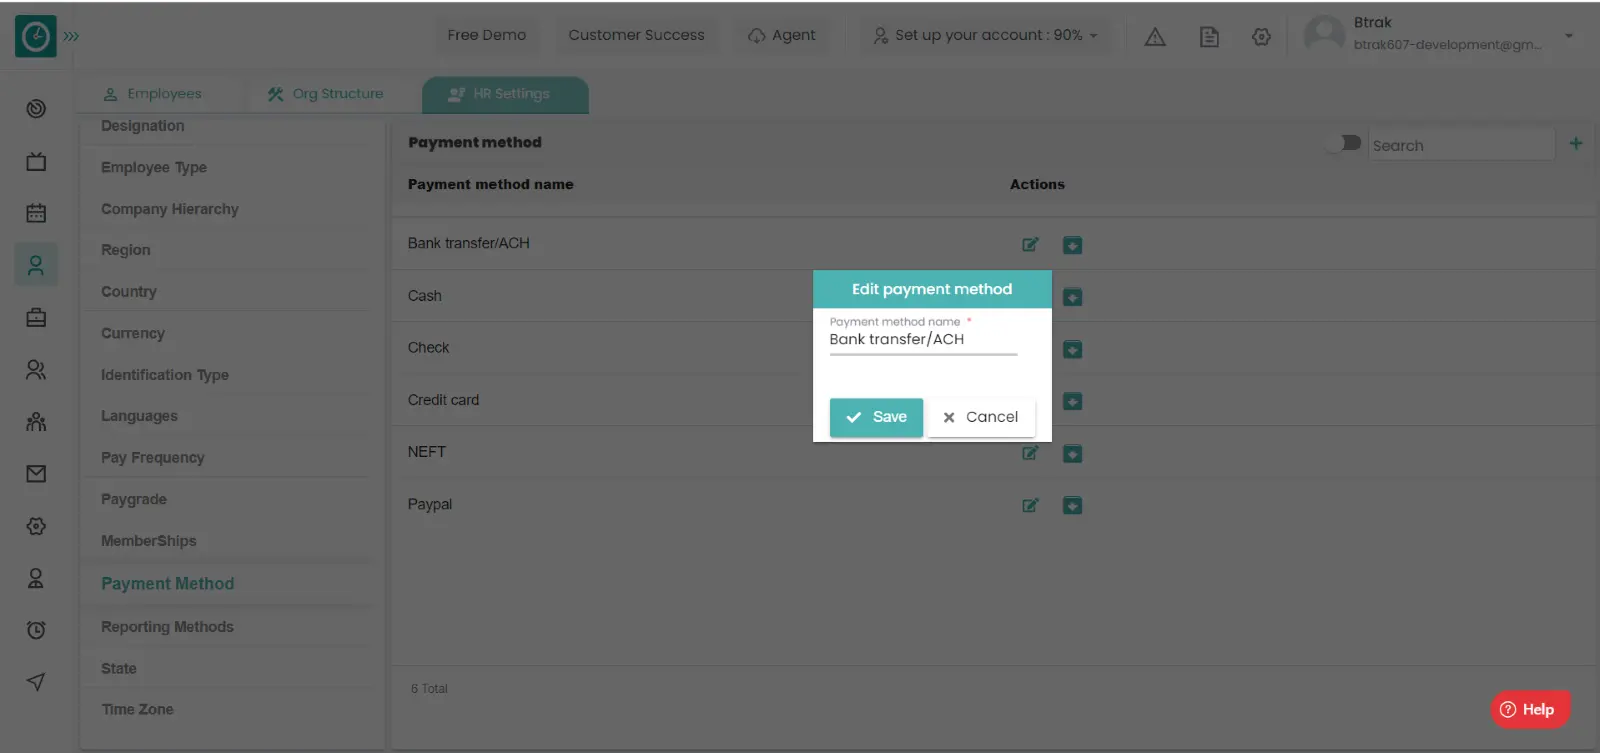
Edit payment method :-
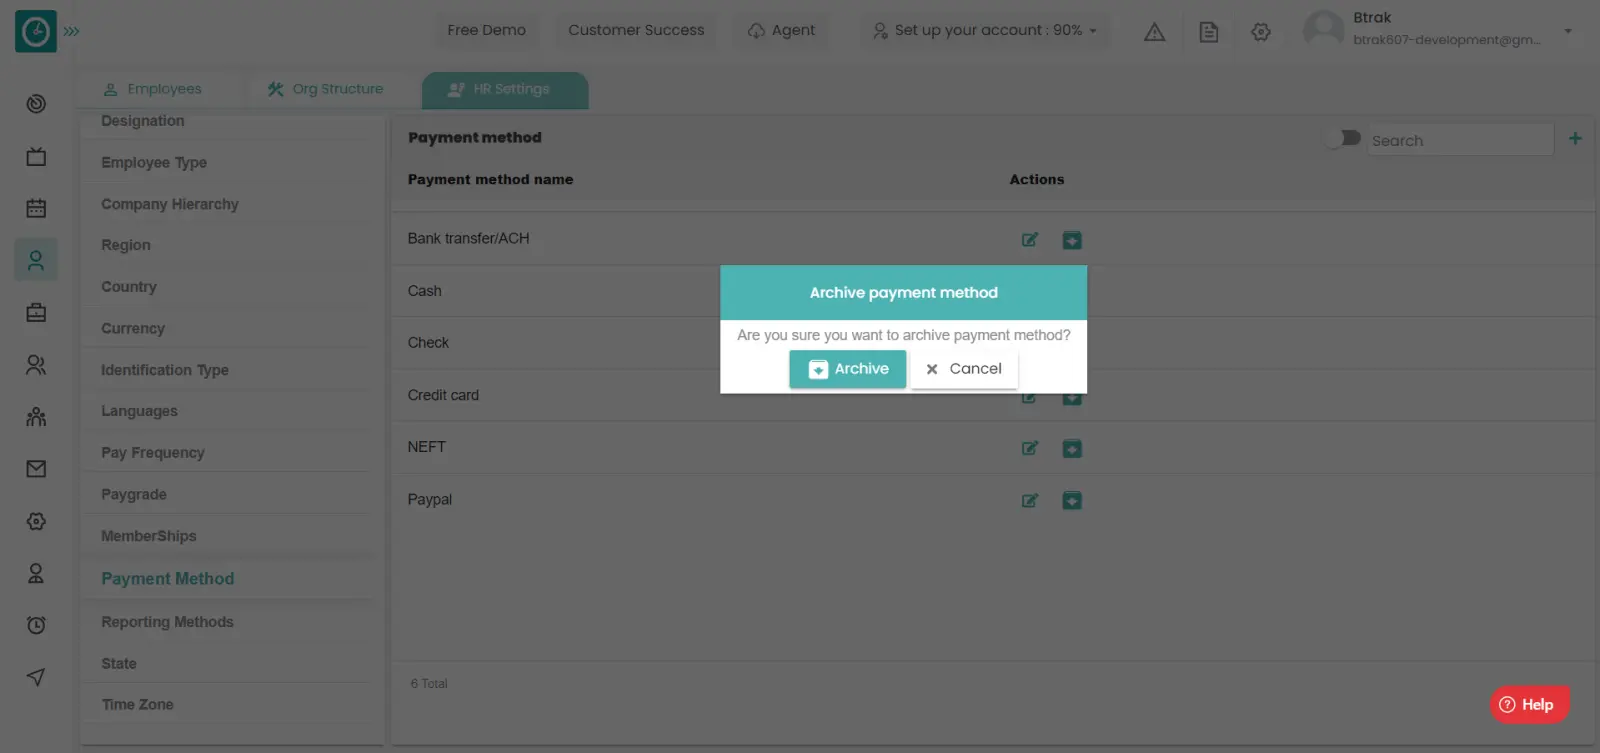
Archive payment method :-

View Archived payment method :-

Unarchive payment Method :-
You can access/view the reporting method of employee in organization.
Navigation: Goto HR => HR Tab => HR settings
If the user is having Super Admin
Permissions, then he can be able to access/view reporting method in
organization.
This permission can be configured by following the steps: -
View My Detailed Profile / View My Subordinate Profile / Edit My Subordinate Profile / Manage HR settings,
then select the roles for what you must give the permissions to configure and check them.View My Detailed Profile / View My Subordinate Profile / Edit My Subordinate Profile / Manage HR settings
for the defined roles.
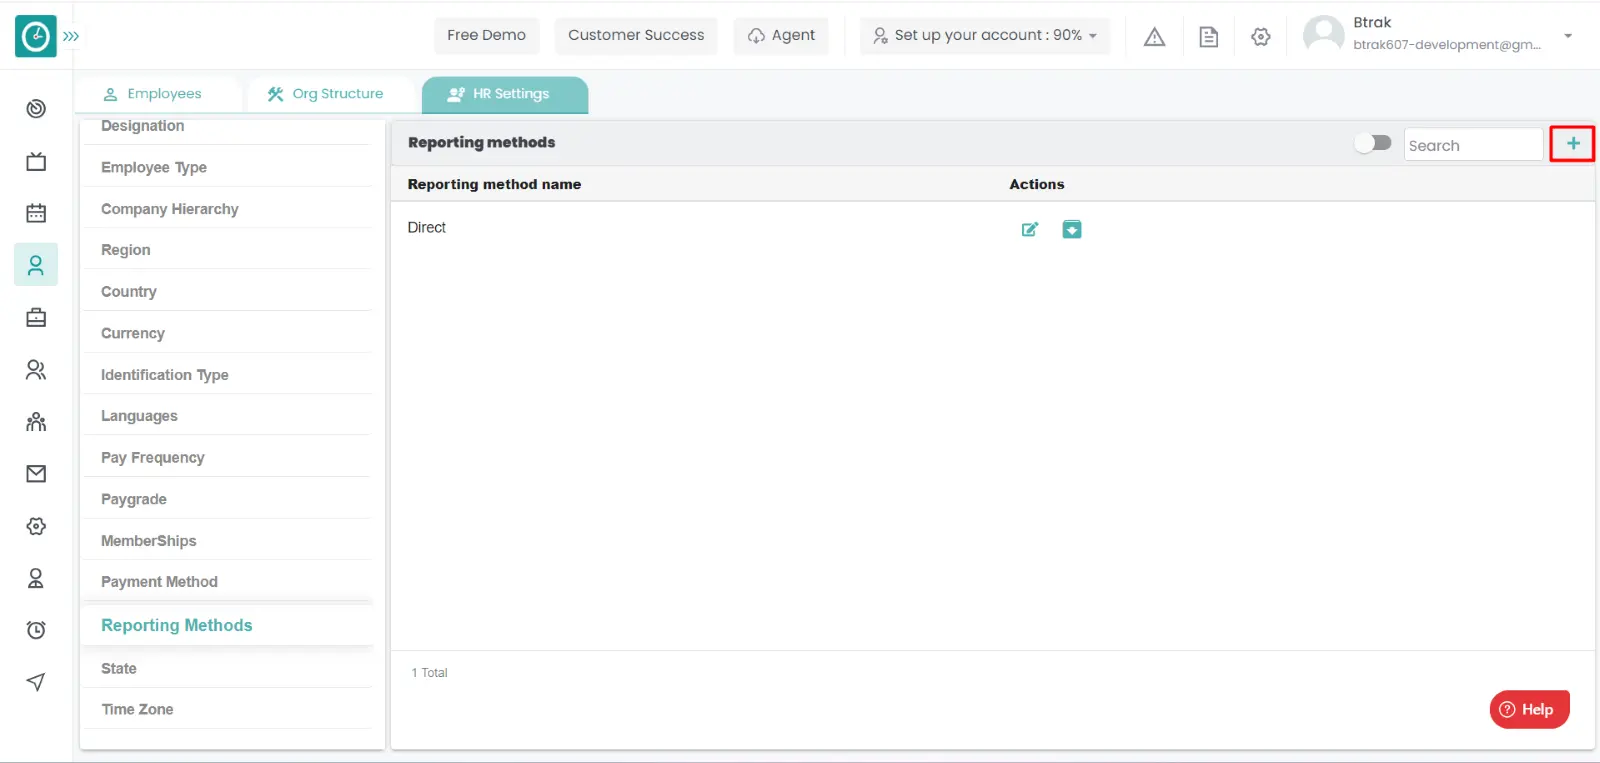
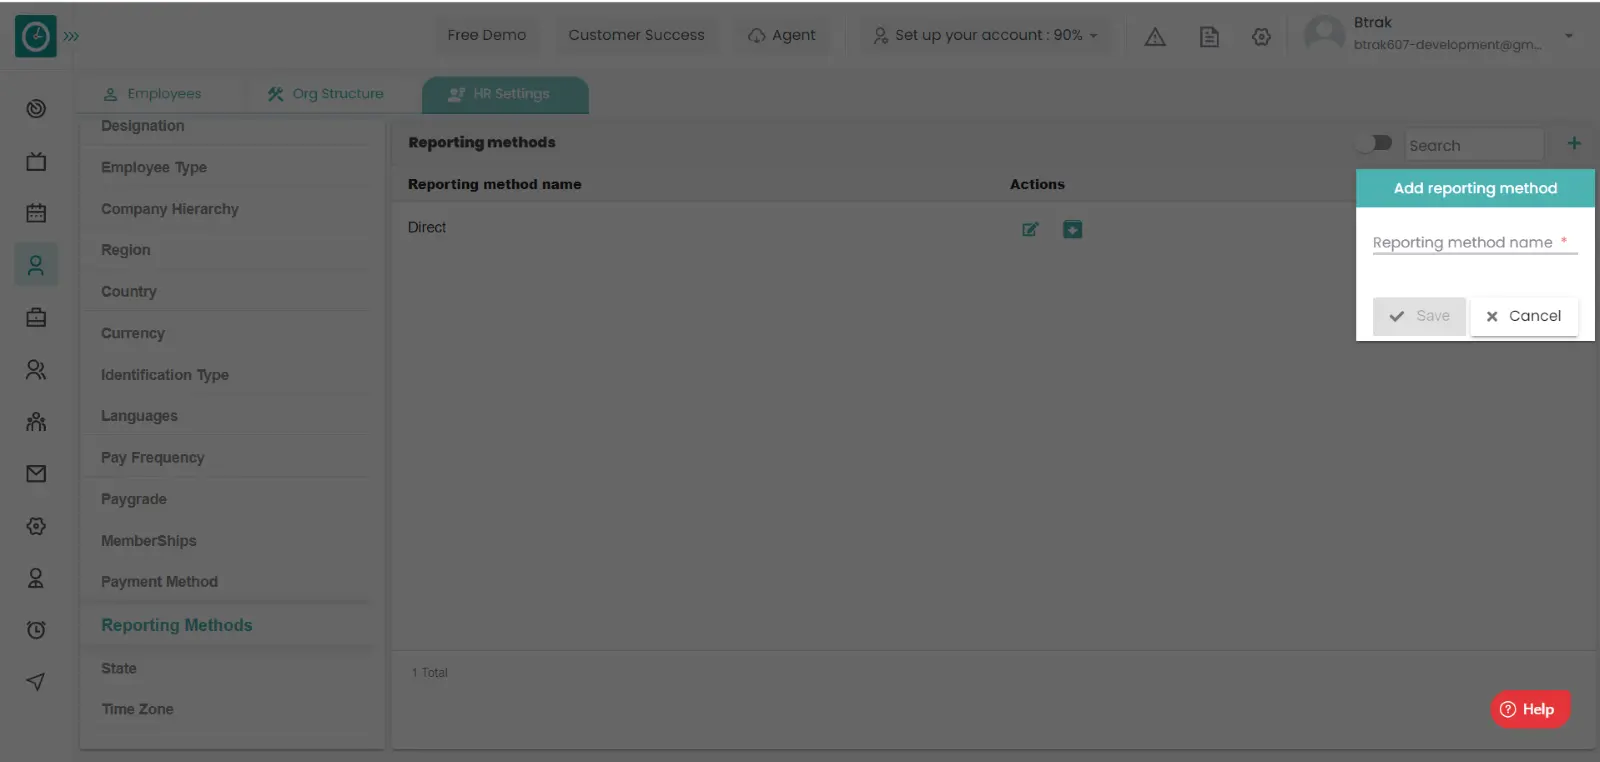
Add new reporting method :-
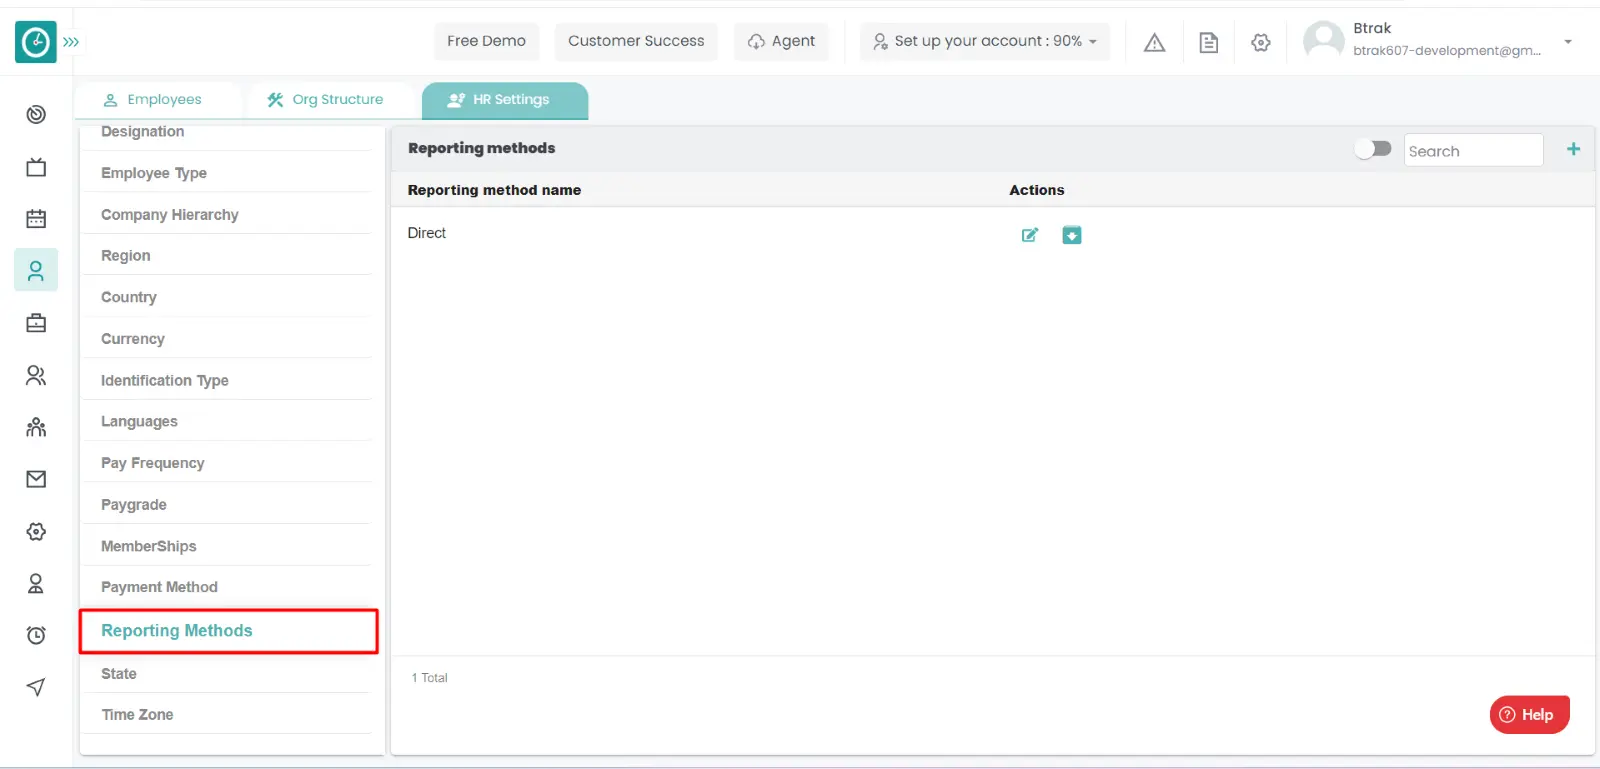
Edit reporting method :-


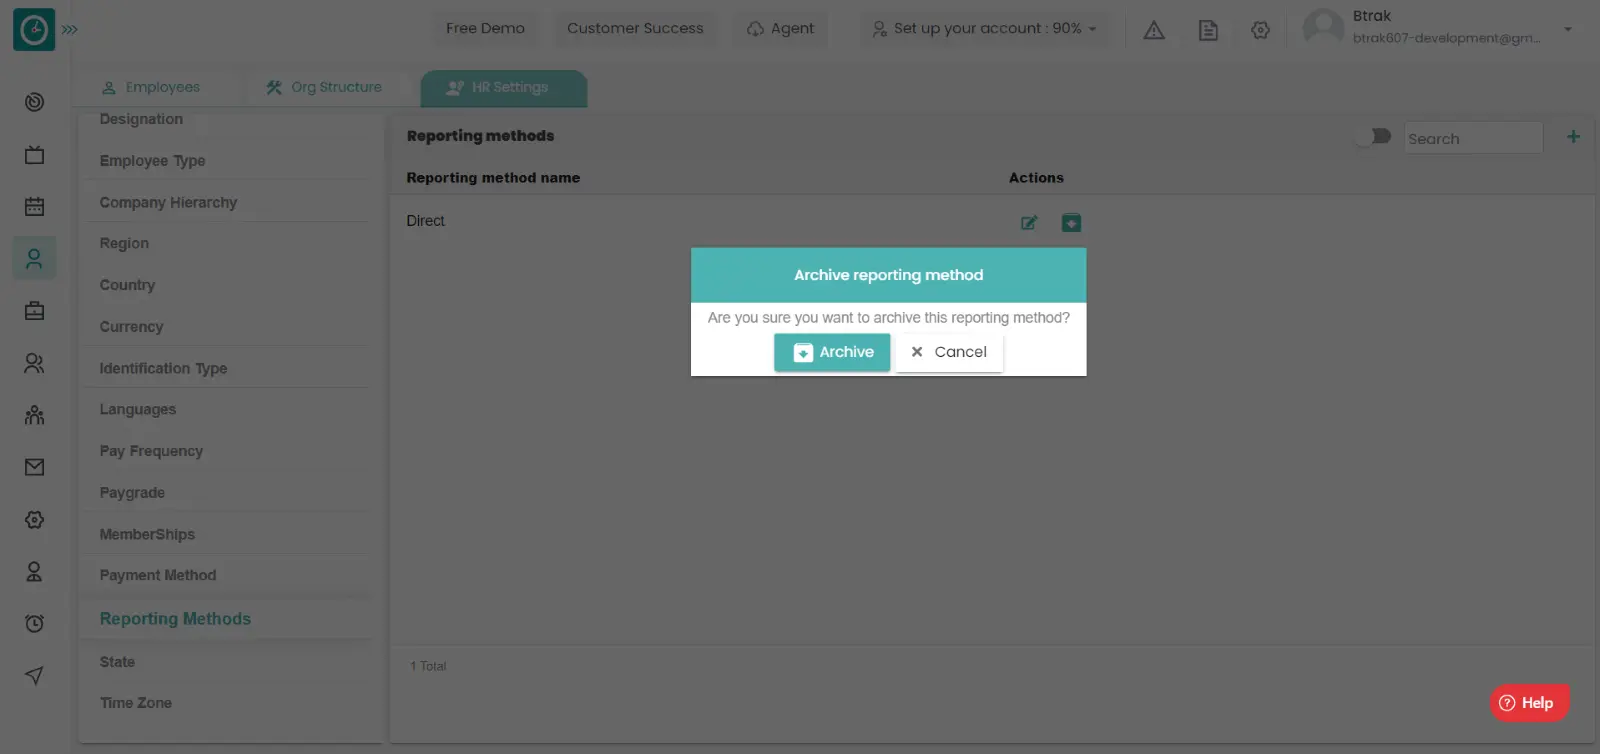
Archive reporting method :-

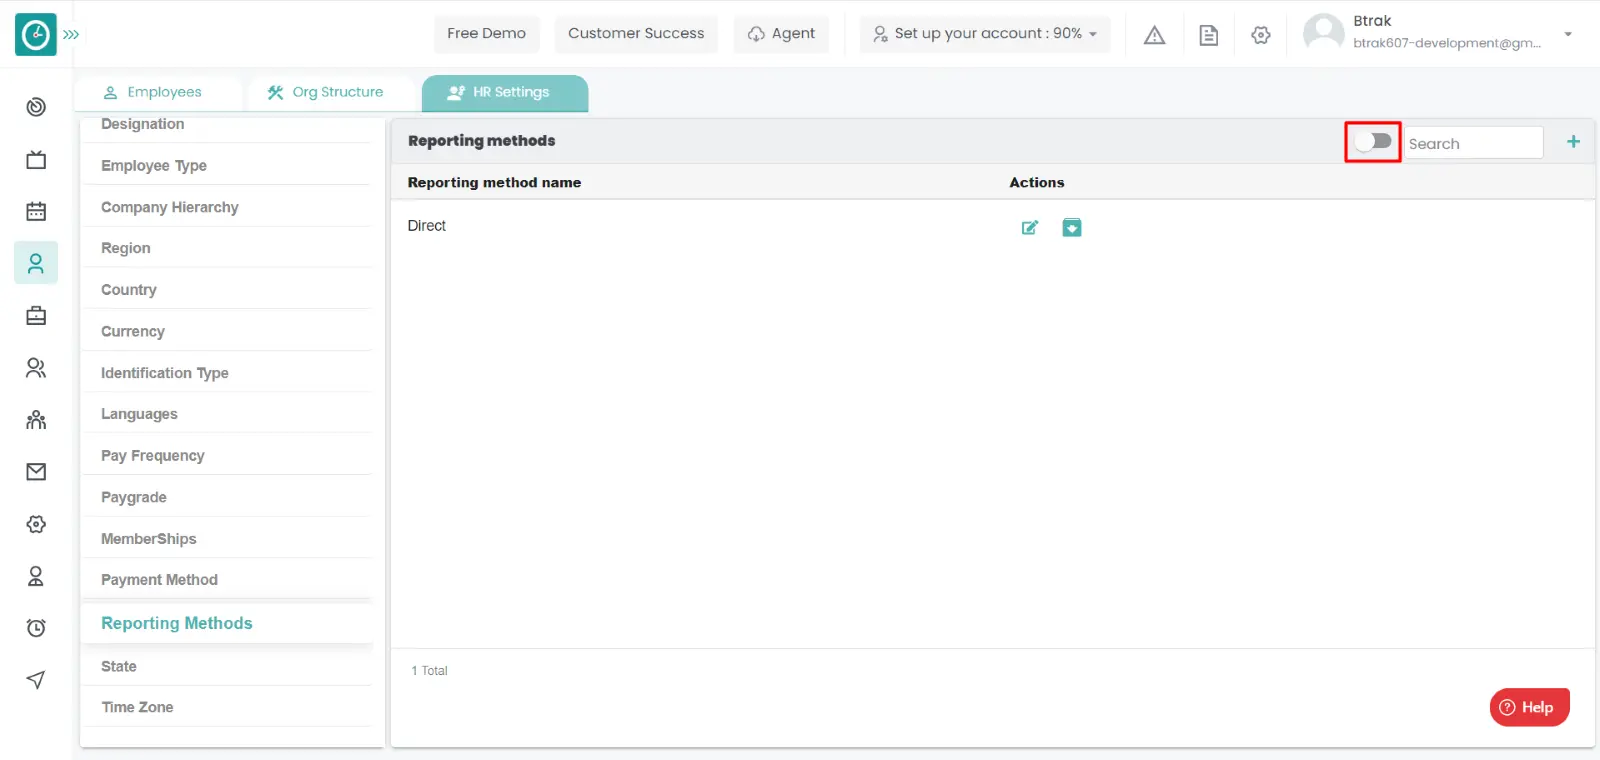
View Archived reporting method :-
Unarchive reporting Method :-

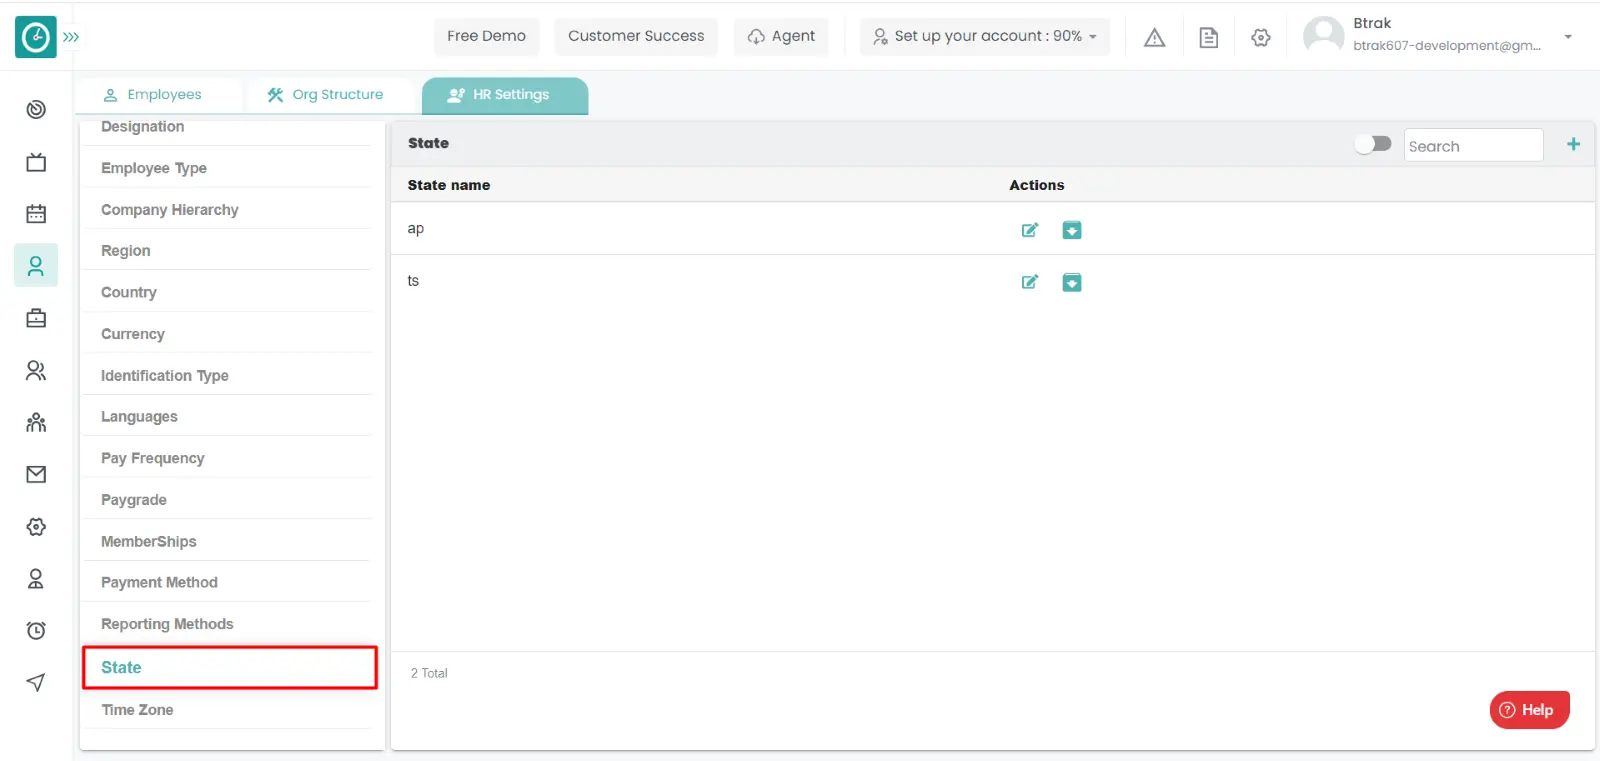
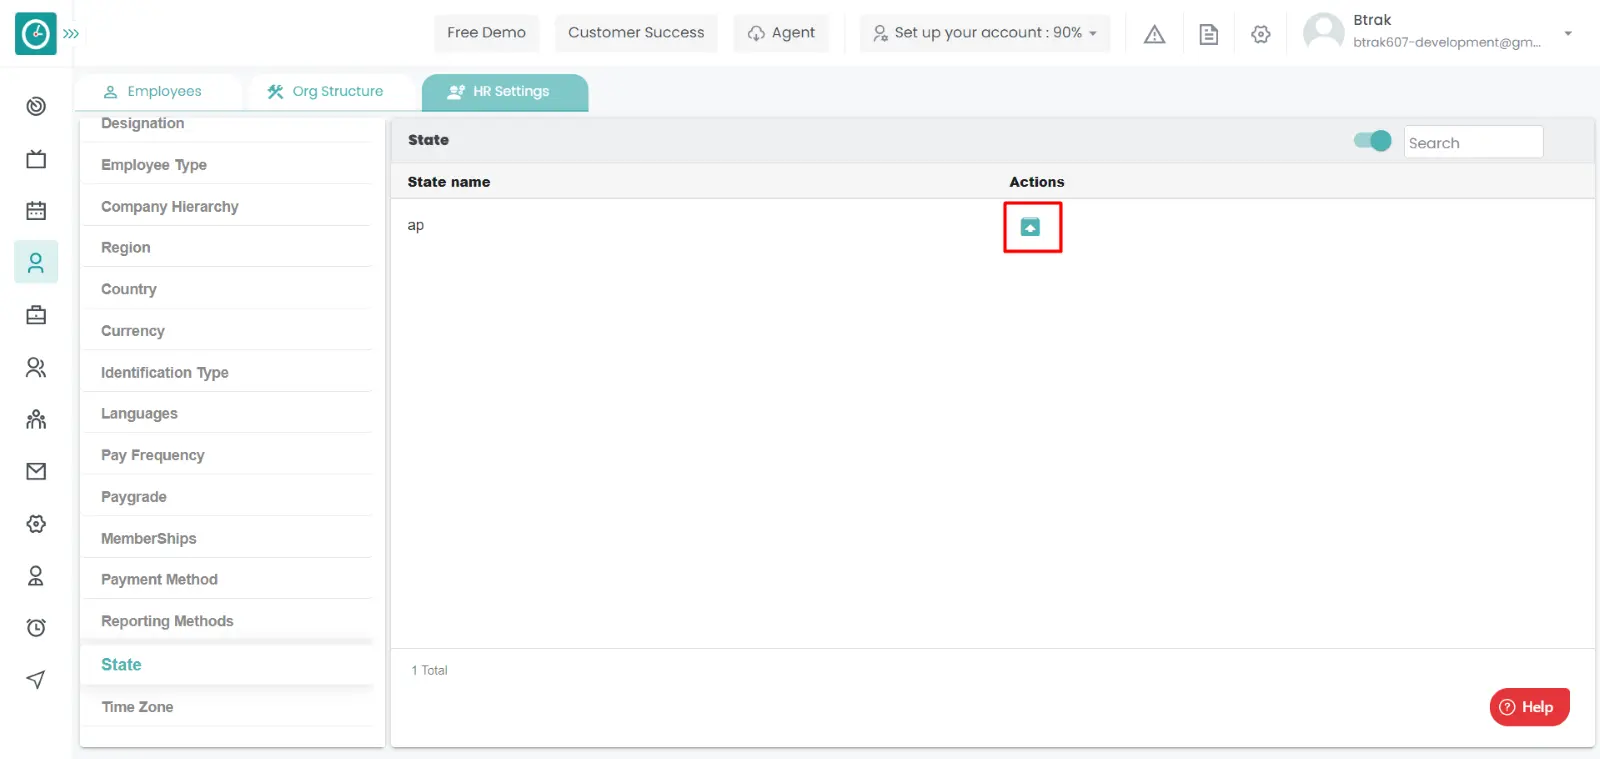
You can access/view the states of employee in organization.
Navigation: Goto HR => HR Tab => HR settings
If the user is having Super Admin
Permissions, then he can be able to access/view states in organization.
This permission can be configured by following the steps: -
View My Detailed Profile / View My Subordinate Profile / Edit My Subordinate Profile / Manage HR settings,
then select the roles for what you must give the permissions to configure and check them.View My Detailed Profile / View My Subordinate Profile / Edit My Subordinate Profile / Manage HR settings
for the defined roles.
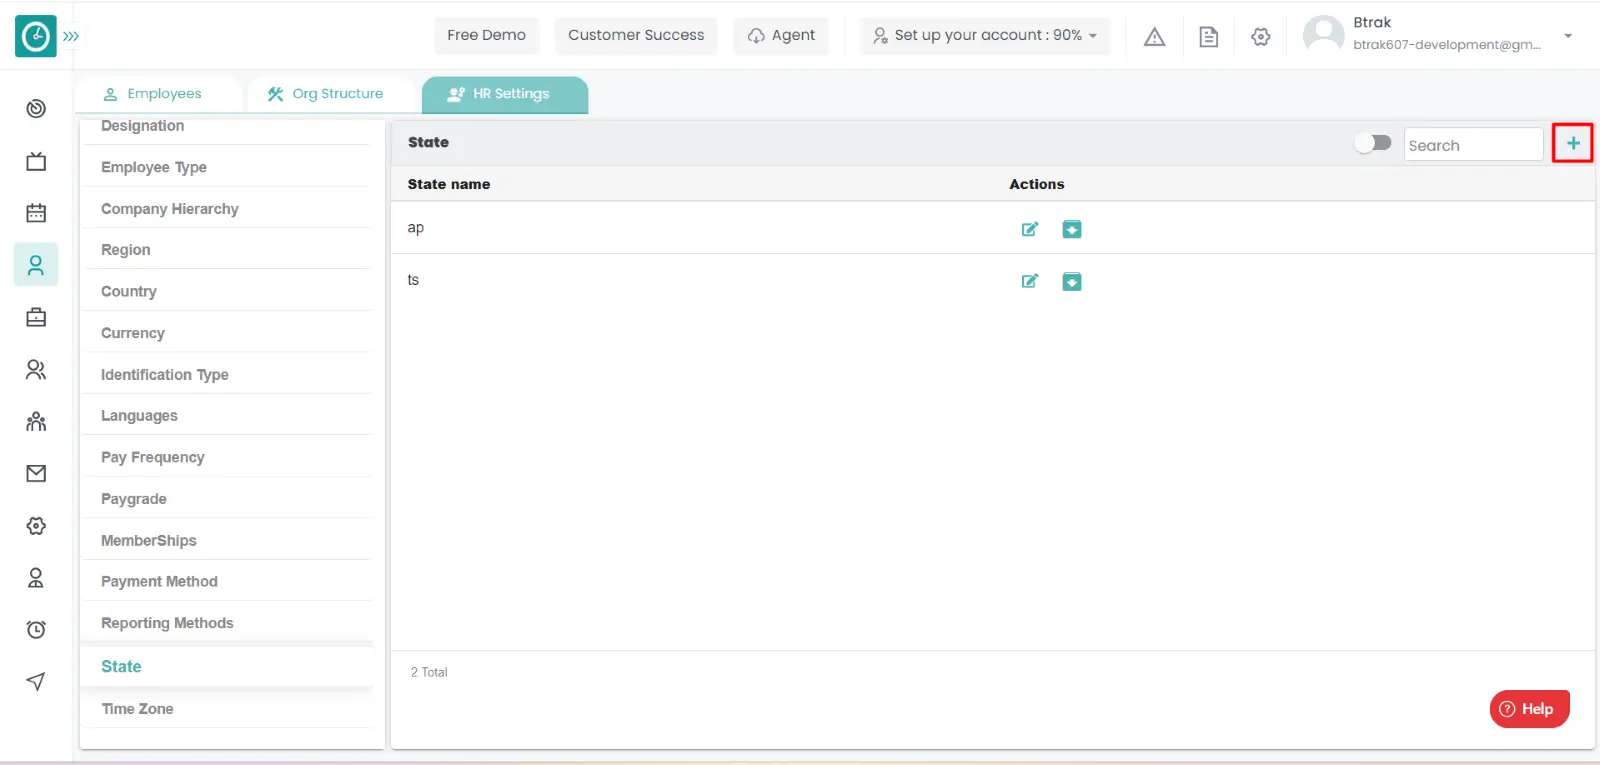
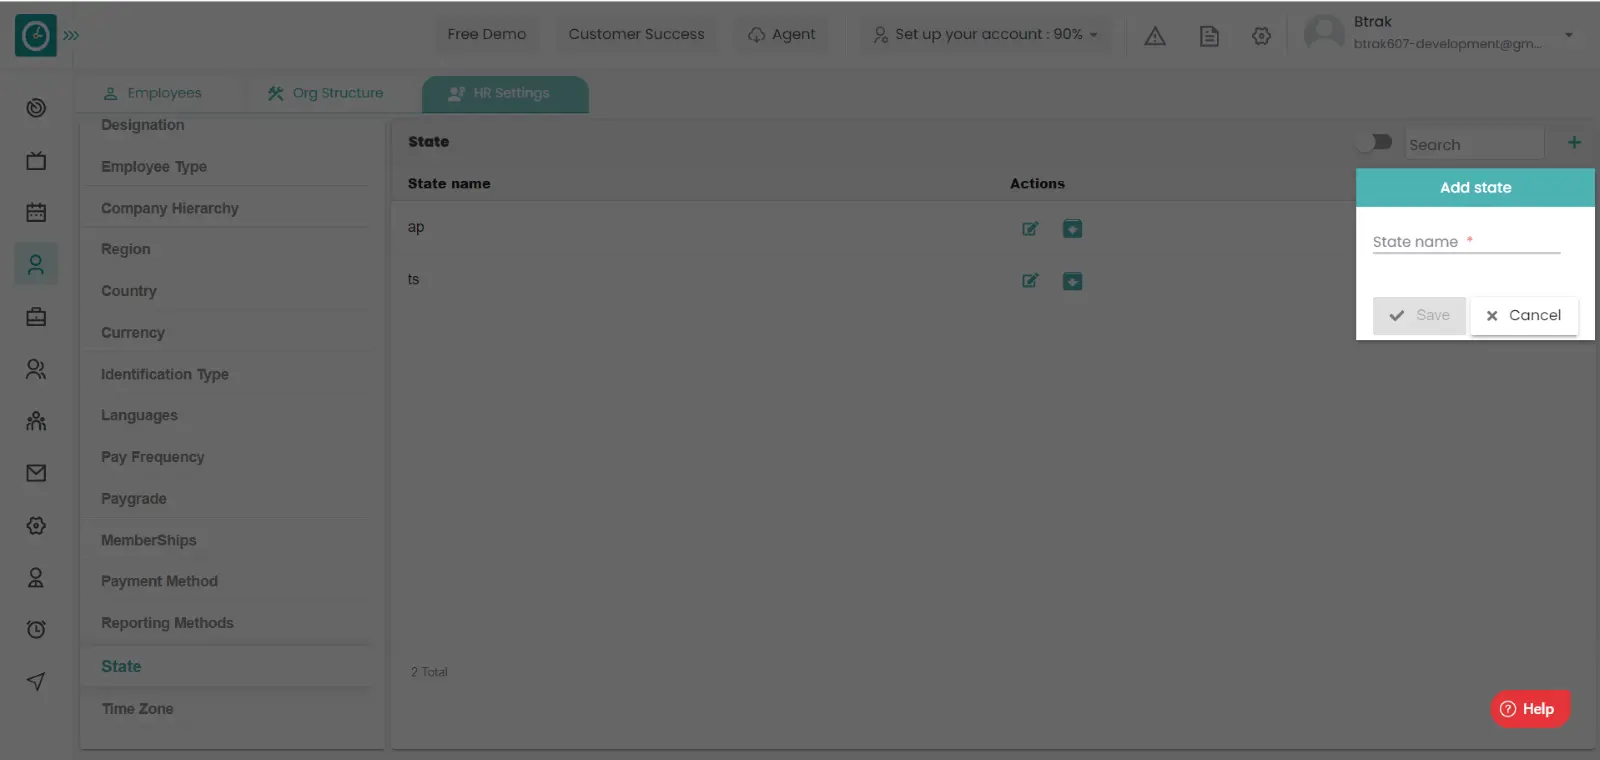
Add new state :-
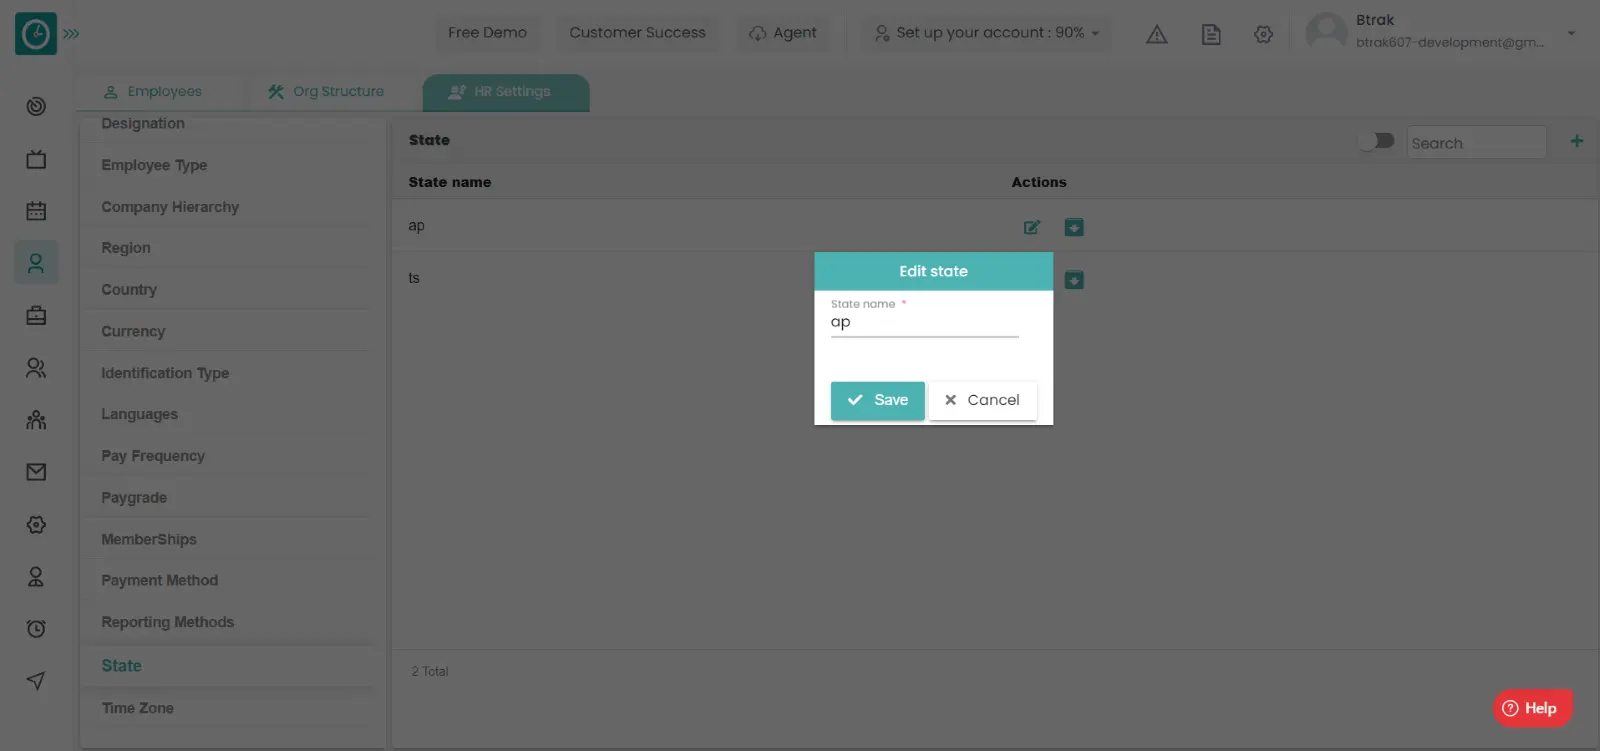
Edit state :-

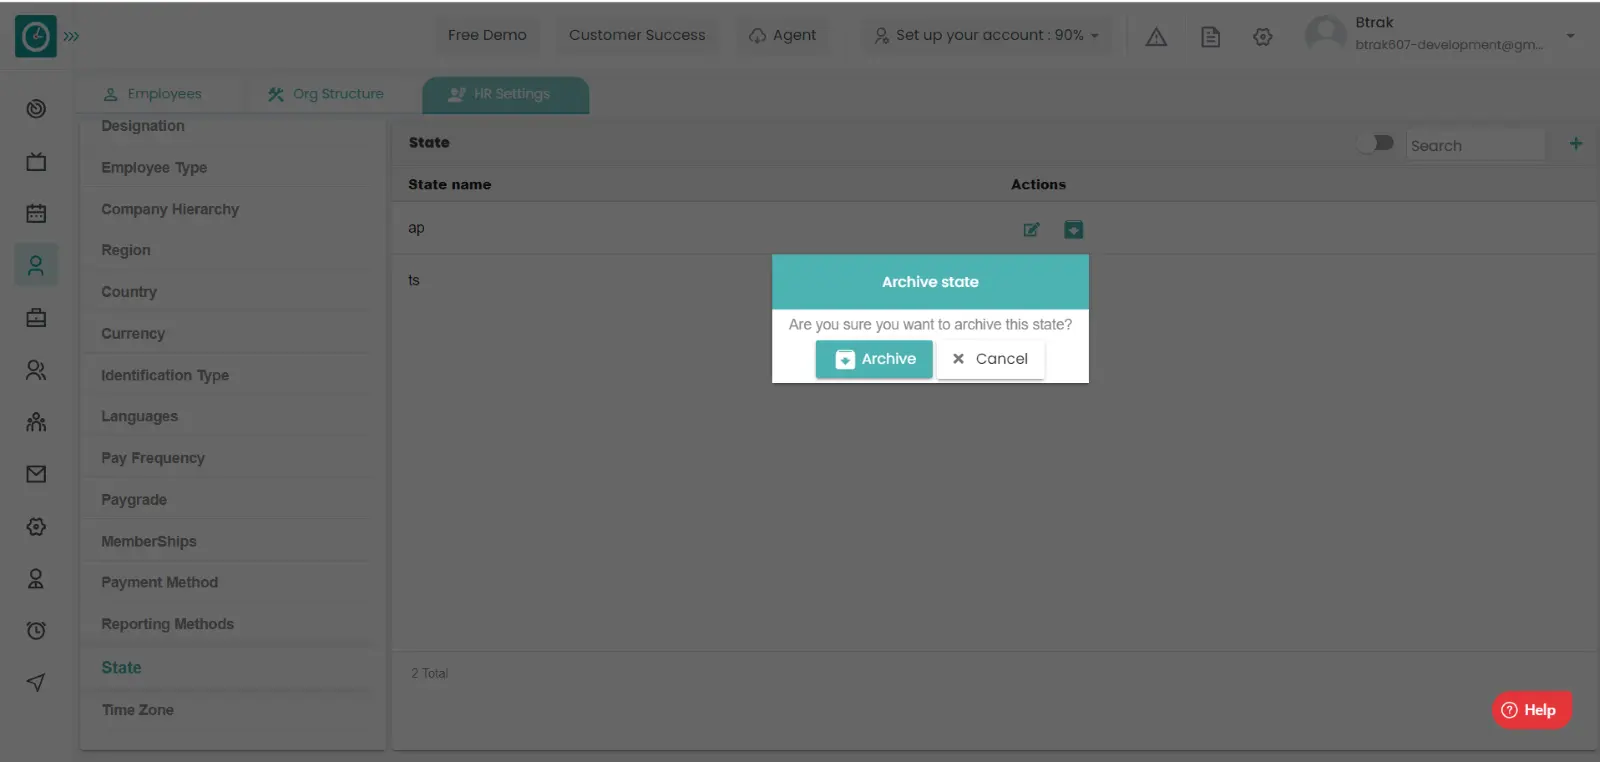
Archive state :-

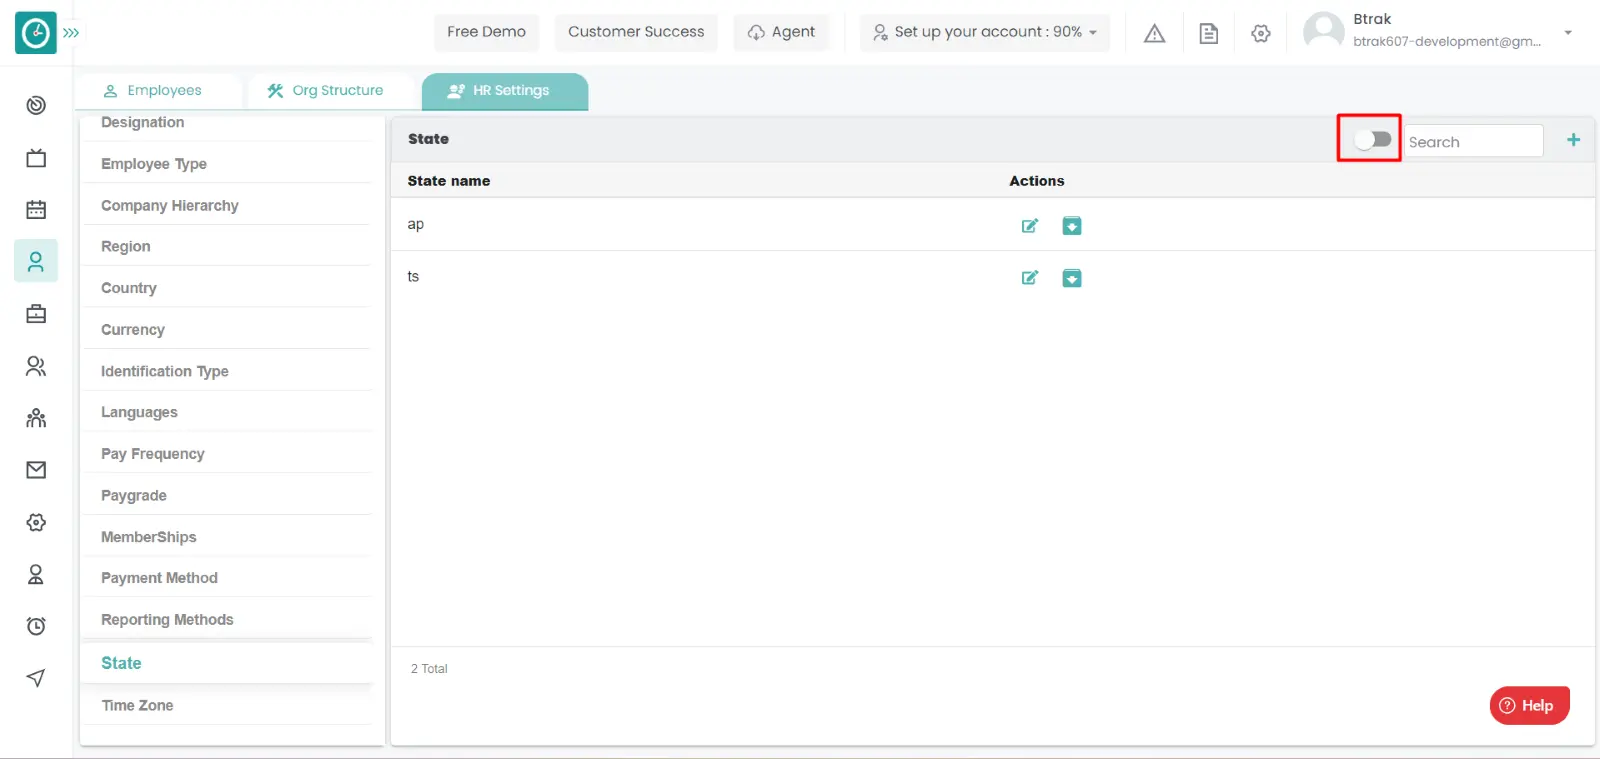
View Archived state :-
Unarchive state :-
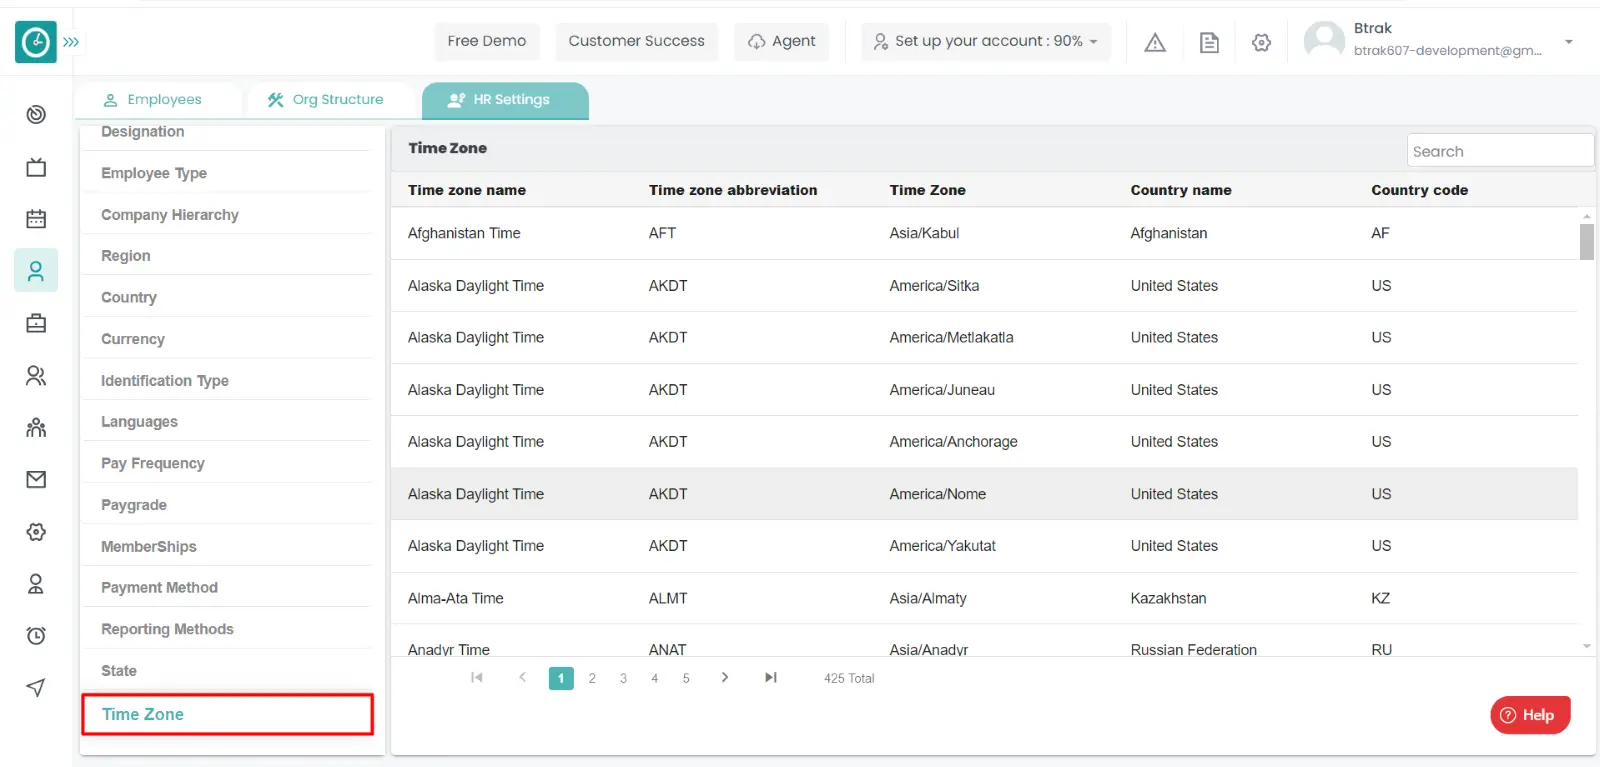
You can access/view the time zone of employee in organization.
Navigation: Goto HR => HR Tab => HR settings
If the user is having Super Admin
Permissions, then he can be able to access/view time zone in organization.
This permission can be configured by following the steps: -
View My Detailed Profile / View My Subordinate Profile / Edit My Subordinate Profile / Manage HR settings,
then select the roles for what you must give the permissions to configure and check them.View My Detailed Profile / View My Subordinate Profile / Edit My Subordinate Profile / Manage HR settings
for the defined roles.
View time zone :-
Absence Management - Leaves
![]() Copied
Copied
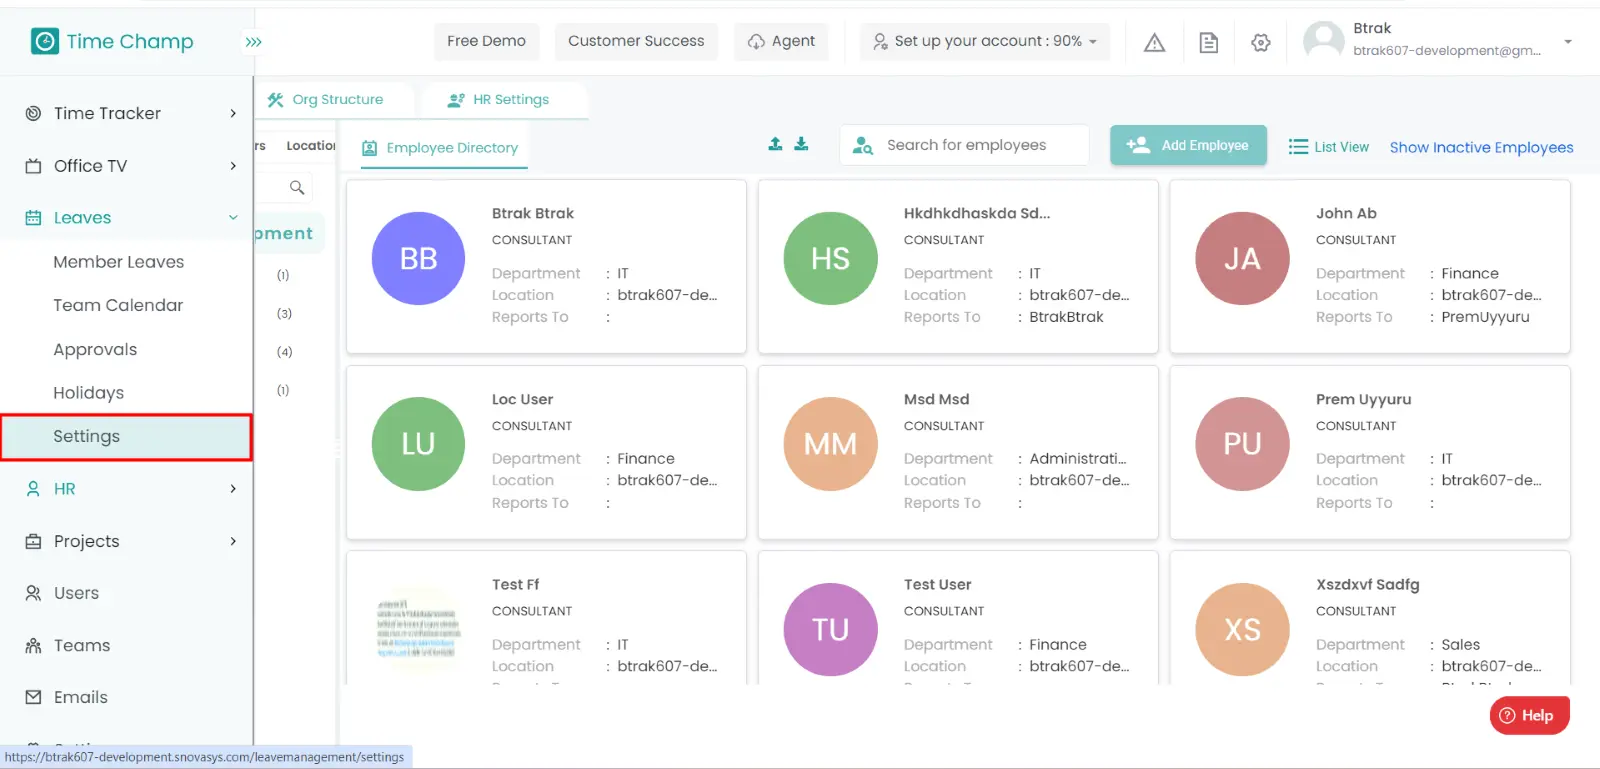
Absence management is one of the most important and powerful modules in Time Champ. Leave management enables companies to set up their leave policies according to their wish. They can setup different types of leaves and on top of it they can set up the restrictions on which type of people are eligible for these leaves. Then employees can see their leaves quota and apply for leaves according to their eligibility.
Read MoreIn case of any emergency or any personal leaves can be applied from here. An employee has his own works for that he needs to take leave.
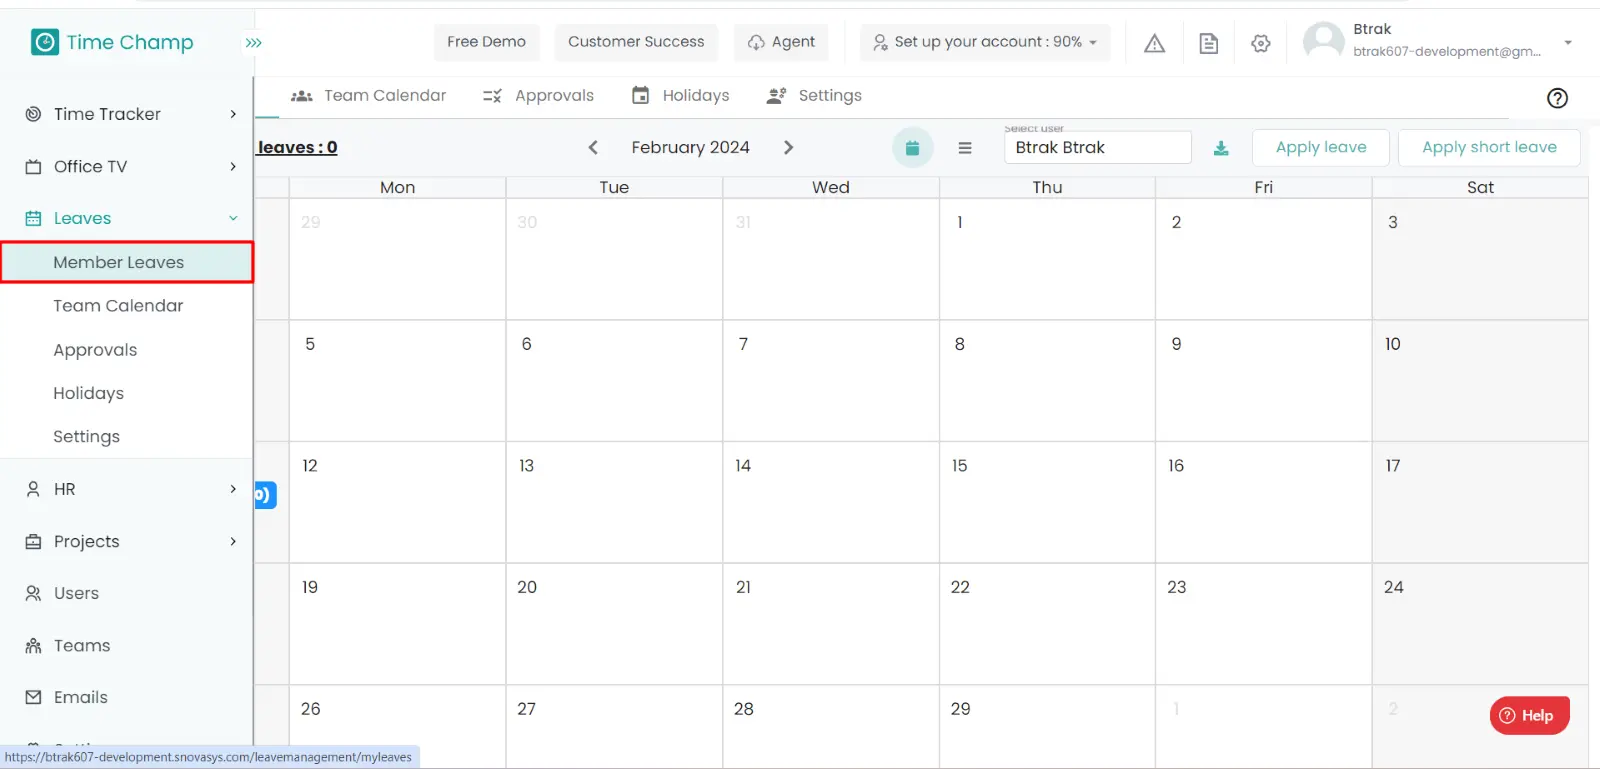
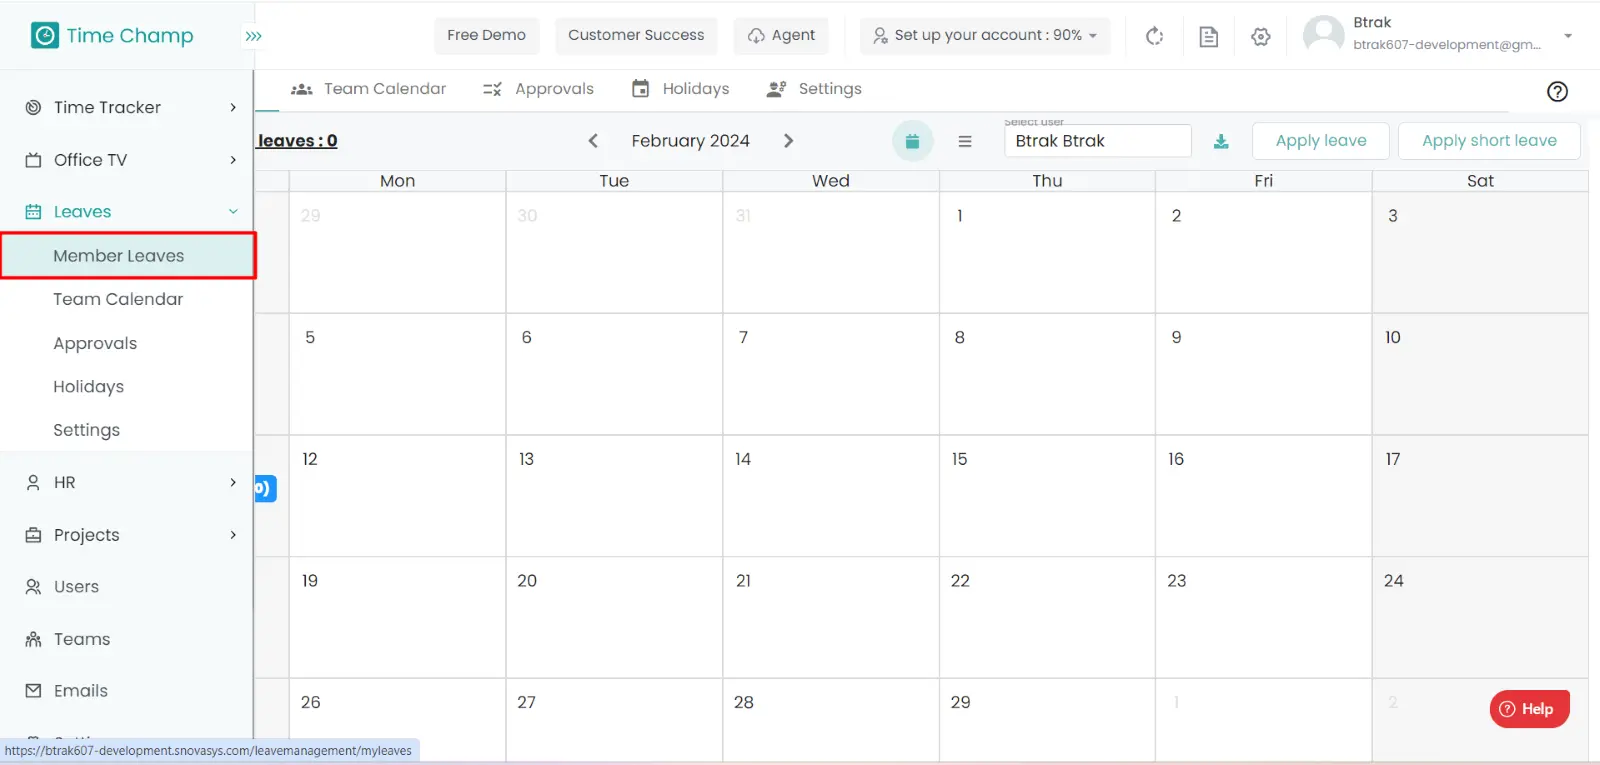
Navigation: Goto Leaves
If the user is having Super Admin
permissions, then he can be able to
apply the leave.
This permission can be configured by following the steps: -
Leave management
in Permissions.apply the Leave
for the defined roles.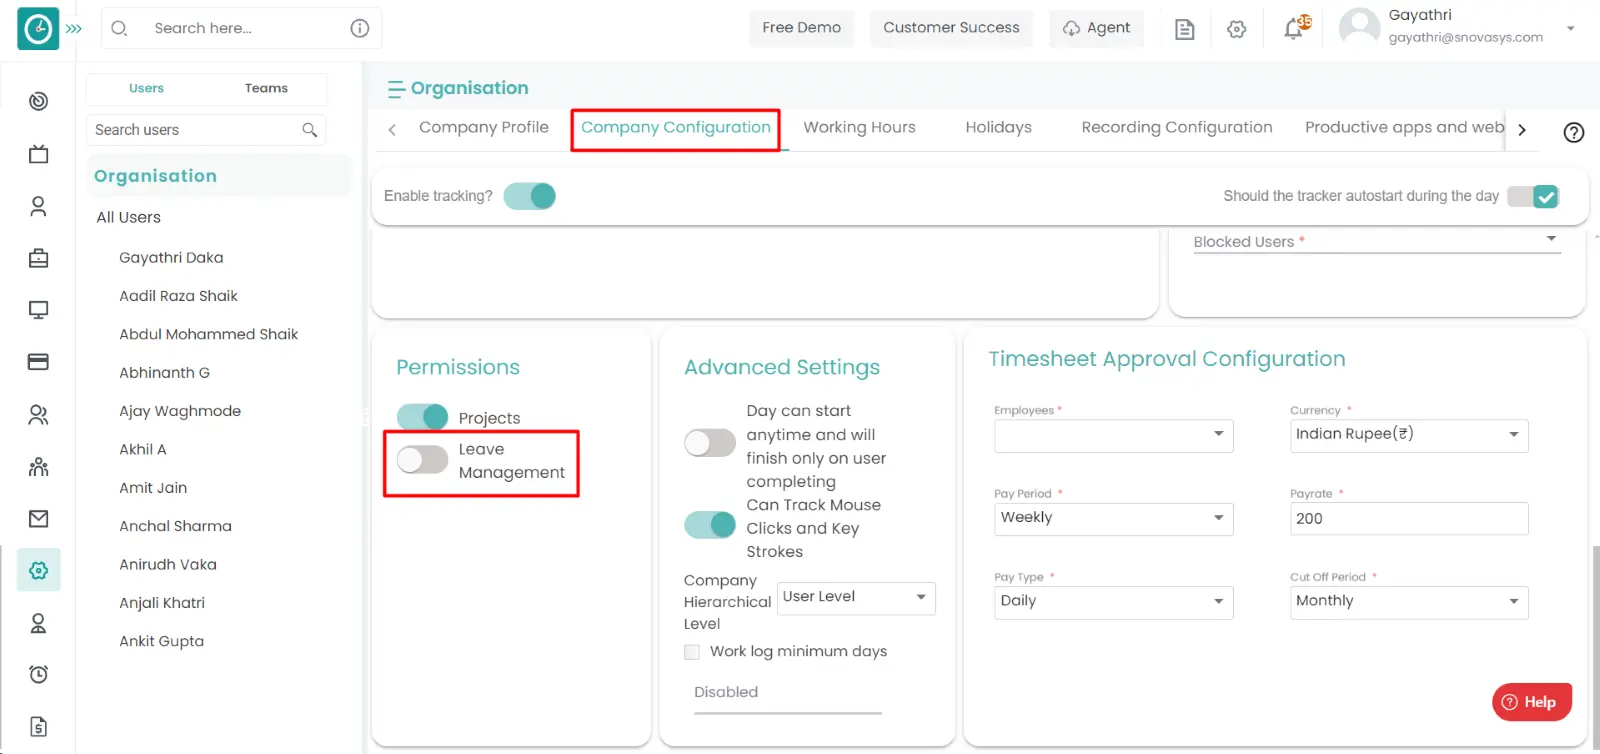
Procedure: -
Apply leave.

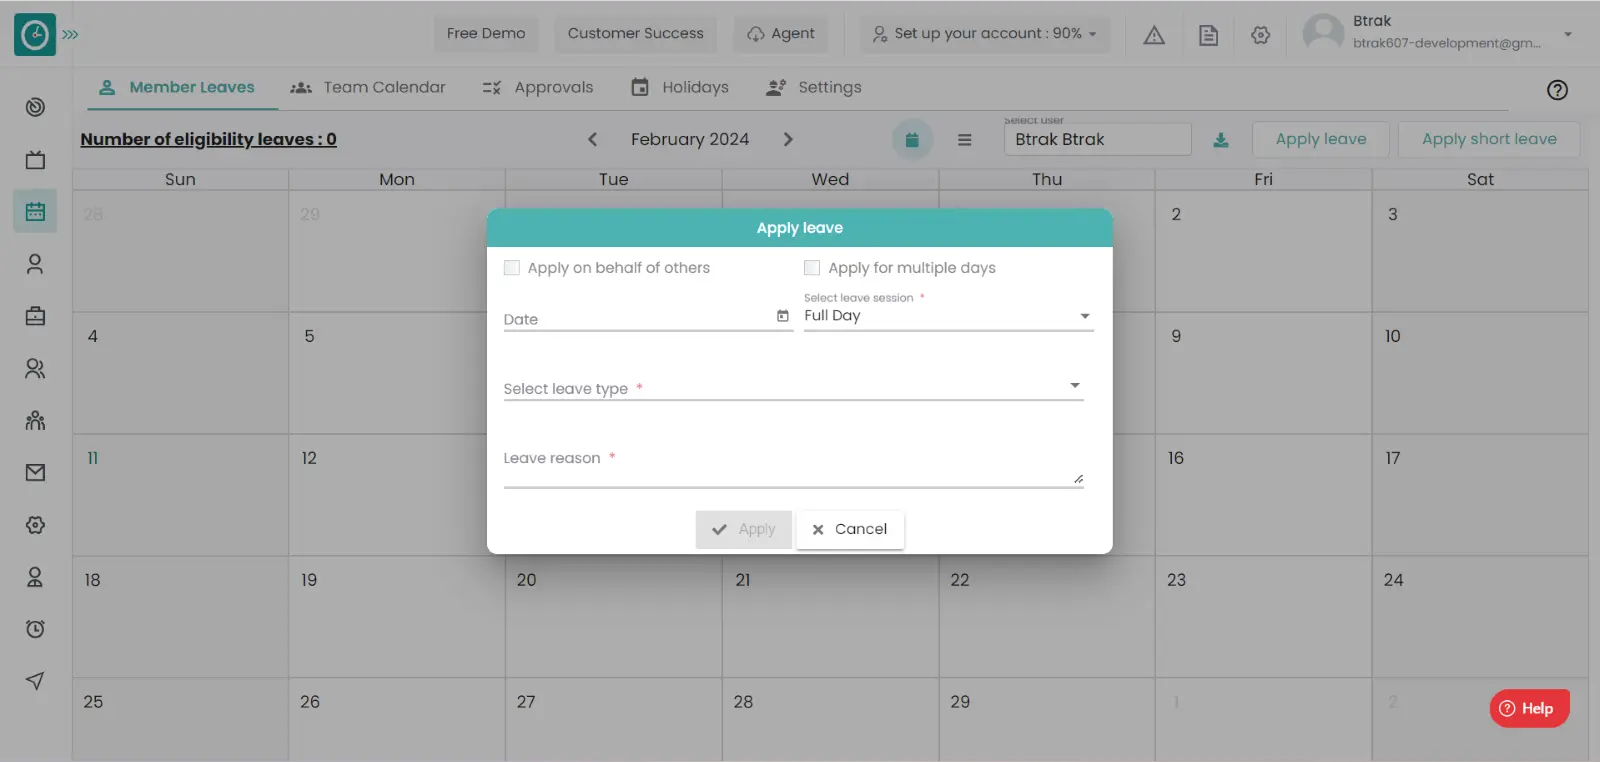
Now you have Requested for the leave
If the employee has the genuine reason to take leave you can approve the leave request or else you can reject the request.
Navigation: Goto Leaves => Tab: Approvals
If the user is having Super Admin
permissions, then he can be able to
Approve/reject the leave requests of
an employee, team, company.
This permission can be configured by following the steps: -
Approve/Reject leaves for Subordinates from Leaves module,
then select the roles for what you must give the permissions to configure and check them.apply the configurations
, for the defined roles.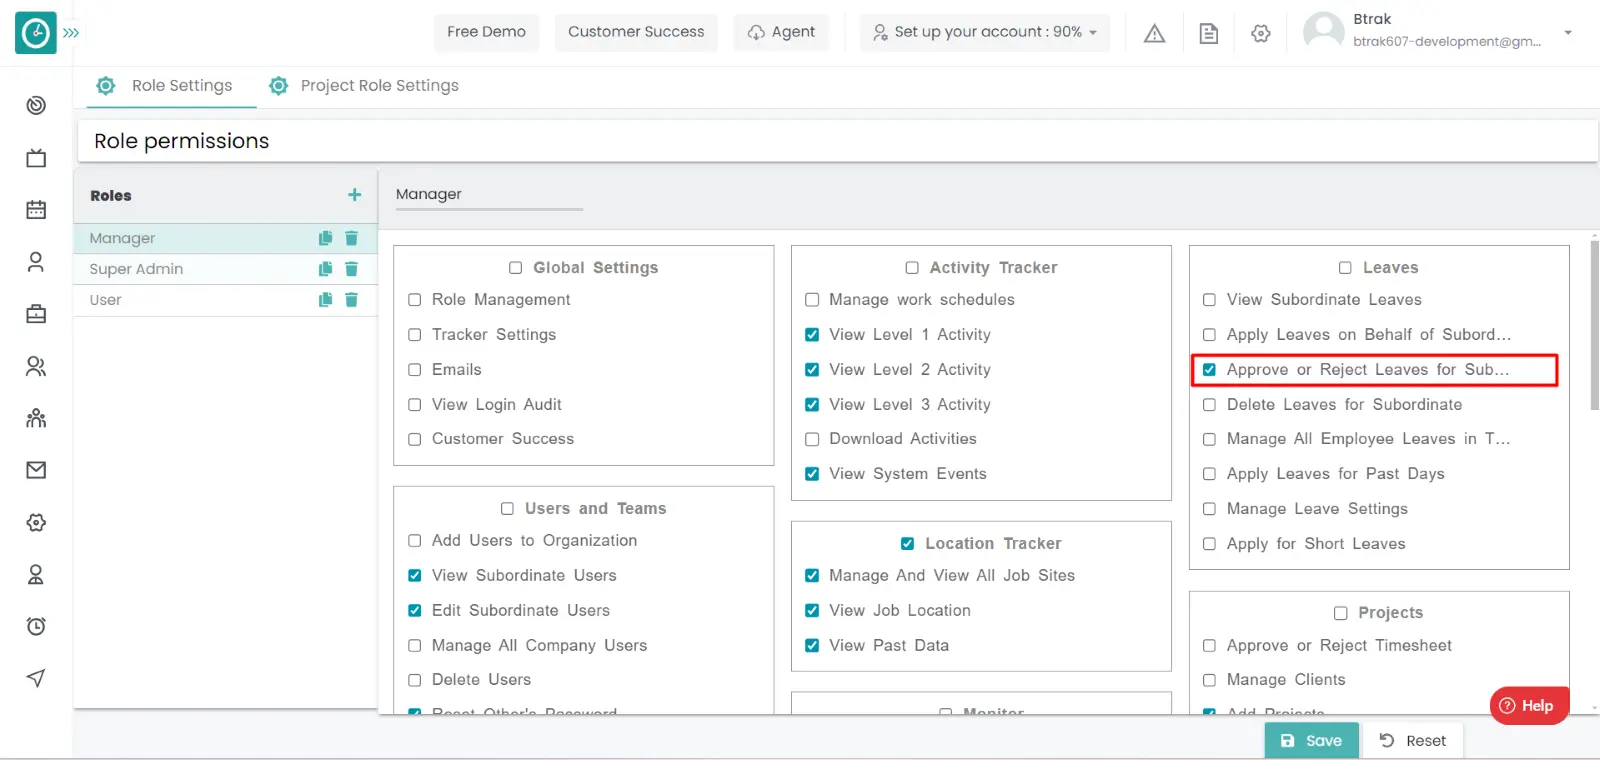
Procedure: -
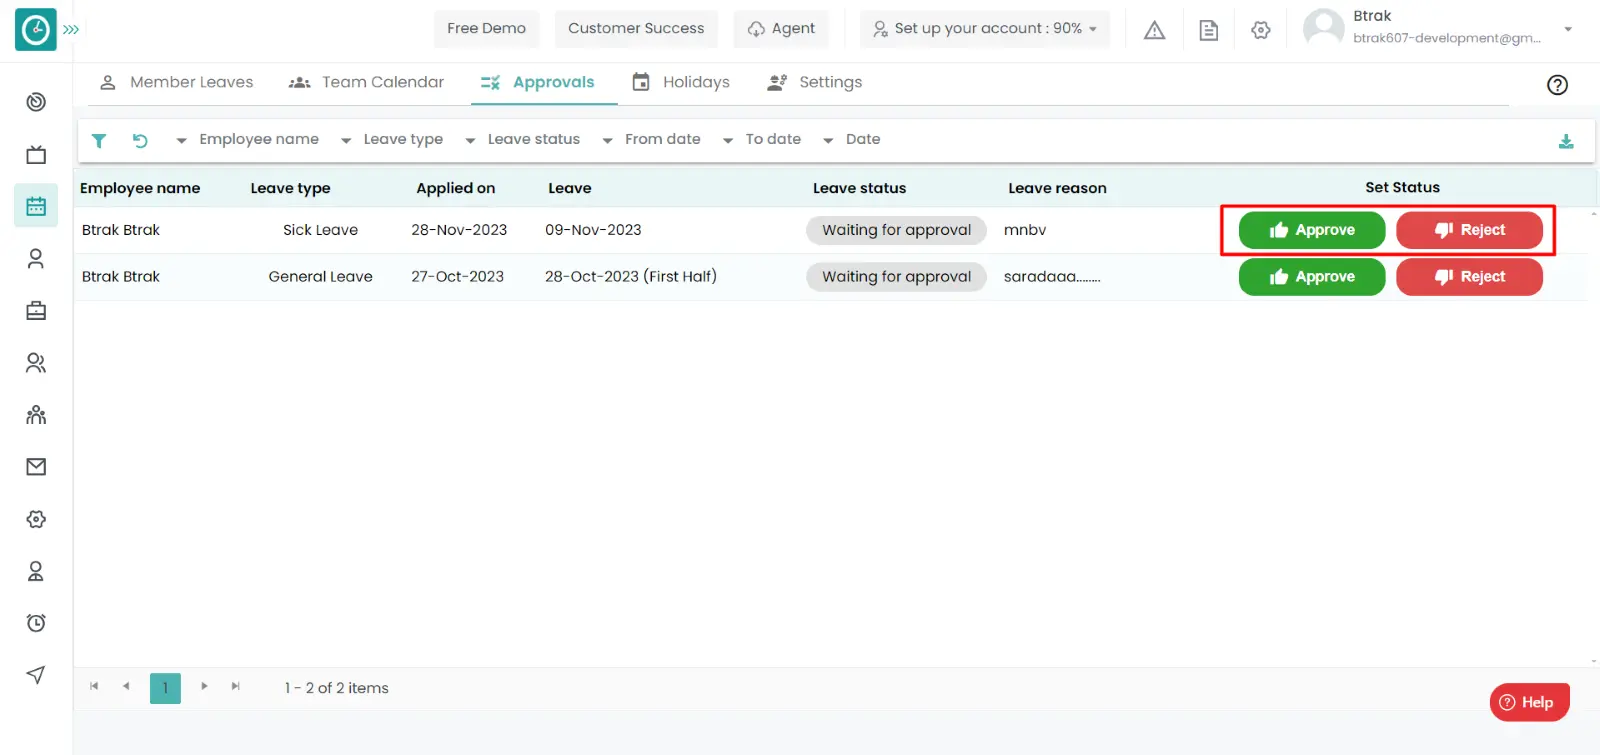
Now you have approved/rejected your subordinates leave requests.
If the user applied for leave request with wrong dates and timings or wrong reason, he/she can be able to edit the request from this.
Navigation: Goto Leaves => Tab: Member Leaves.

If the user is having Super Admin
permissions, then he can be able to edit the leave.
This permission can be configured by following the steps: -
Leave management
in Permissions.edit the Leave
for the defined roles.
Procedure:

Now you have successfully edited the applied leave request.
To maintain the records of all the employees the download option will be helpful, with this you can be able to download all the approved/rejected leave requests in csv or excel format.
Navigation: Goto Leaves => Tab: Approvals.
If the user is having Super Admin
permissions, then he can be able to download the applied leave request,
Approved/rejected requests of employees, teams, company.
This permission can be configured by following the steps: -
Approve Or Reject Leaves for subordinates from Leaves module,
then select the roles for what you must give the permissions to configure and check them.Approve/Reject the leaves for subordinates
for the defined roles.
Procedure:
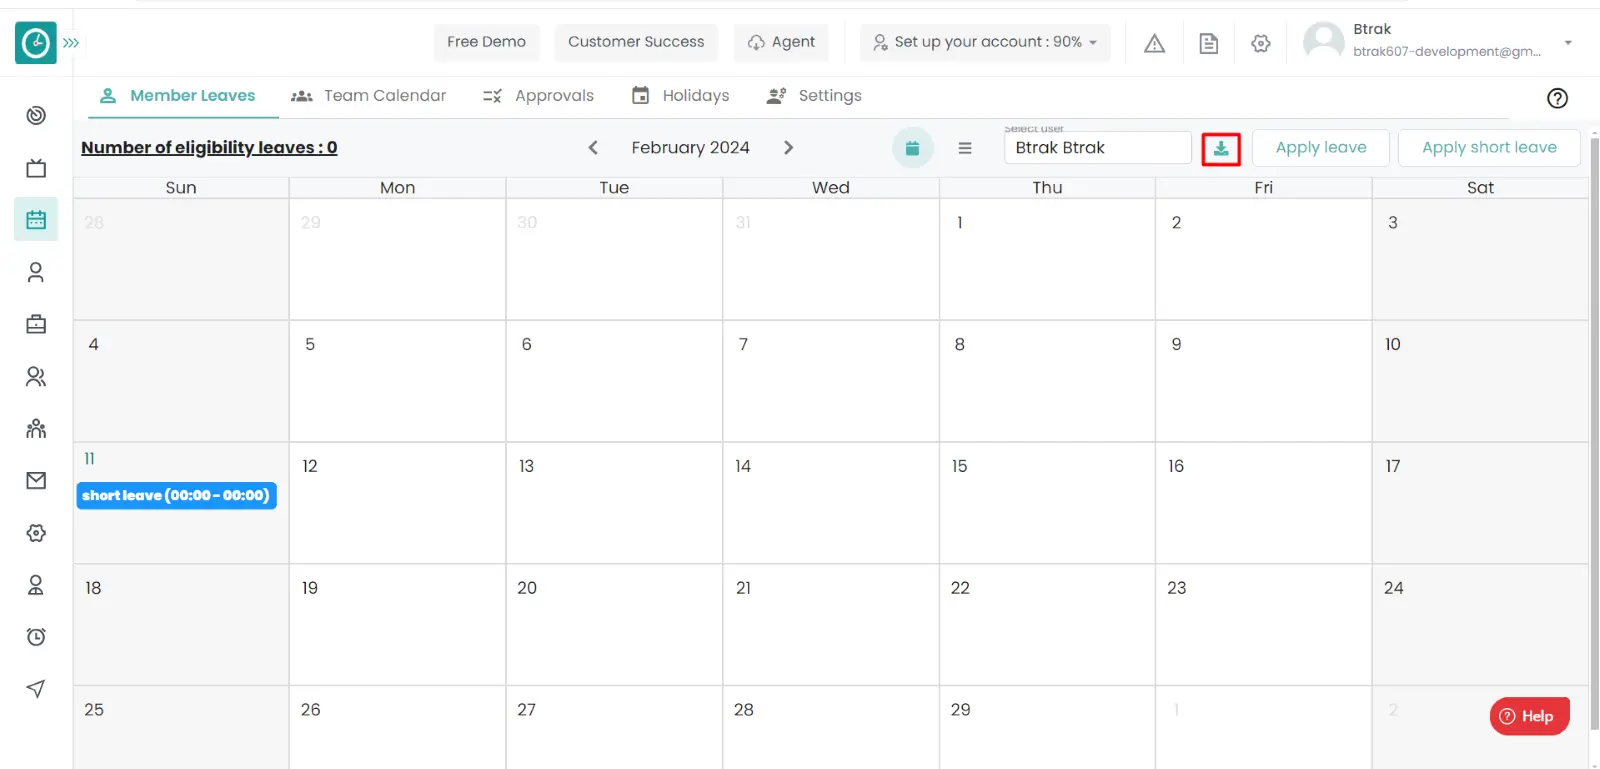
Now you successfully downloaded the approved/rejected leave requests
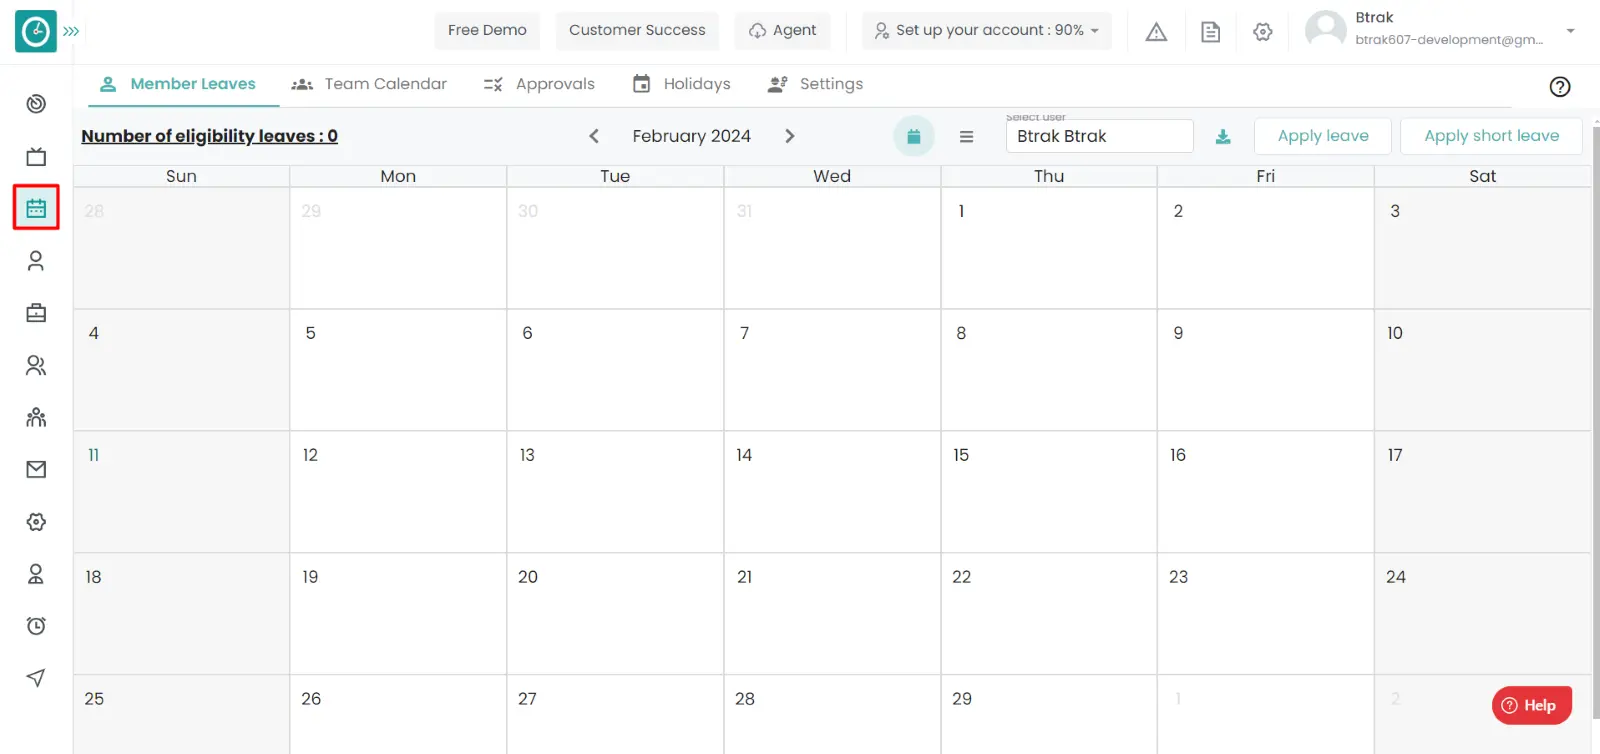
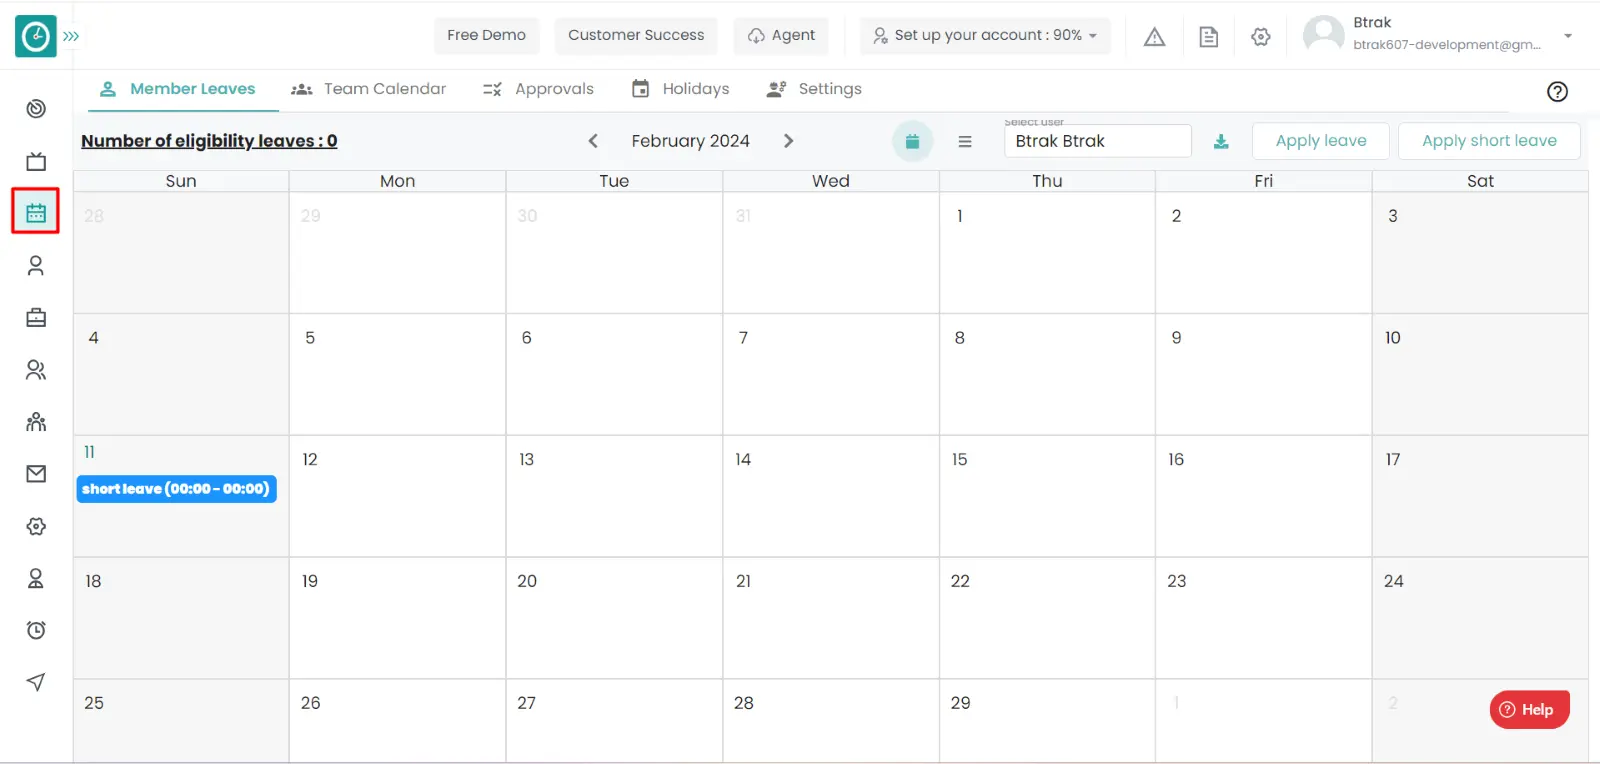
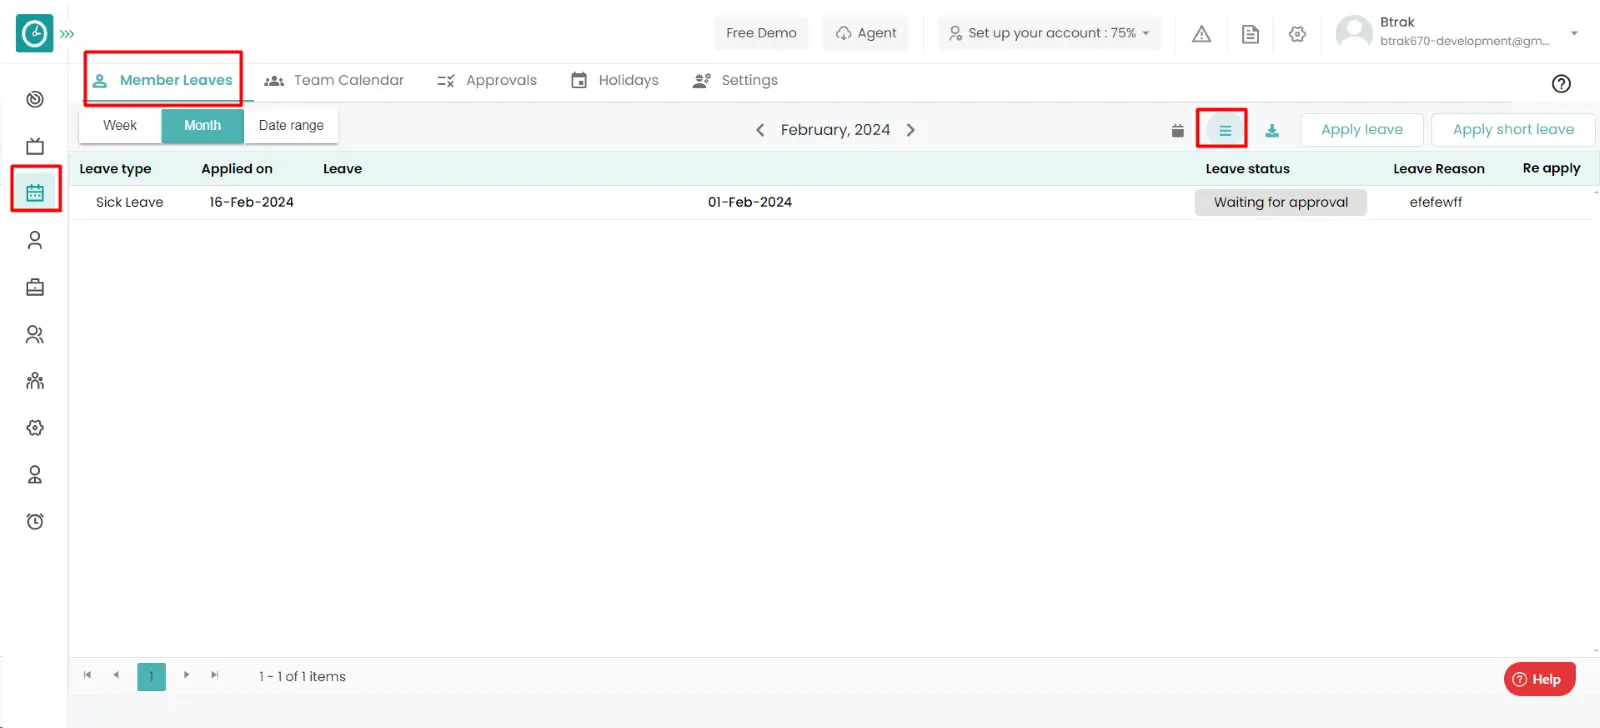
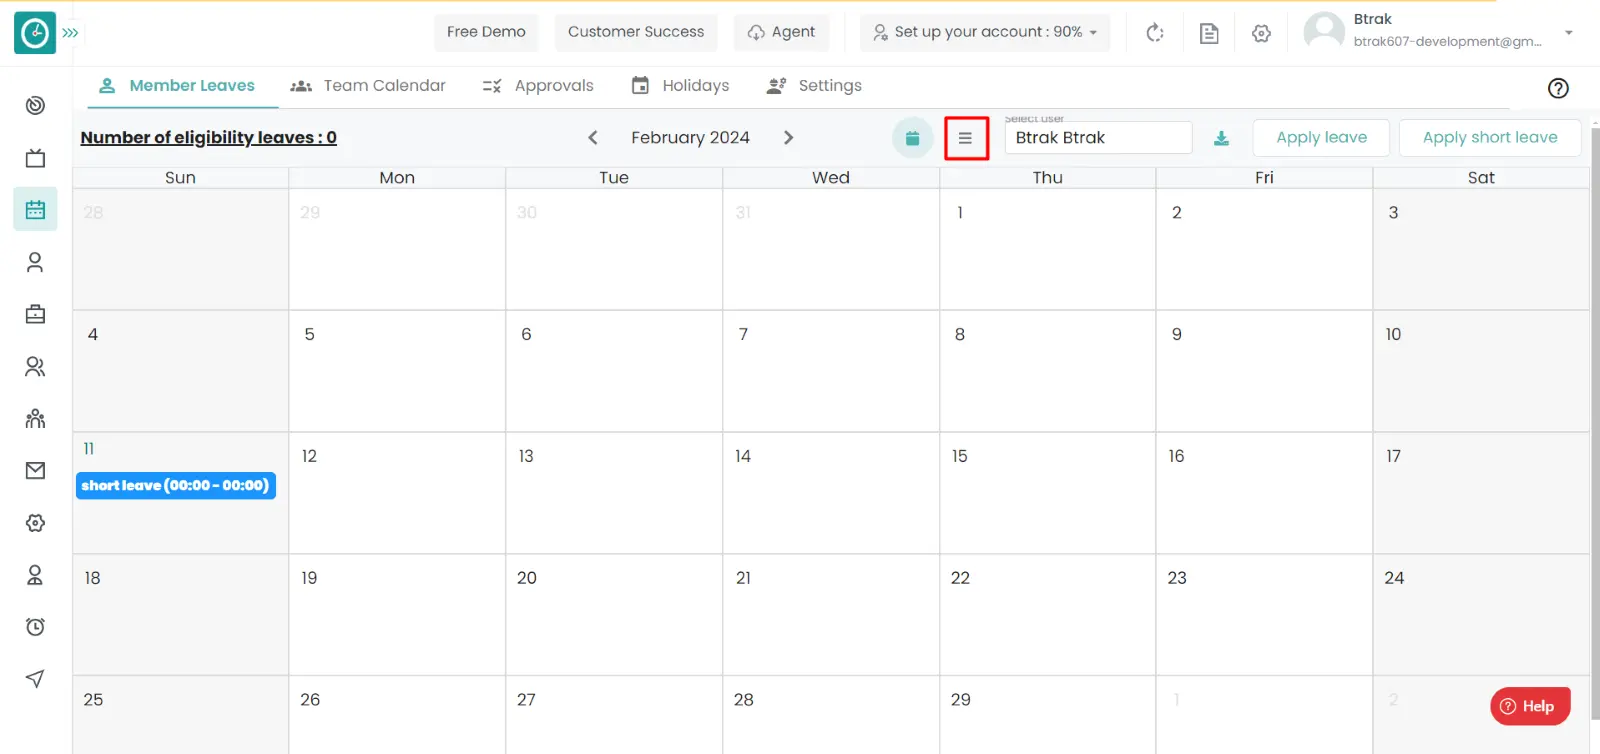
To View all the requests in a list view of all the employees to get the better understanding who are in leave for the week/month.
Navigation: Goto Leaves => Tab: Member Leaves=> Click on the list icon.

If the user is having Super Admin permissions, then he can be able to view the leaves requests.
If the user is having Super Admin
permissions, then he can be able to view the leaves in list view.
This permission can be configured by following the steps: -
Leave management,
in Permissions.view the Leave request in list view
for the defined roles.All the users can be able to view their leave requests in list view by giving the above permissions.
Now you are view the leave requests in list view.
To apply for the leave, you should know the available leaves for the employee. So that the paid leaves will be applied for the leave plan or else loss pay will be applied.
Navigation: Goto Leaves => Tab: Member Leaves
If the user is having Super Admin
permissions, then he can be able to find remaining number of leaves.
This permission can be configured by following the steps: -
Leave management,
in Permissions.view the remaining number of leaves
for the defined roles.All the users can be able to view their remaining leaves for the period.
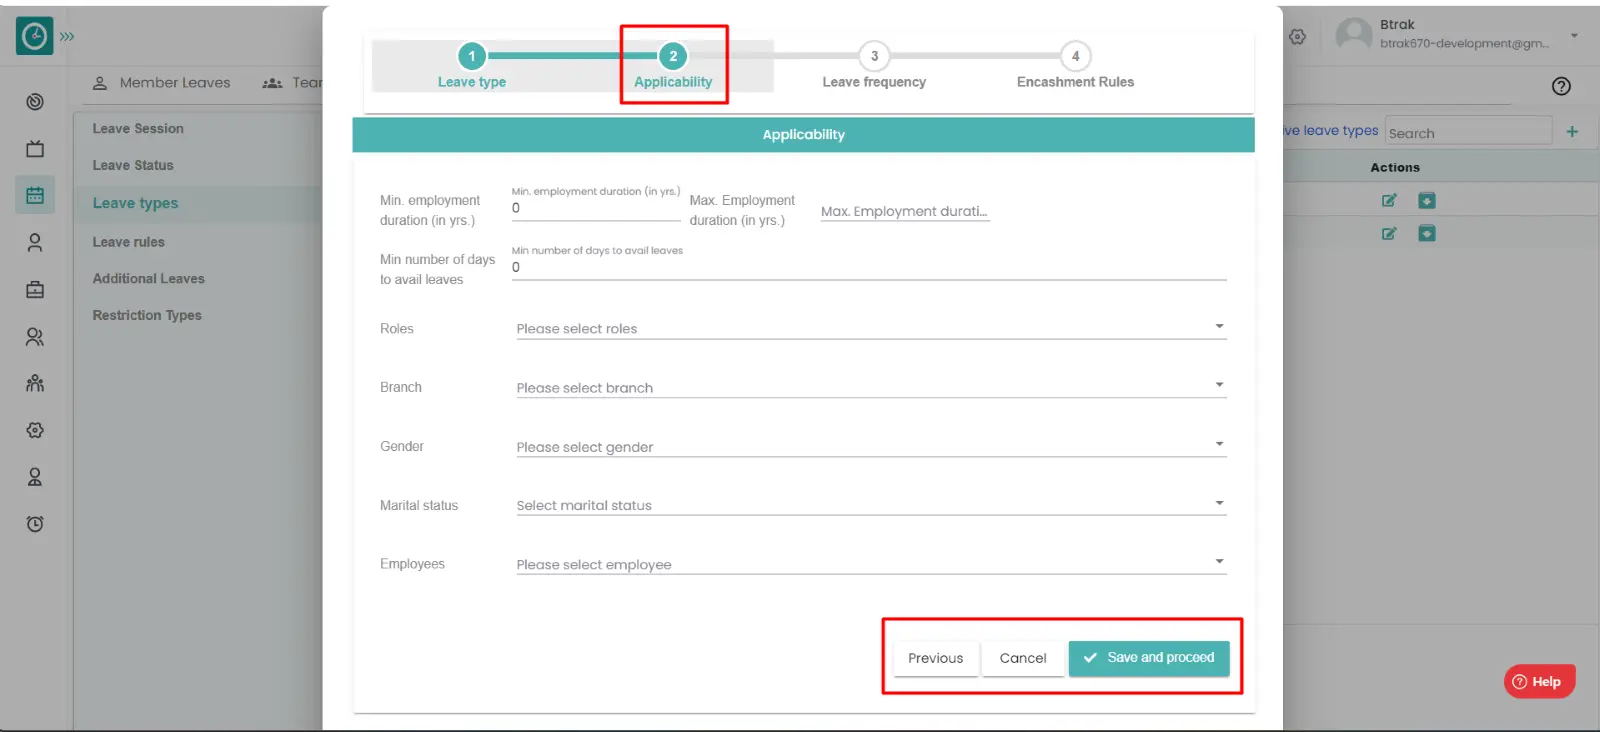
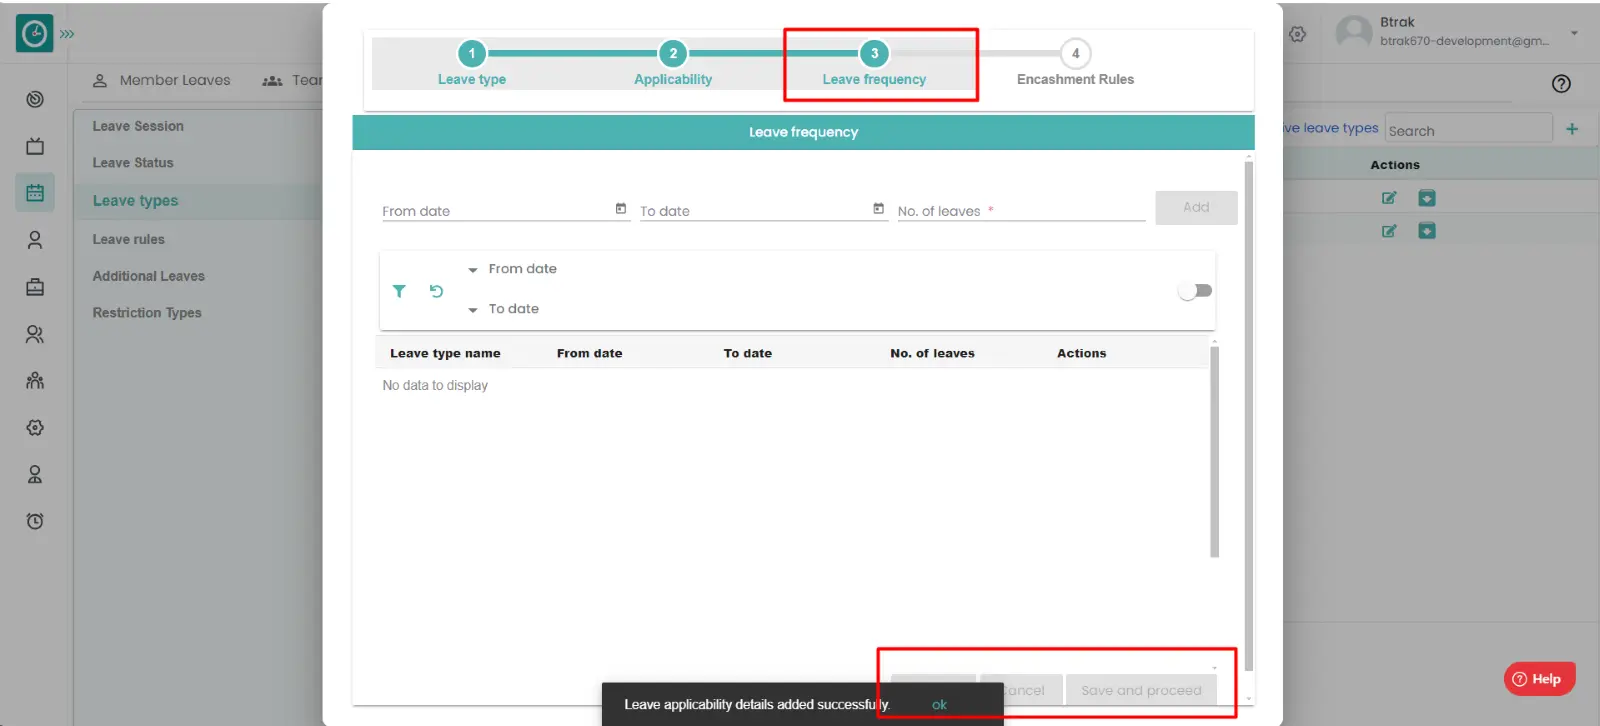
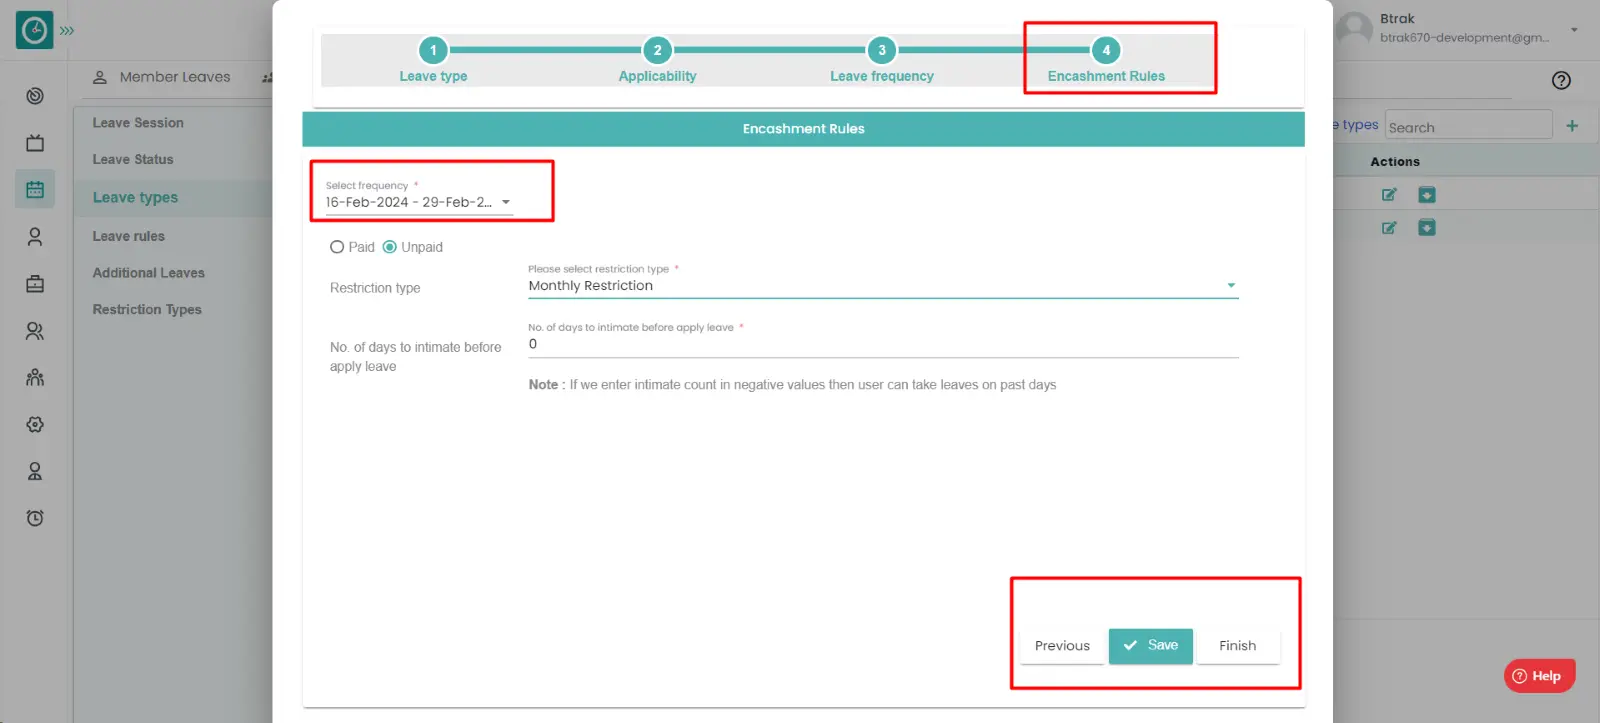
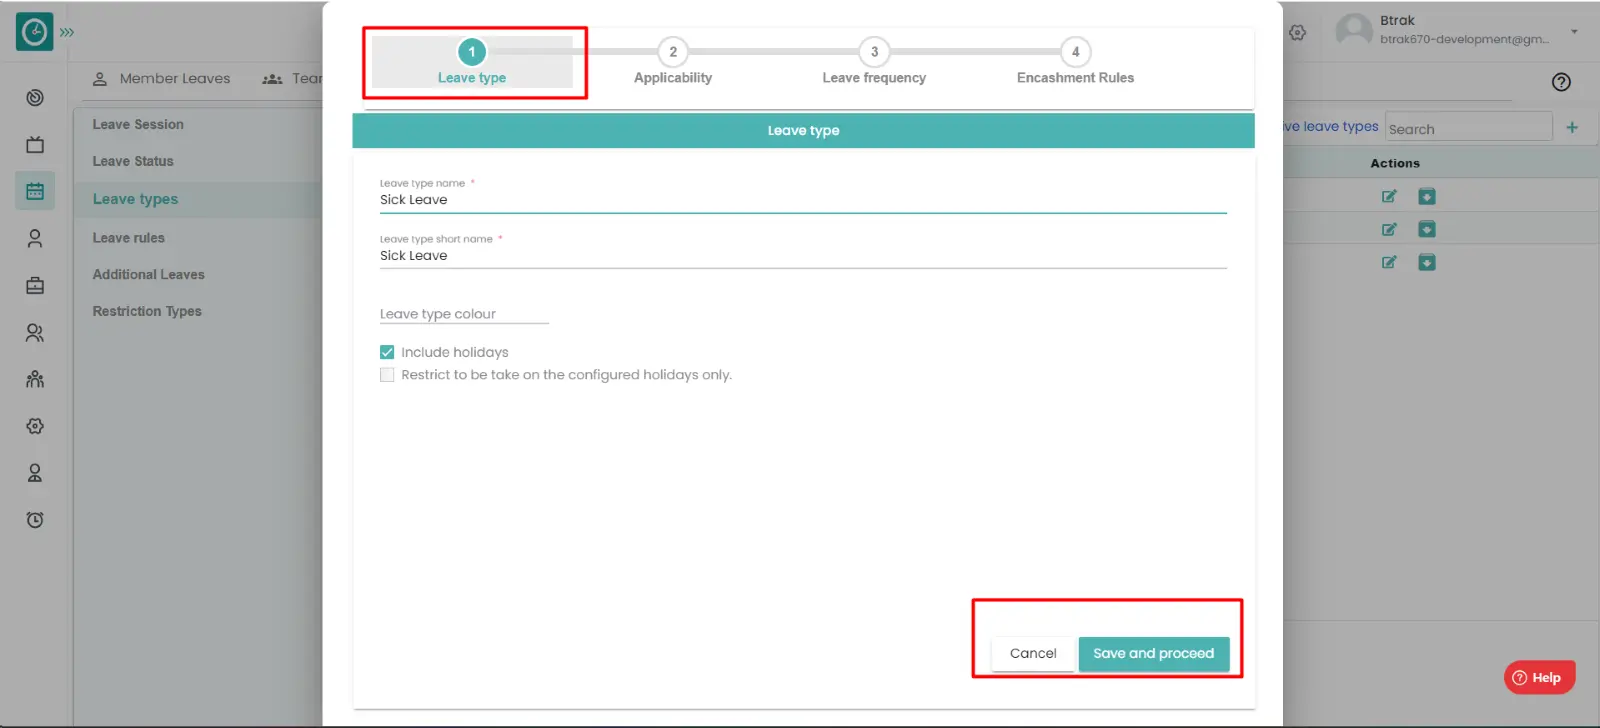
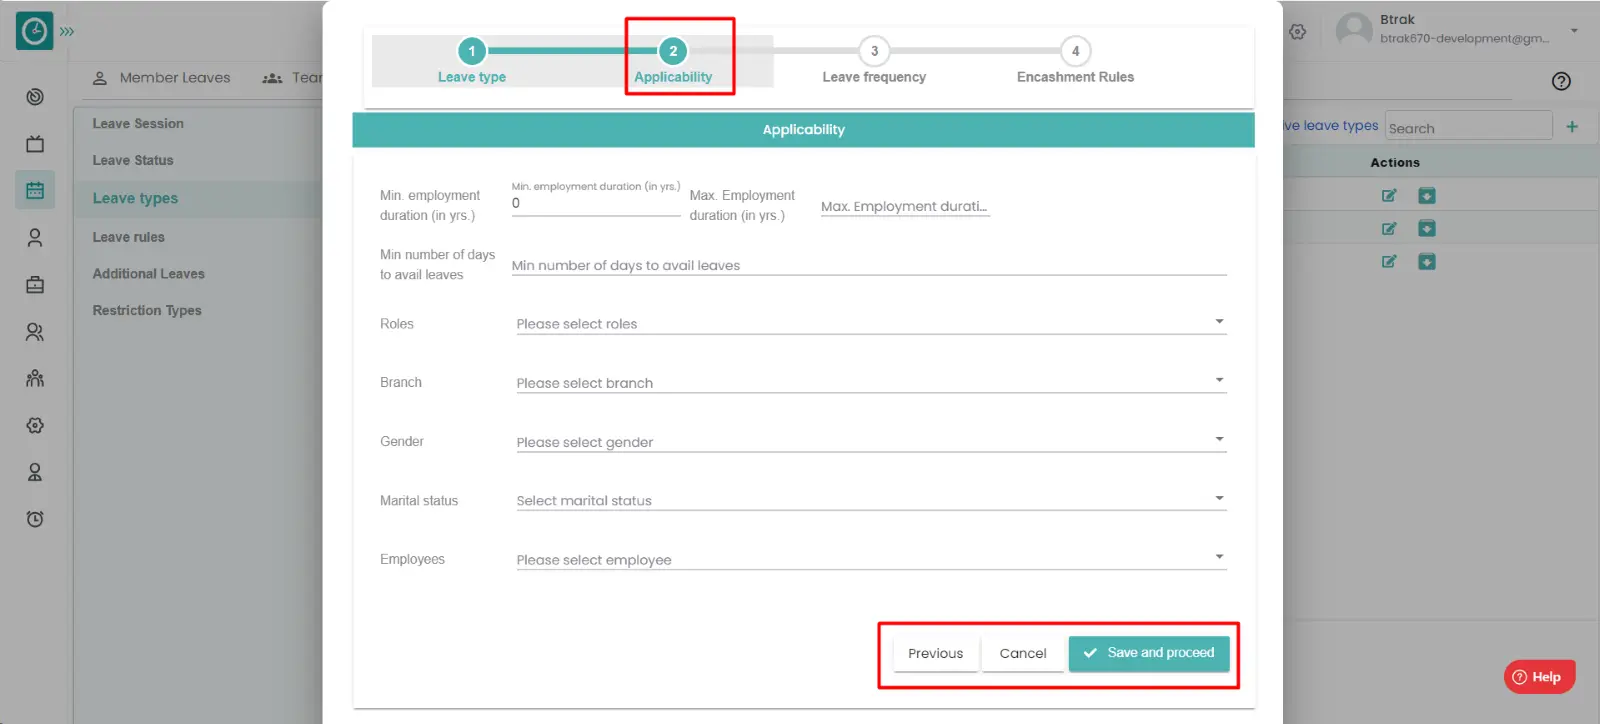
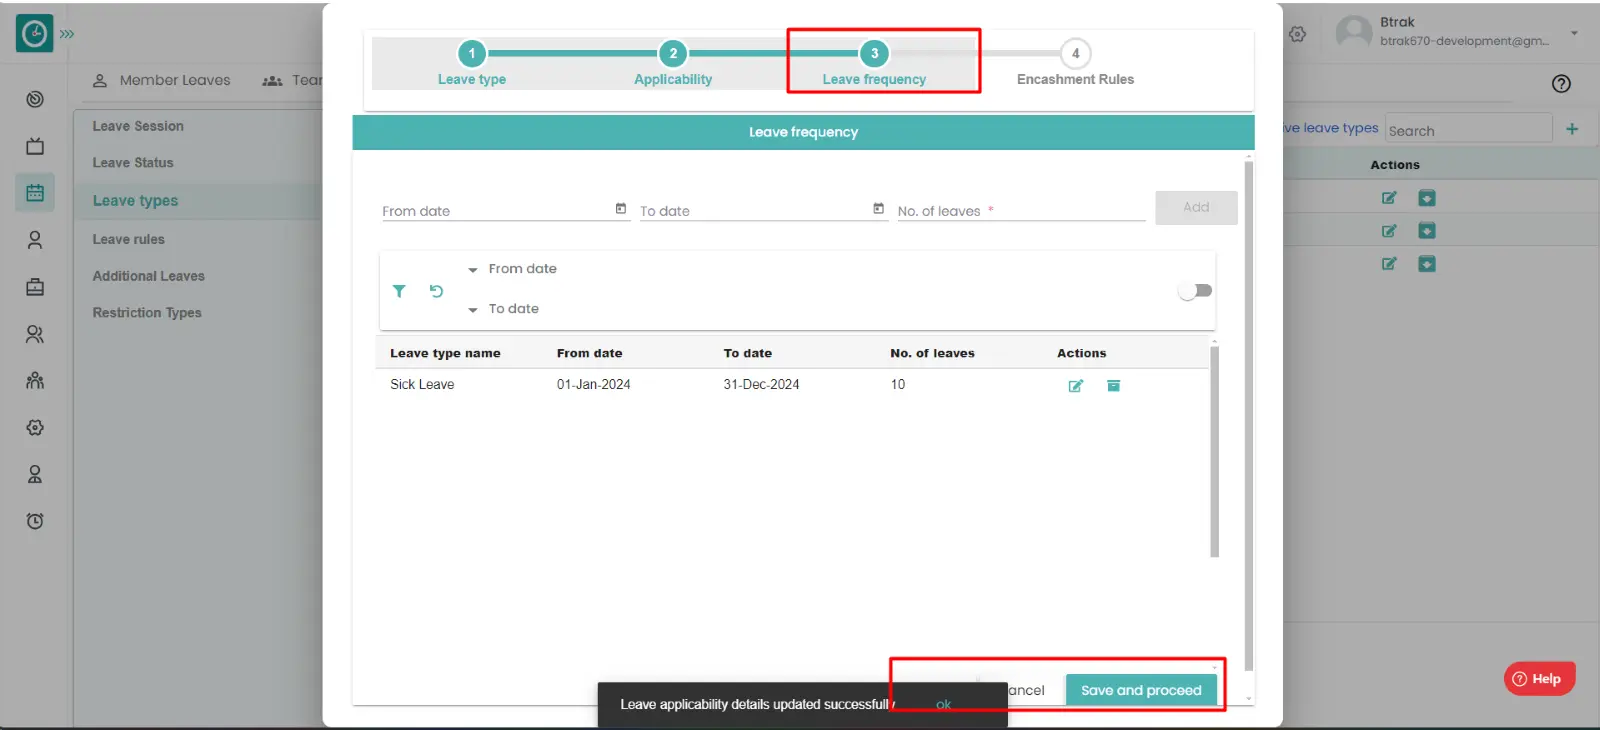
Different organization has different leave types based on their needs. They are vacation leave, sick leave, casual leave etc. The first step in making leave policies is to define all the types of leaves that your organization will use.
Navigation: Goto Leaves => Tab: Settings => Leave types.
If the user is having Super Admin
permissions, then he can be able to setup the leave types for an employee, team,
company.
This permission can be configured by following the steps: -
Manage leave settings from Leaves module,
then select the roles for what you must give the permissions to configure and check them.create/ edit the leave type
for the defined roles.
Procedure to Add leave type:
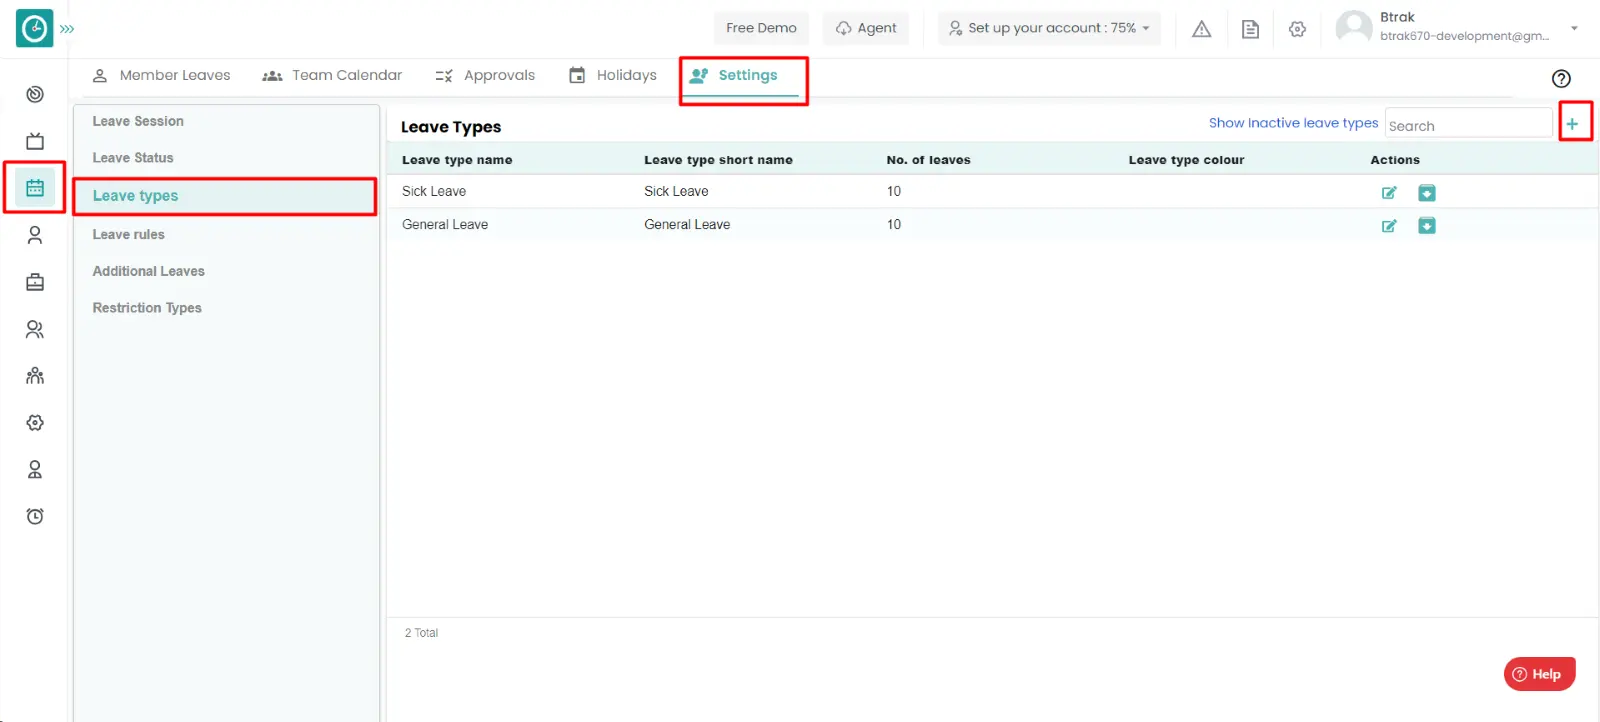
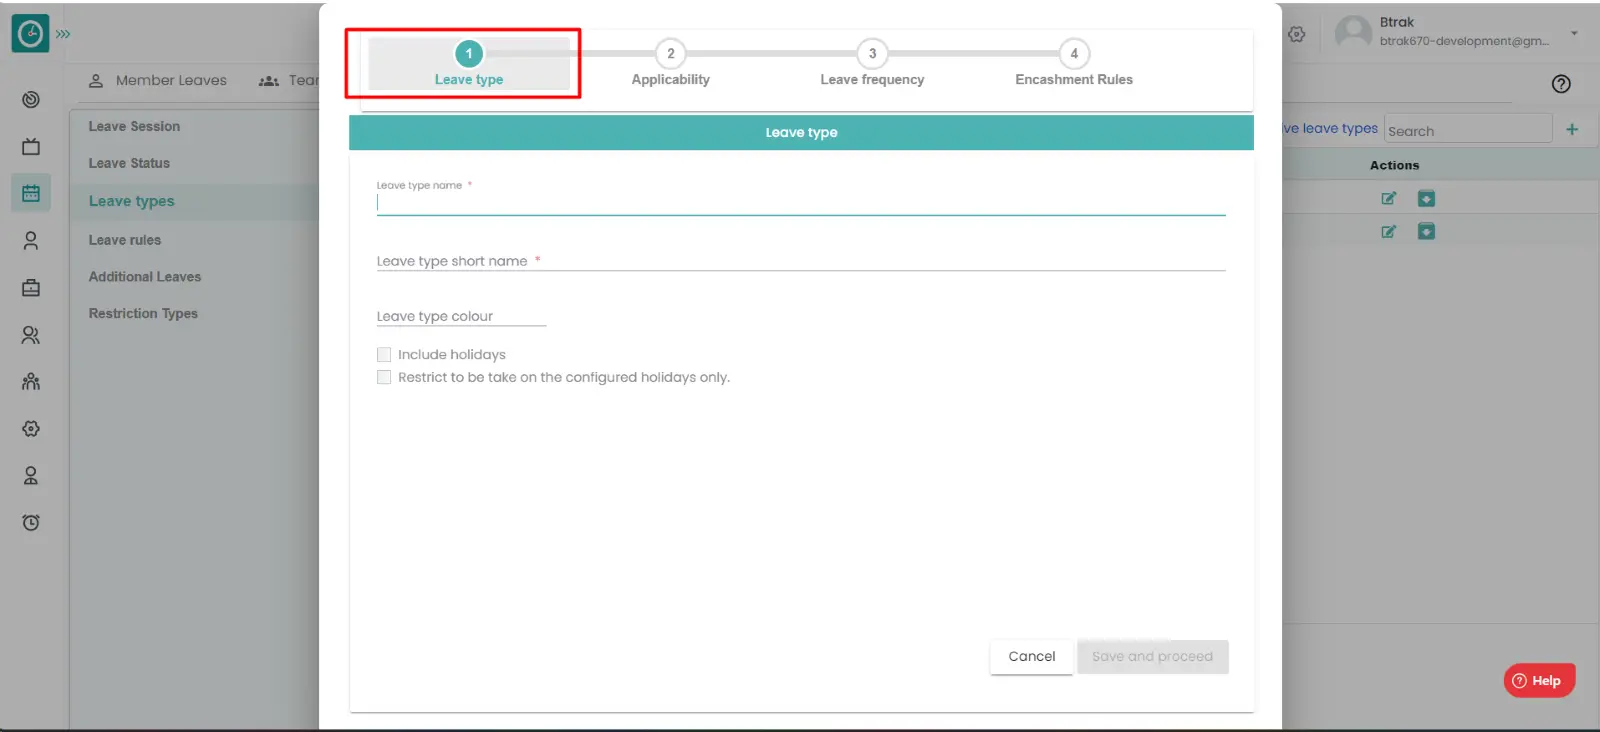
Procedure to edit leave type:
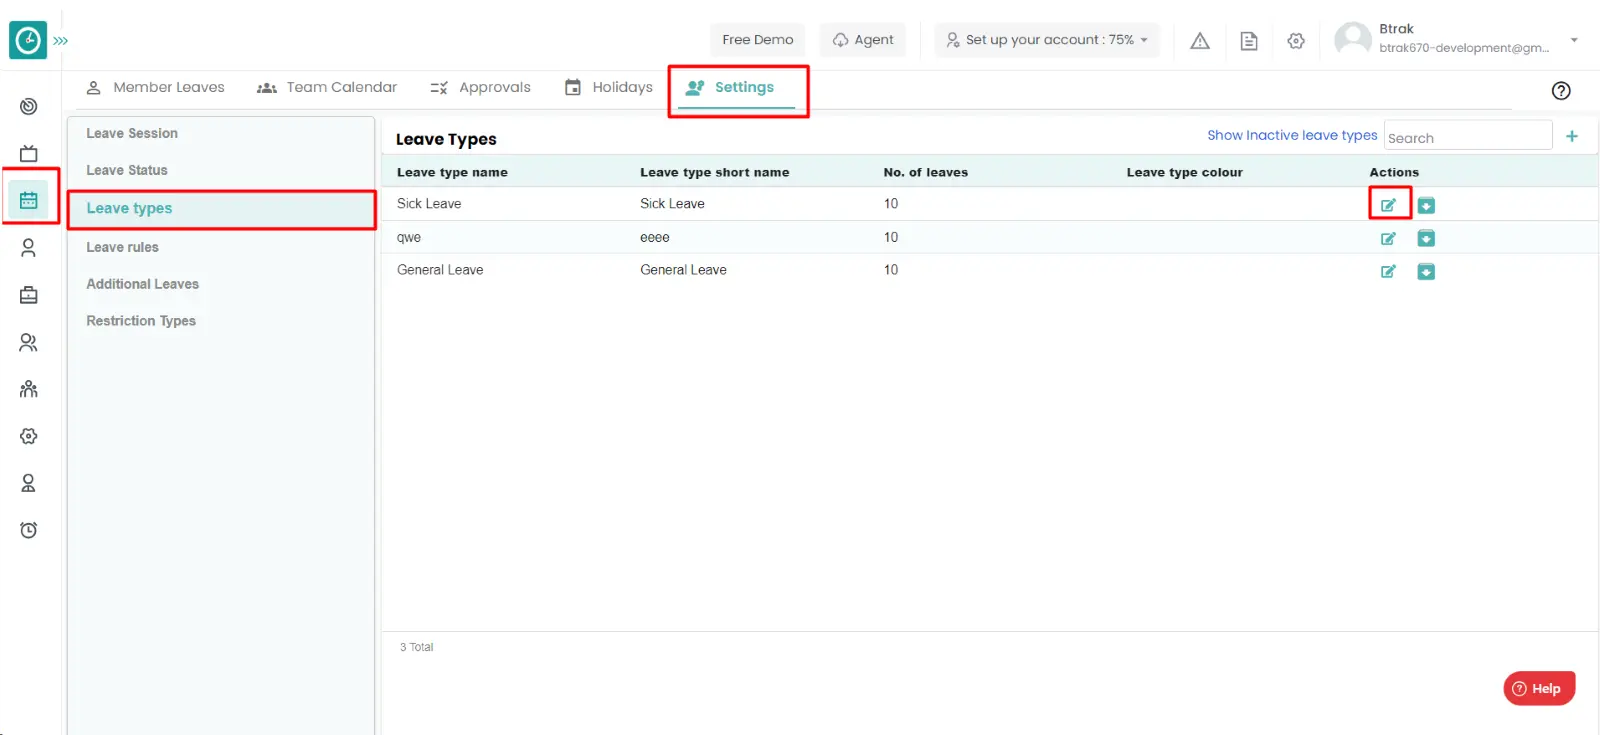
Now you have successfully created a leave type and edited the leave type.
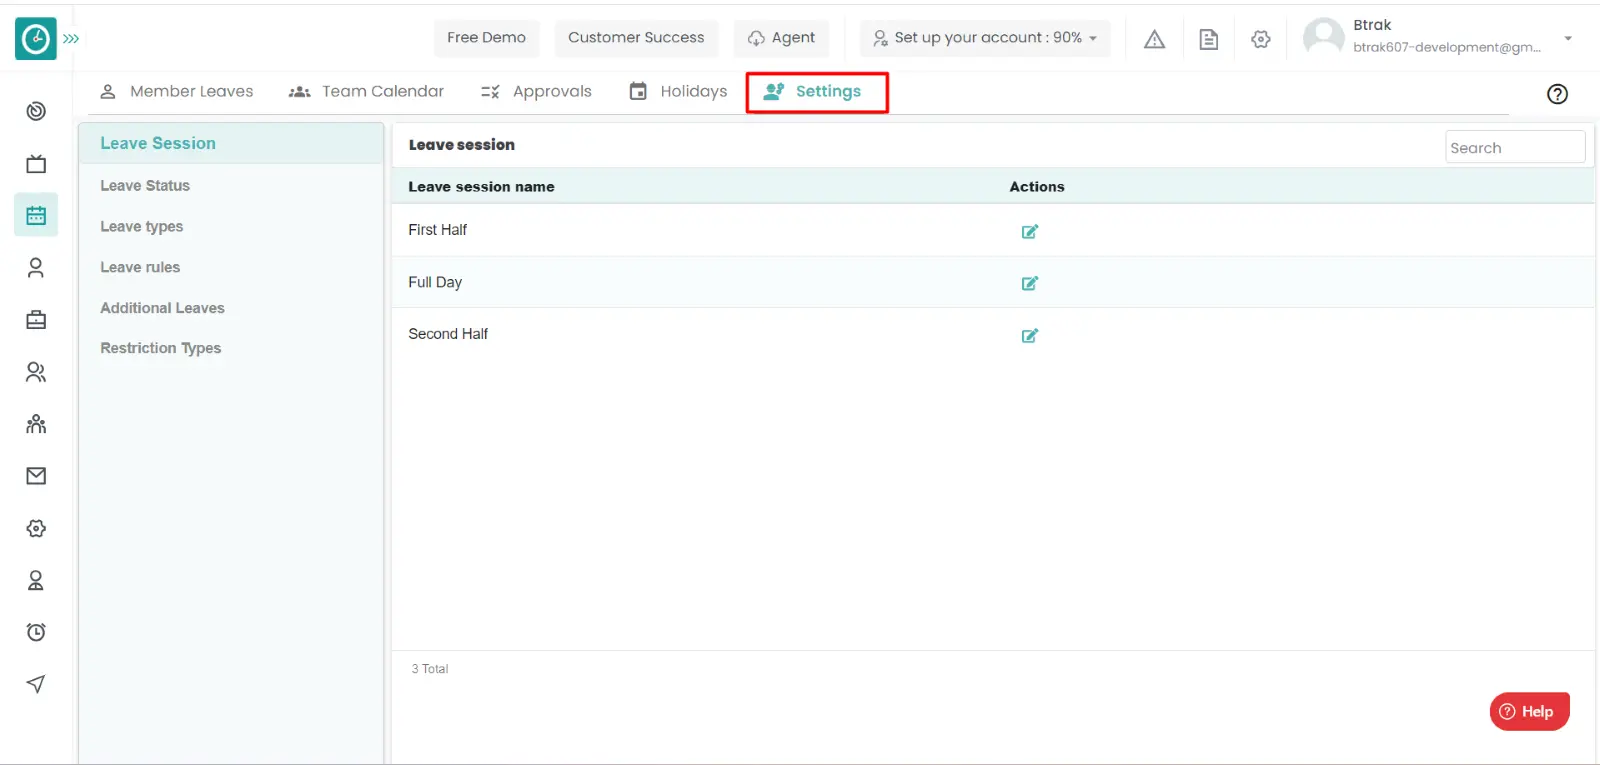
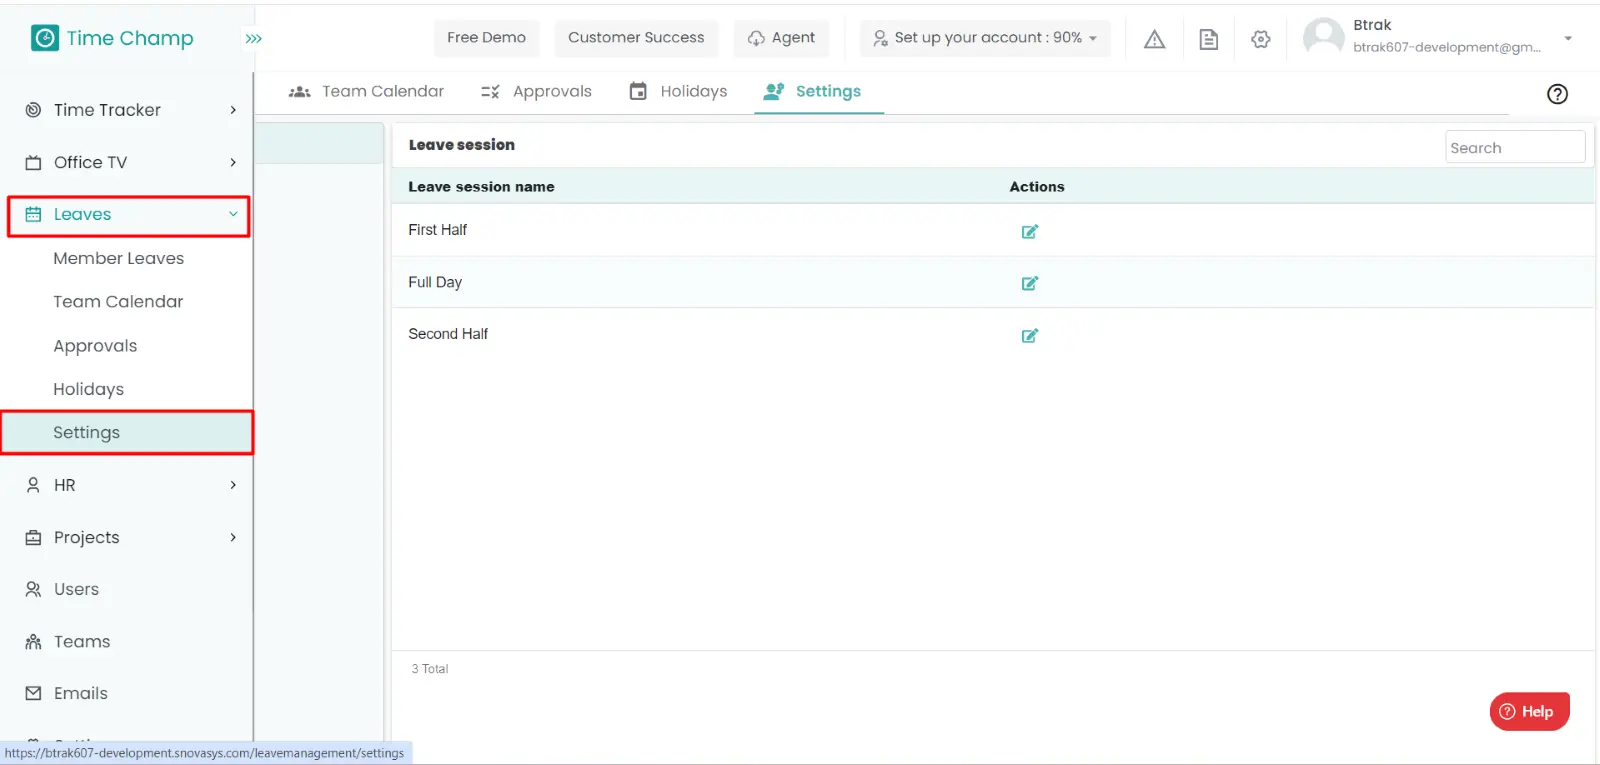
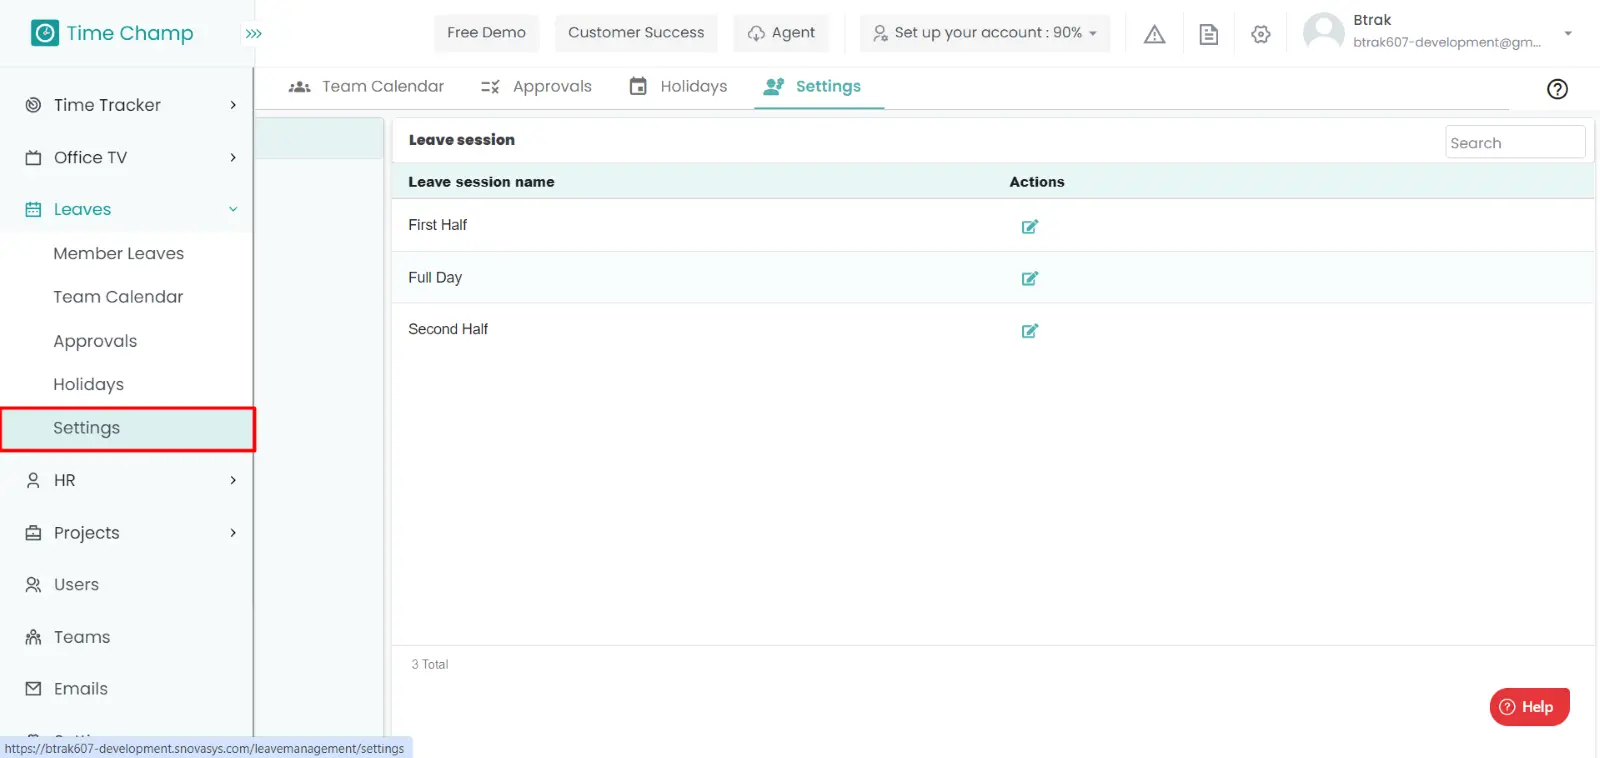
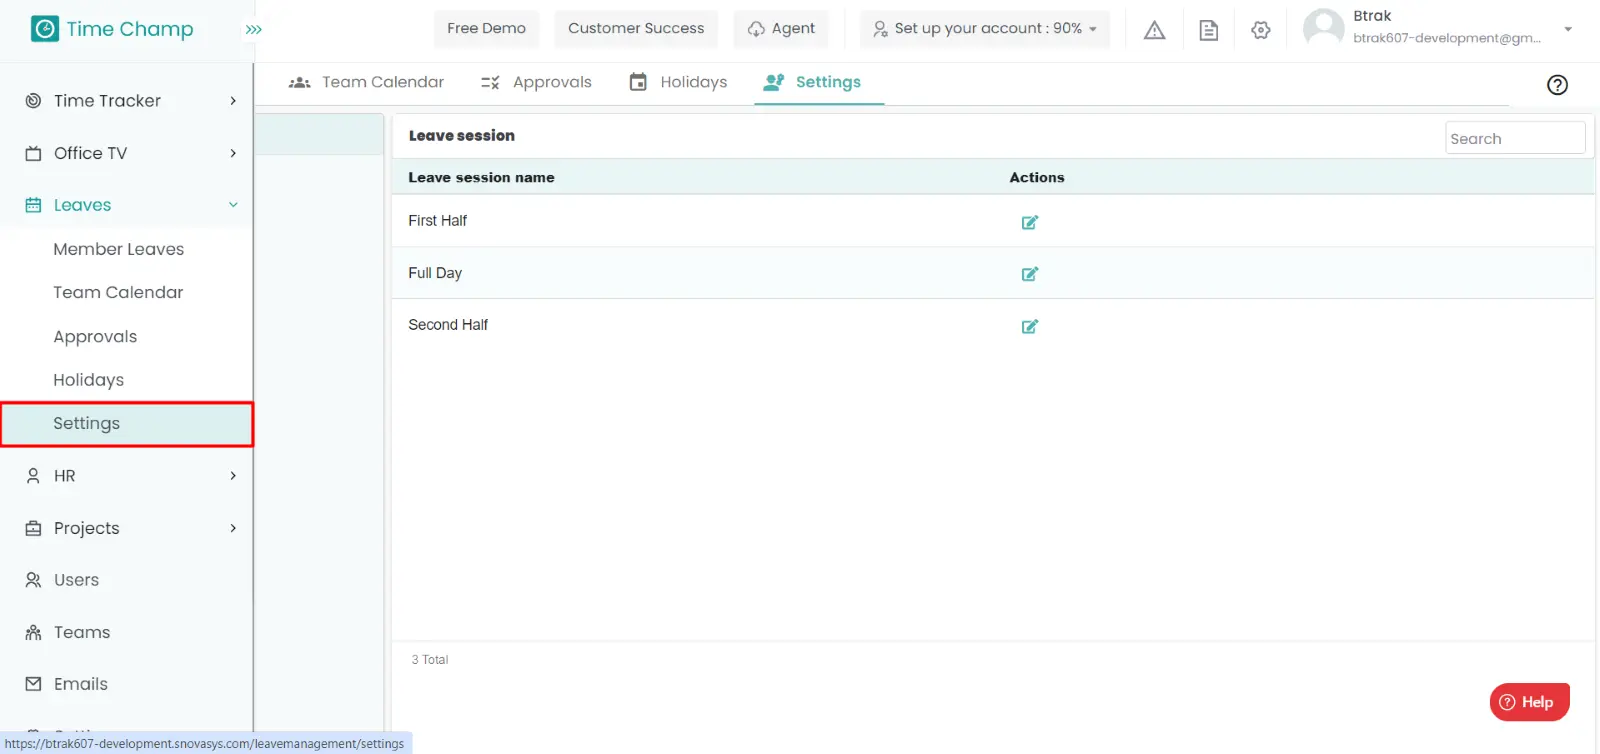
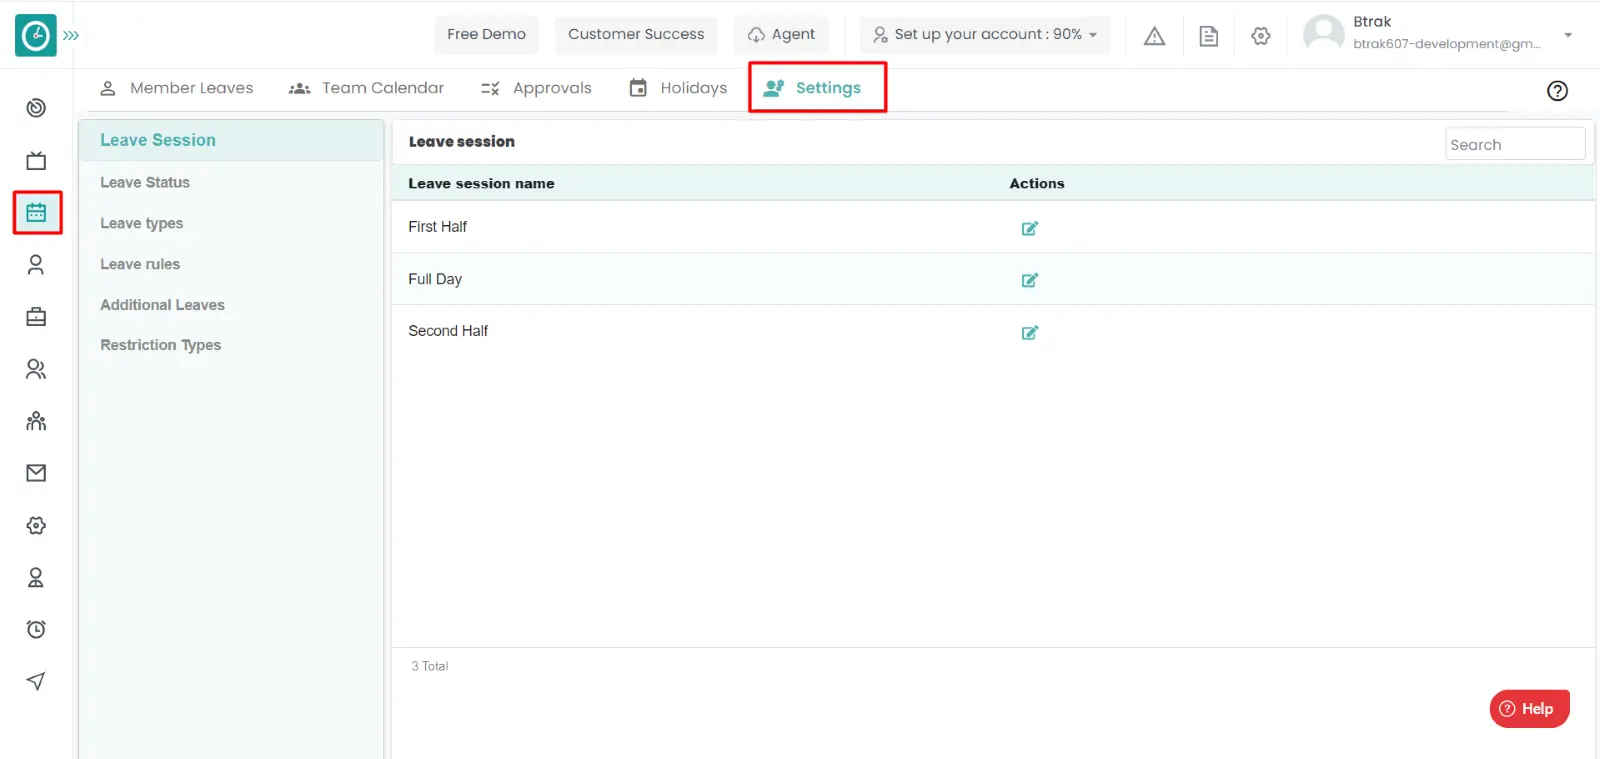
Leave sessions are to define the leave for the day. Suddenly the employee suffers with any health issue he wants to take only second half/first half of the day then it will be helpful.
Navigation: Goto Leaves => Tab: Settings.
If the user is having Super Admin
permissions, then he can be able edit the leave sessions of employees, teams,
company.
This permission can be configured by following the steps: -
Manage leave settings from Leaves module,
then select the roles for what you must give the permissions to configure and check them.edit the leave sessions
for the defined roles.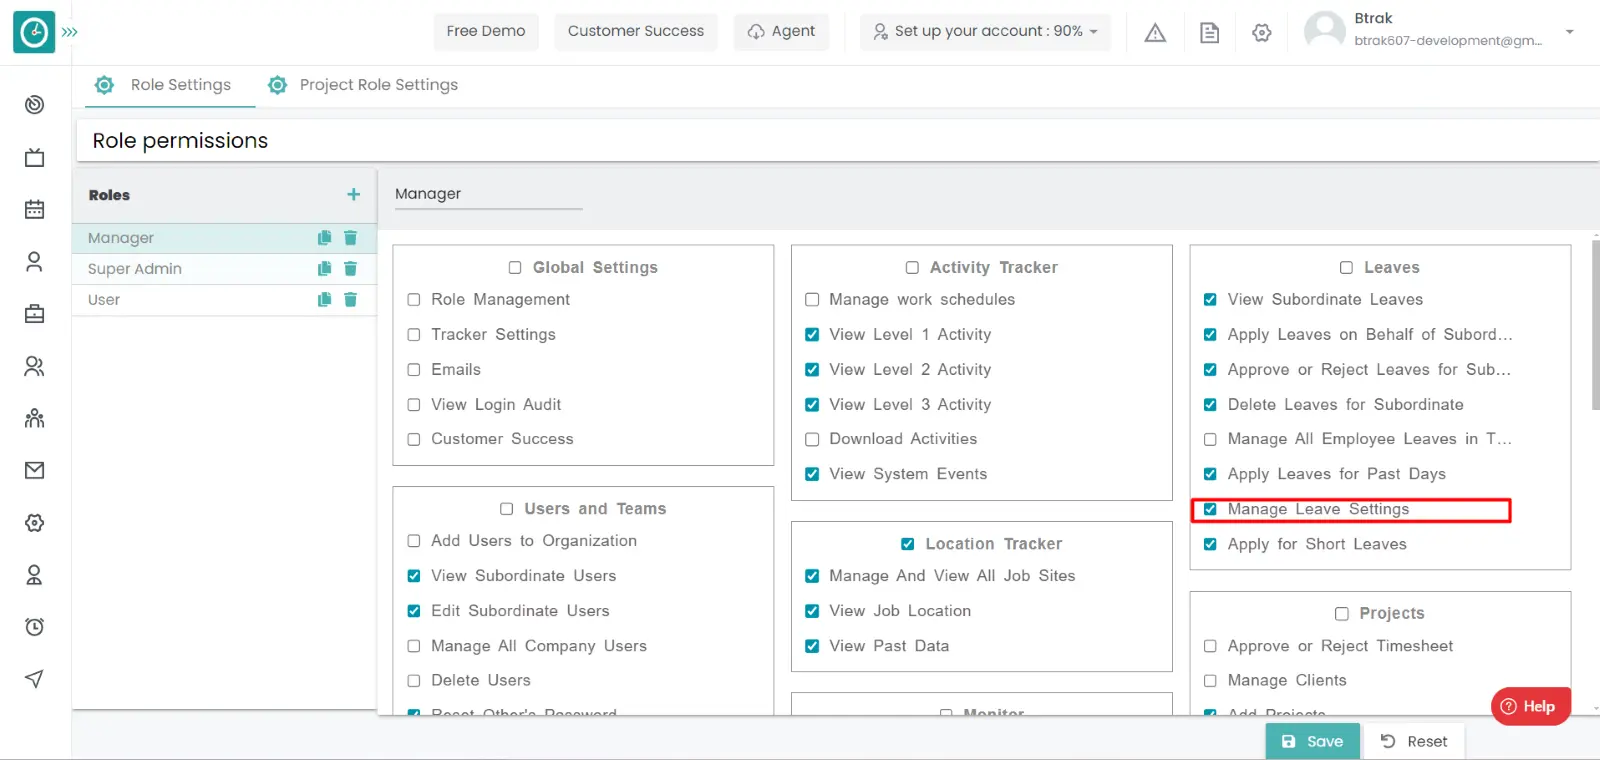
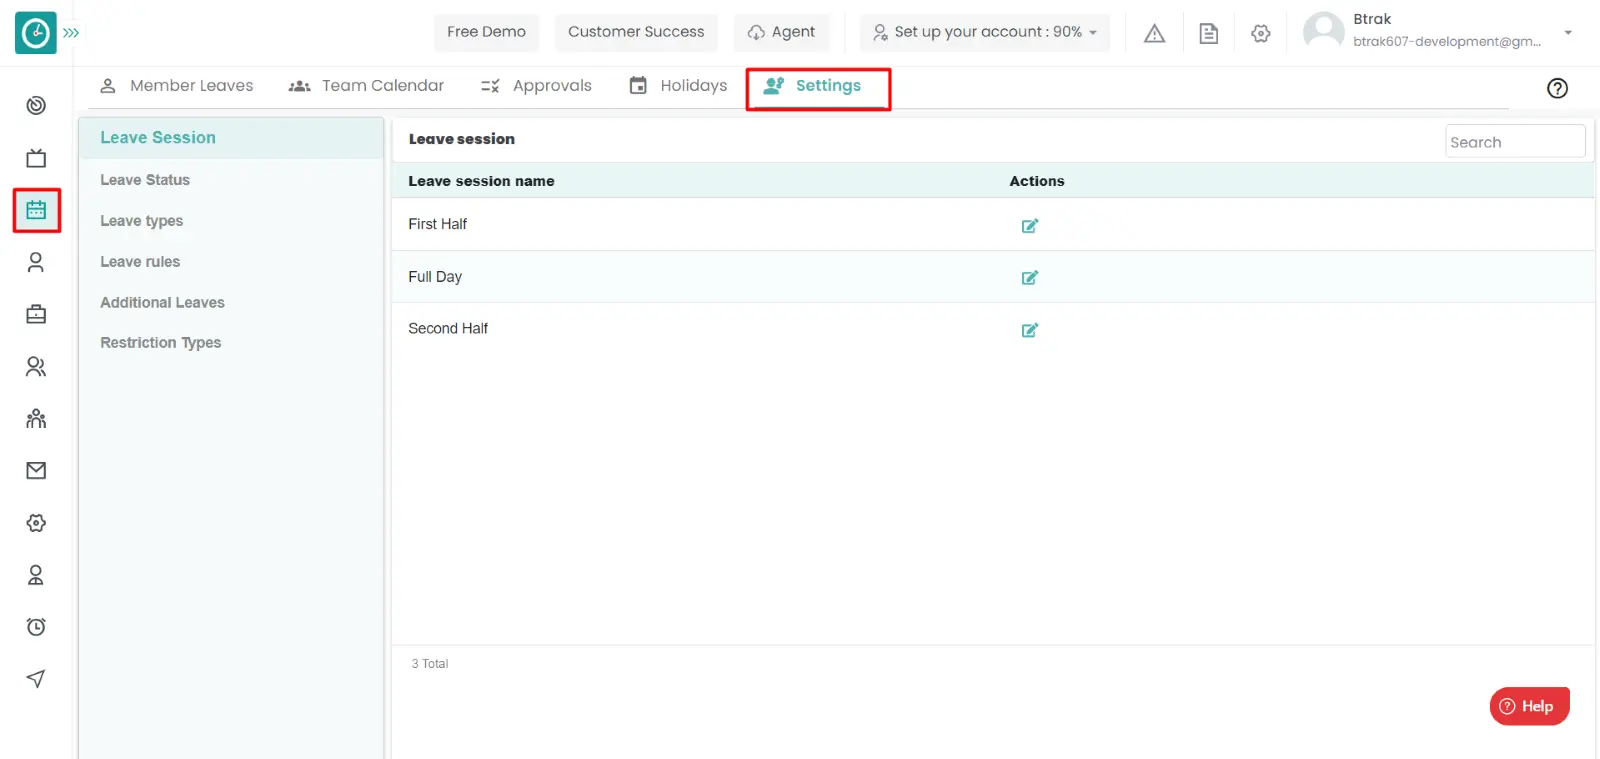
Procedure:
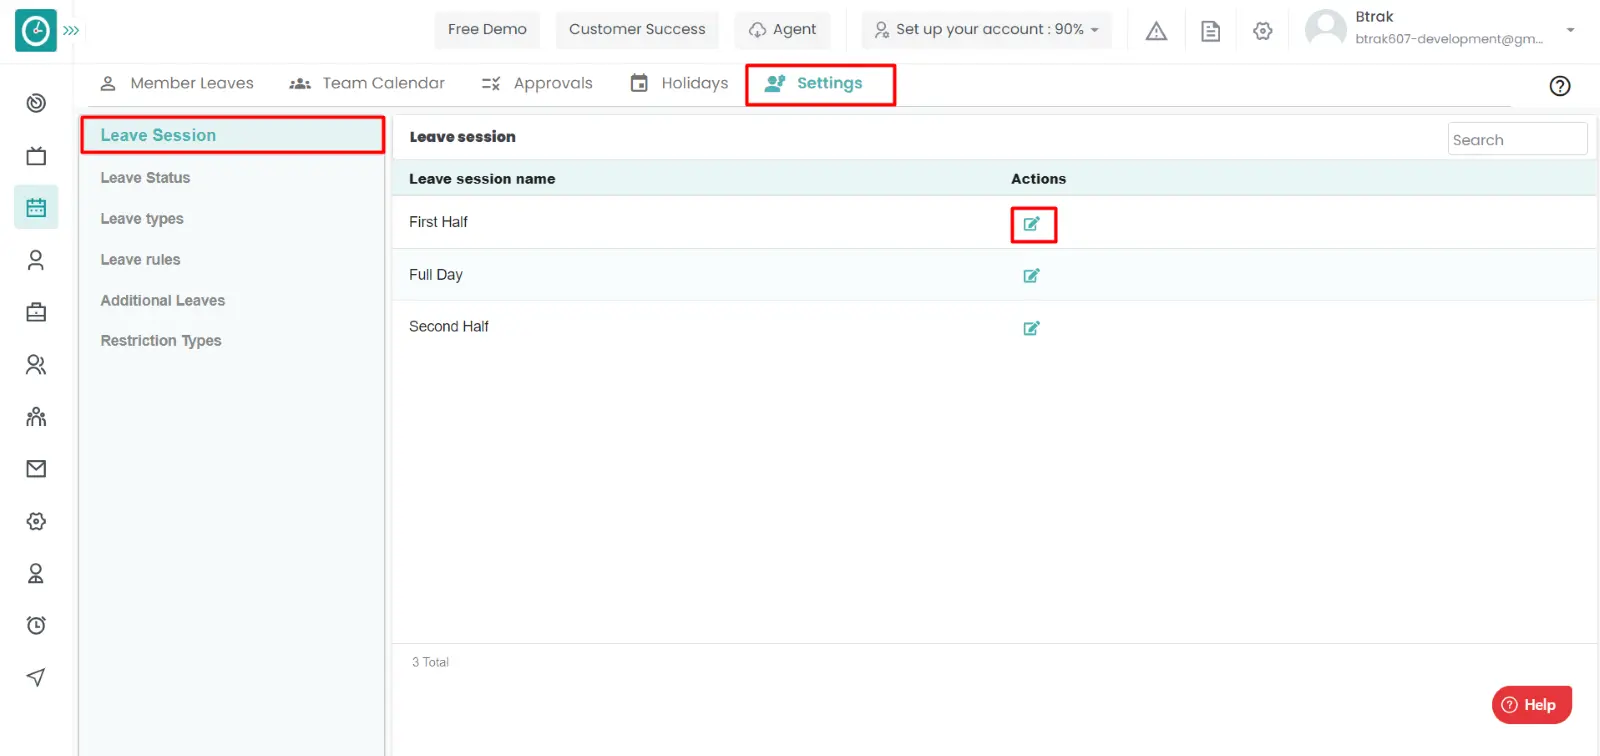
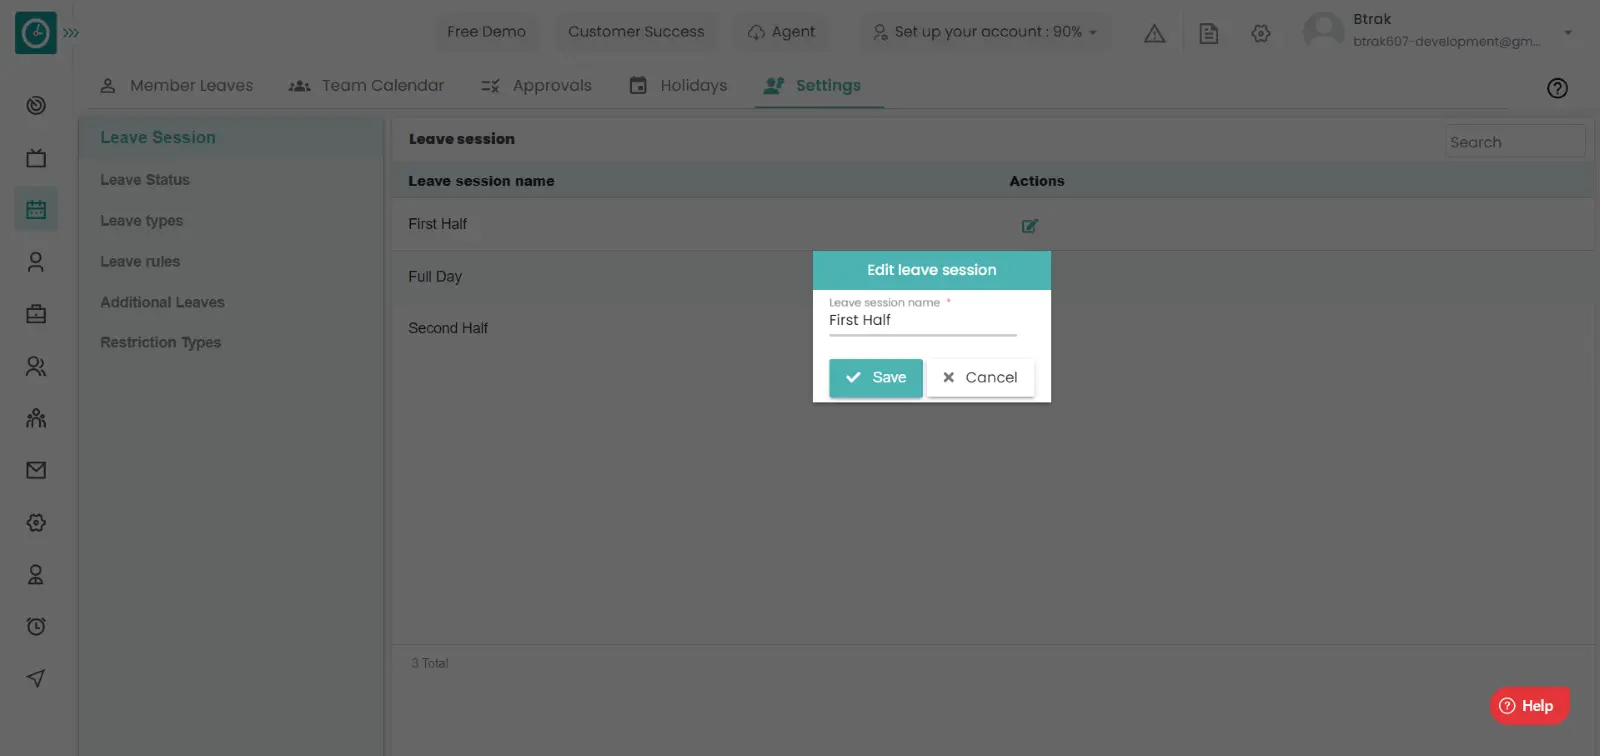
Now you have edited the leave sessions.
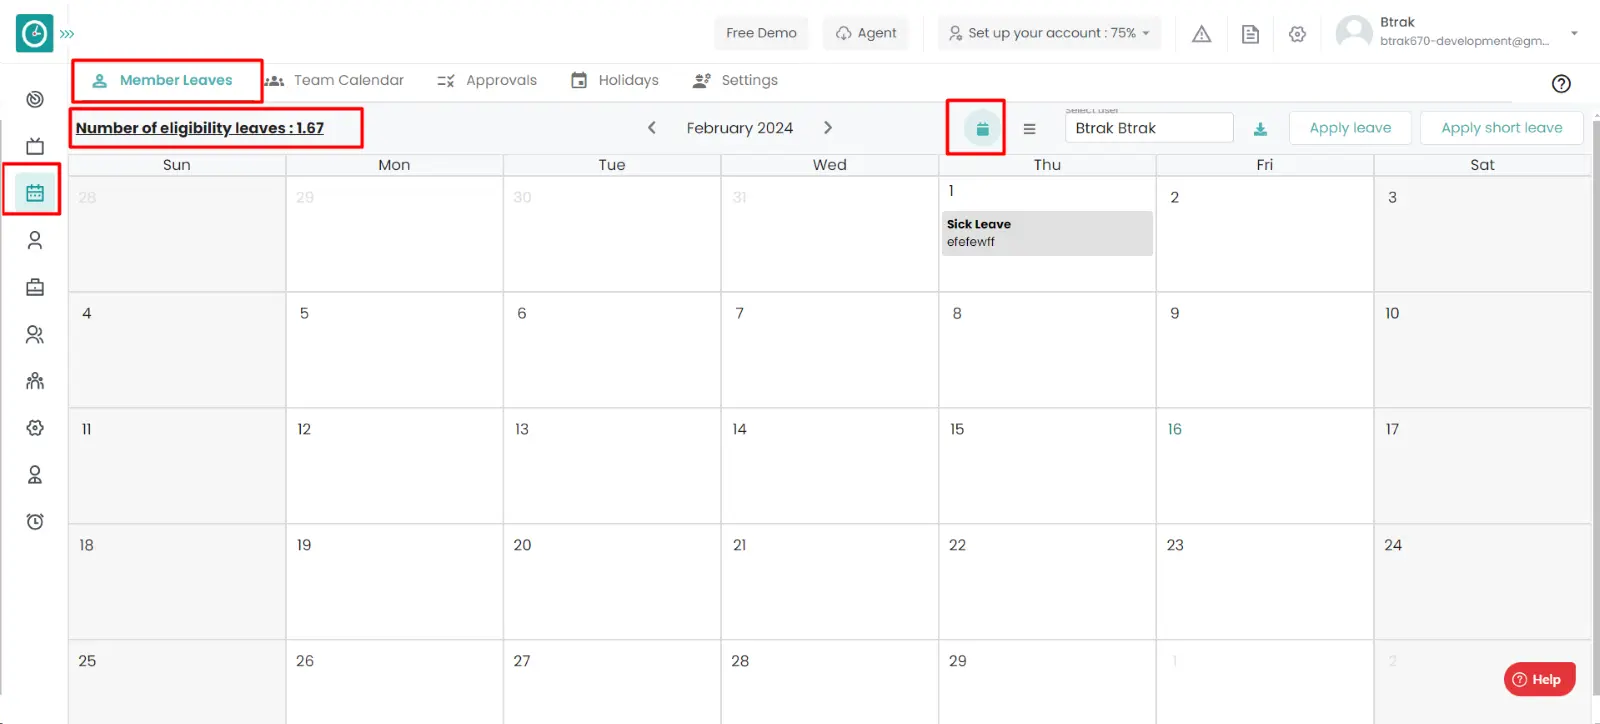
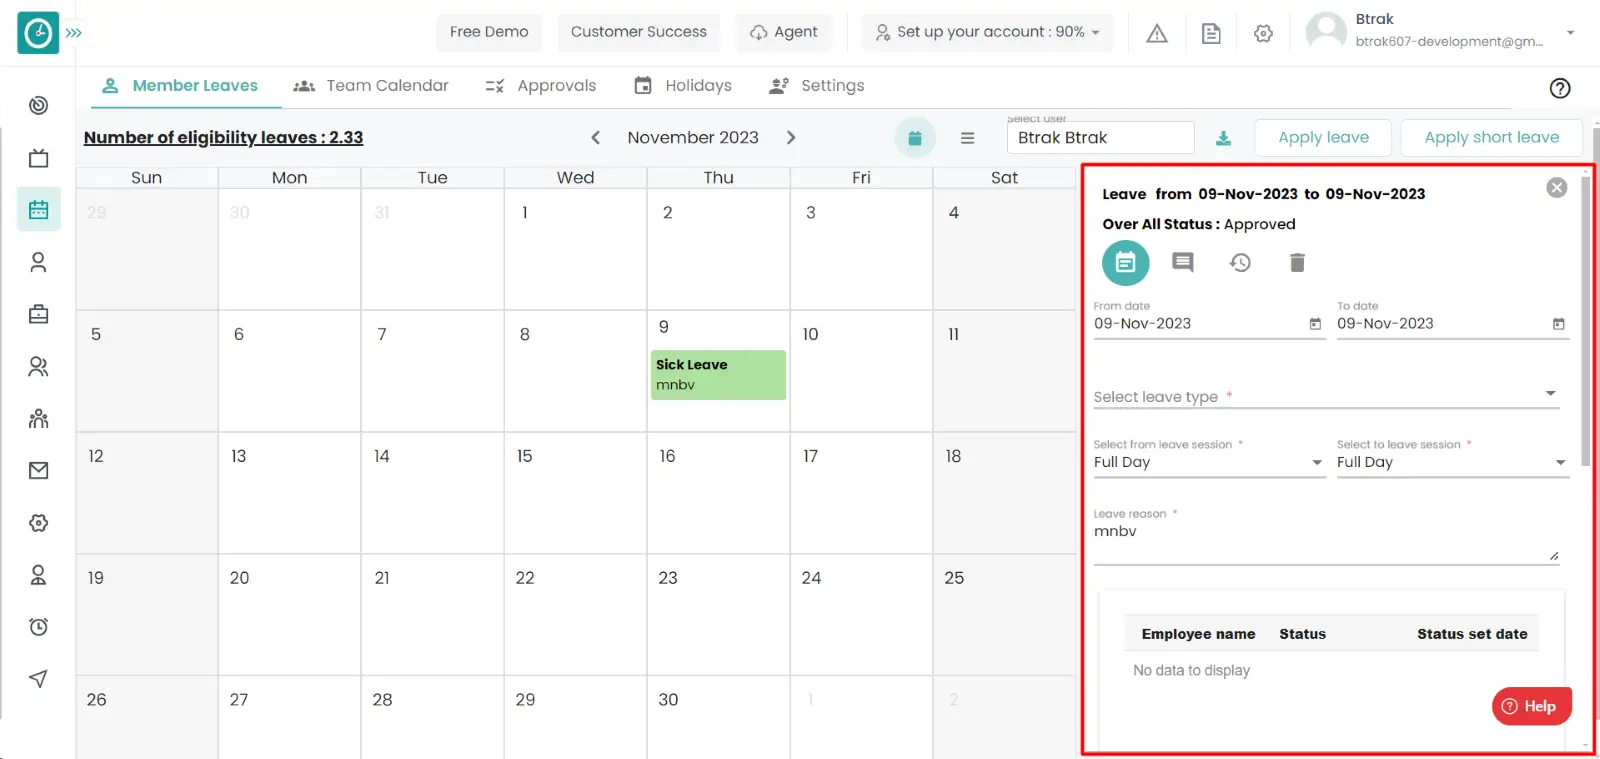
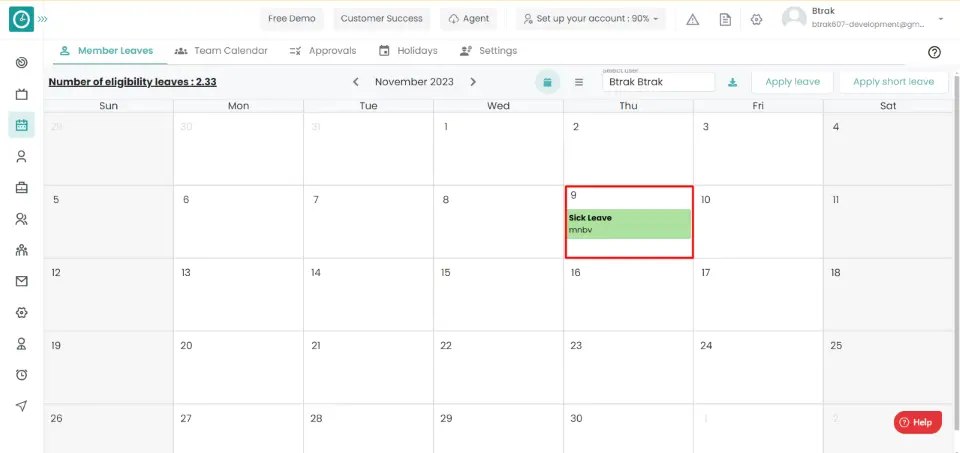
You can be able to take leave only when it is approved by your reporting manager/HR. You can take leave after checking the status of the request.
Navigation: Goto Leaves => Tab: Member Leaves
If the user is having Super Admin
permissions, then he can be able to view the leave requests are approved or not.
This permission can be configured by following the steps: -
Leave management
in permissions.view the applied leave request is approved or not
for the defined roles.All the users can be able to view their leave requests whether it is approved/rejected by having the above permission.
Procedure 1:
Procedure 2:

Now you are able to view the Approved/Rejected leave requests.
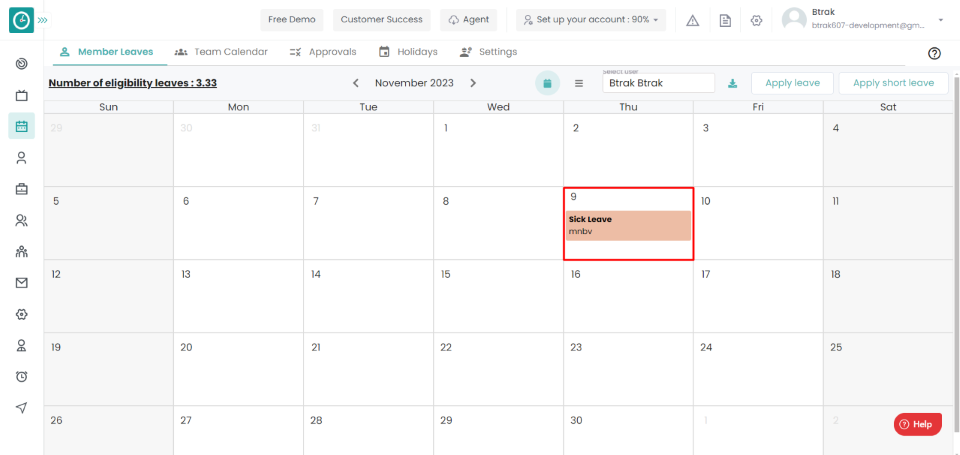
Color Indication:
If the Applied Request is in red color then the request is rejected.

If the Applied Request is in green color then the request is approved.

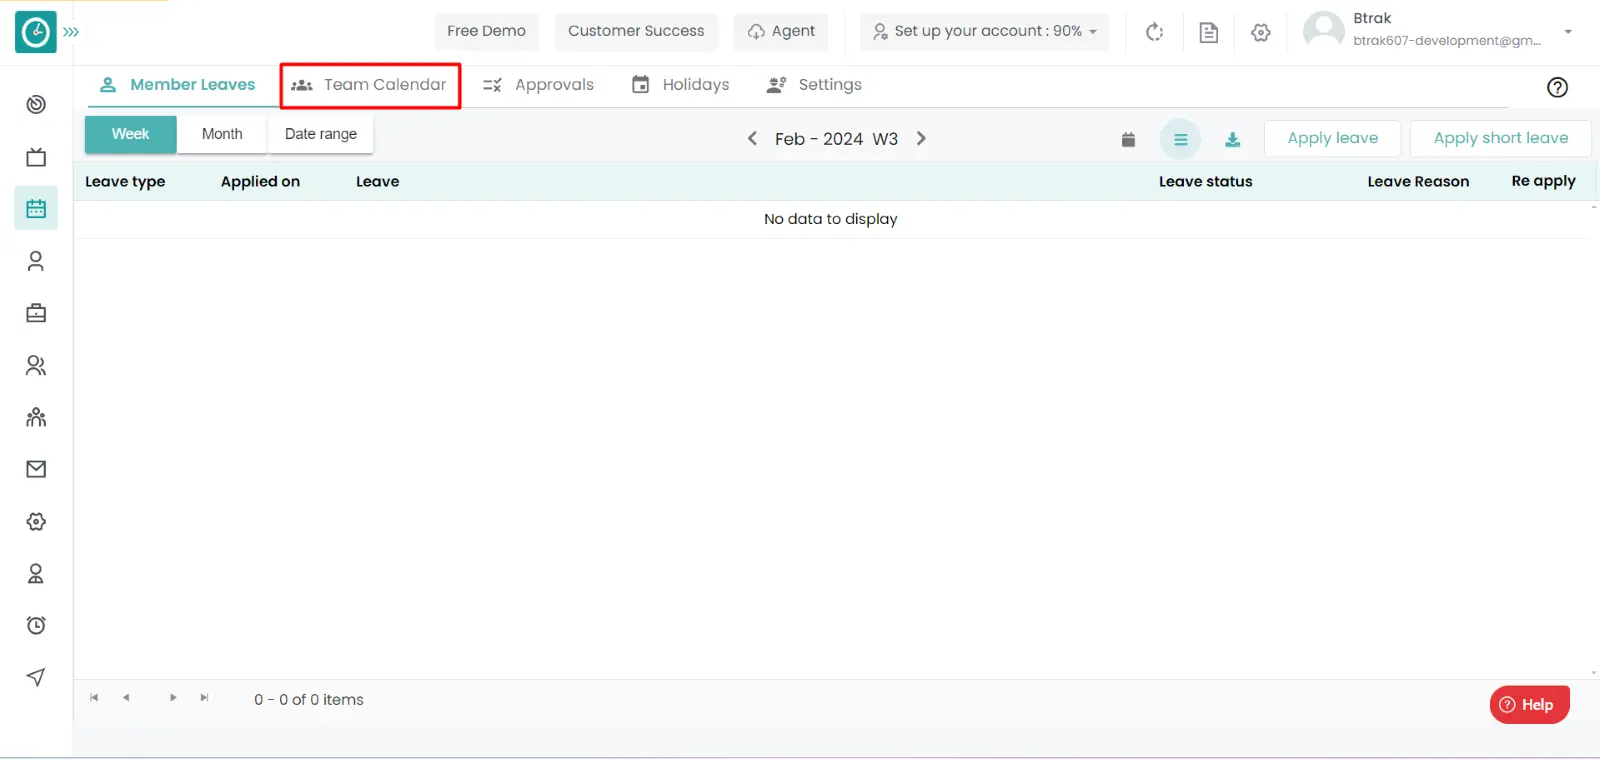
In order to plan the work, you should have clear information about your team members leaves. So that this feature helps you to get the clear information about the employees who are in leave and who are working.
Navigation: Goto Leaves => Tab: Team Calendar
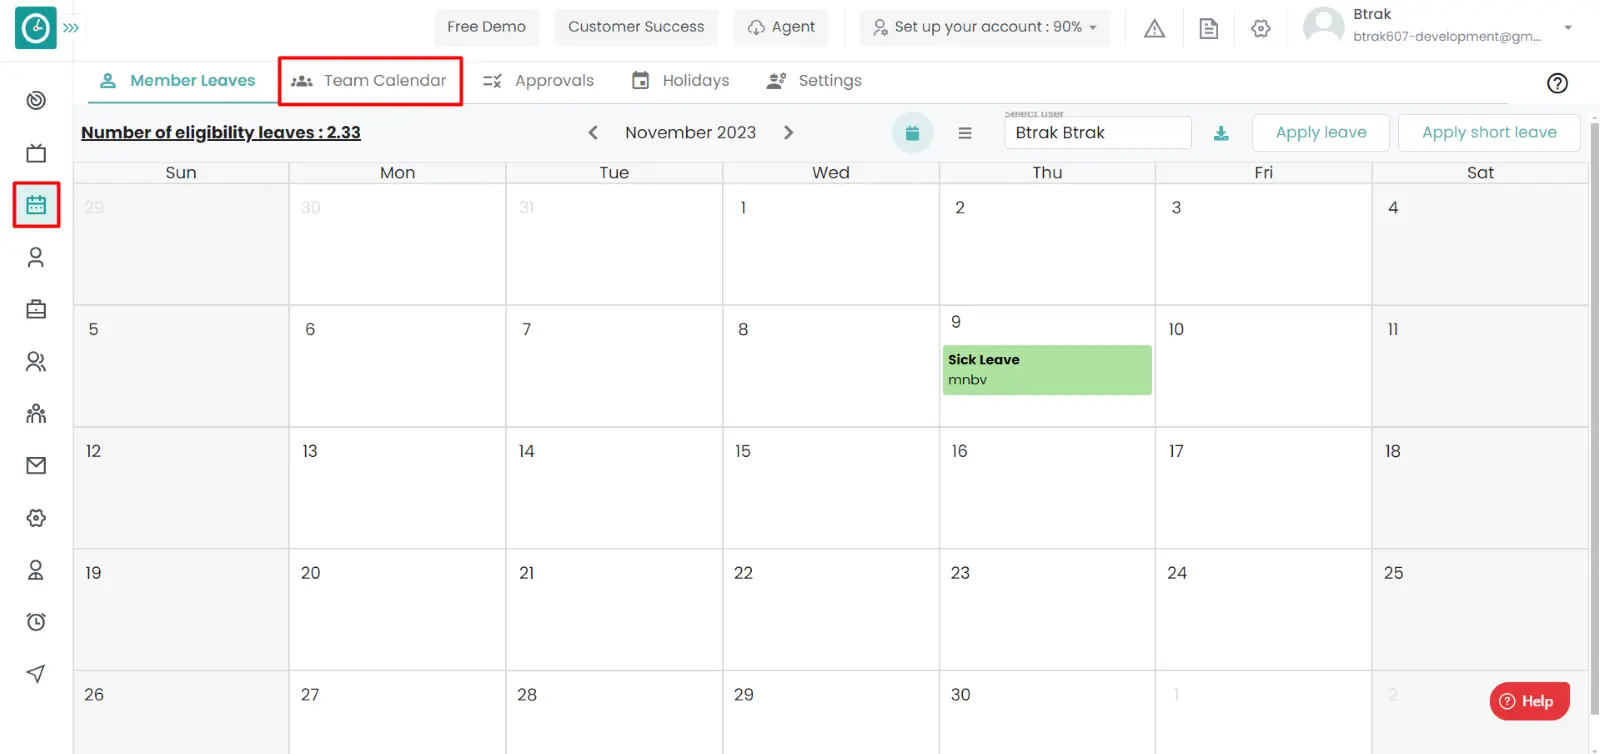
If the user is having Super Admin
permissions, then he can be able to view the leaves of employees, teams,
company.
This permission can be configured by following the steps: -
View subordinate leaves from Leaves module,
then select the roles for what you must give the permissions to configure and check them.view the subordinate leaves
for the defined roles.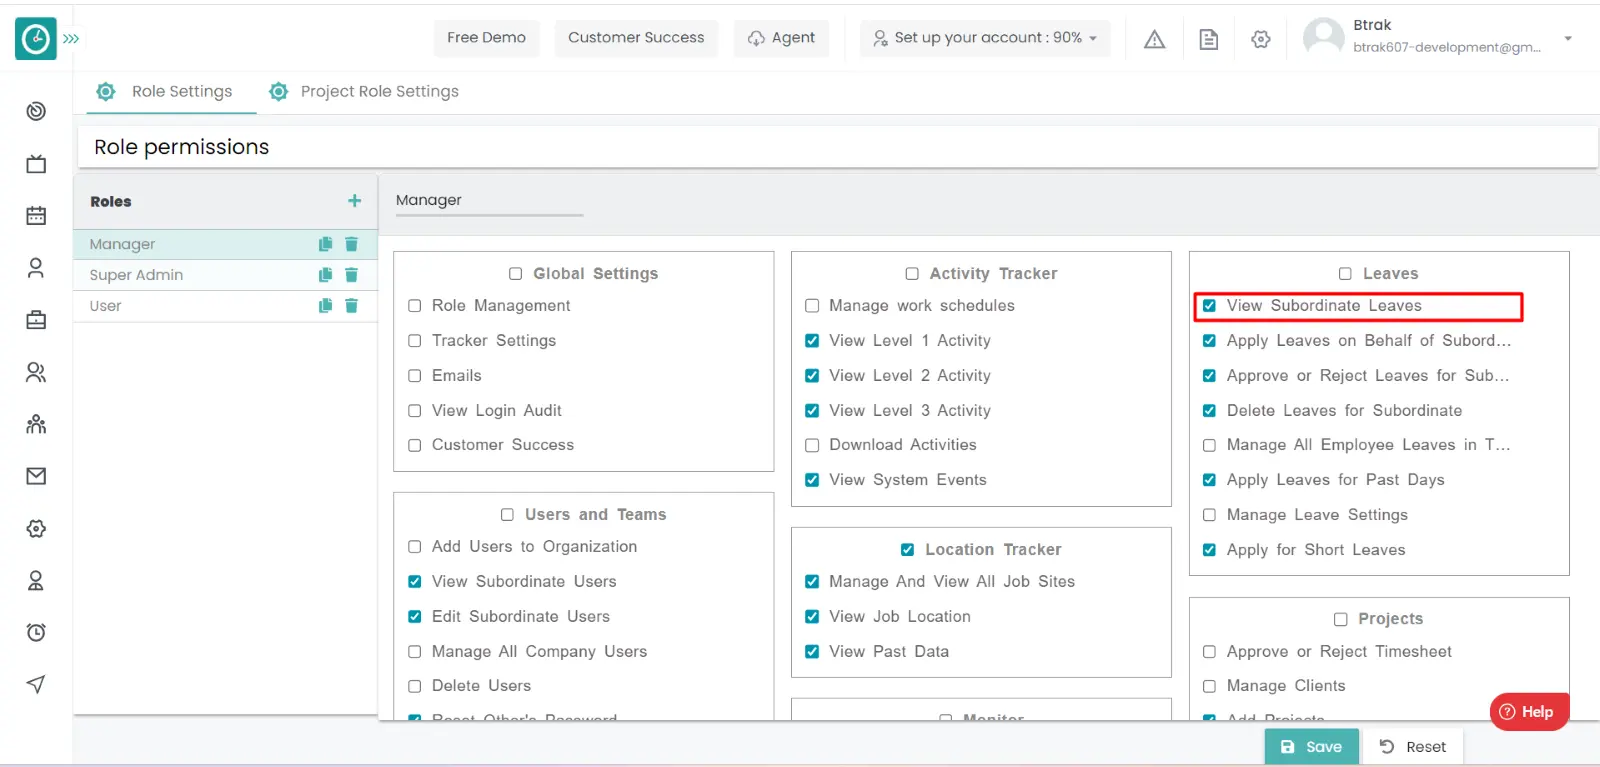
By giving the above permissions to the manager or team leader can view their subordinates leaves.
Yes, if you are an Admin, you can view any team members leave requests. But if you are a manager, you can view only your subordinates leave requests.
Leave policies will be getting changed as the requirements changed. So that the old leave types will no more valid for the new requirements. So that it will be archived, if it is again needs in the leave policies it can be unarchived again.
Navigation: Goto Leaves => Tab: Settings => Leave Types.
If the user is having Super Admin
permissions, then he can be able to archive the leave types of employees, teams,
company.
This permission can be configured by following the steps: -
Manage Leave settings from Leaves module,
then select the roles for what you must give the permissions to configure and check them.Archive the leave types
for the defined roles.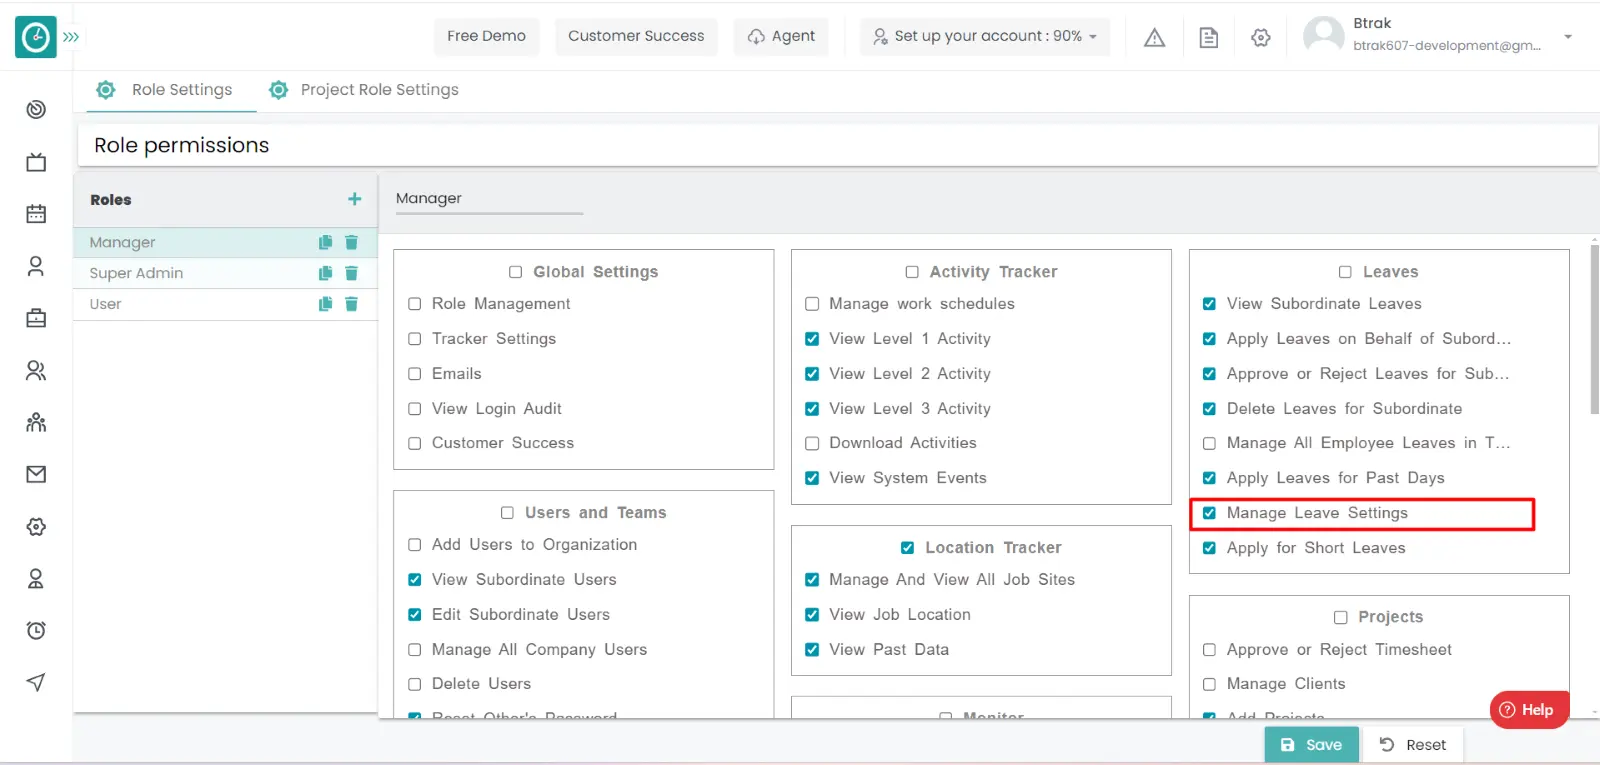
Procedure:
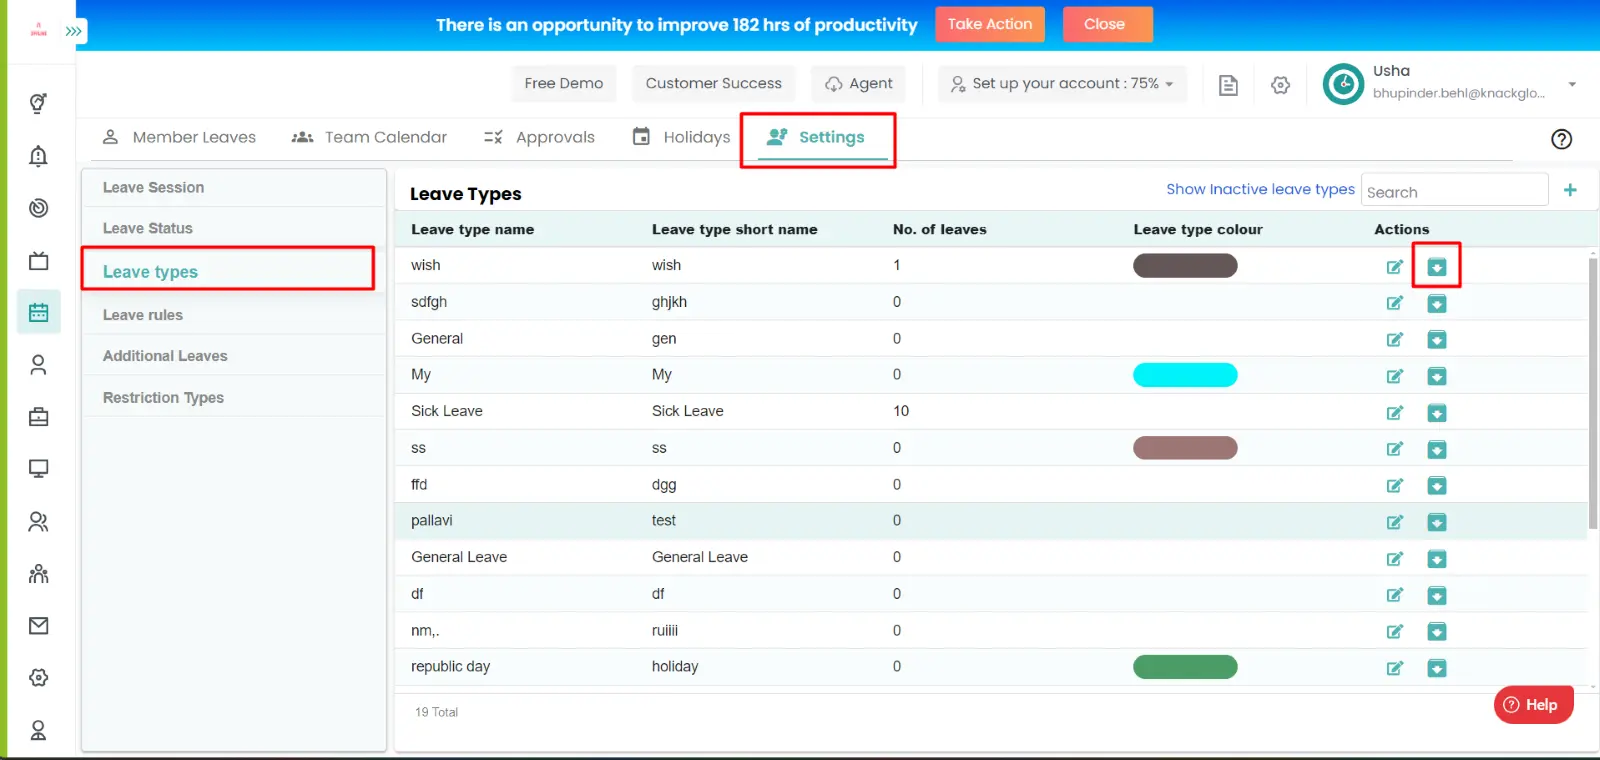
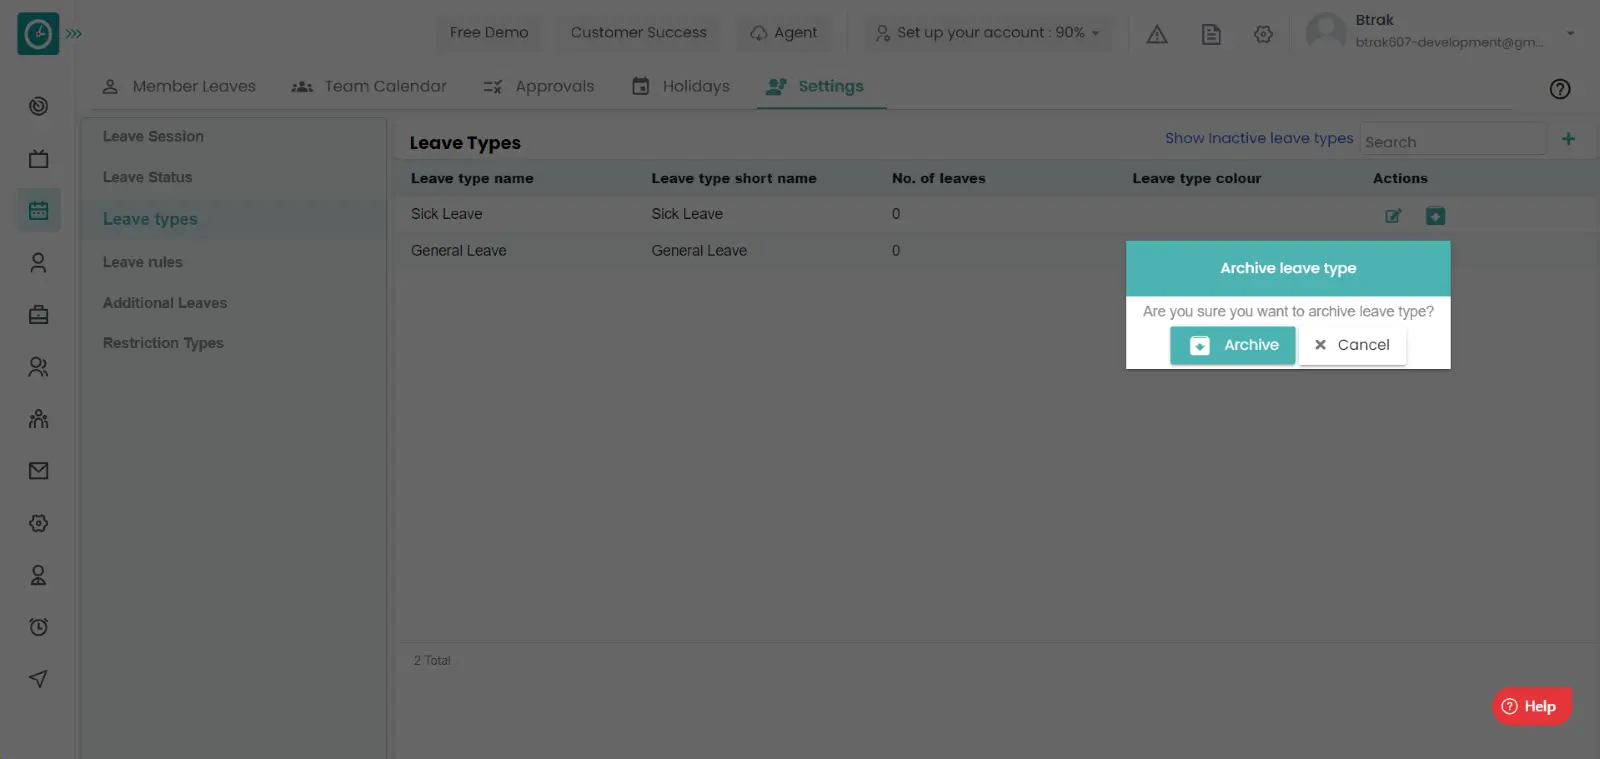
Now you have successfully archived a leave type.
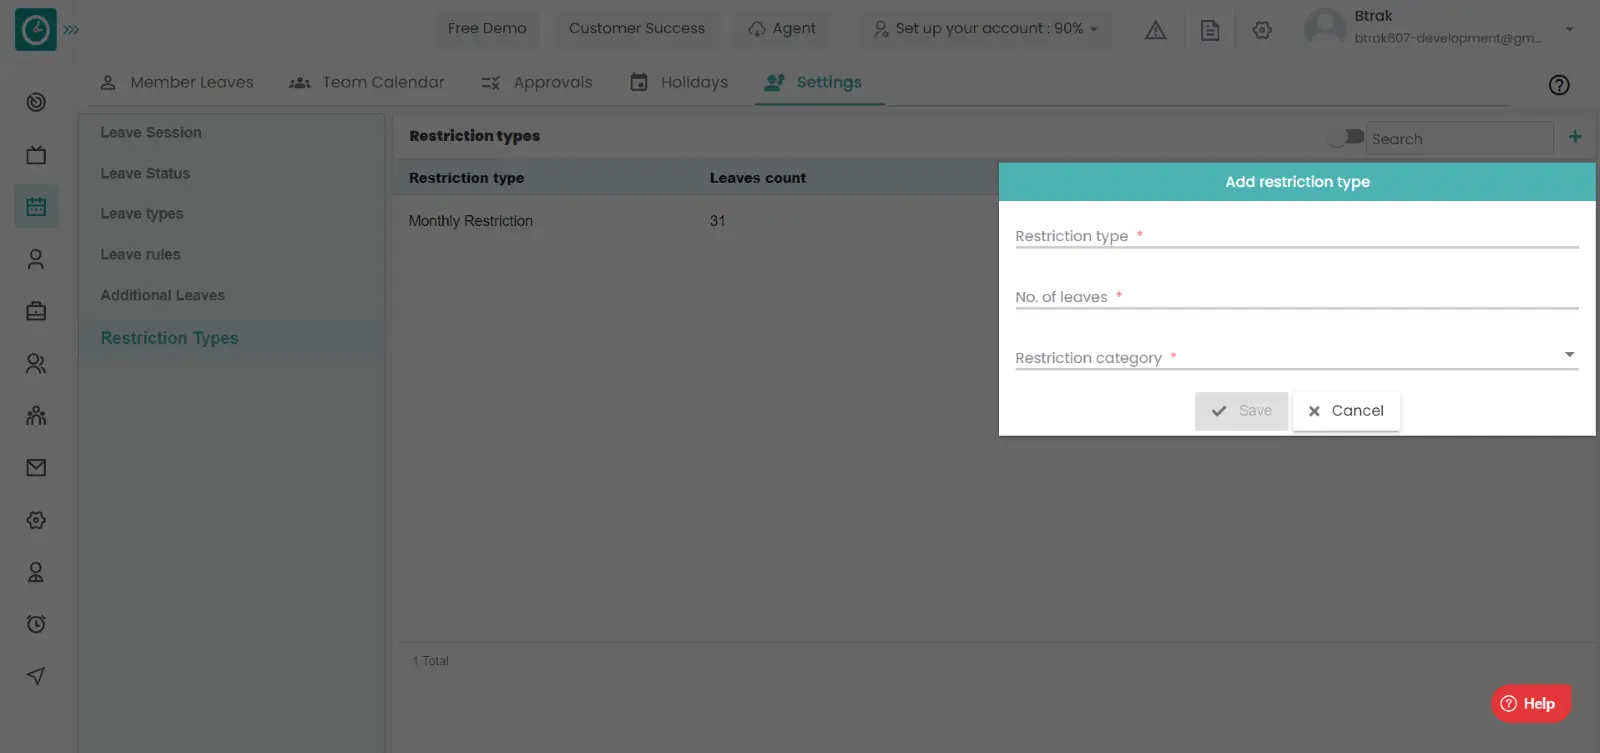
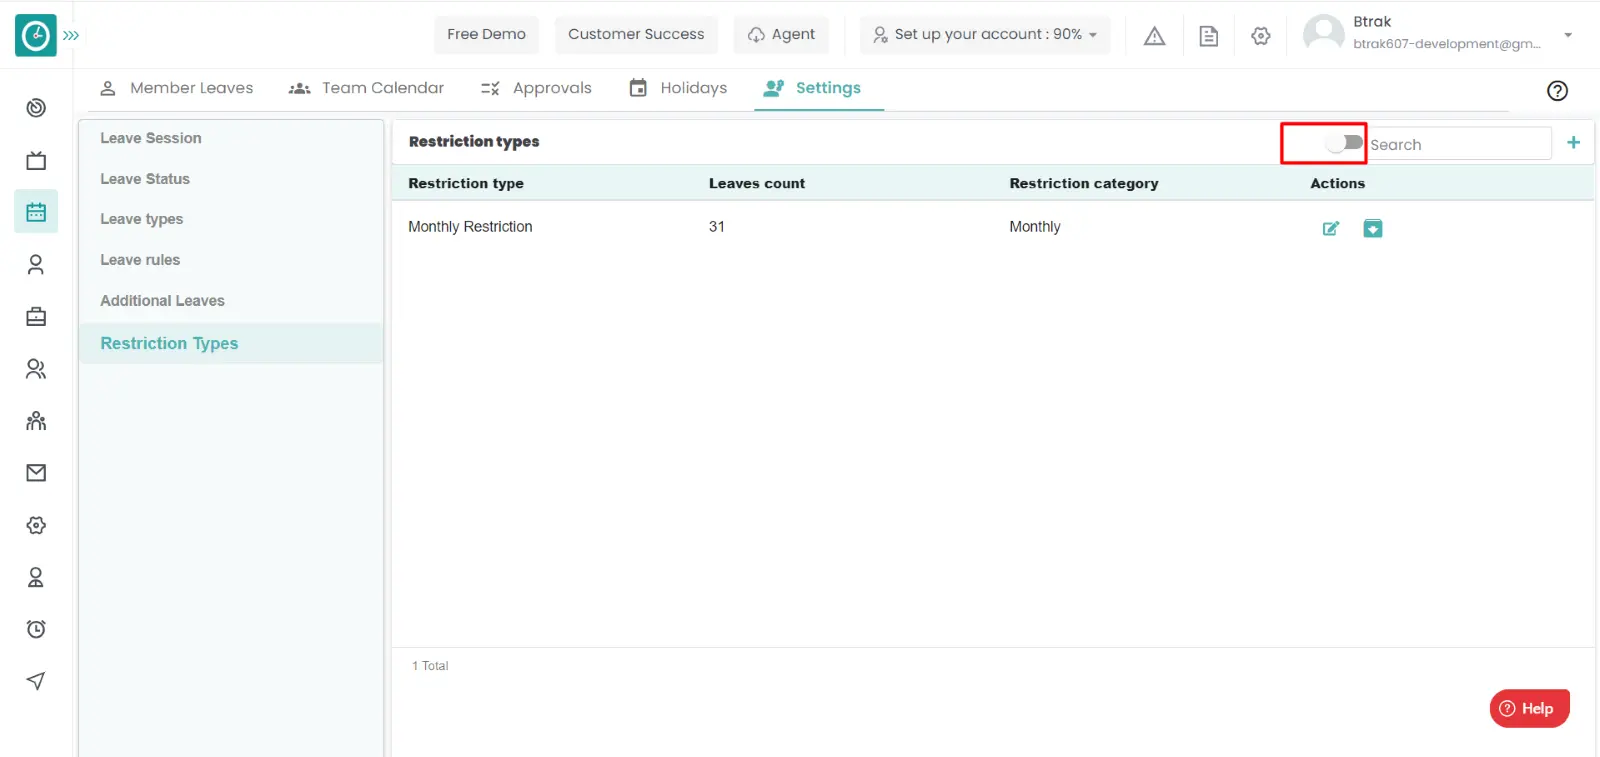
Some of the employees are taking to many leaves unnecessarily, for that type of employees you need to restrict the leaves to be taken, if the employee exceeds the limit, then the leave is marked as loss of pay.
Navigation: Goto Leaves => Tab: Settings.
If the user is having Super Admin
permissions, then he can be able to archive the leave types of employees, teams,
company.
This permission can be configured by following the steps: -
Manage Leave settings from Leaves module,
then select the roles for what you must give the permissions to configure and check them.restrict the users for the number of leaves to take in a period
for the defined roles.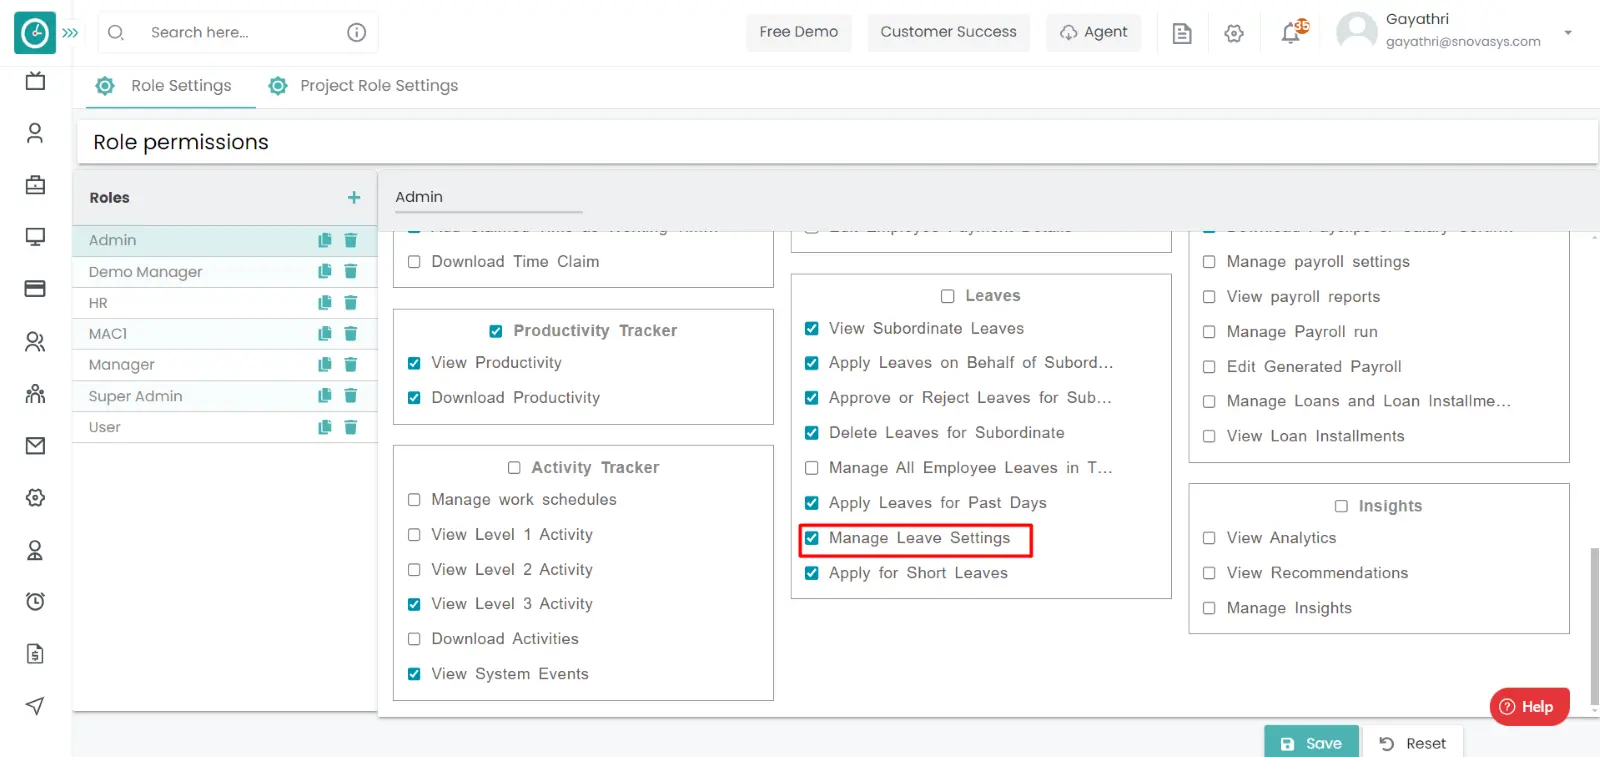
Procedure:
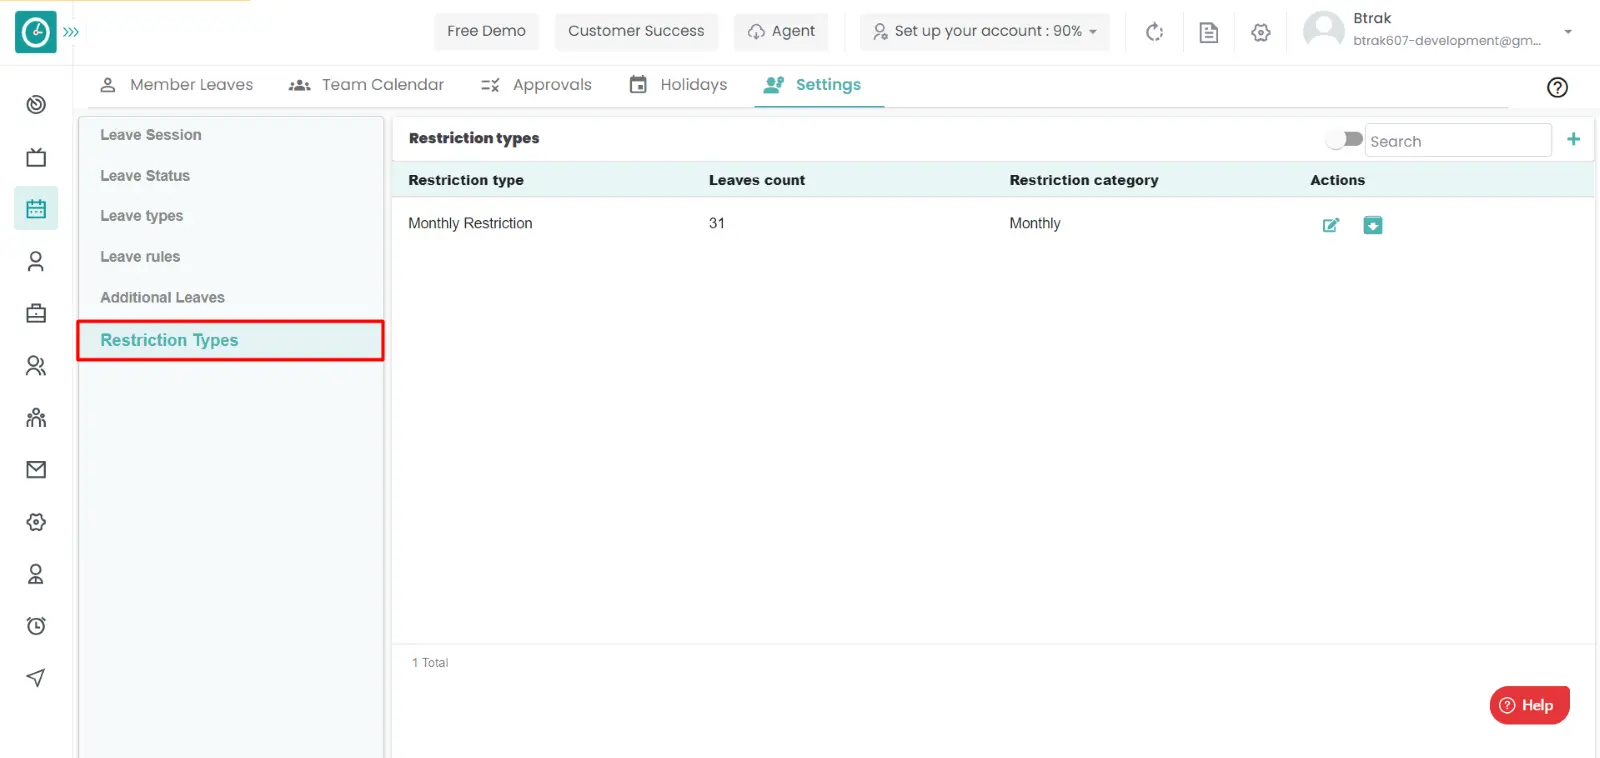
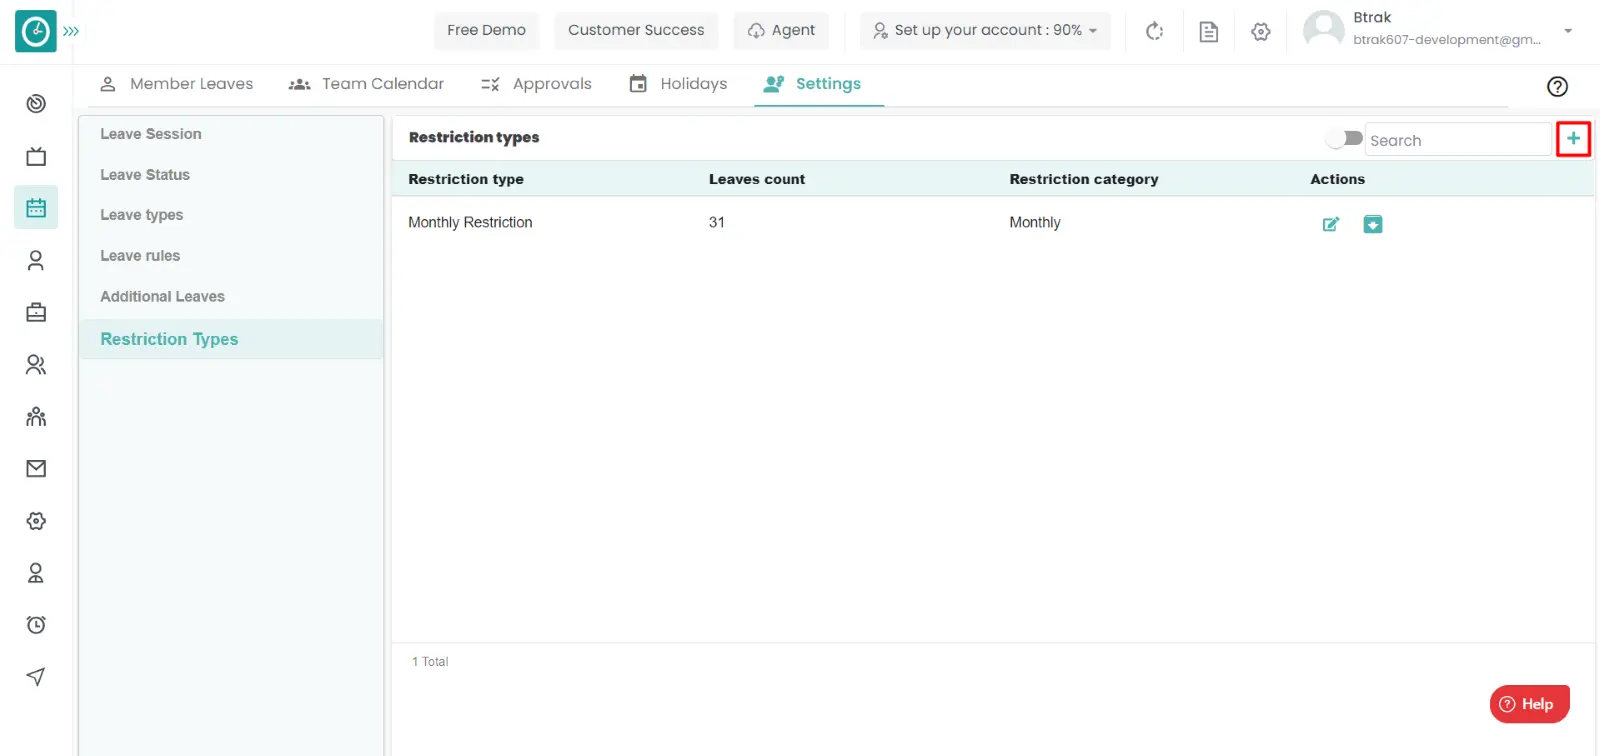
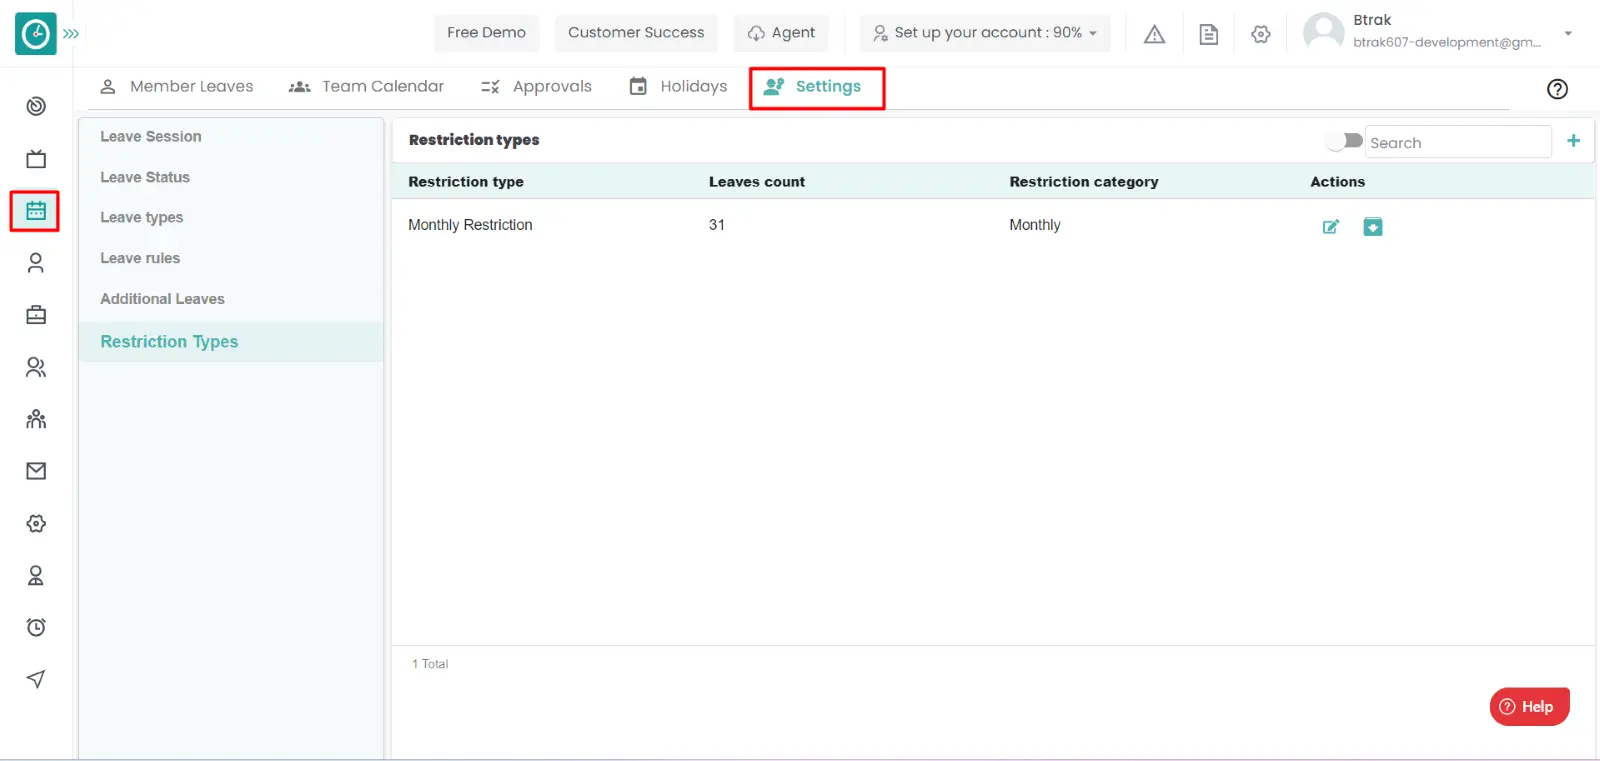
Add New Restriction Type
Edit Restriction Type
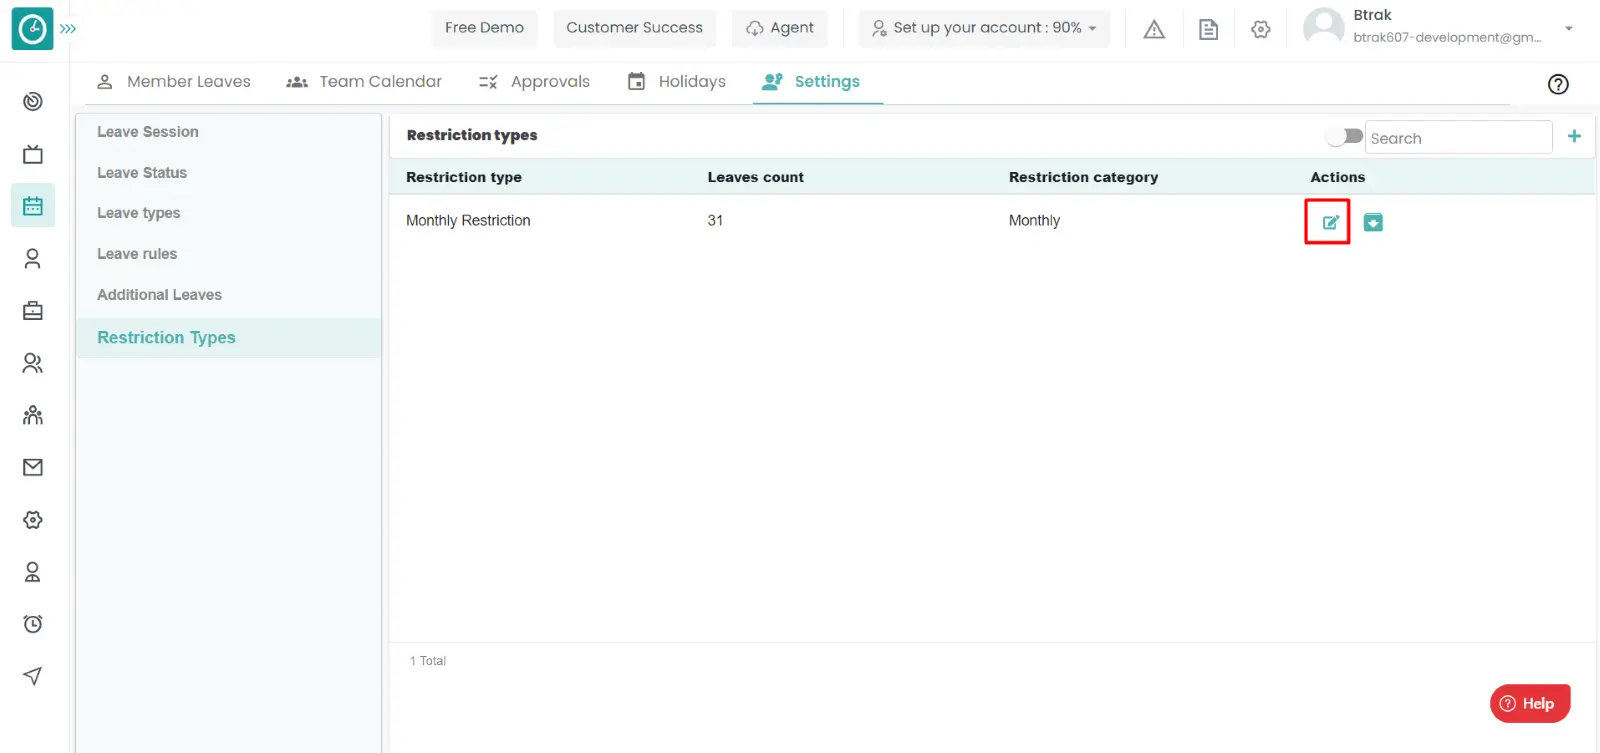
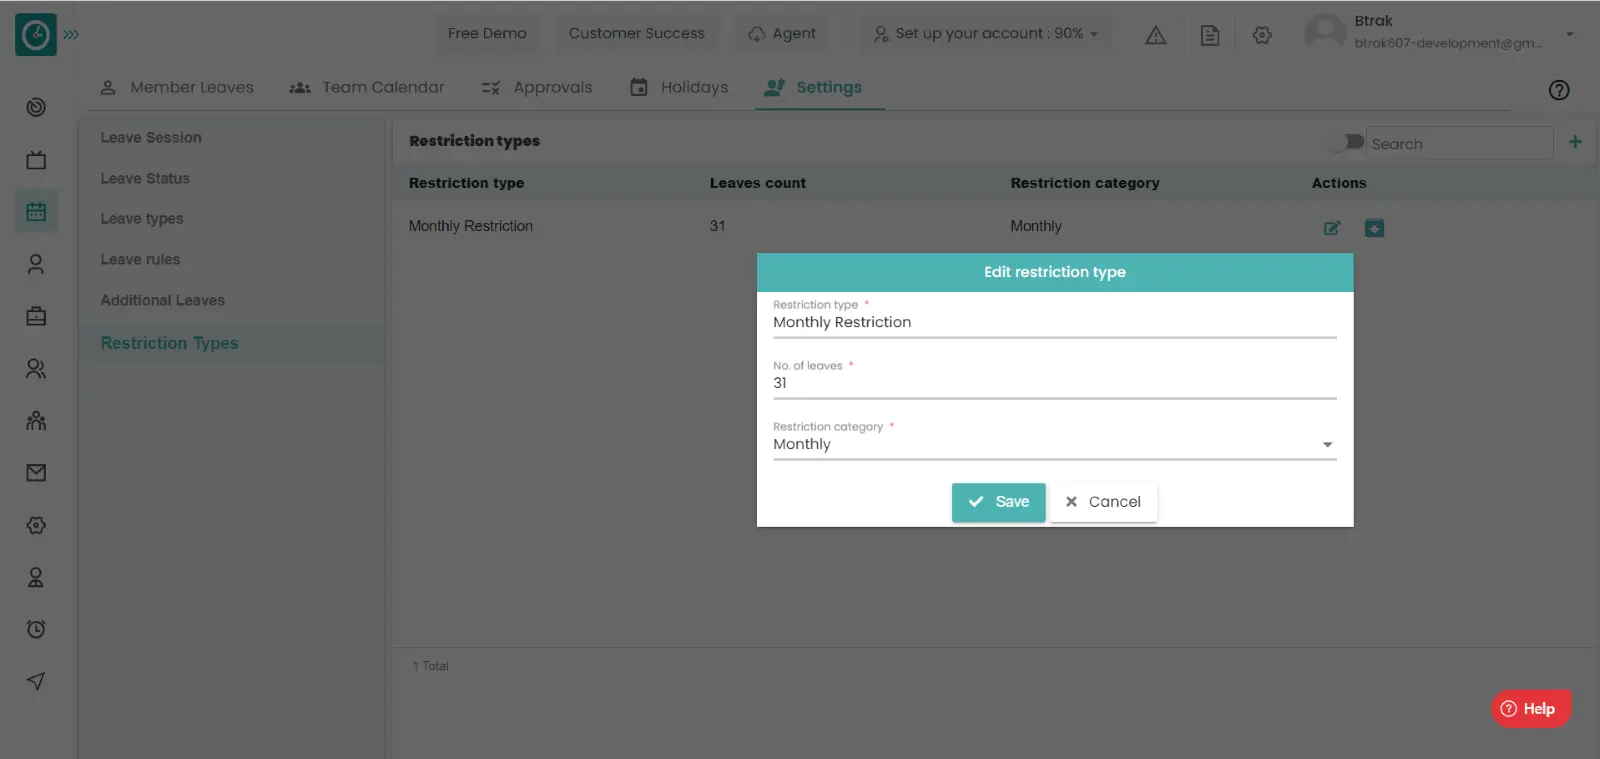
Archive Restriction Type
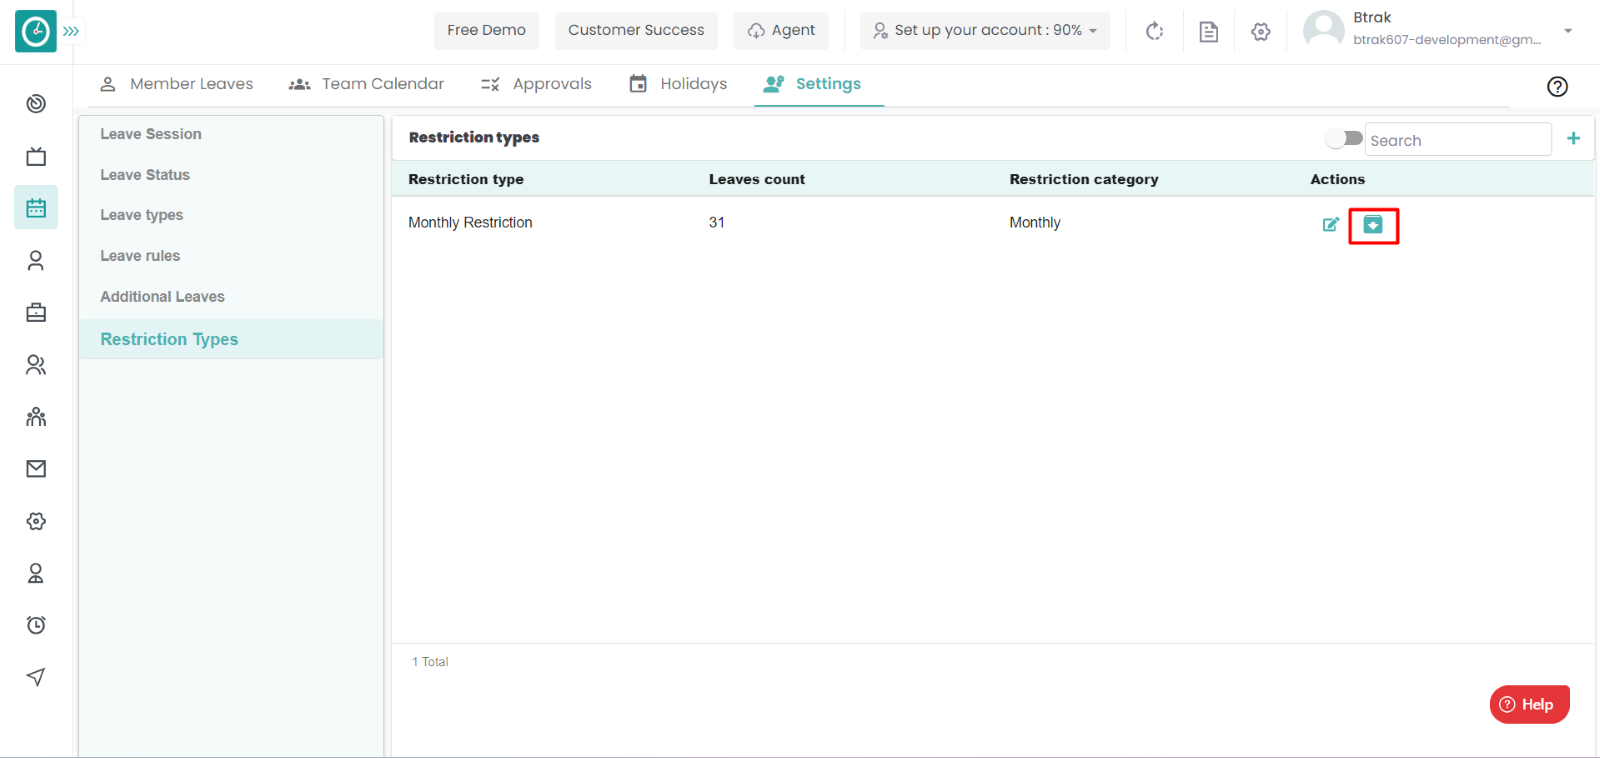
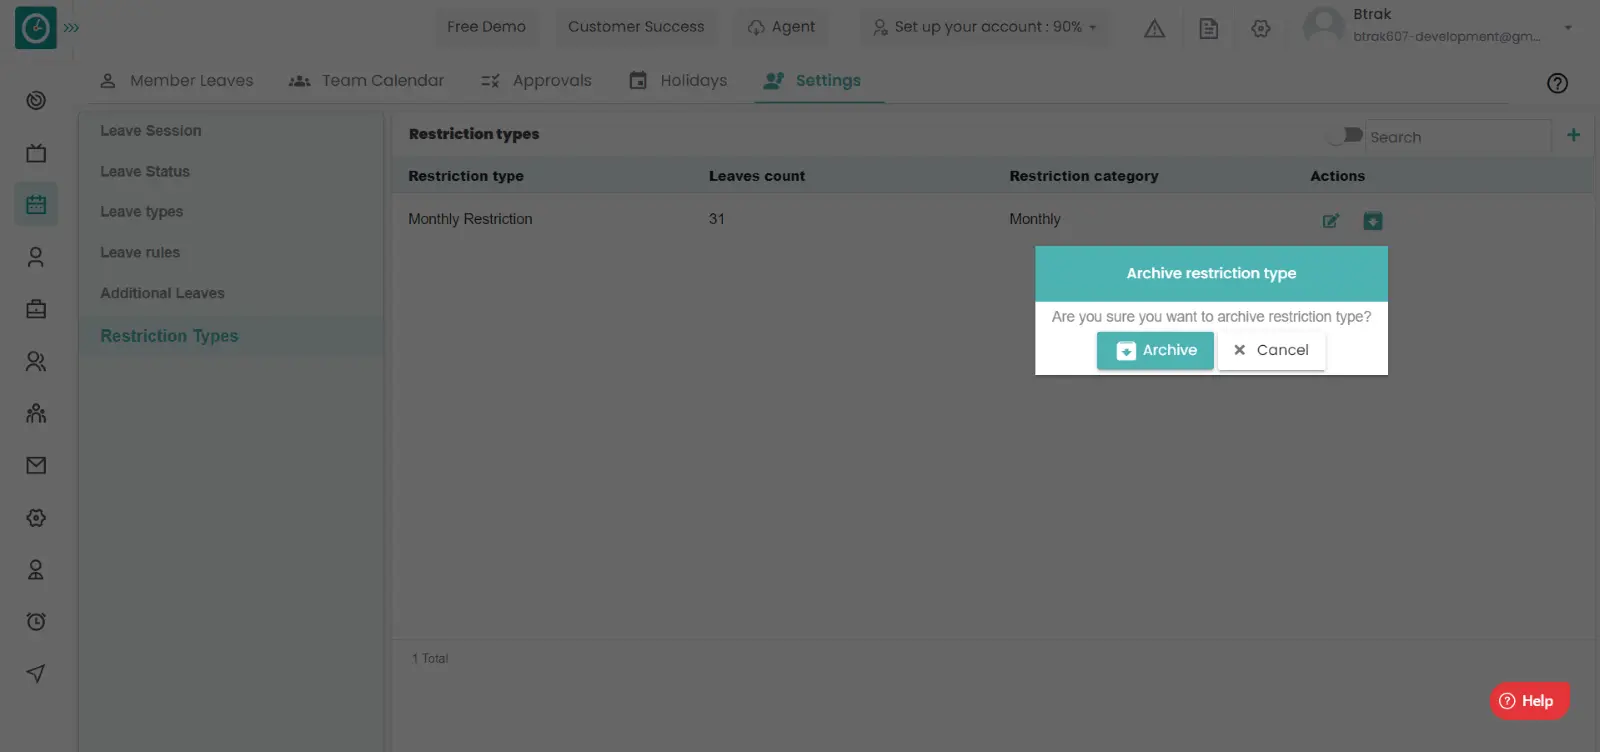
Access the archived Restriction types

Now you have successfully created the restriction rules for the users.
Many employees in a company will take short leaves for their personnel needs. In order to generate the payroll according to leaves of an employee this can be used.
Navigation: Goto Leaves => Tab: Settings.
If the user is having Super Admin
permissions, then he can be able to setup the Enable the Automatic Leave
deduction an employee, team, company.
This permission can be configured by following the steps: -
Manage leave settings from Leaves module,
then select the roles for what you must give the permissions to configure and check them.setup the number of short leaves as leave
for the defined roles.
Procedure:
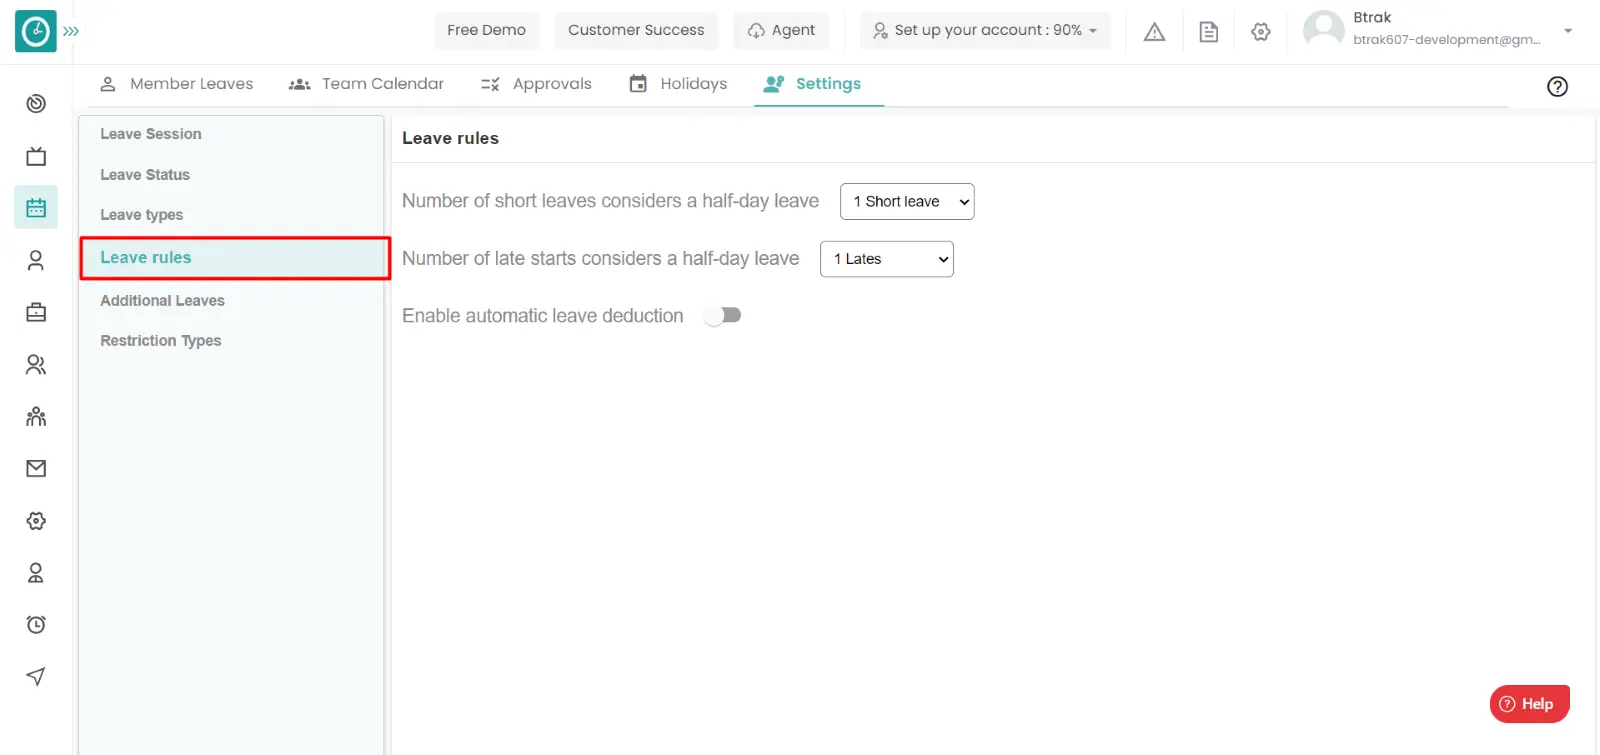
Time Champ has the feature of deduction of leaves automatically from the employee leaves for the short leaves during office hours. With this you can be able to process the payroll based on the attendance.
Navigation: Goto Leaves => Tab: Settings.
If the user is having Super Admin
permissions, then he can be able to setup the Enable the Automatic Leave
deduction an employee, team, company.
This permission can be configured by following the steps: -
Manage leave settings from Leaves module,
then select the roles for what you must give the permissions to configure and check them.enable the automatic leave deductions
for the defined roles.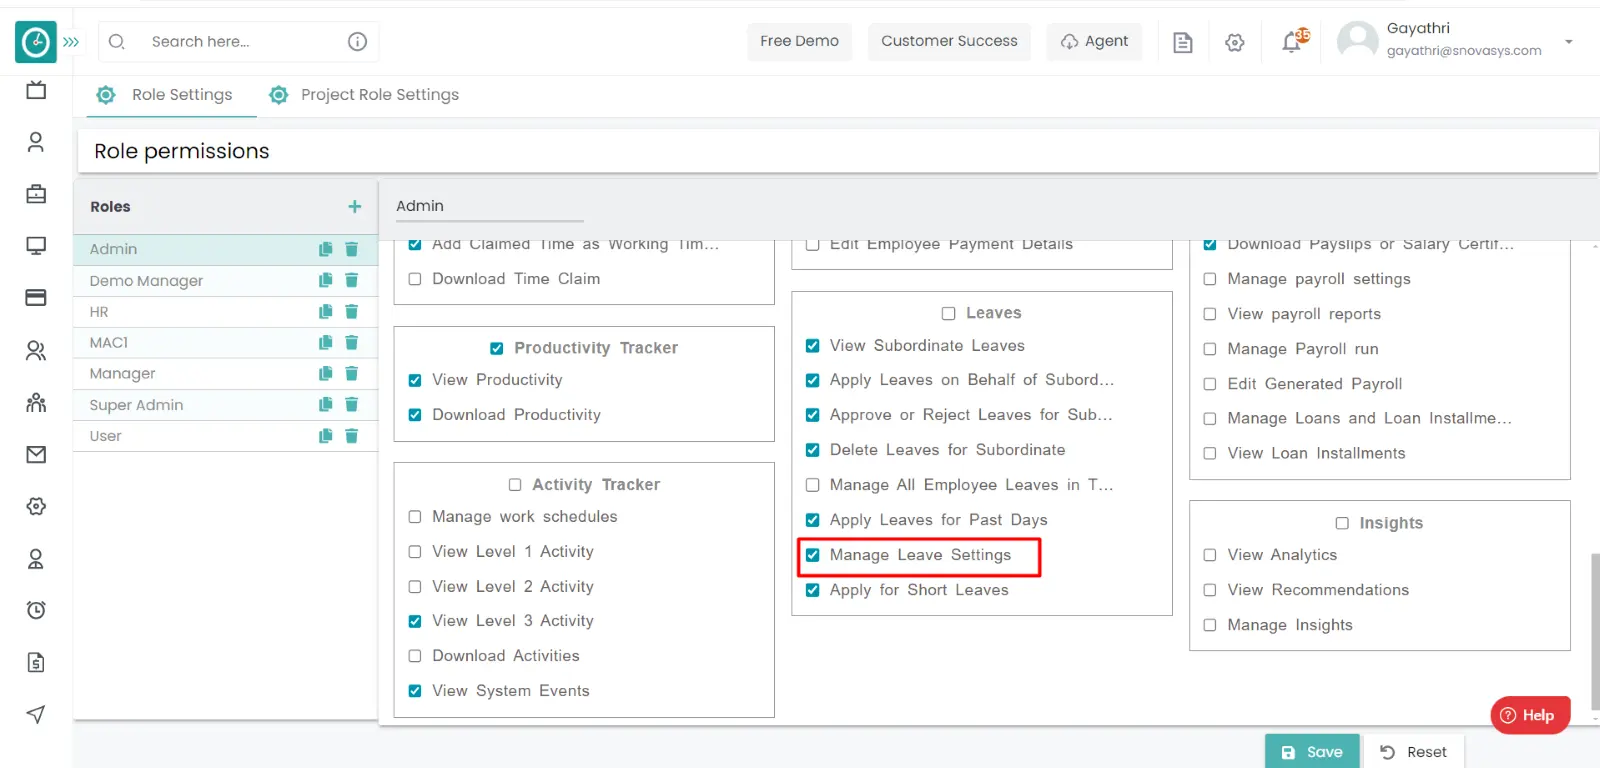
Procedure:
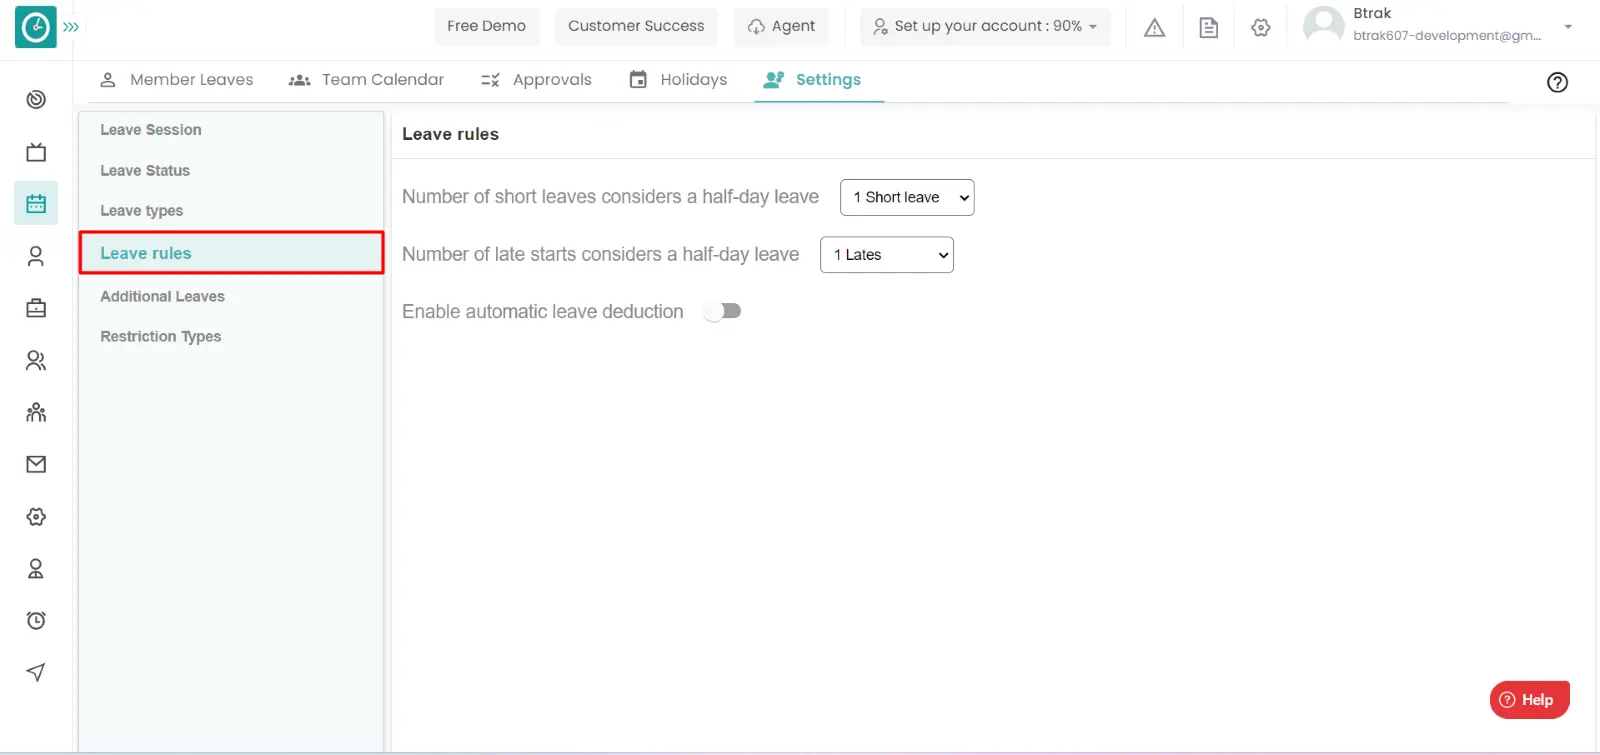

Now you have enabled the automatic leave deductions for the short leaves taken.
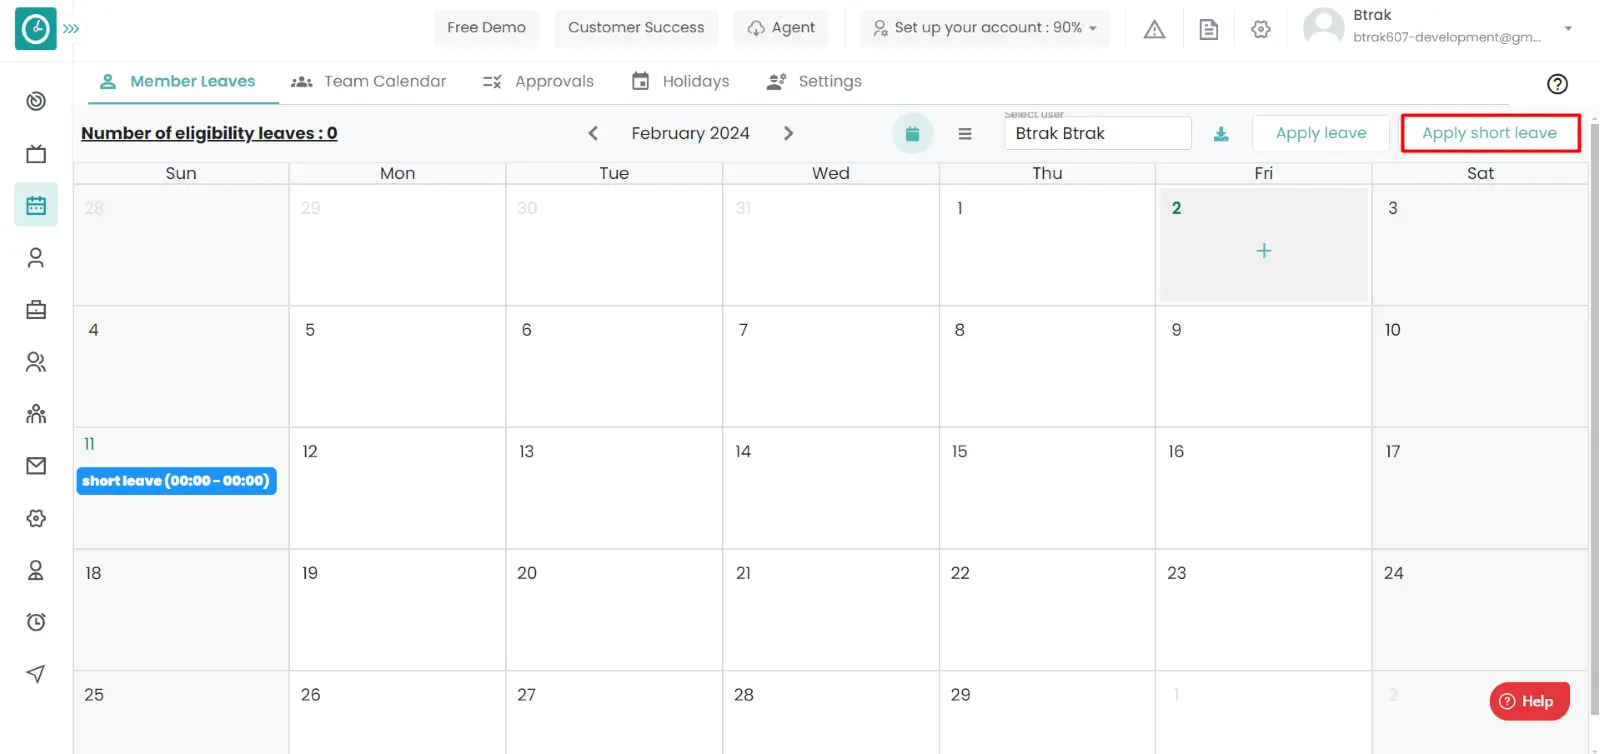
Time champ enables the user to take the short leaves, in case of any emergency or any personal leaves can be applied from here. An employee has his own works for that he needs to take leave for 2 hours then he will be able take the short leave.
Navigation: Goto Leaves => Members Leaves
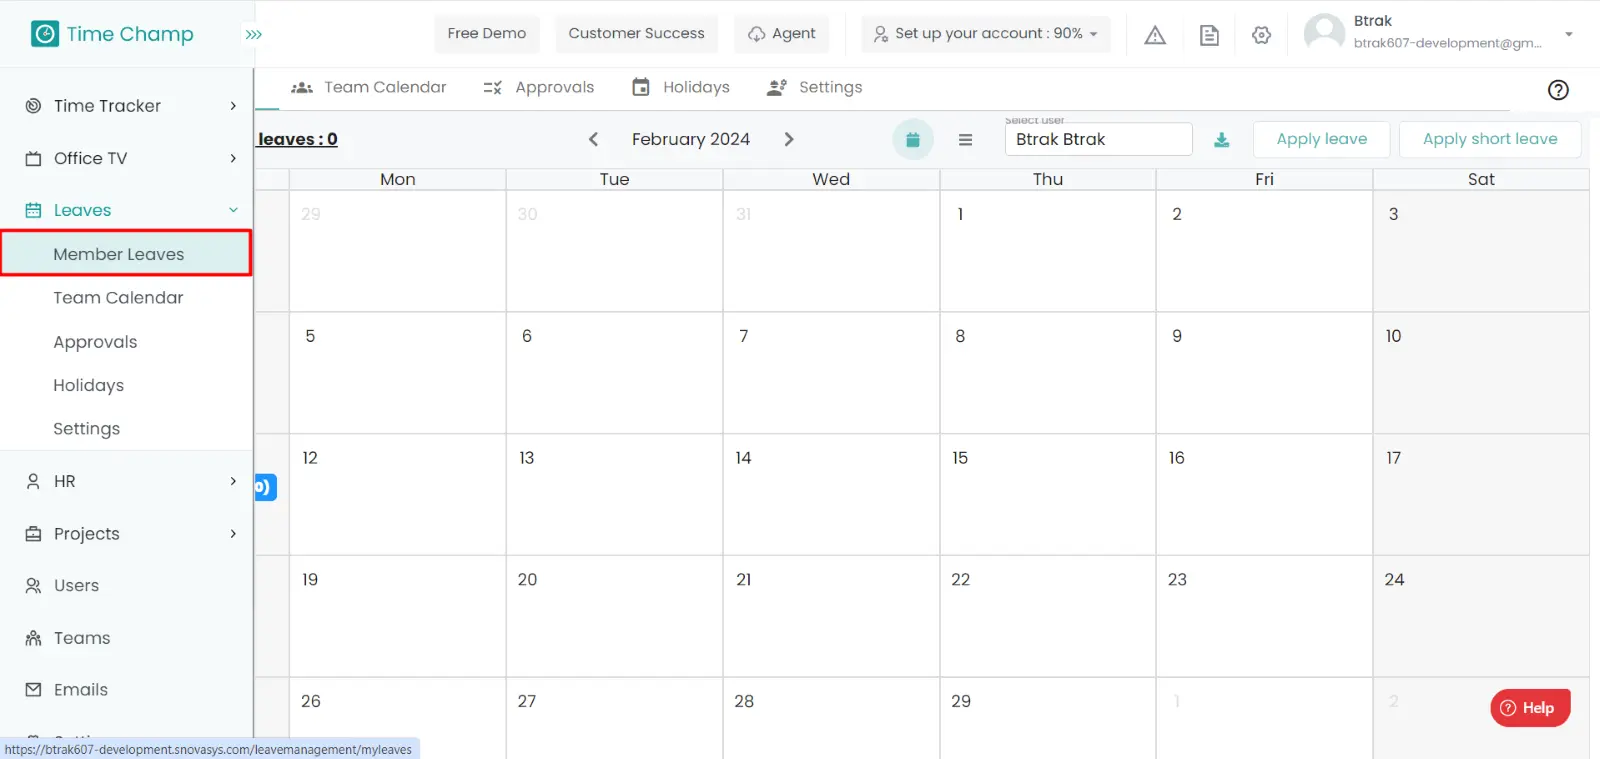
If the user is having Super Admin
permissions, then he can be able to apply the leave.
This permission can be configured by following the steps: -
Apply Short Leaves from Leaves Module,
then select the roles for what you must give the permissions to configure and check them.apply the short leave
for the defined roles.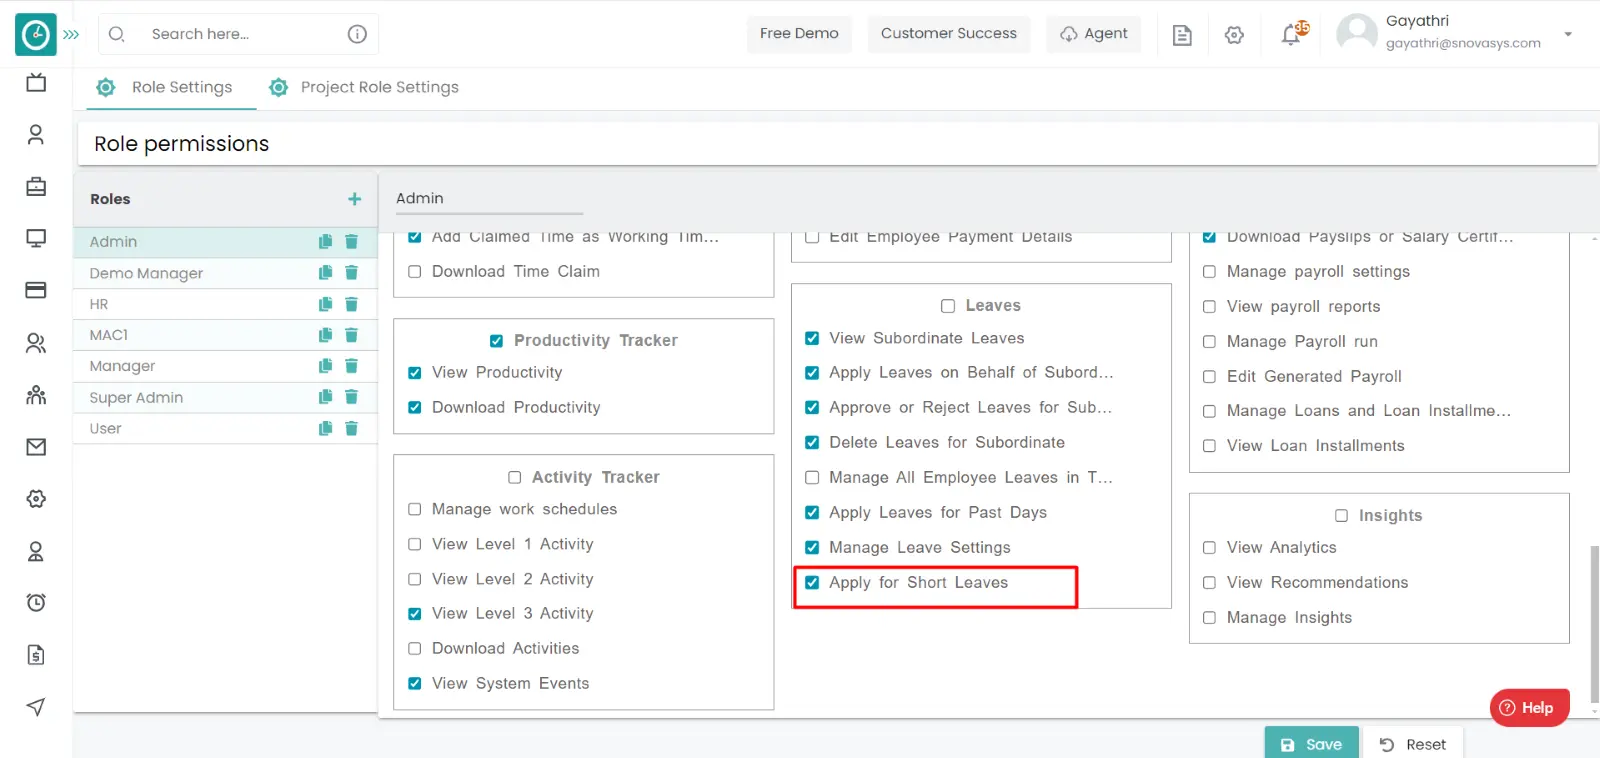
Procedure: -

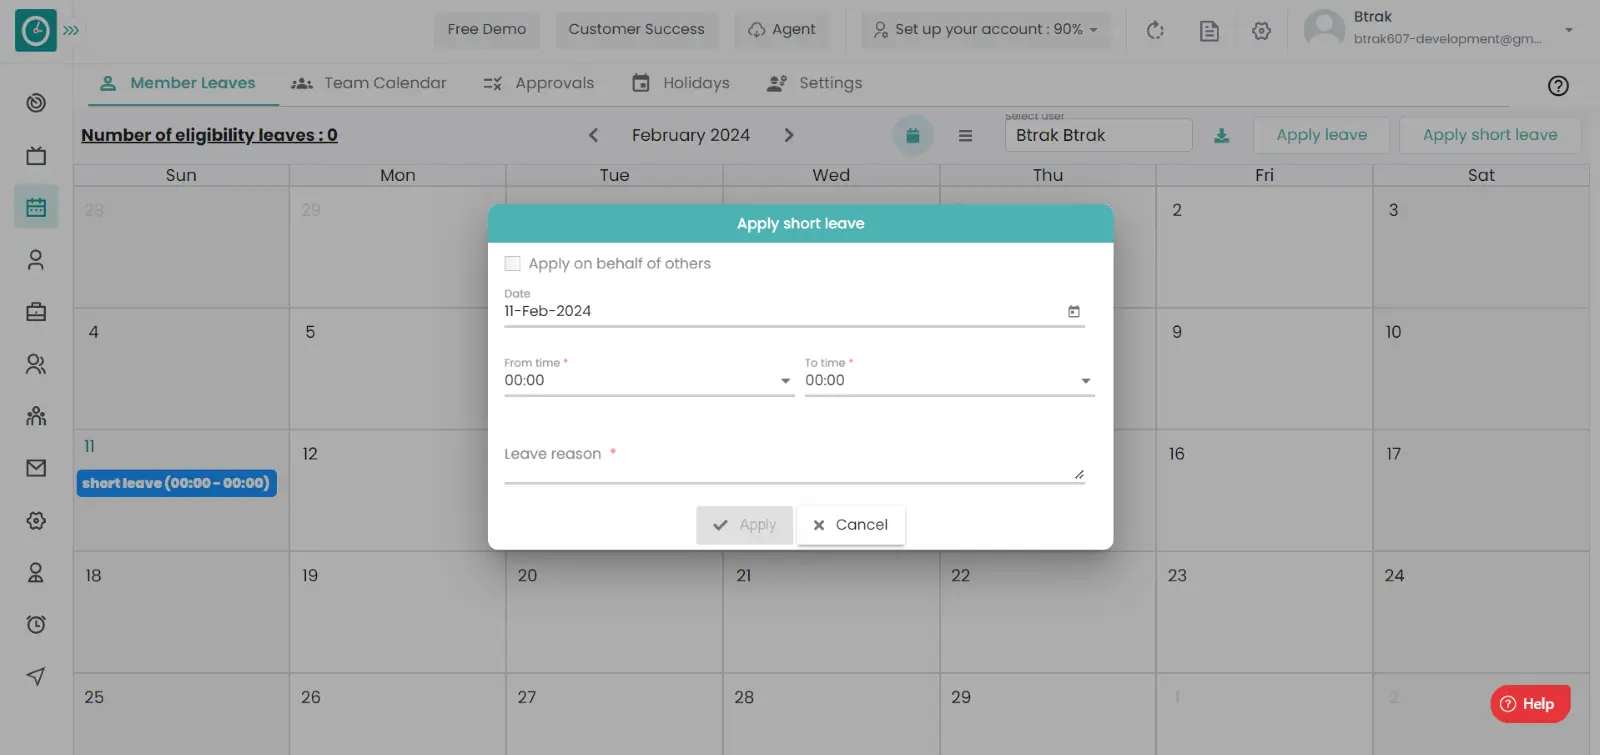
Now you have applied for the short leave.
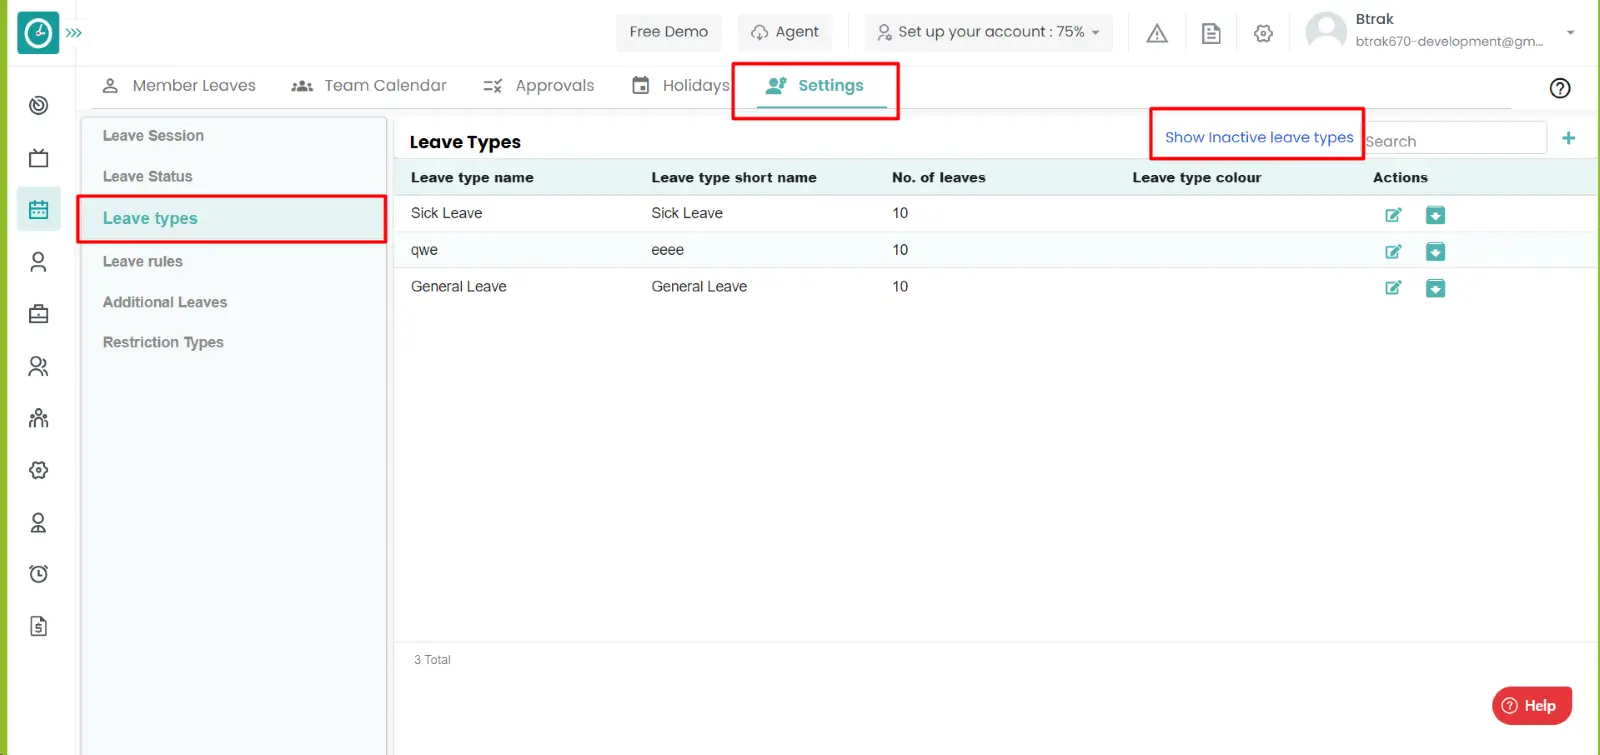
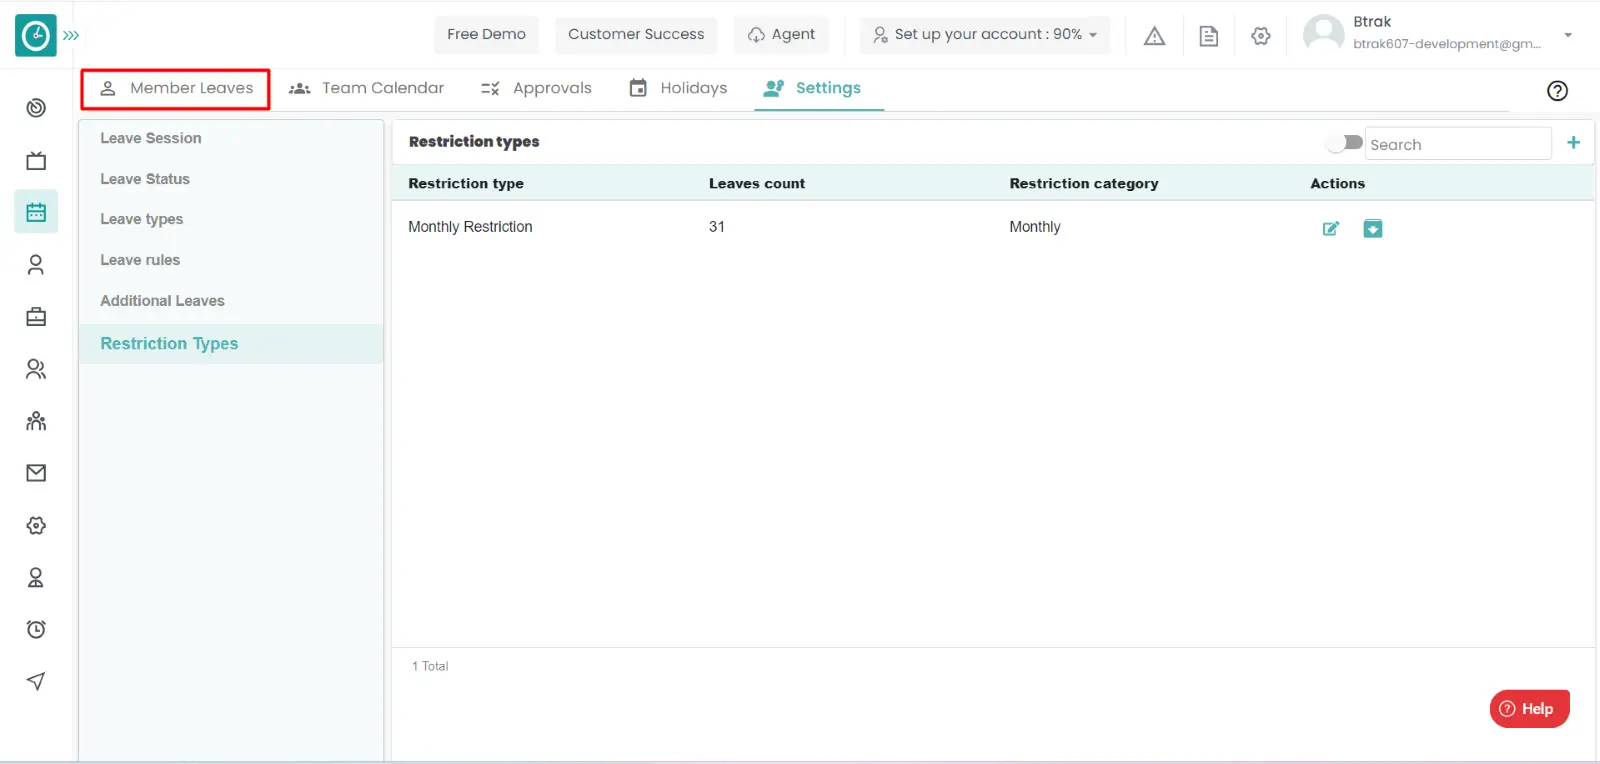
Leave policies will be getting changed as the requirements changed. So that the old leave types will no more valid for the new requirements. So that it will be archived, if it is again needs in the leave policies it can be unarchived again.
Navigation: Goto Leaves => Tab: Settings => Restriction Types.

If the user is having Super Admin
permissions, then he can be able to archive the leave types of employees, teams,
company.
This permission can be configured by following the steps: -
Manage Leave settings from Leaves module,
then select the roles for what you must give the permissions to configure and check them.view the Archived restriction types
for the defined roles.
Procedure:
Now you are Viewing the archived restriction types.
Yes, you can upload the documents to a leave only when the leave is applied. but you cannot upload the documents while you are applying for the leave.
Navigation: Goto Leaves >> Tab: Member leaves.
Procedure:
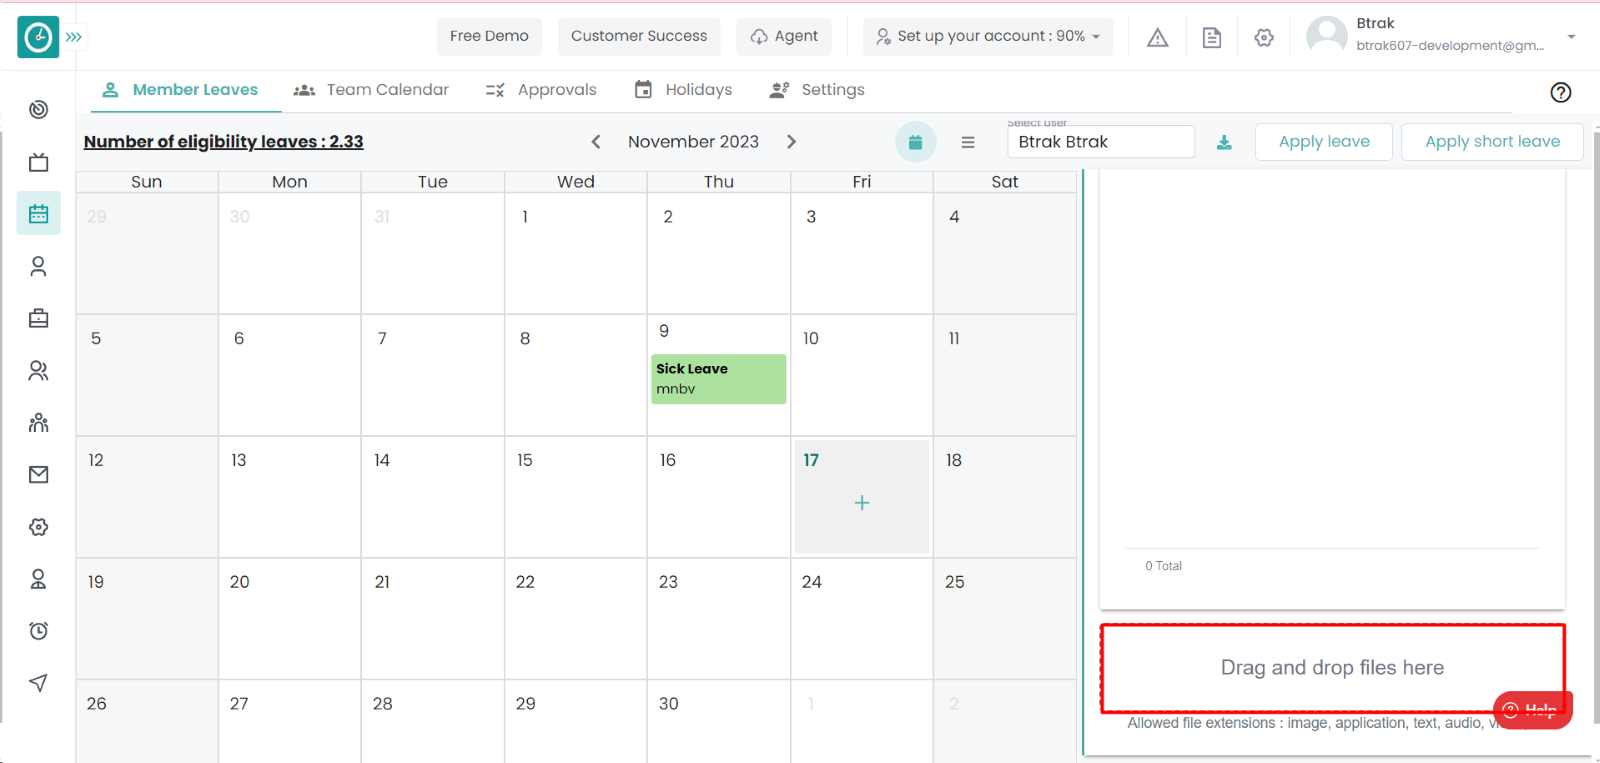

Now you have successfully added the documents to the leave.
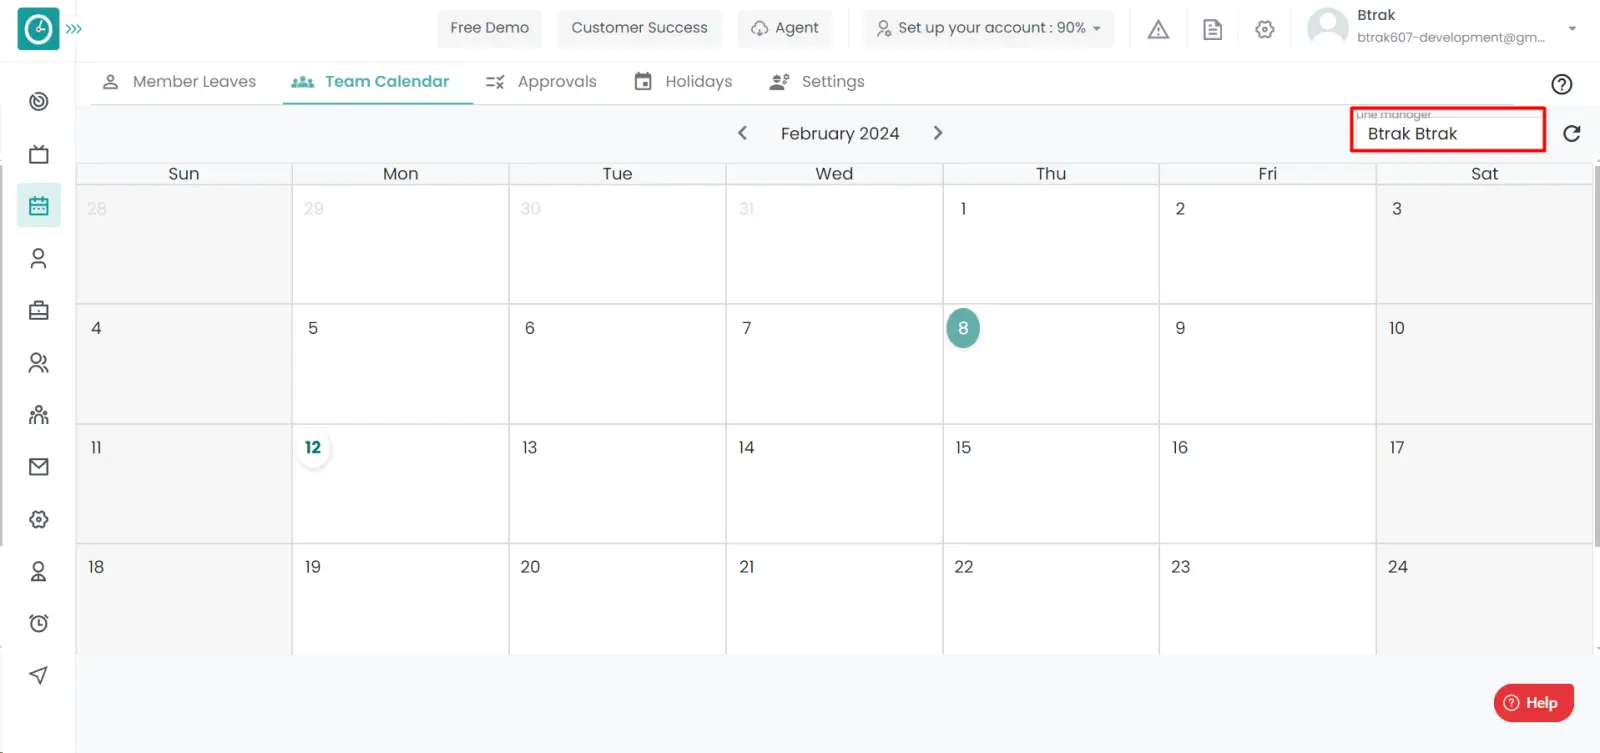
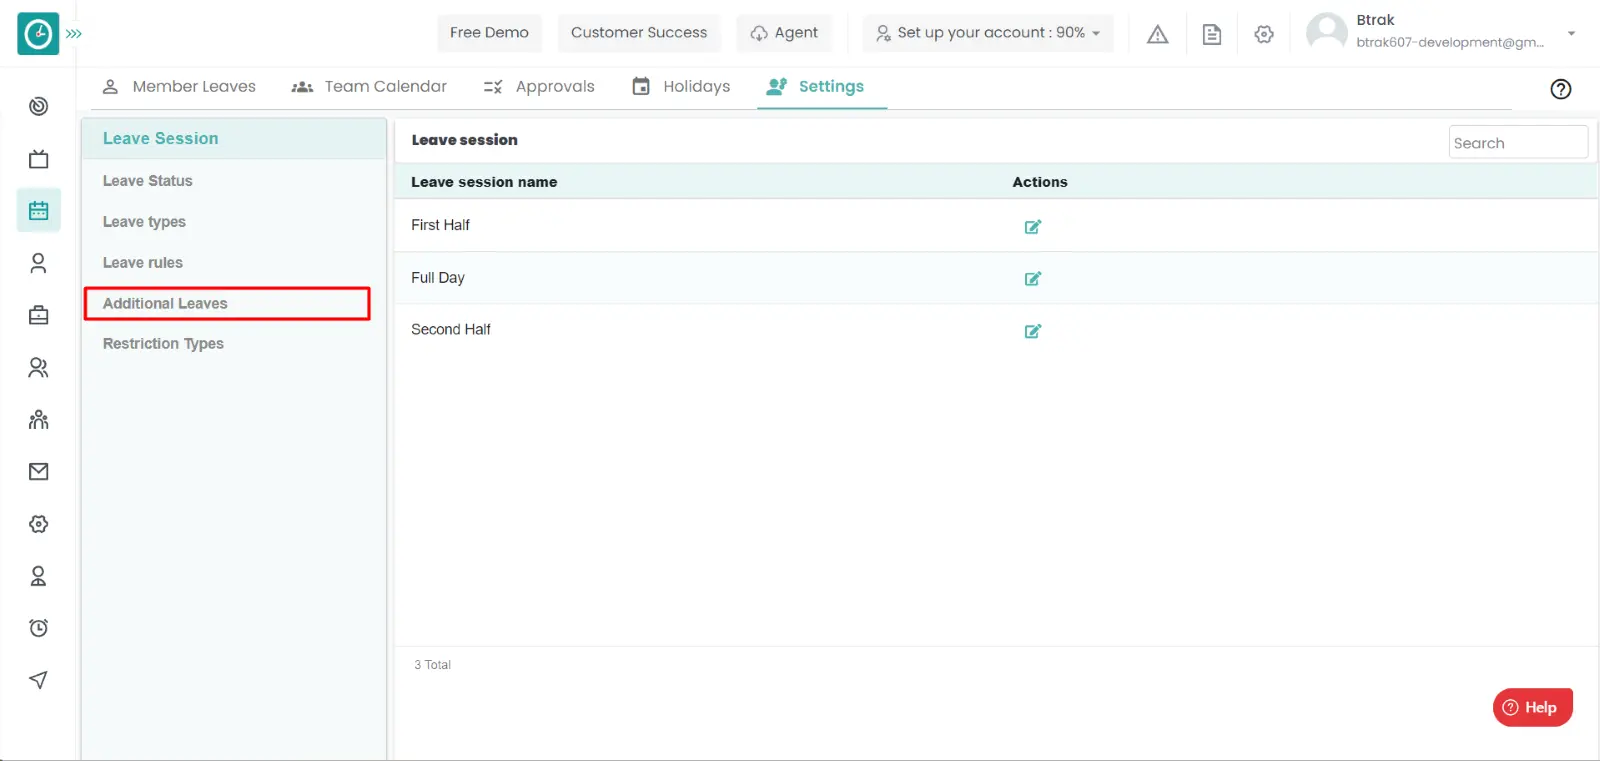
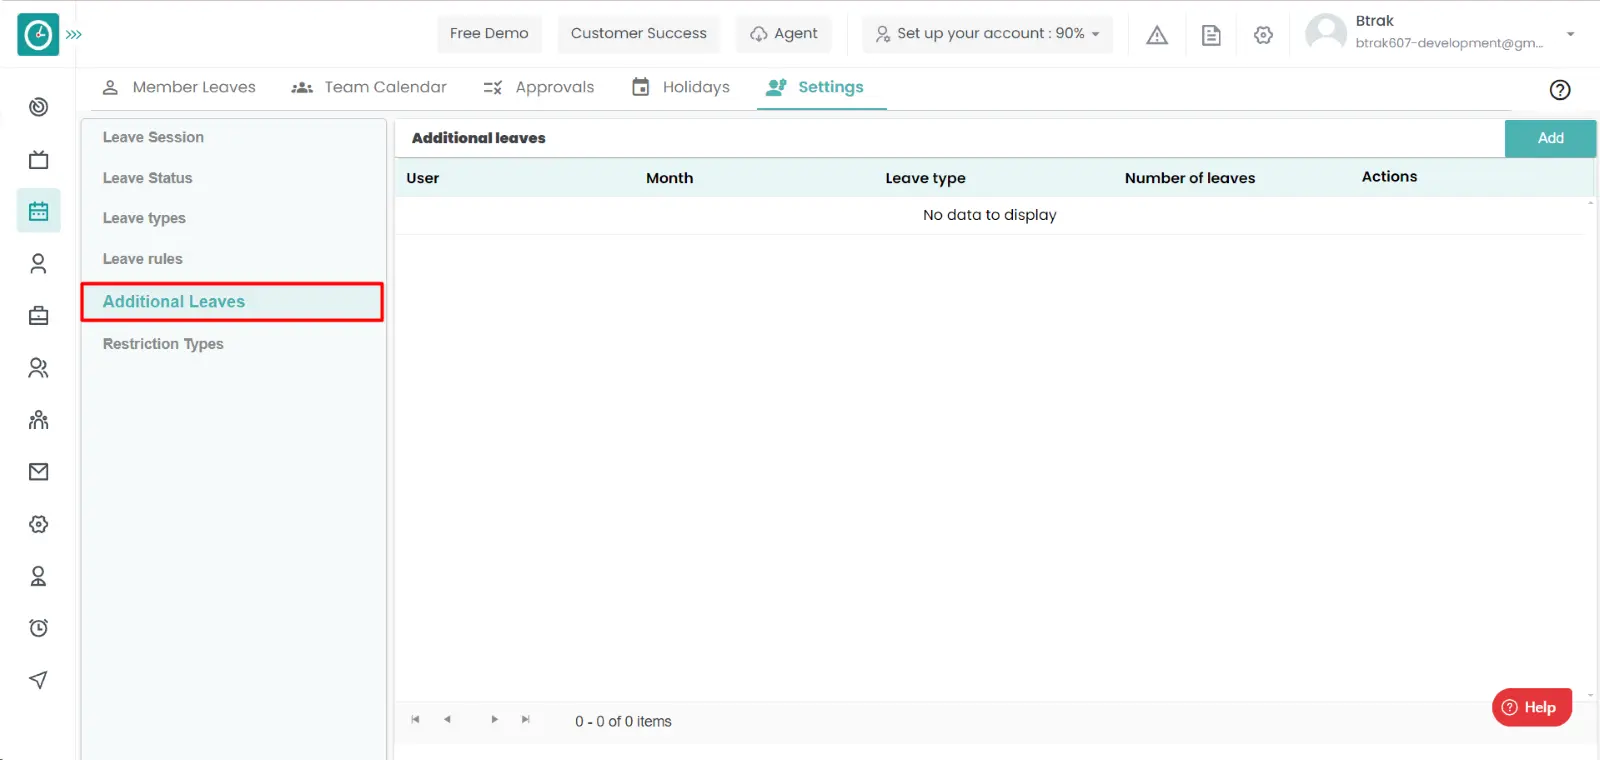
Time champ allows you to add additional leaves to an user. It is necessary to add the leaves to an individual to allow them to take leaves and if the user is having higher experience, he/she can be able to take leaves.
Navigation: Goto Leaves => Tab: Team Calendar
If the user is having Super Admin
permissions, then he can be able to view the leave request of your subordinates.
This permission can be configured by following the steps: -
View Subordinates leaves from Leaves module
then select the roles for what you must give the permissions to configure and check them.View the leaves of subordinates
for the defined roles.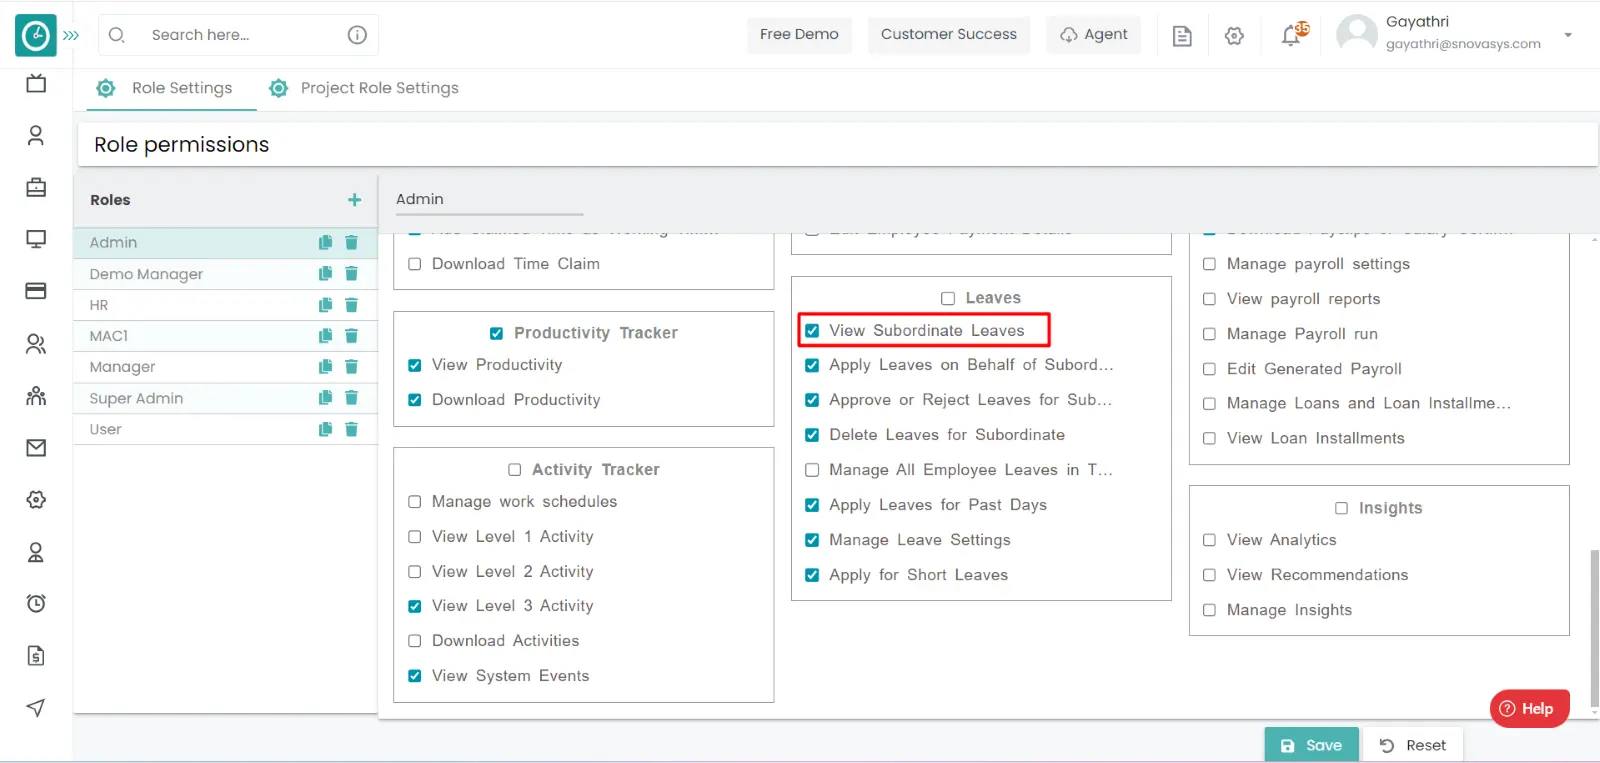
Procedure:
Now you are able to view the leaves of your subordinates.
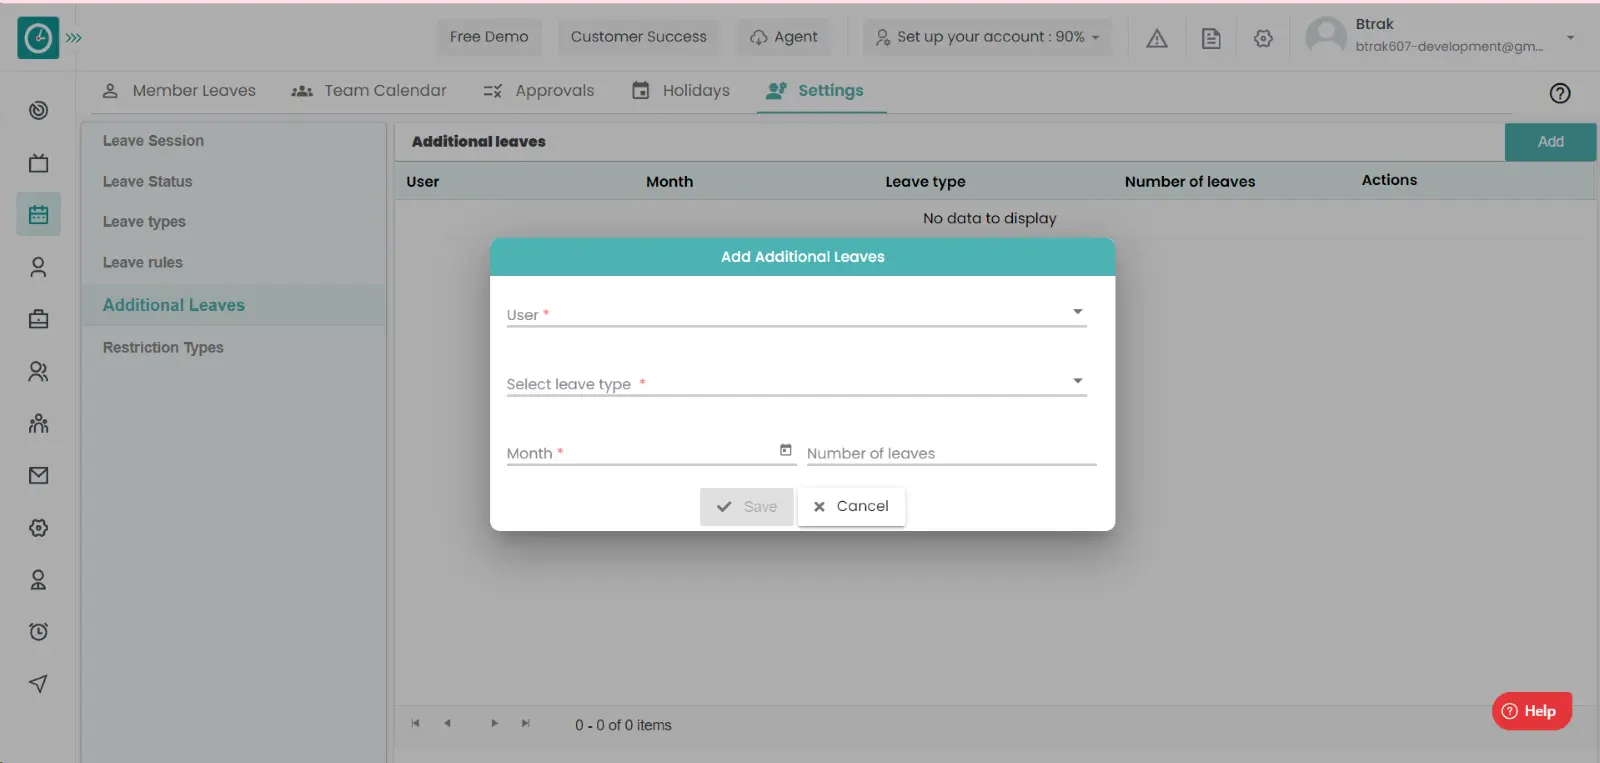
Time champ allows you to view and approve and reject the leaves of your subordinates. It is necessary to know that who are in leave within your team to plan the work.
Navigation: Goto Leaves => Tab: Team Calendar.
If the user is having Super Admin
permissions, then he can be able to view the leave request of your subordinates.
This permission can be configured by following the steps: -
Manage Leave settings from Leaves module,
then select the roles for what you must give the permissions to configure and check them.View and add the additional leaves
for the defined roles.
Procedure:
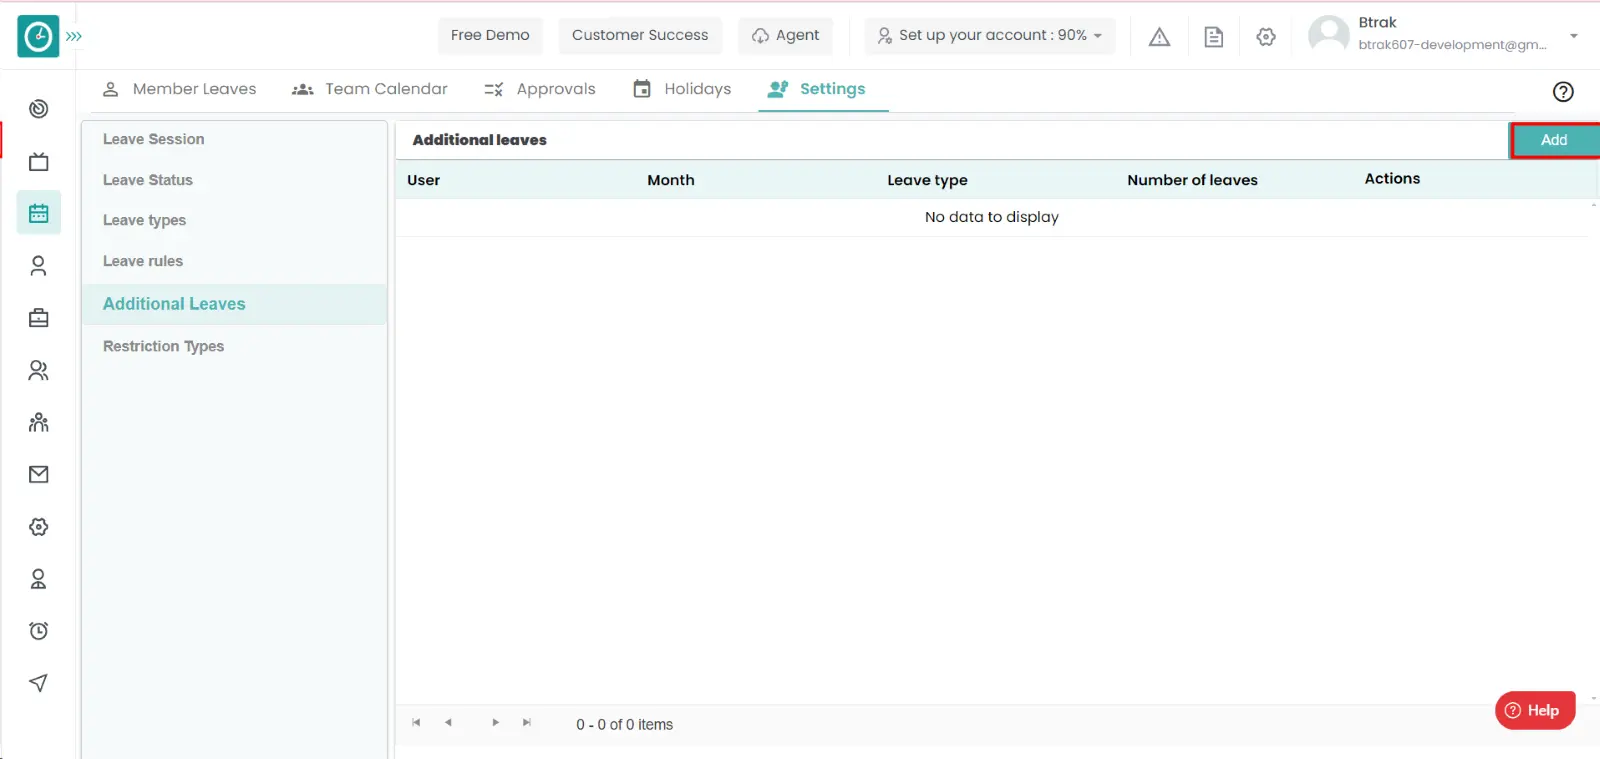
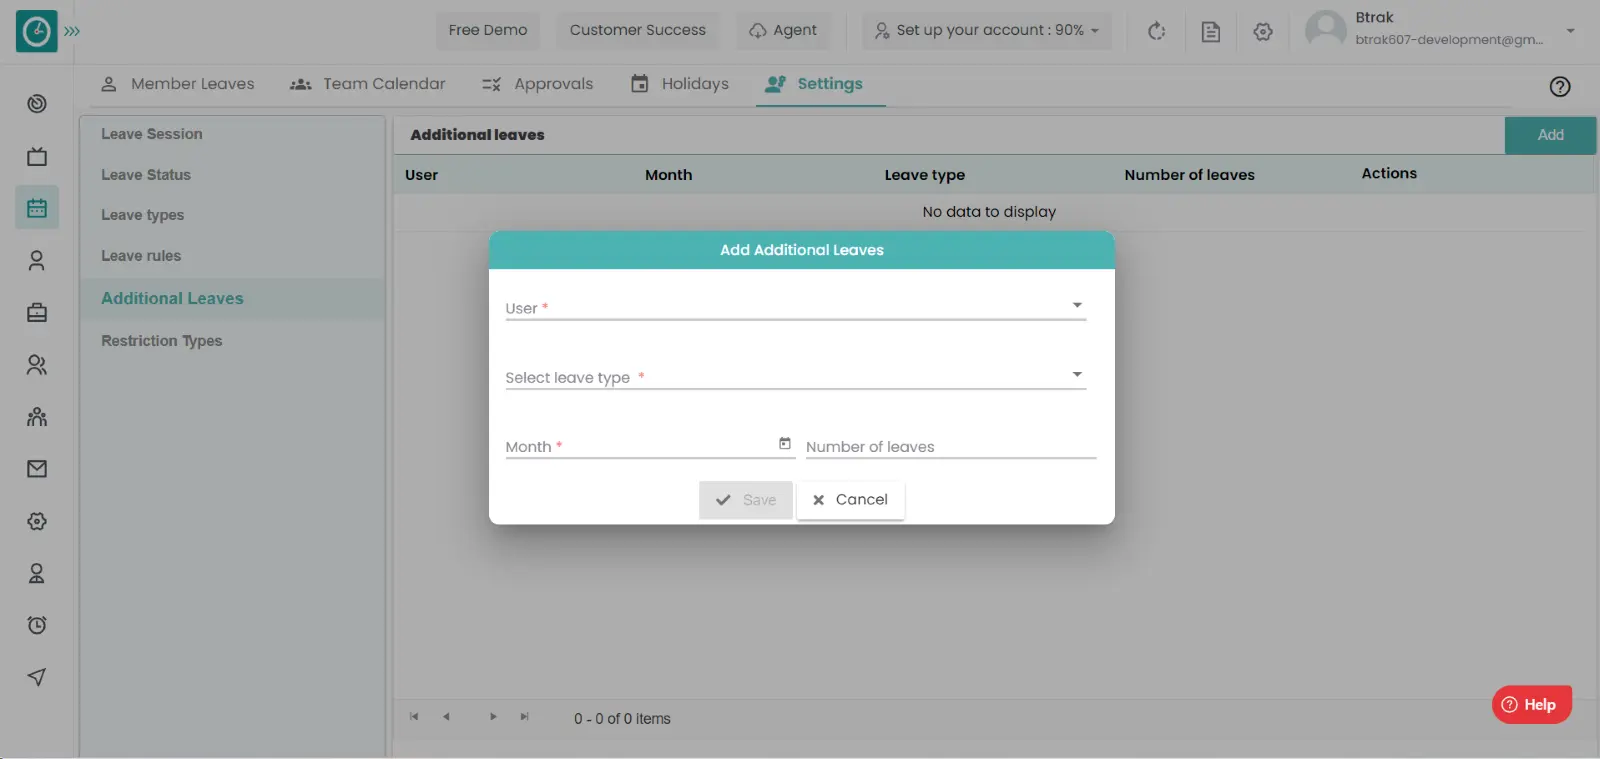
Now you are able to add the additional leaves.
Time champ allows you to edit additional leaves to an user. If the leaves are configured more than he avails to an individual, then you need to change them.
Navigation: Goto Leaves => Tab: Settings

If the user is having Super Admin
permissions, then he can be able to view the leave request of your subordinates.
This permission can be configured by following the steps: -
Manage Leave settings from Leaves module,
then select the roles for what you must give the permissions to configure and check them.View and add the additional leaves
for the defined roles.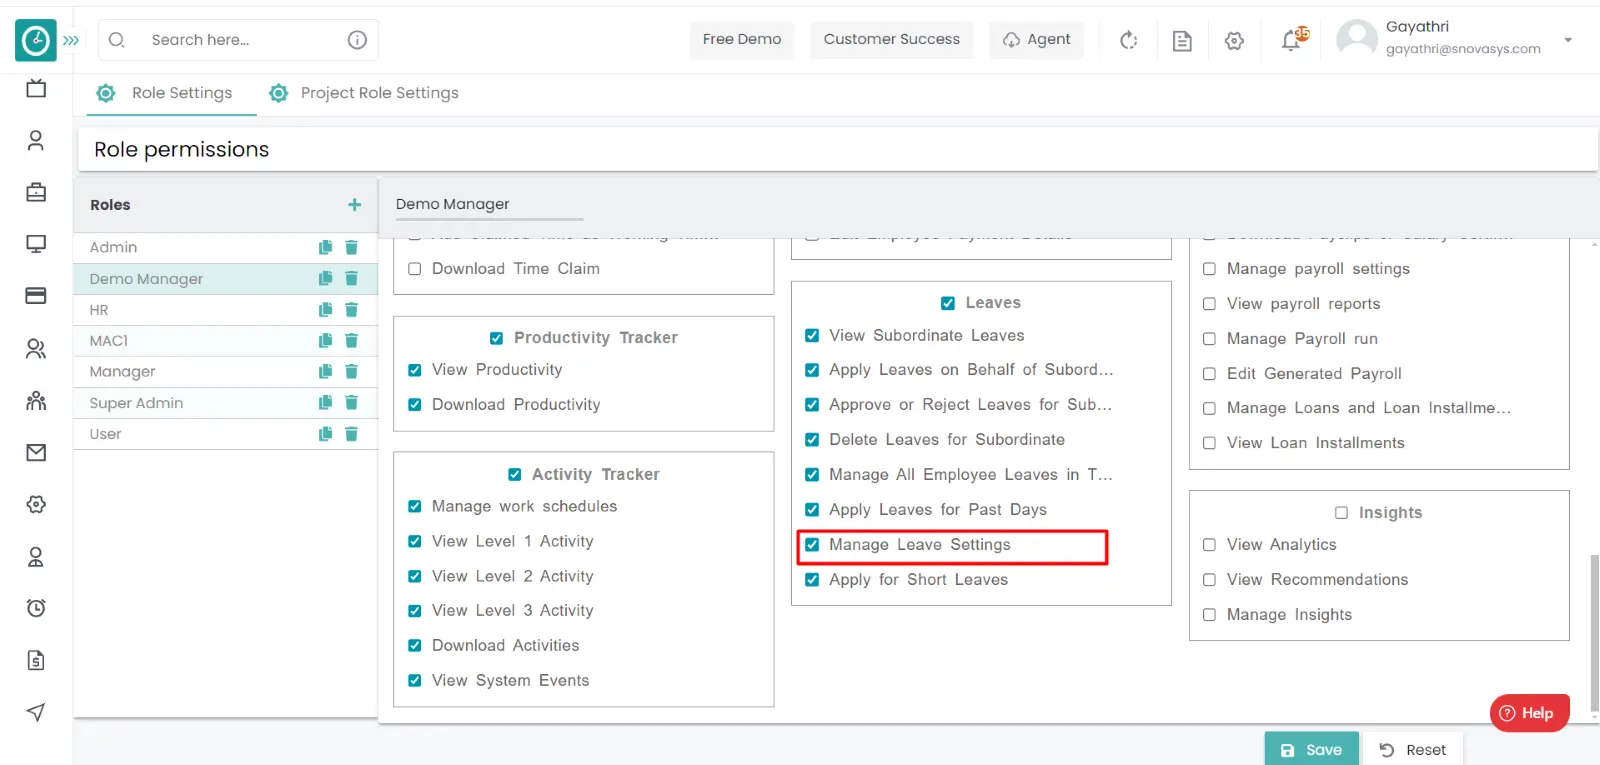
Procedure:
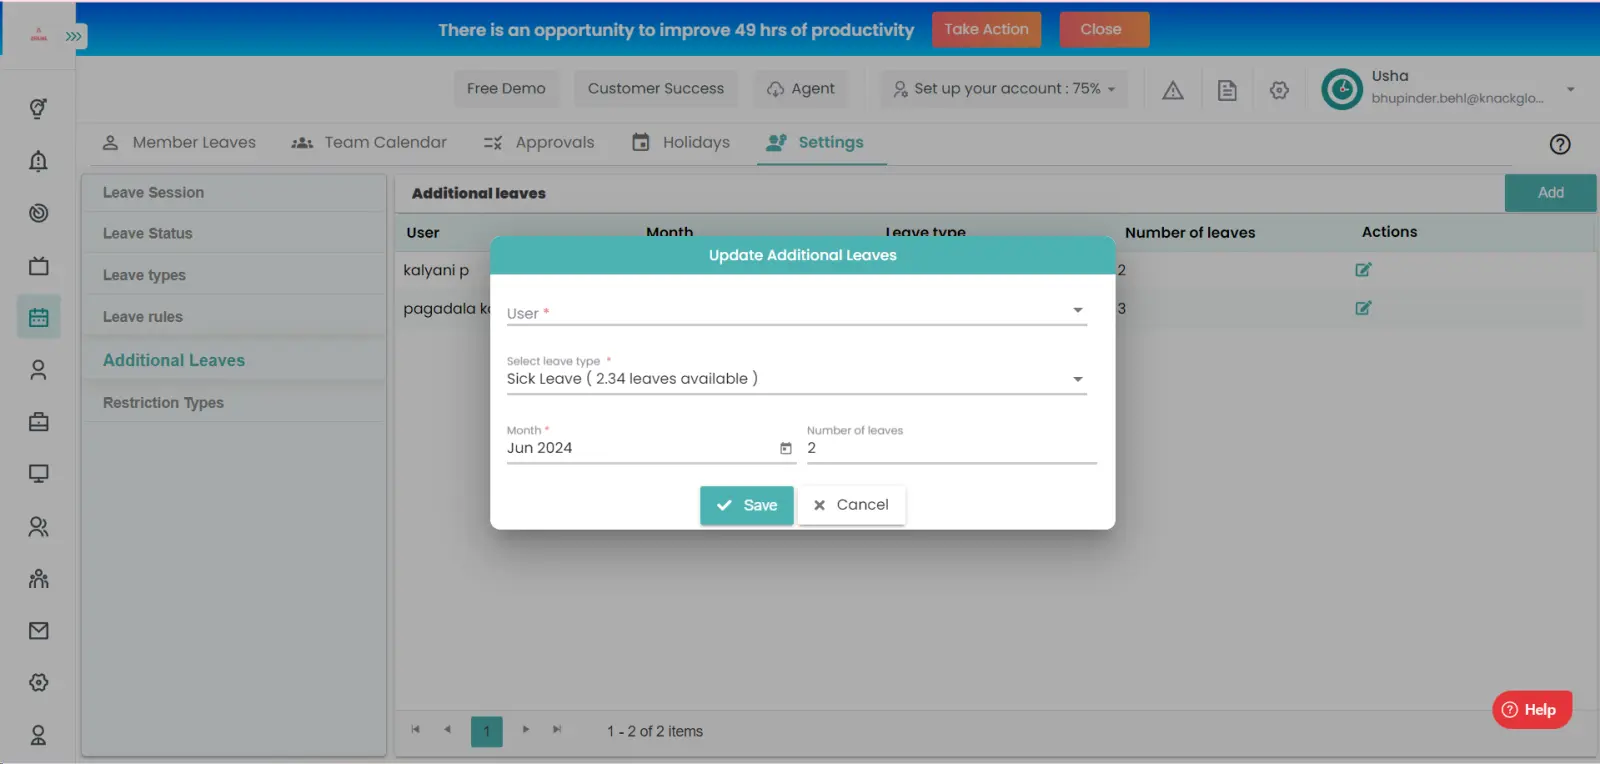
Now you are able to Update the additional leave.
Time champ allows you to approve the applied leaves. if the applied leave is approved by the manager, then we need to indicate them as approved/rejected to give acknowledgement to the user.
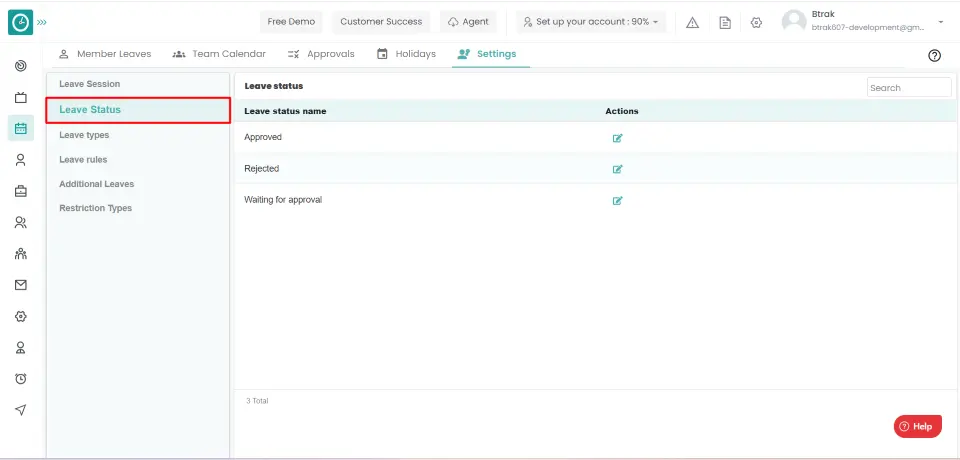
Navigation: Goto Leaves => Tab: Settings
If the user is having Super Admin
permissions, then he can be able to view the leave Status.
This permission can be configured by following the steps: -
Manage Leave settings from Leaves module,
then select the roles for what you must give the permissions to configure and check them.View the leave status
for the defined roles.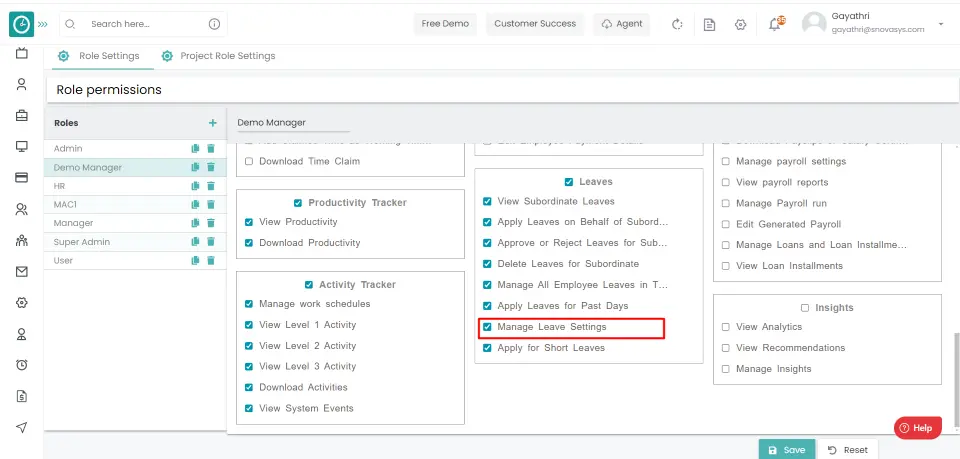
Procedure:
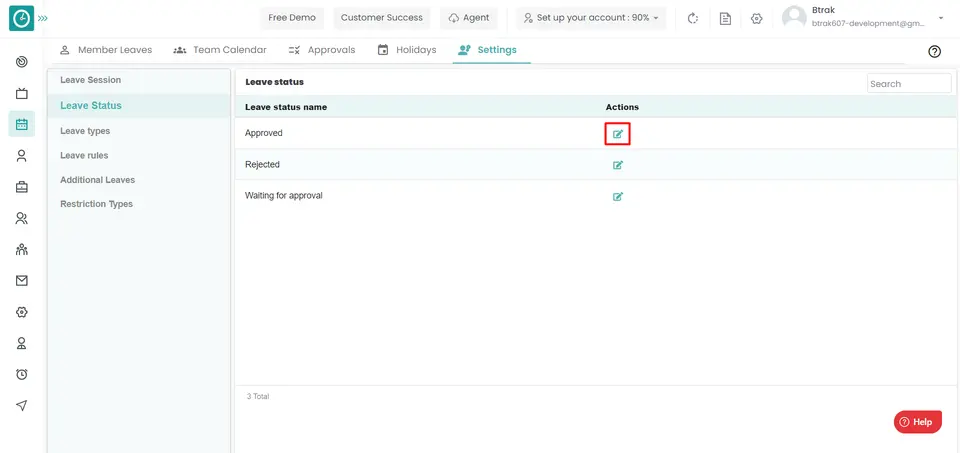
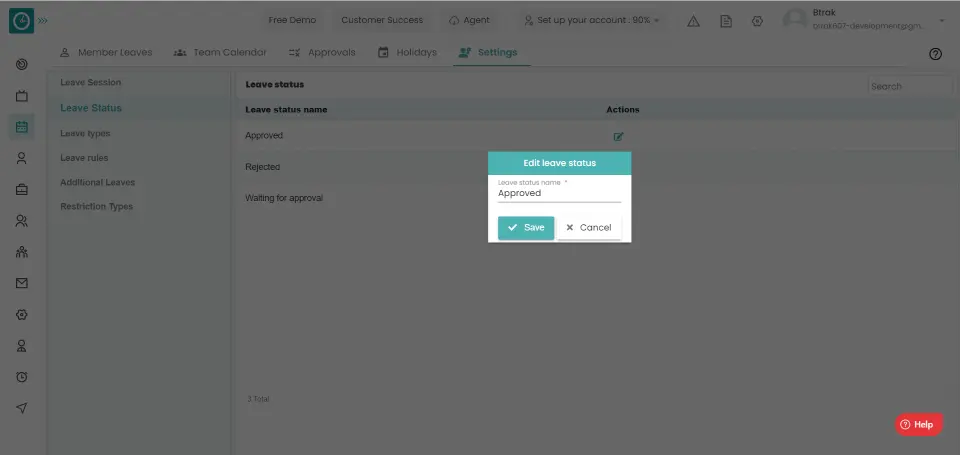
Now you are able to Update the additional leave.
Note: -
If the applied leave request appears in green color, then the request is approved.
If the applied leave request appears in red color then the request is rejected.
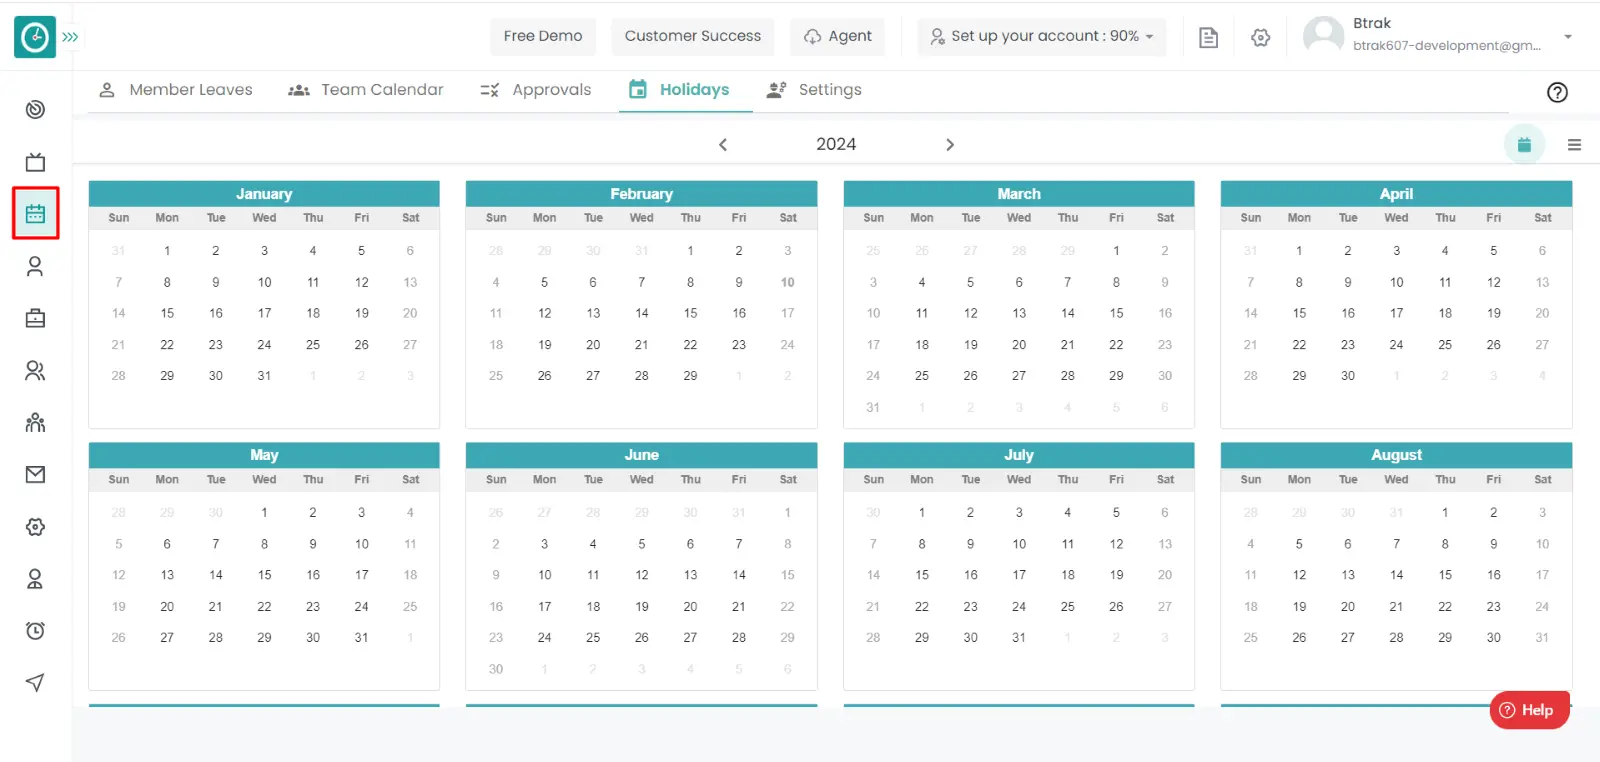
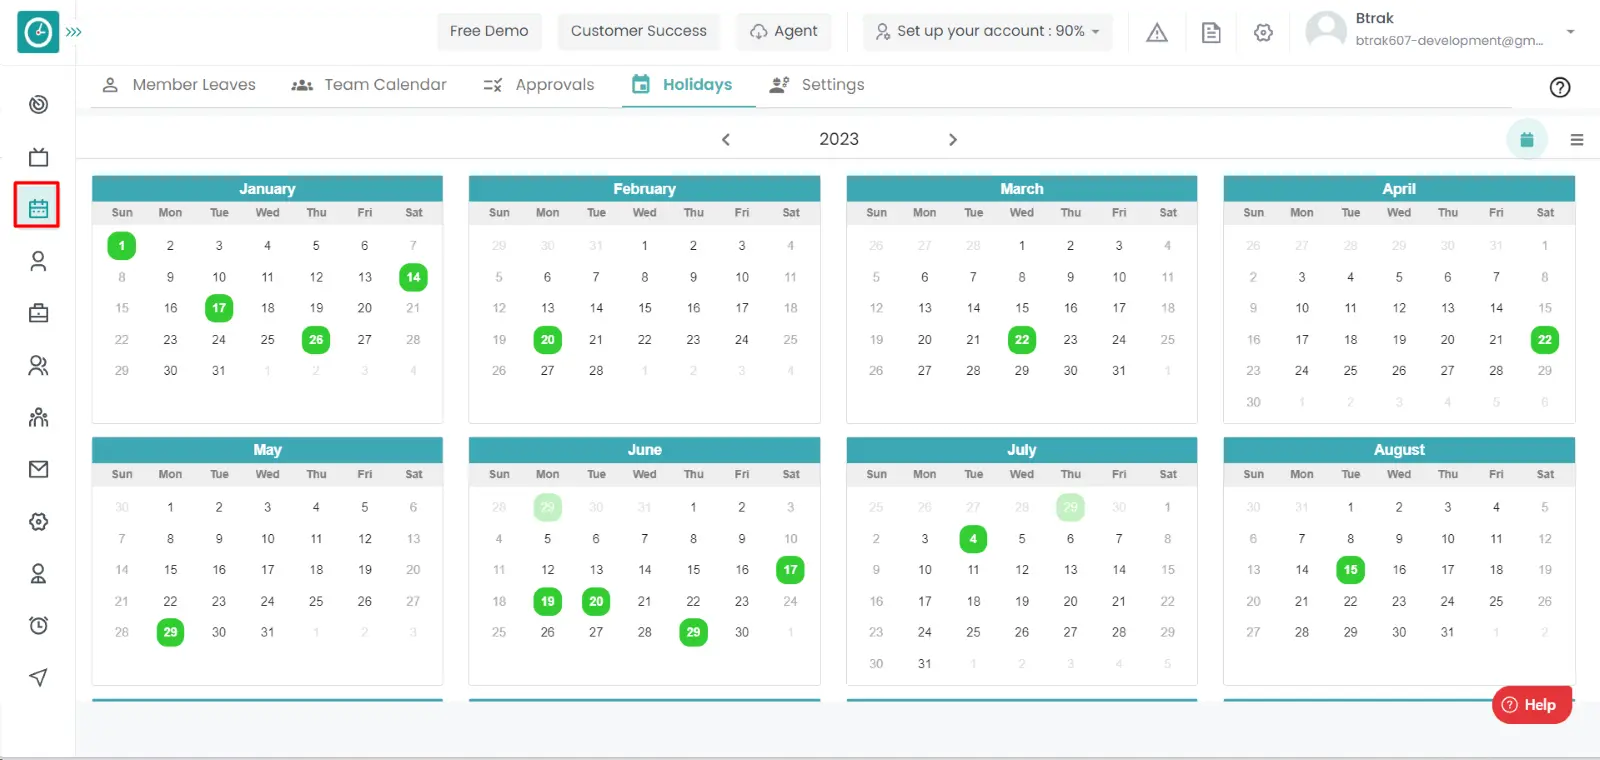
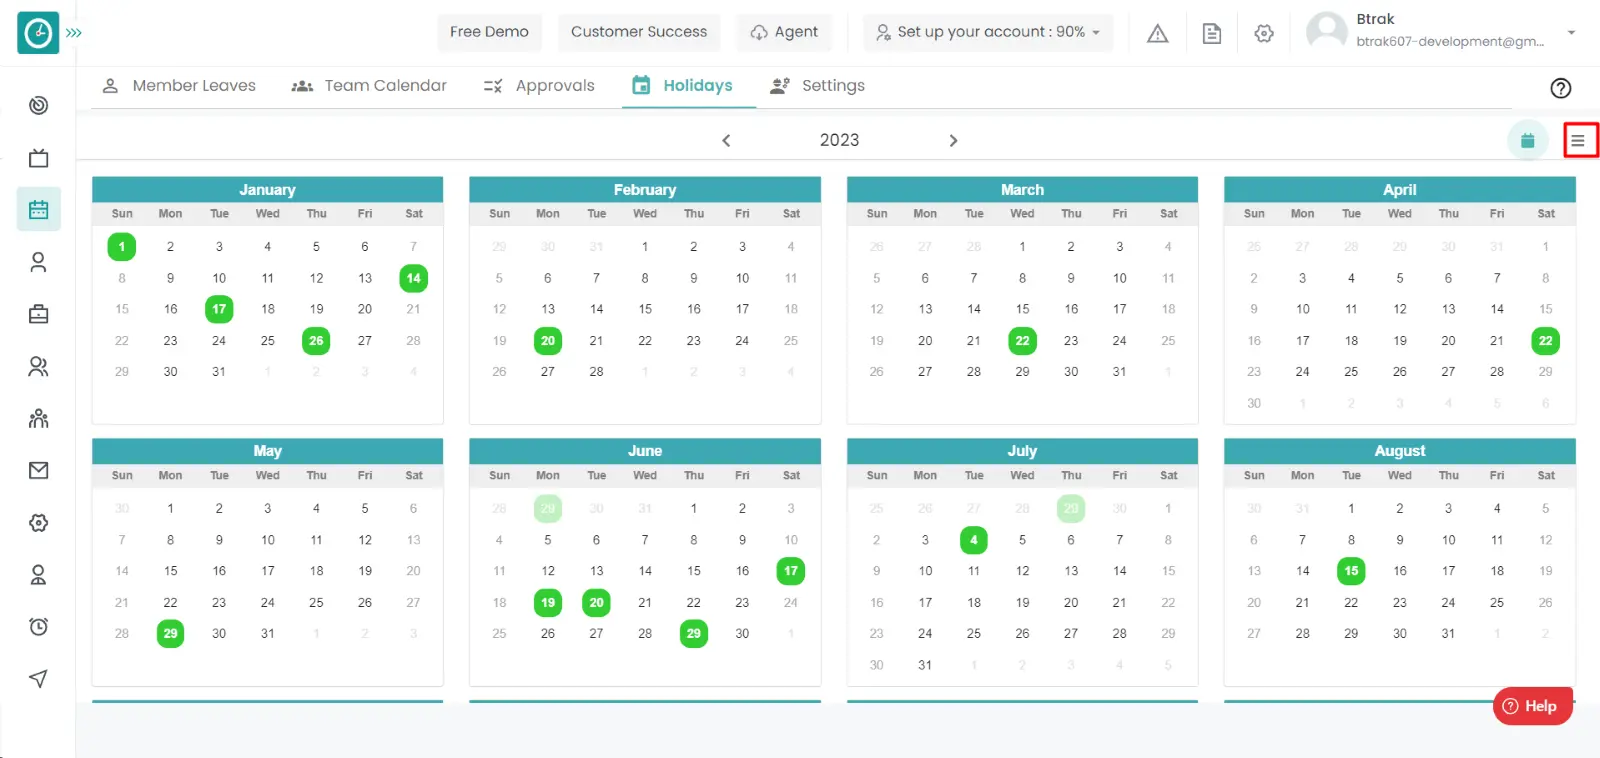
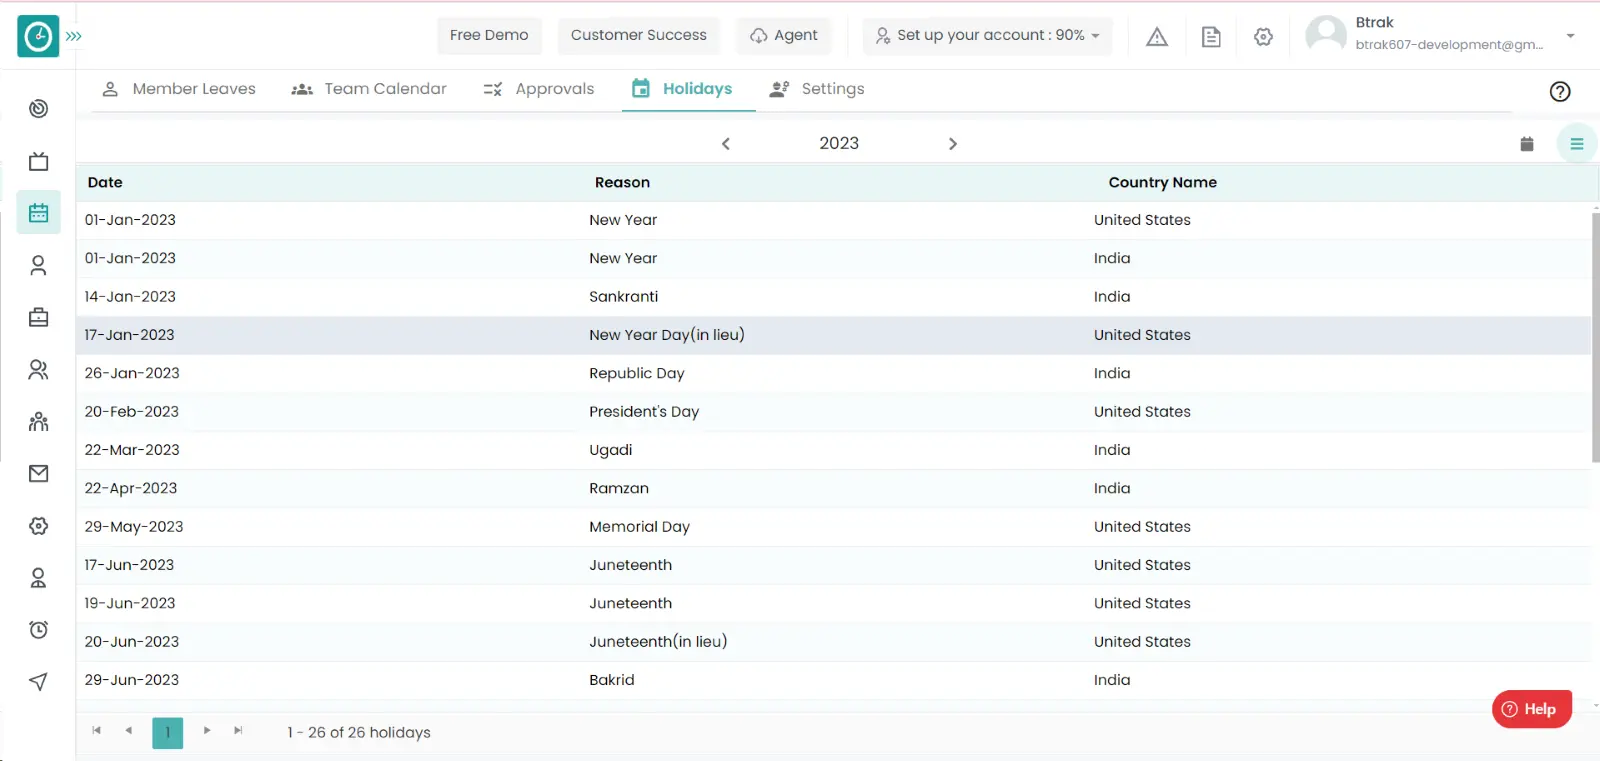
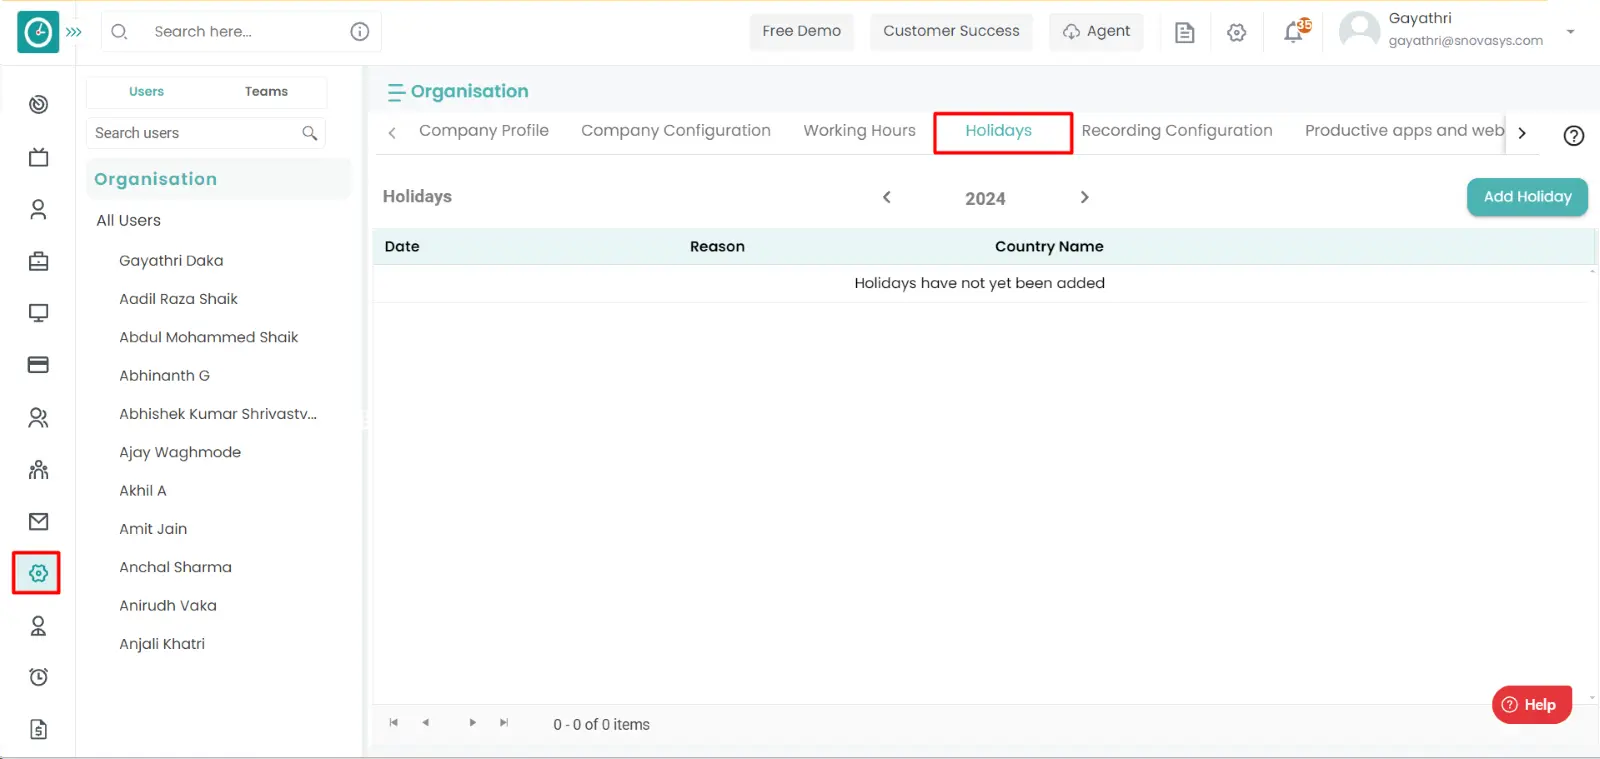
It is to get the clear information about the holidays at the organization level, and to plan the work accordingly to complete their day-to-day tasks.
Navigation: Goto Leaves => Tab: holidays => you can view it in both calendar and list view.
If the user is having Super Admin
Permission, then he can be able to view the Public Holidays at the company
level.
This permission can be configured by following the steps: -
Leave Management.
View all the Holidays at the company level
for all the roles.
By giving the above permissions to the user, he/she can be able to view the holidays at the company level.
Procedure 1: -
If the user is having Super Admin
Permission, then he can be able to setup a Public Holidays at the company
level.
This permission can be configured by following the steps: -
Tracker Settings from Global settings,
then select the roles for what you must give the permissions to configure and check them.Tracker Settings
usage for the defined roles.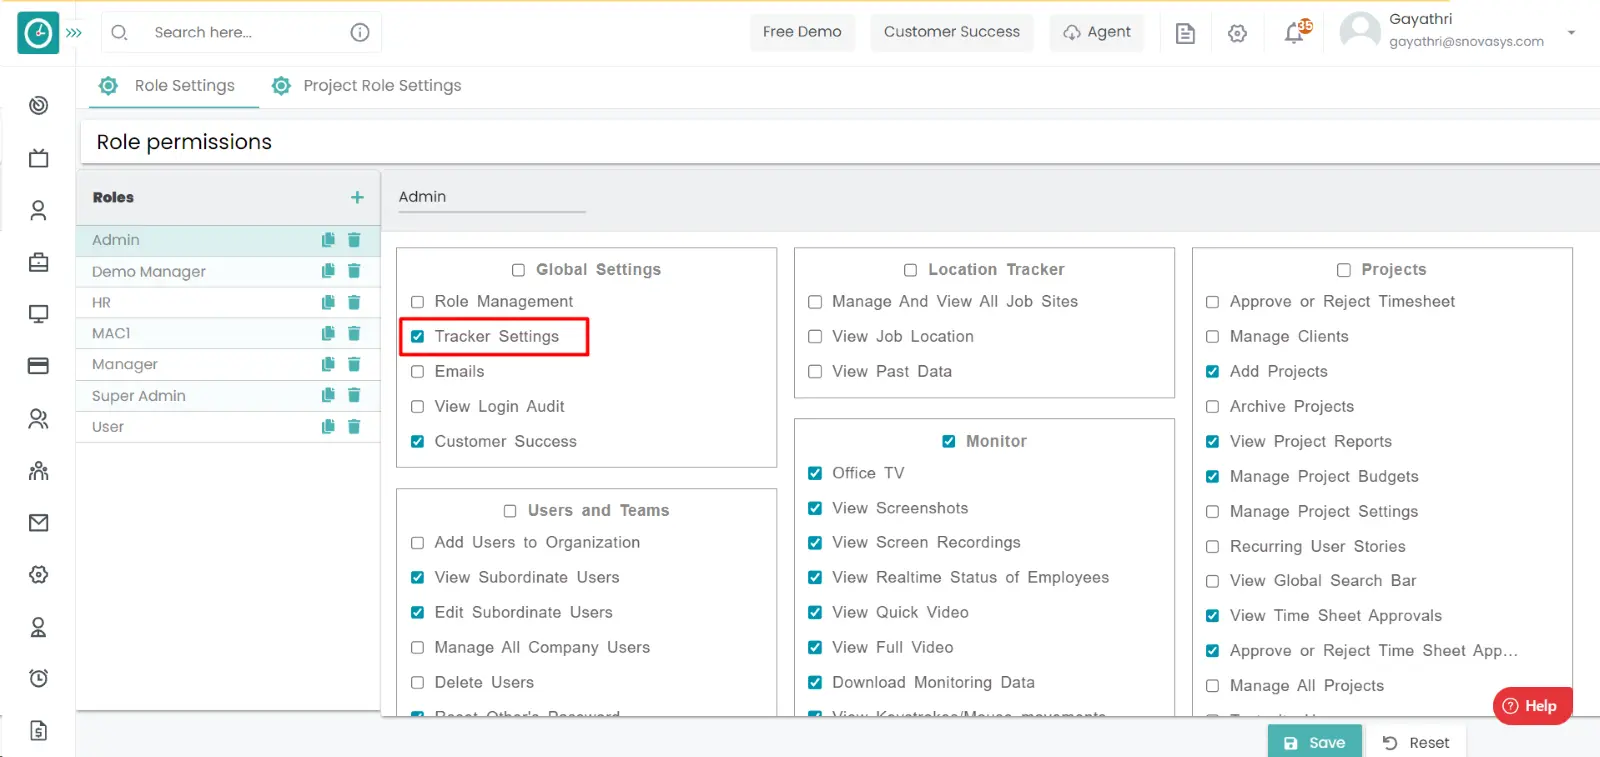
By giving the above permissions to the user, he/she can be able to view the holidays at the company level.
Procedure 2: -
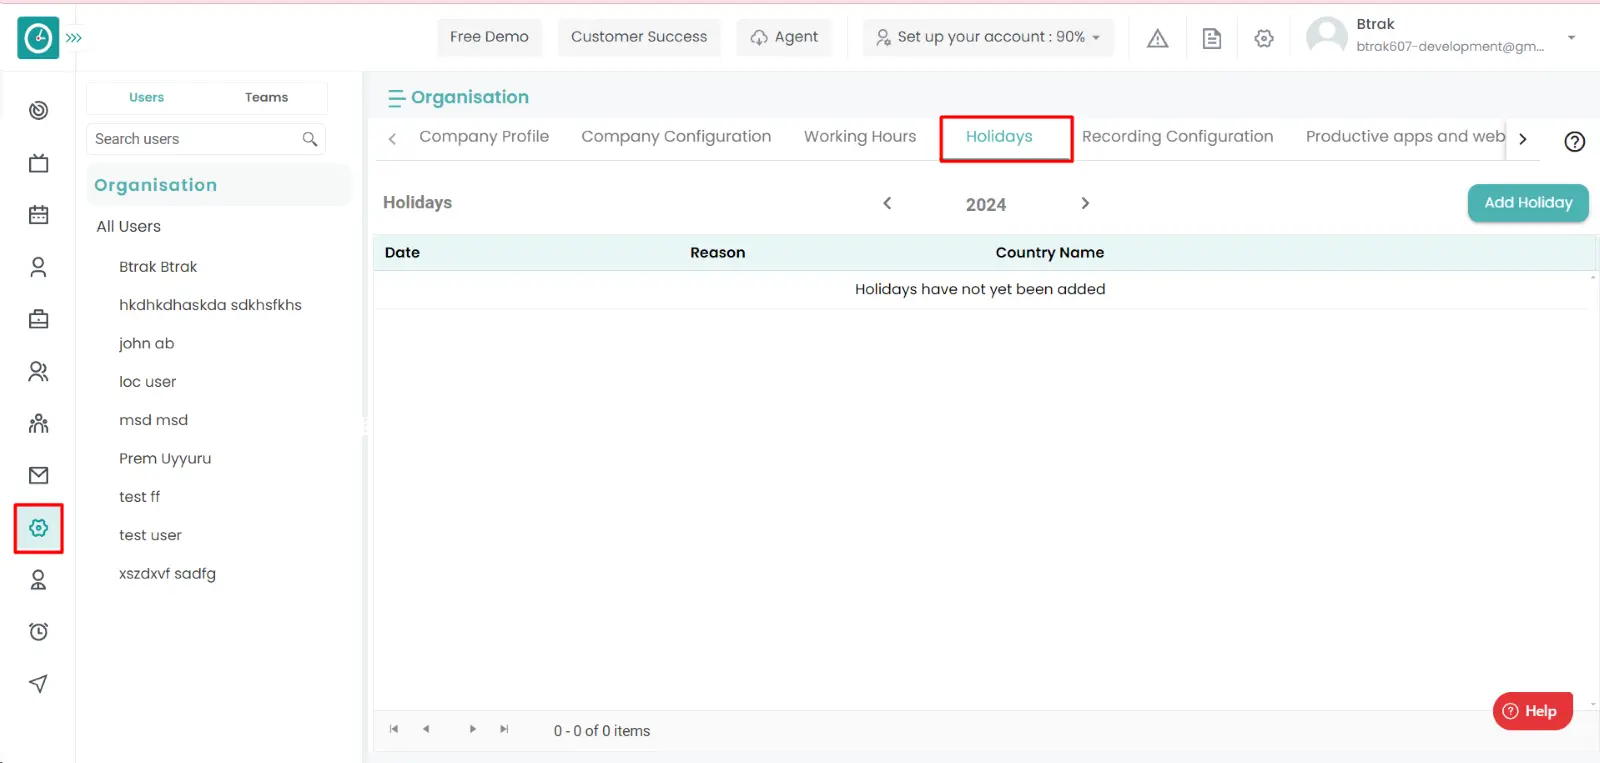
Most nations have specific national days of holiday and celebration on which they recognize and honor national traditions. These days are sometimes also referred to as “public holidays” because most businesses and other institutions are closed.
Navigation: Goto Settings => Tab: holidays.
If the user is having Super Admin
Permission, then he can be able to setup a Public Holidays at the company
level.
This permission can be configured by following the steps: -
Tracker Settings from Global settings,
then select the roles for what you must give the permissions to configure and check them.Tracker Settings
usage for the defined roles.
Procedure: -
Now you have Successfully added the public holiday at the organization level.
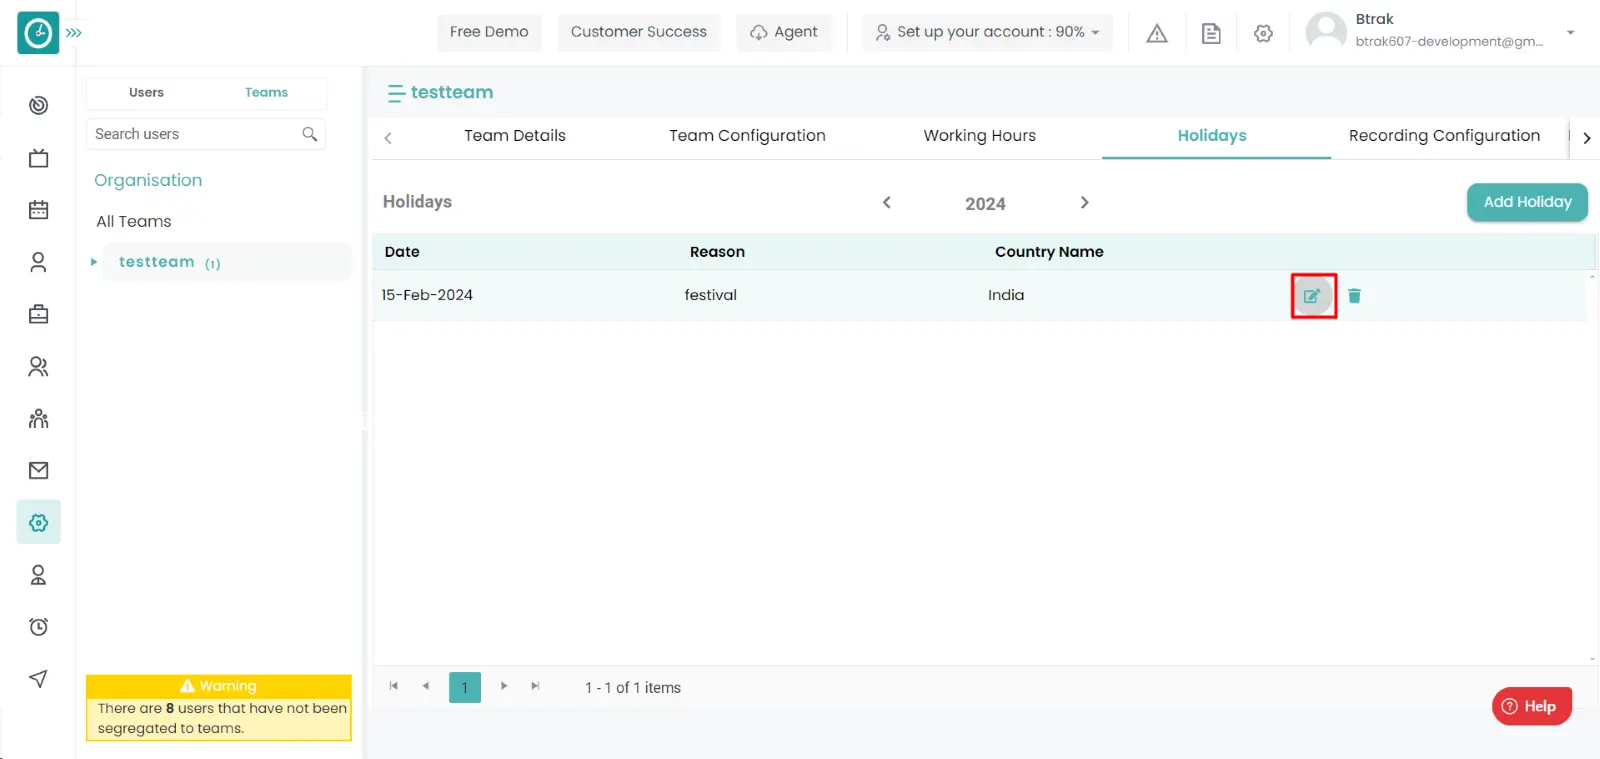
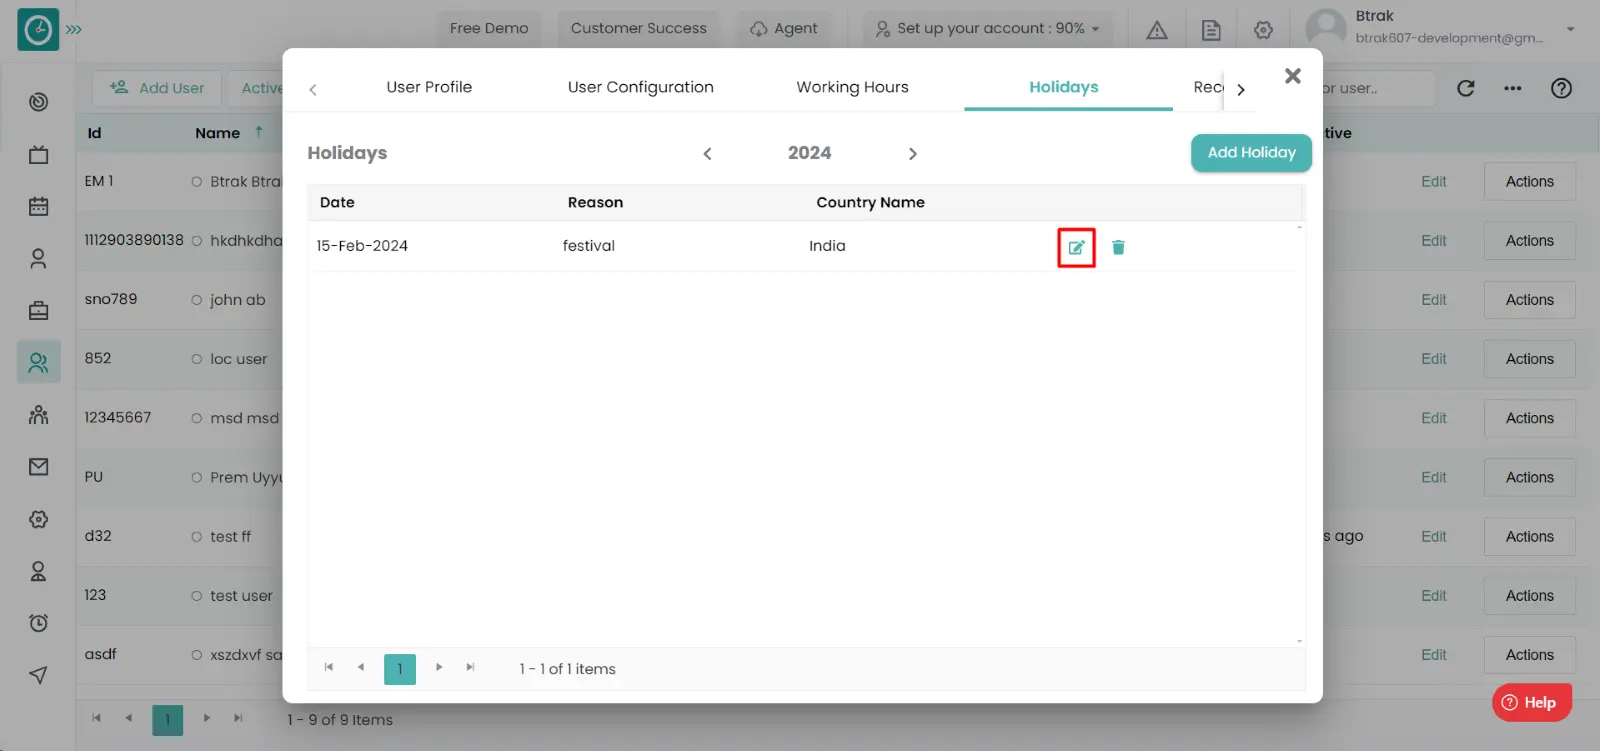
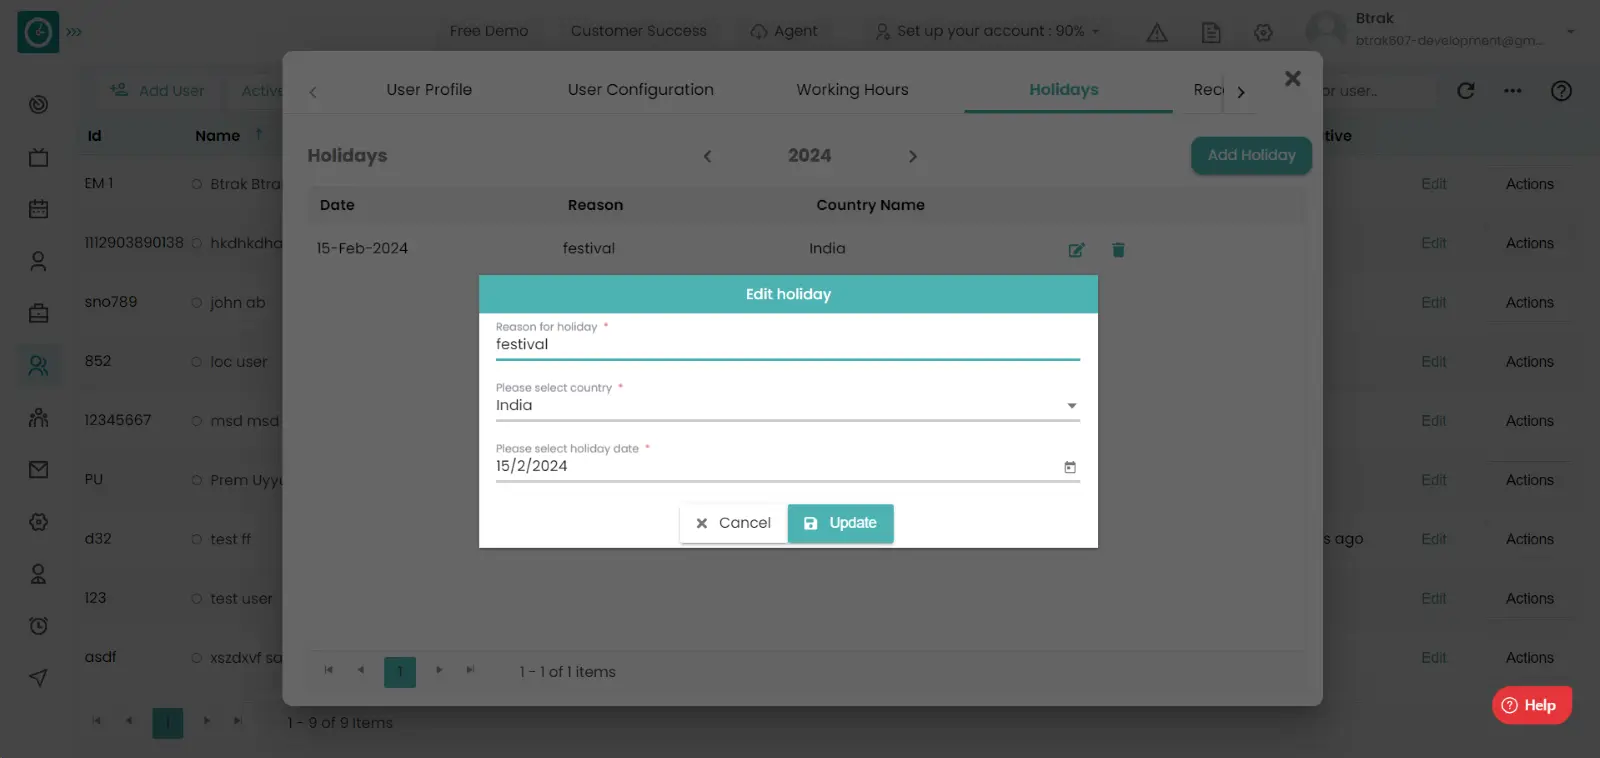
Time champ allows you to edit the holidays if the date of a particular holidays is wrong then you can be able to change them.
Navigation: Goto Settings => Tab: holidays.
If the user is having Super Admin
Permission, then he can be able to setup a Public Holidays at the company
level.
This permission can be configured by following the steps: -
Tracker Settings from Global settings
then select the roles for what you must give the permissions to configure and check them.Tracker Settings
usage for the defined roles.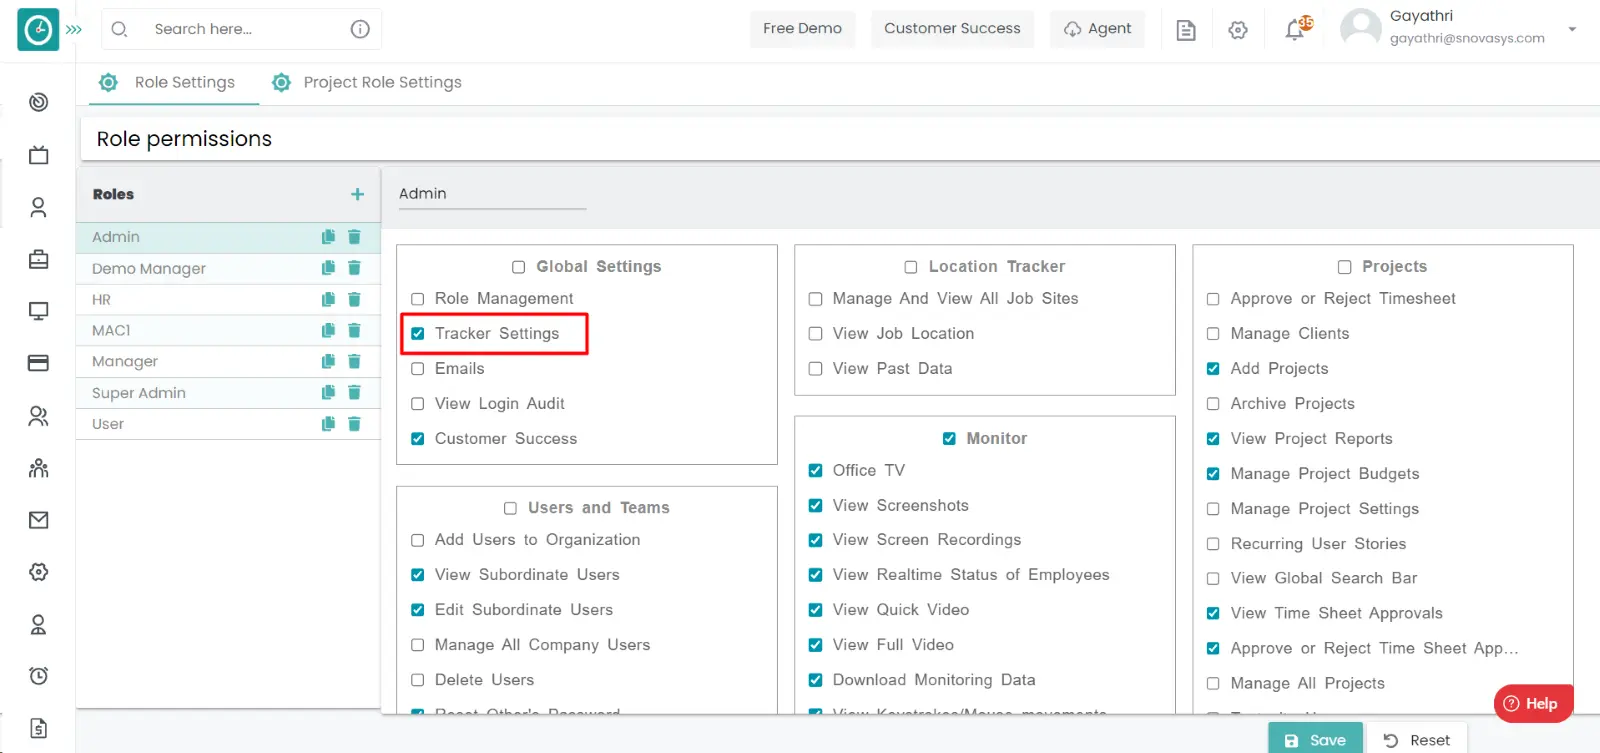
Procedure: -
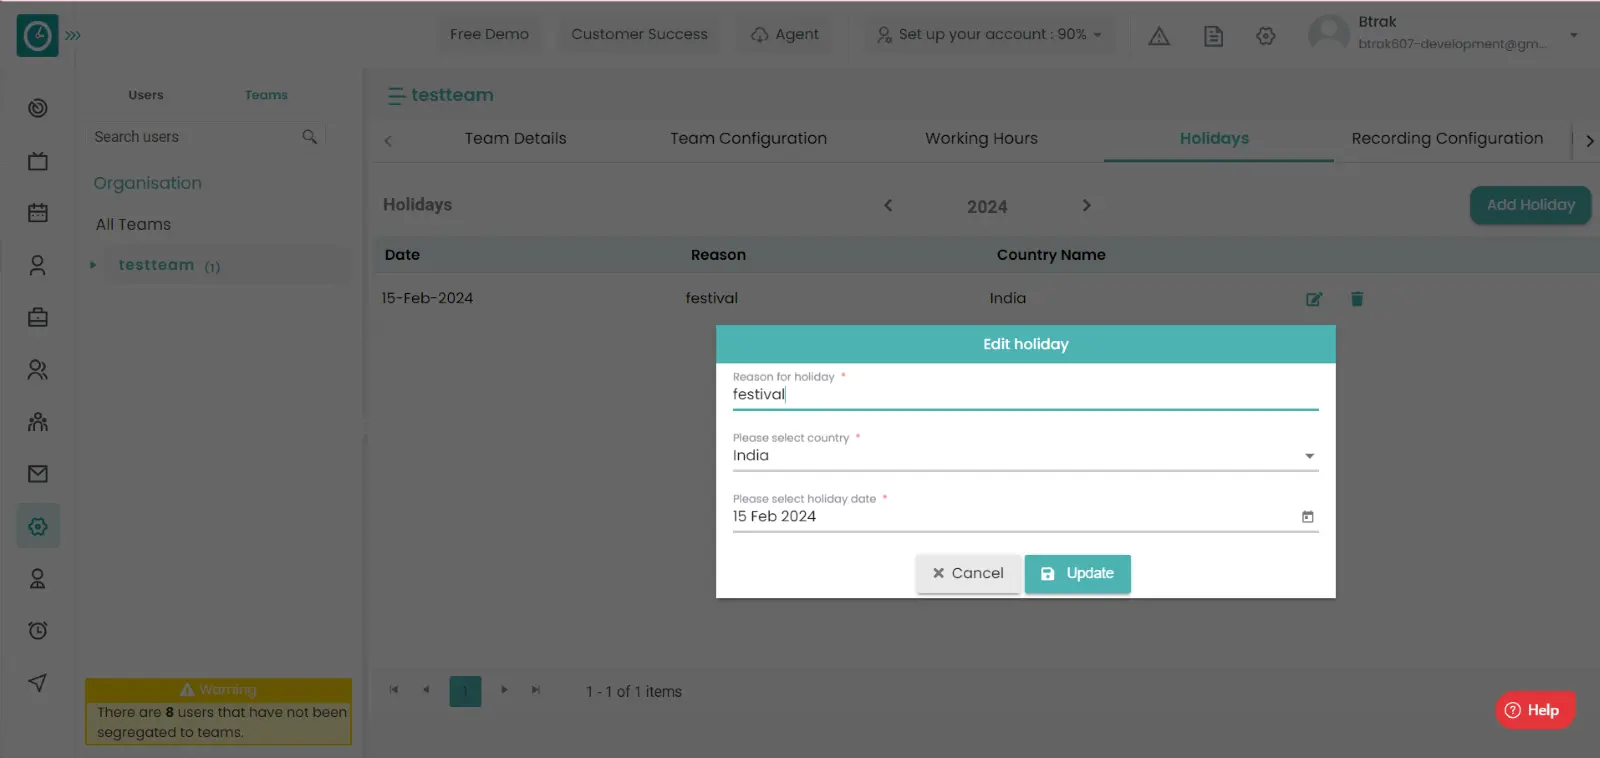
Now you have Successfully edited the public holiday at the organization level.
Time champ allows you to delete the holidays. if the public holiday is completed or it is configured twice then we need to delete it.
Navigation: Goto Settings => Tab: holidays.

If the user is having Super Admin
Permission, then he can be able to delete a Public Holidays at the company
level.
This permission can be configured by following the steps: -
Tracker Settings from Global settings,
then select the roles for what you must give the permissions to configure and check them.delete the public holiday
usage for the defined roles.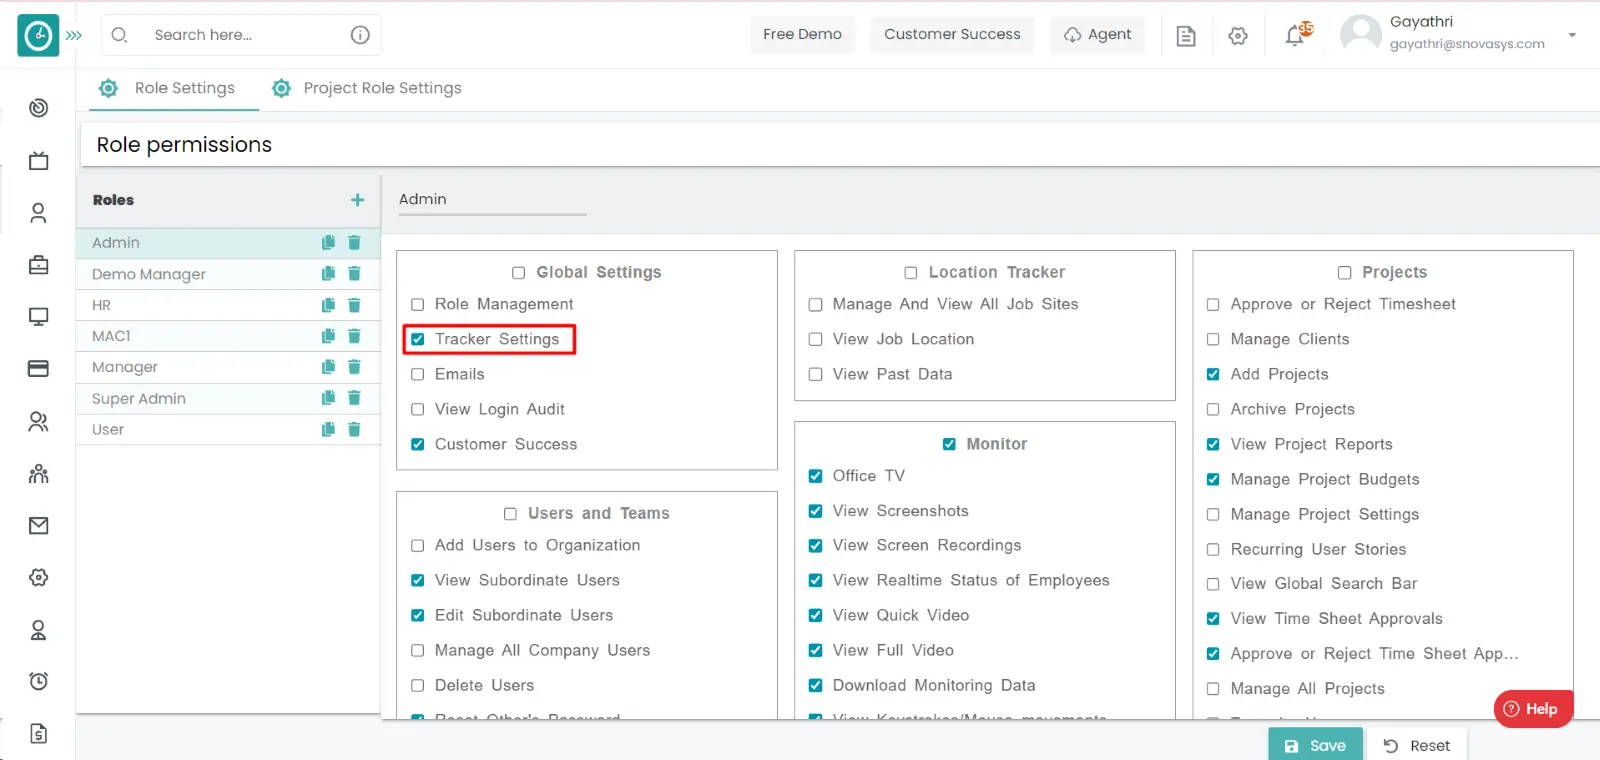
Procedure: -
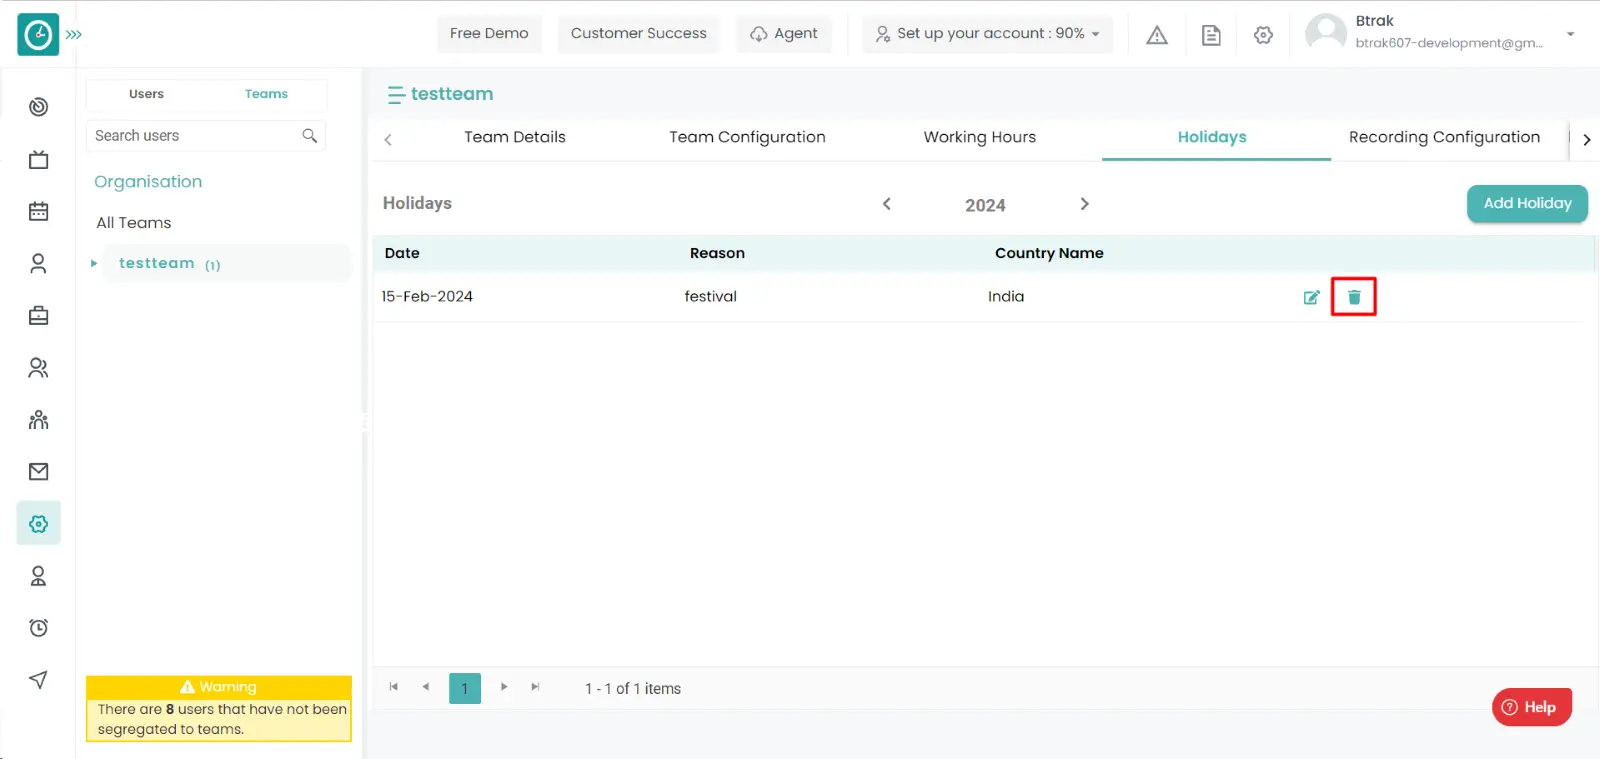
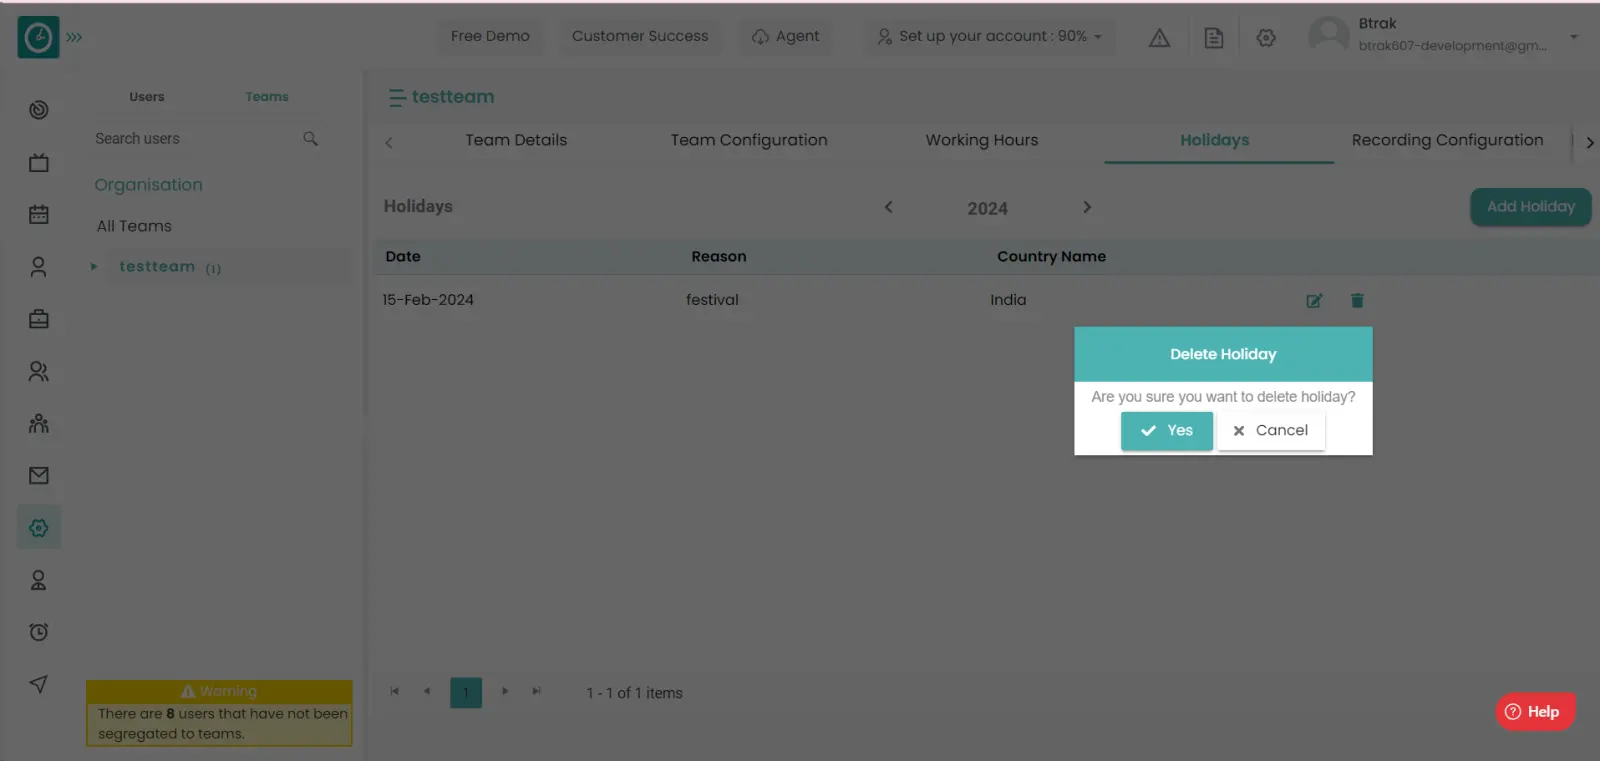
Now you have Successfully deleted the public holiday at the organization level.
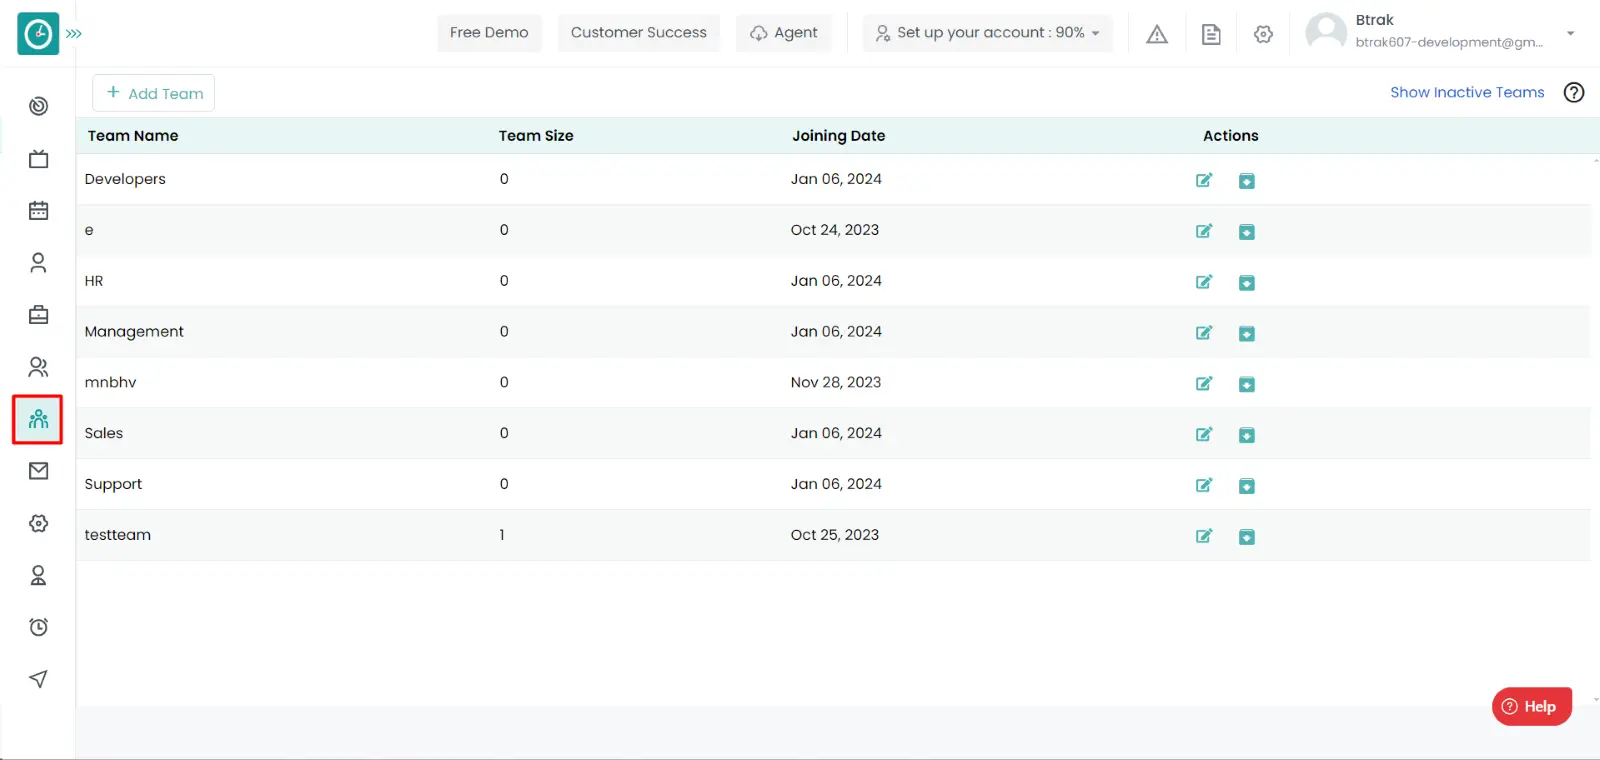
Time champ allows you to delete the holidays. if the public holiday is completed or it is configured twice then we need to delete it.
Navigation: Goto teams
If the user is having Super Admin
Permission, then he can be able to delete a Public Holidays at the company
level.
This permission can be configured by following the steps: -
Manage Team settings from Users and Teams,
then select the roles for what you must give the permissions to configure and check them.delete the public holiday
usage for the defined roles.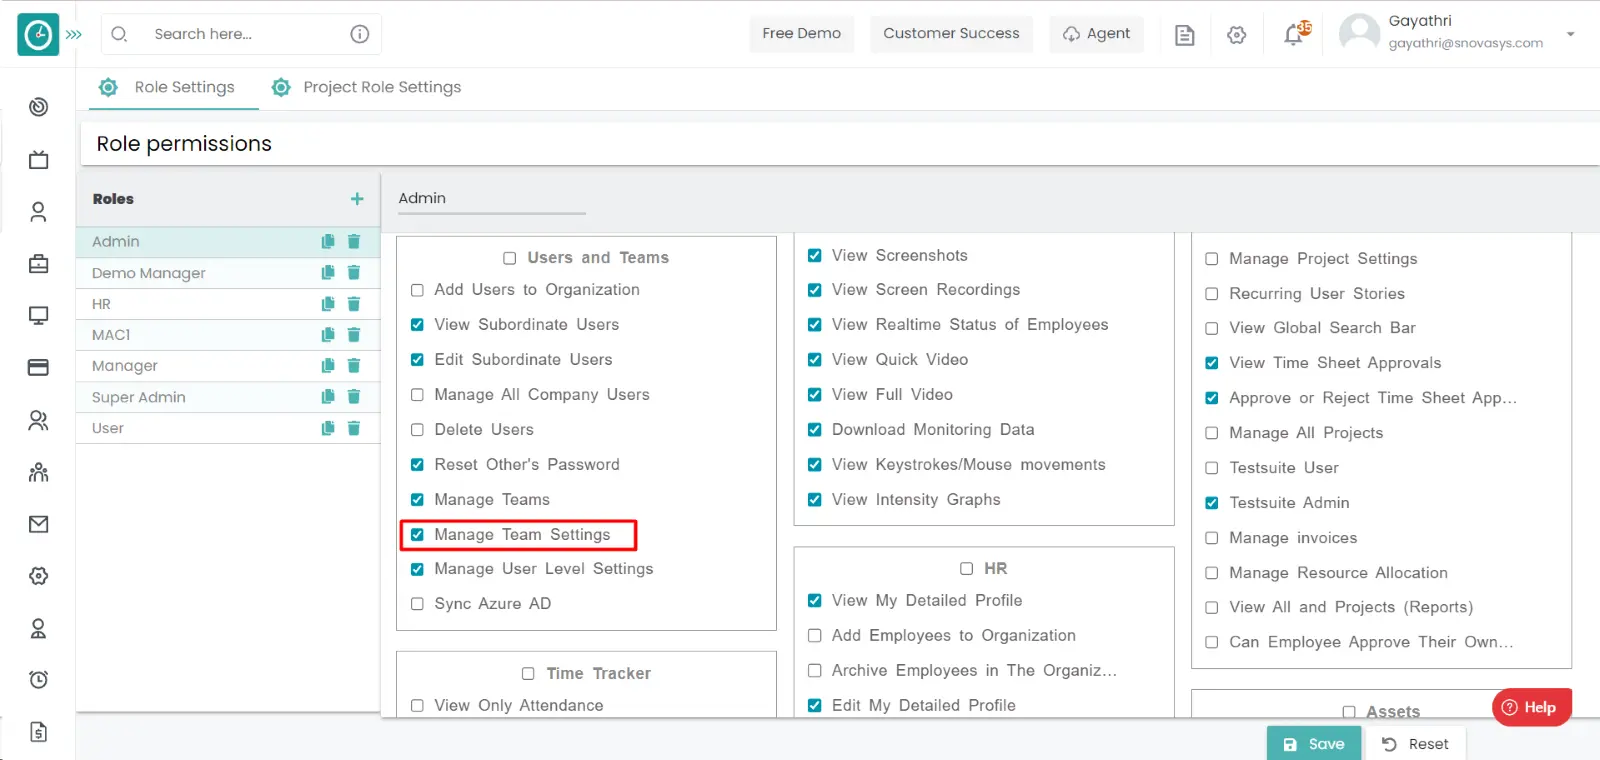
Procedure: -


Now you have Successfully delete the public holiday at the organization level.
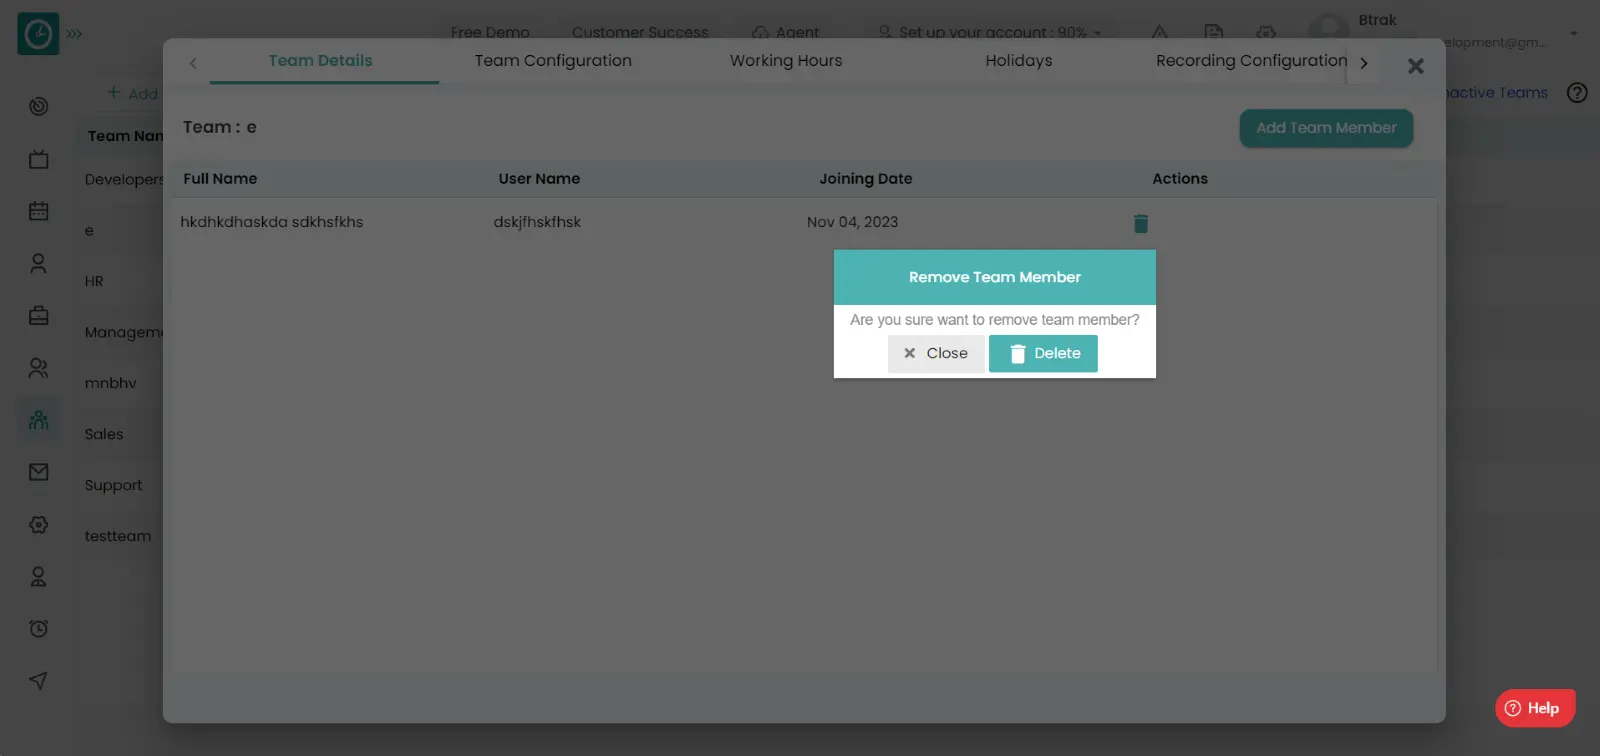
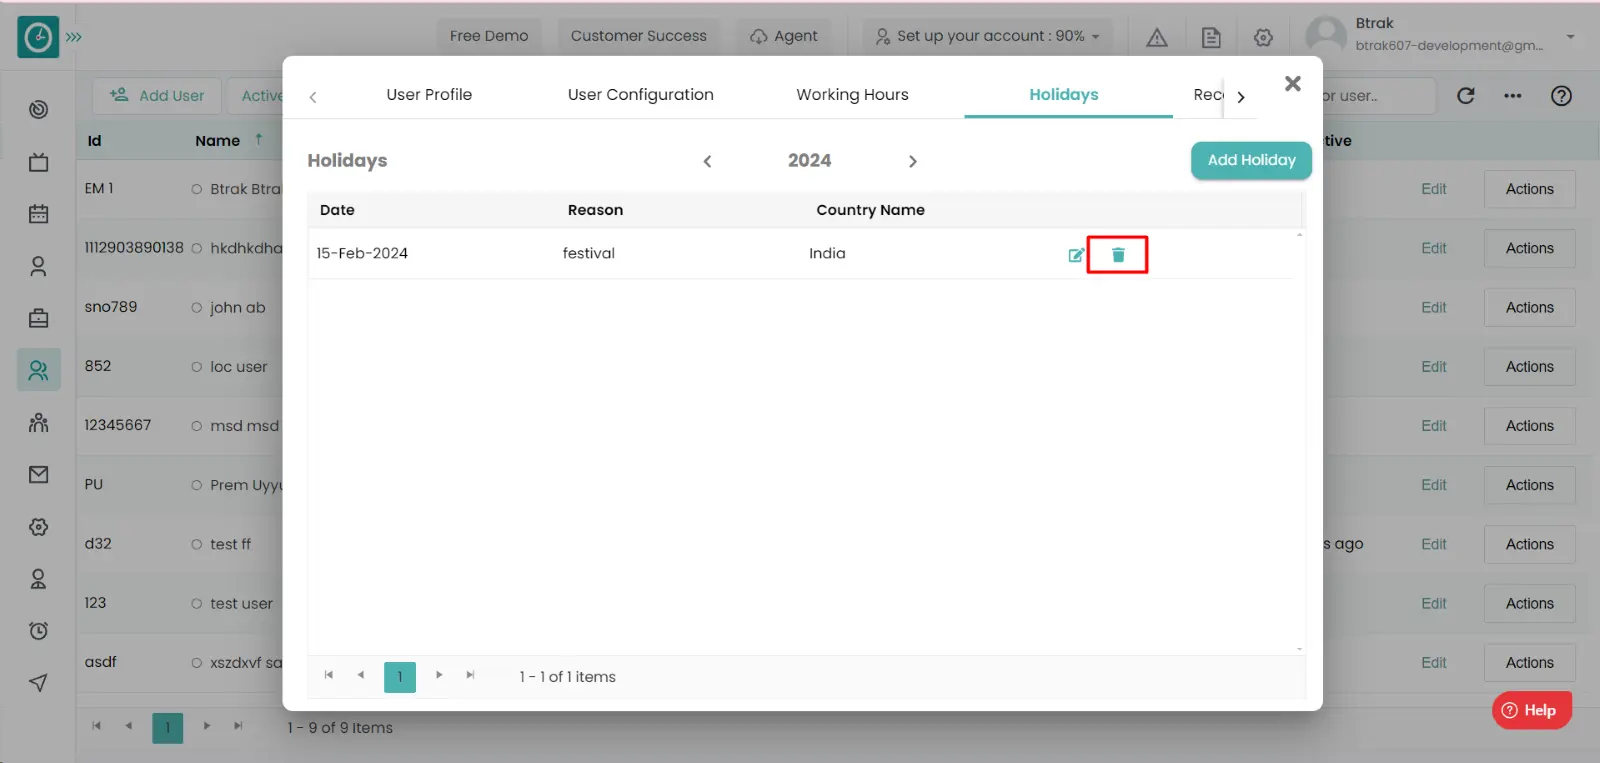
Time champ allows you to delete the holidays. if the public holiday is completed or it is configured twice then we need to delete it.
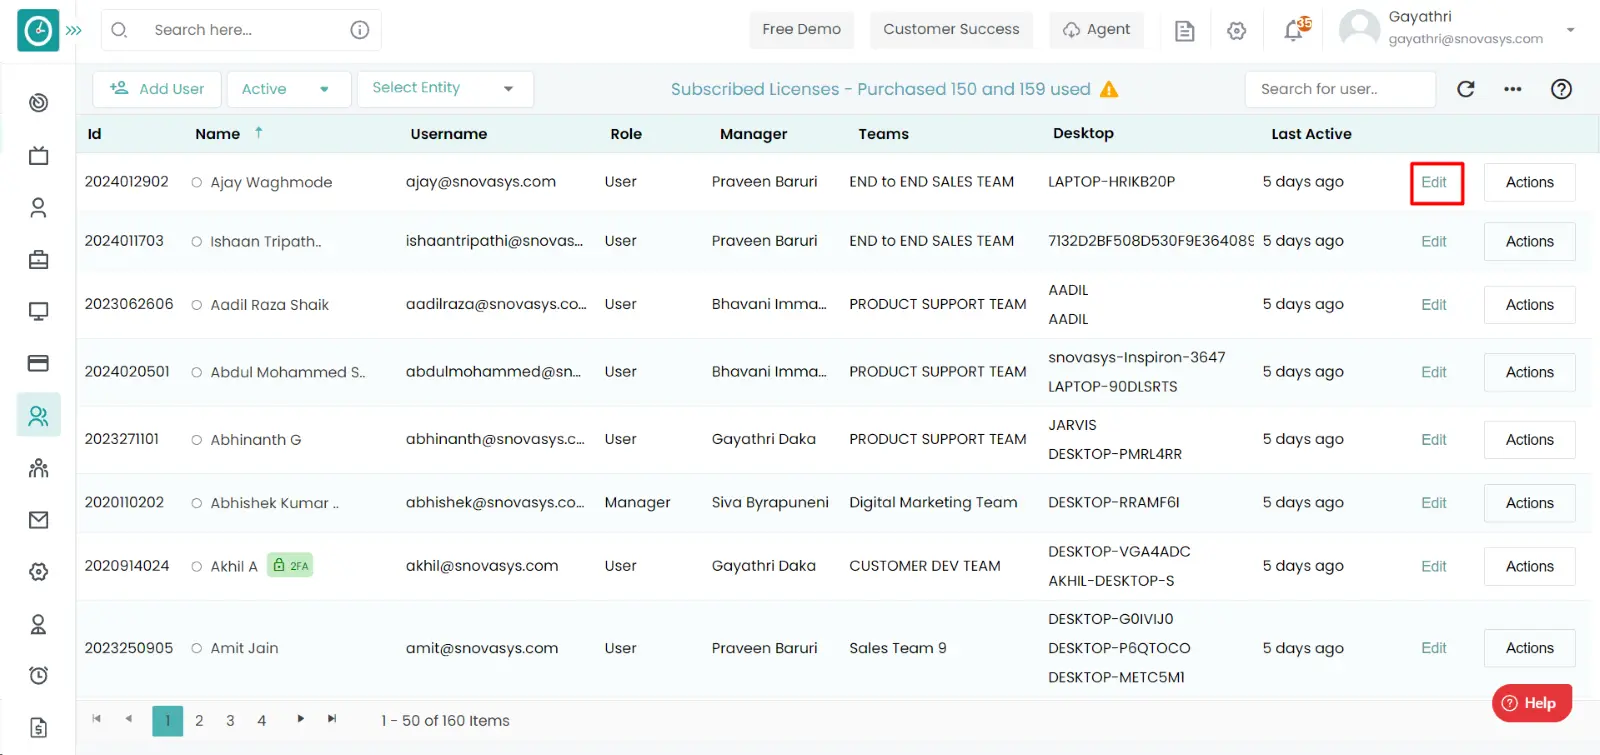
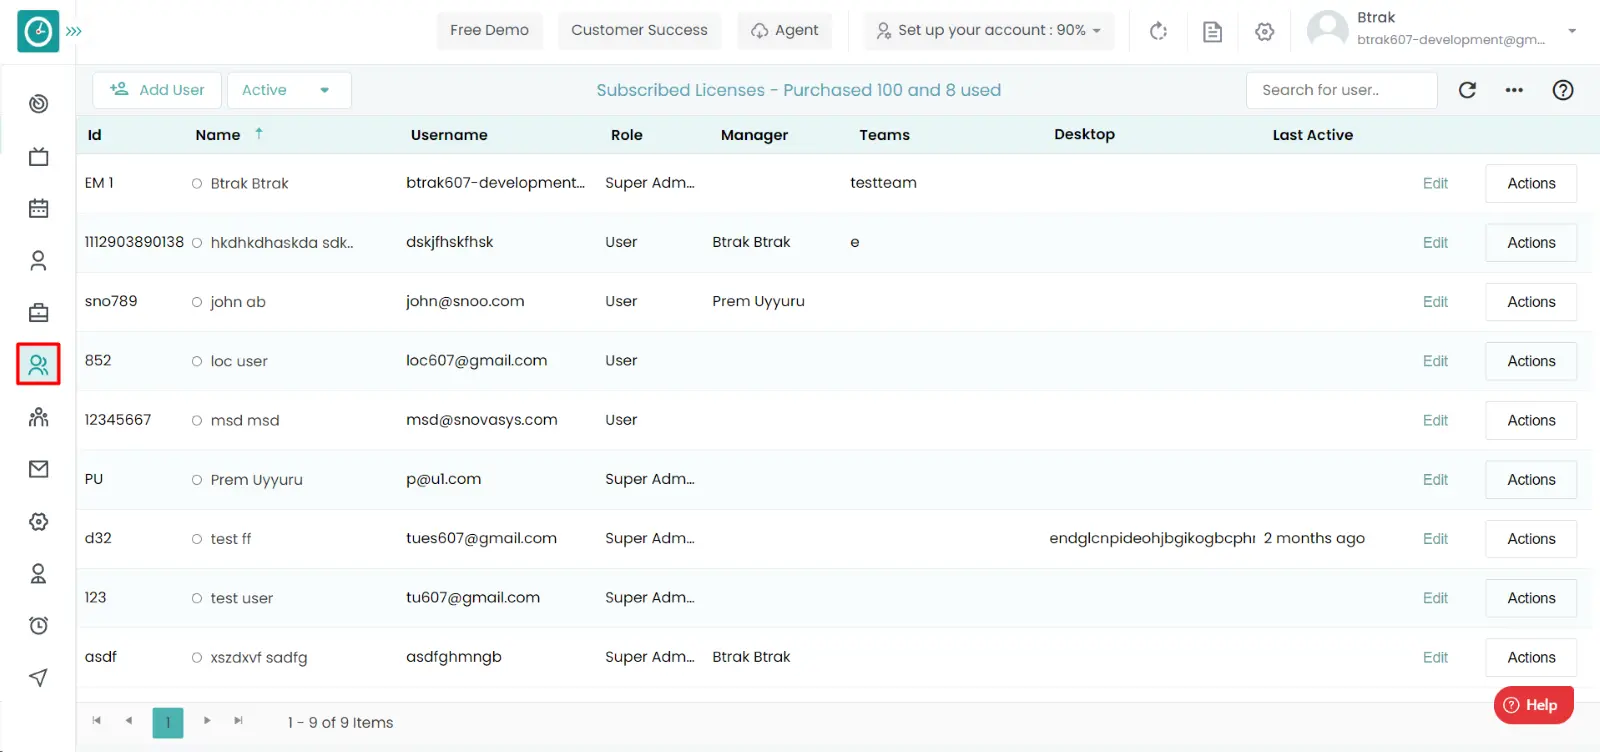
Navigation: Goto users.

If the user is having Super Admin
Permission, then he can be able to delete a Public Holidays at the company
level.
This permission can be configured by following the steps: -
Manage User level settings from Users and Teams,
then select the roles for what you must give the permissions to configure and check them.delete the public holiday
for the defined roles.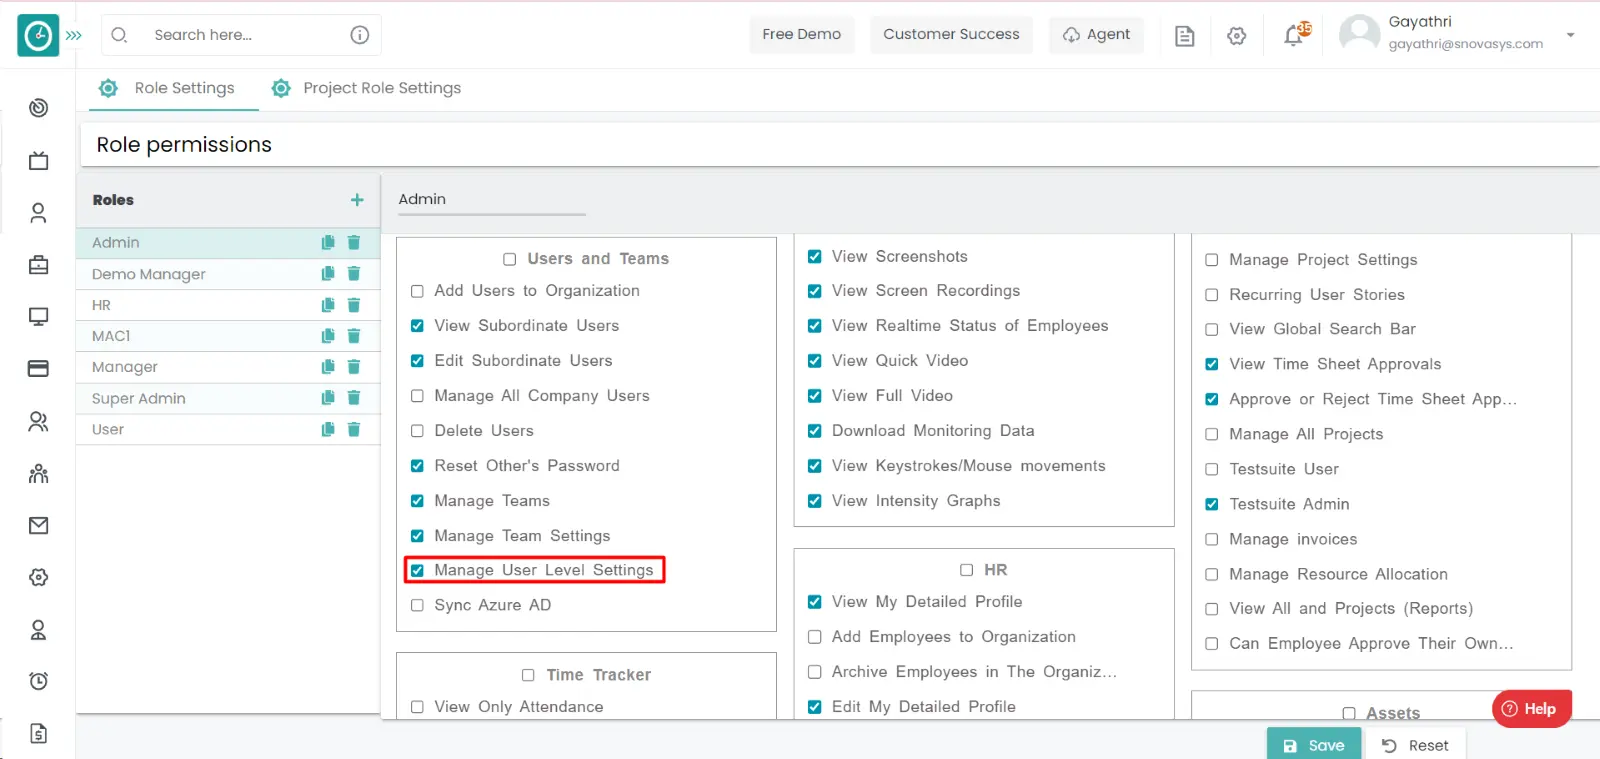
Procedure: -
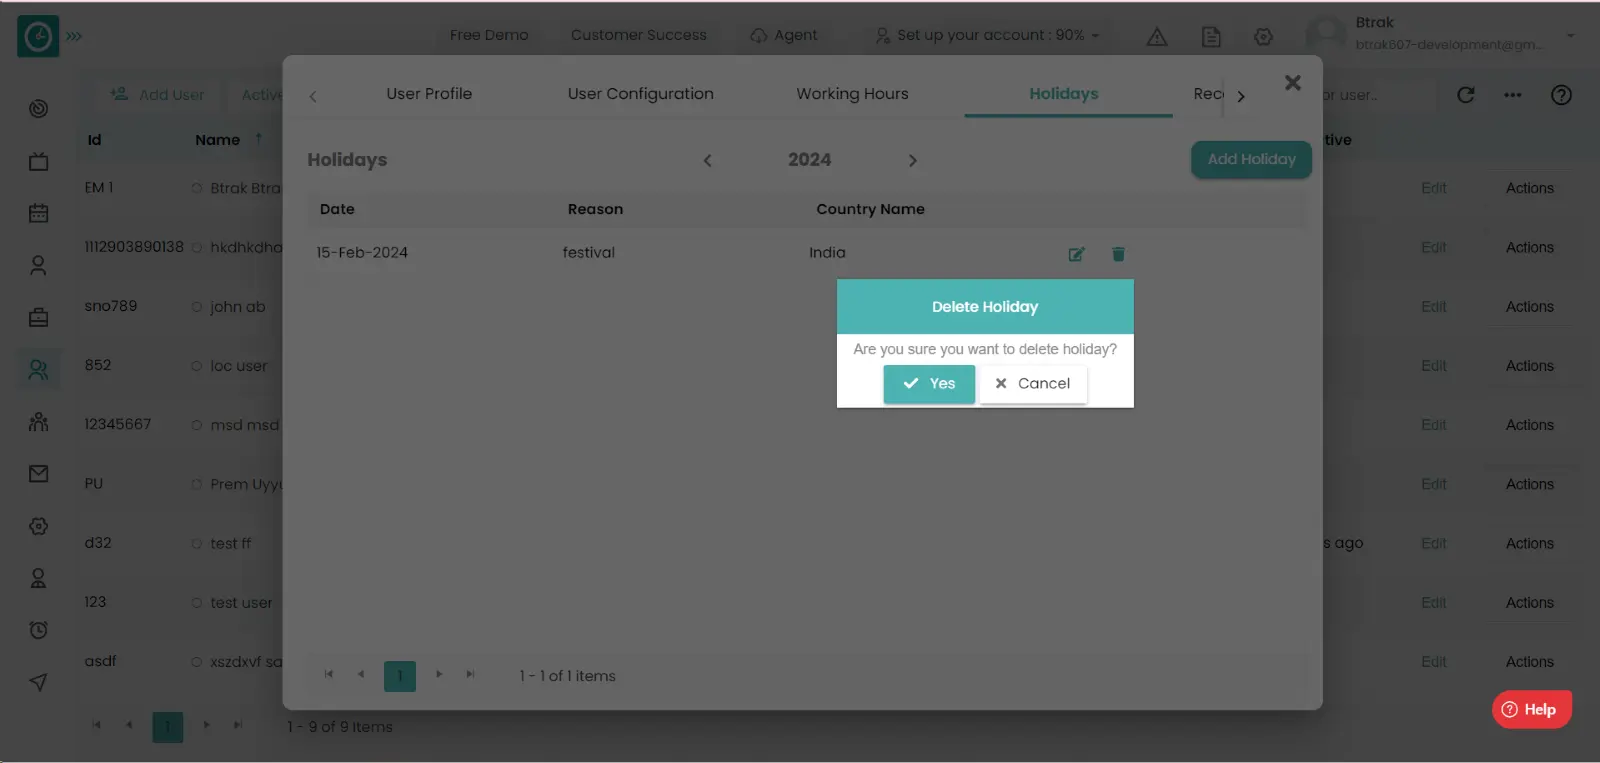
Now you have Successfully deleted the public holiday at the organization level.
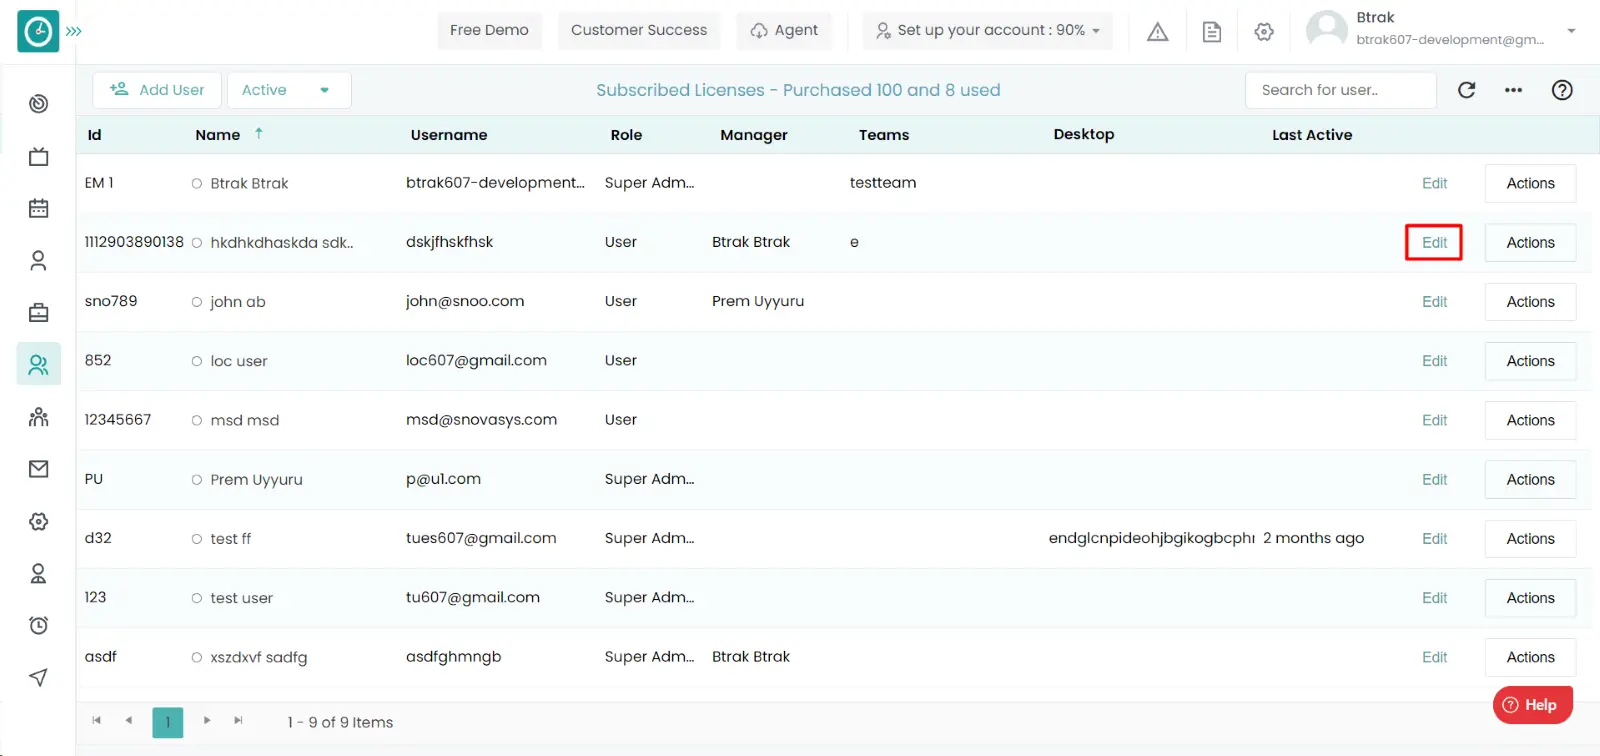
If the user is from another state, then the user is having different festivals based on their religion. So it is important to add the specific holiday to a user.
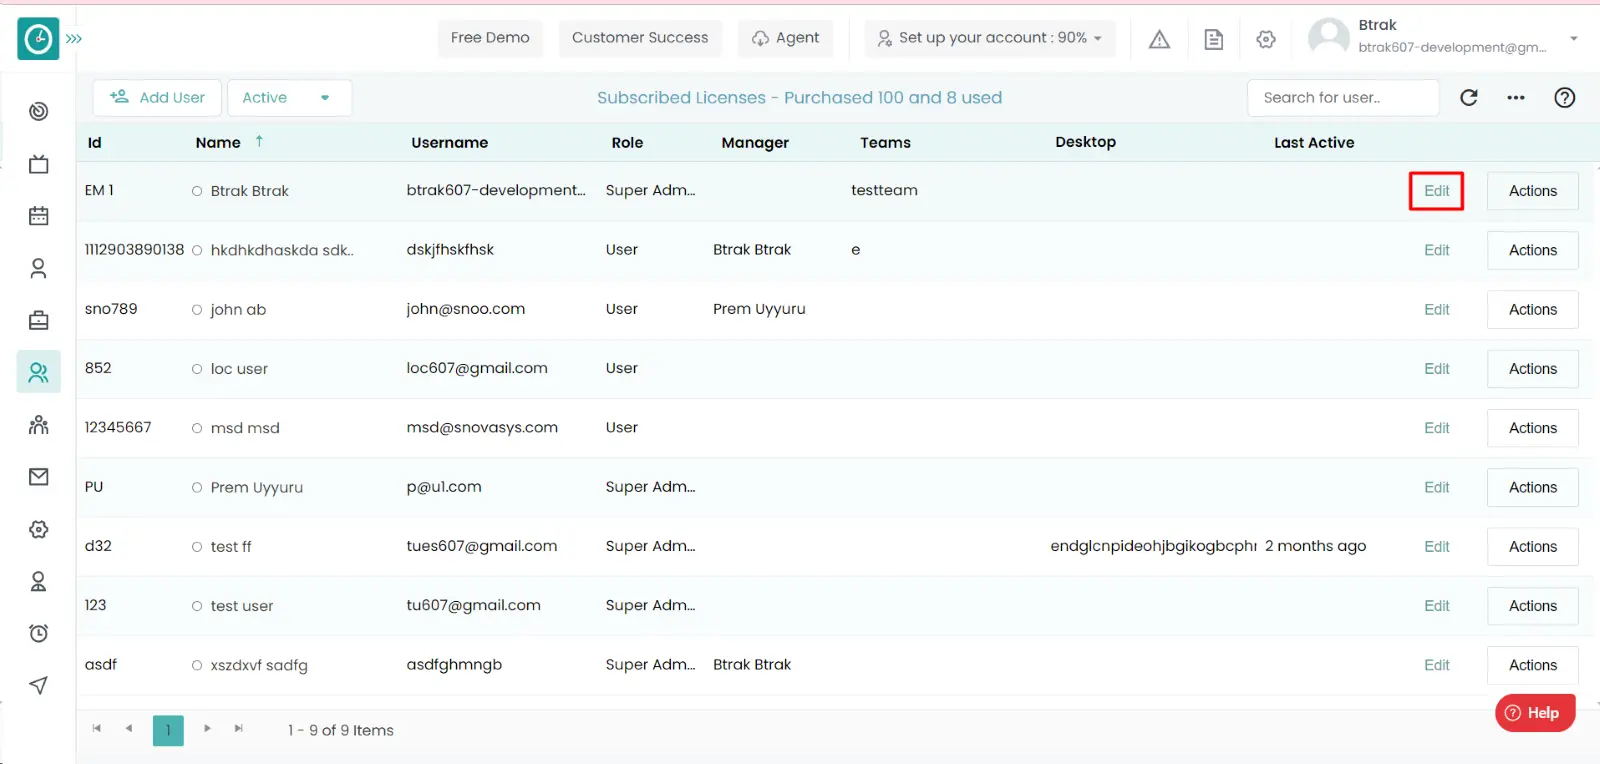
Navigation: Goto Users

If the user is having Super Admin
permissions, then he can be able to view a Holidays of an employee.
This permission can be configured by following the steps: -
View subordinate users, edit subordinate users, manage user level Settings from Users and team's module,
then select the roles for what you must give the permissions to configure and check them.View the holidays of a particular user
for the defined roles.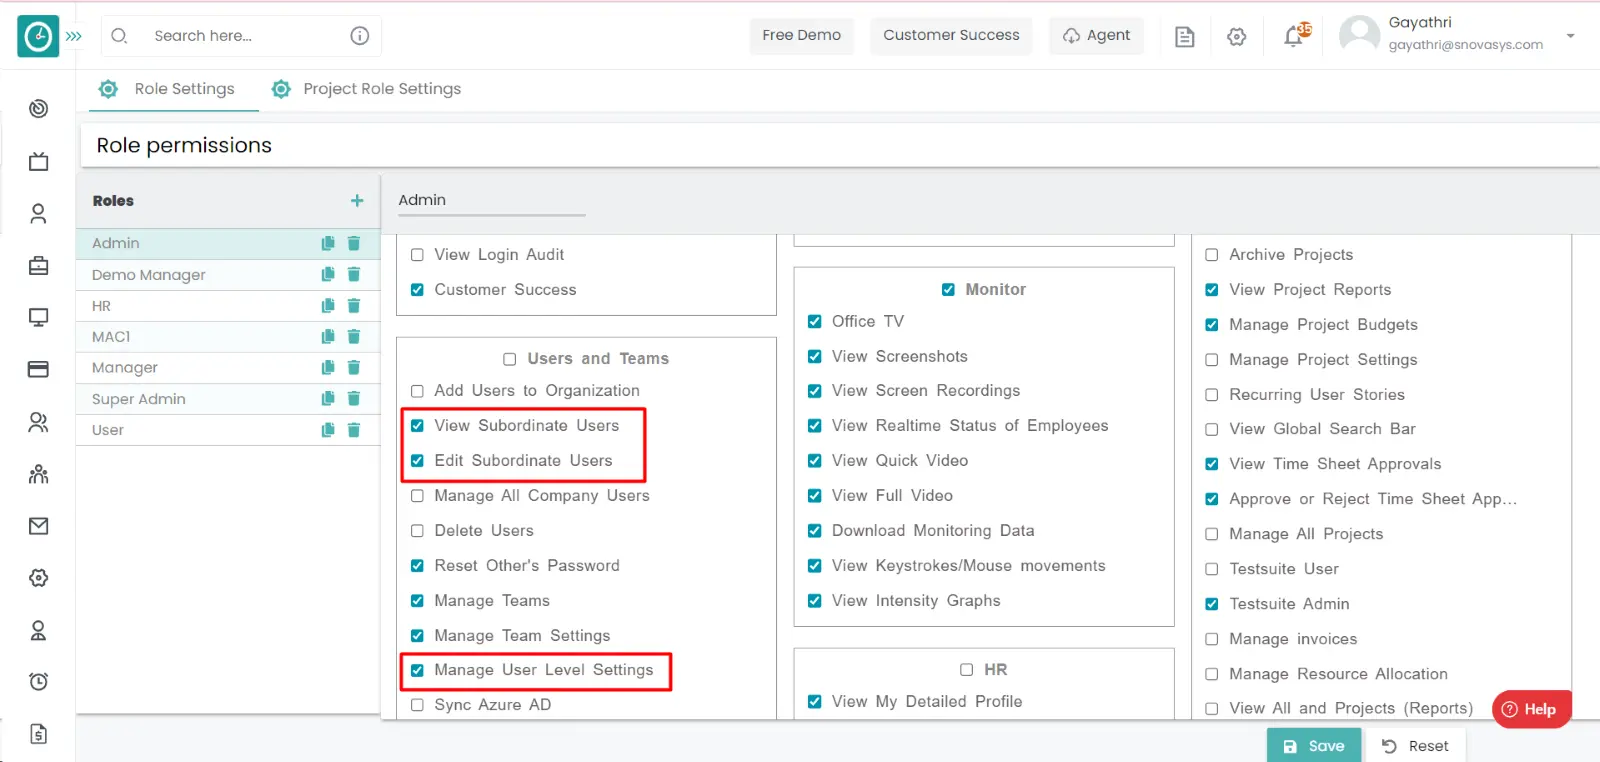
Procedure: -
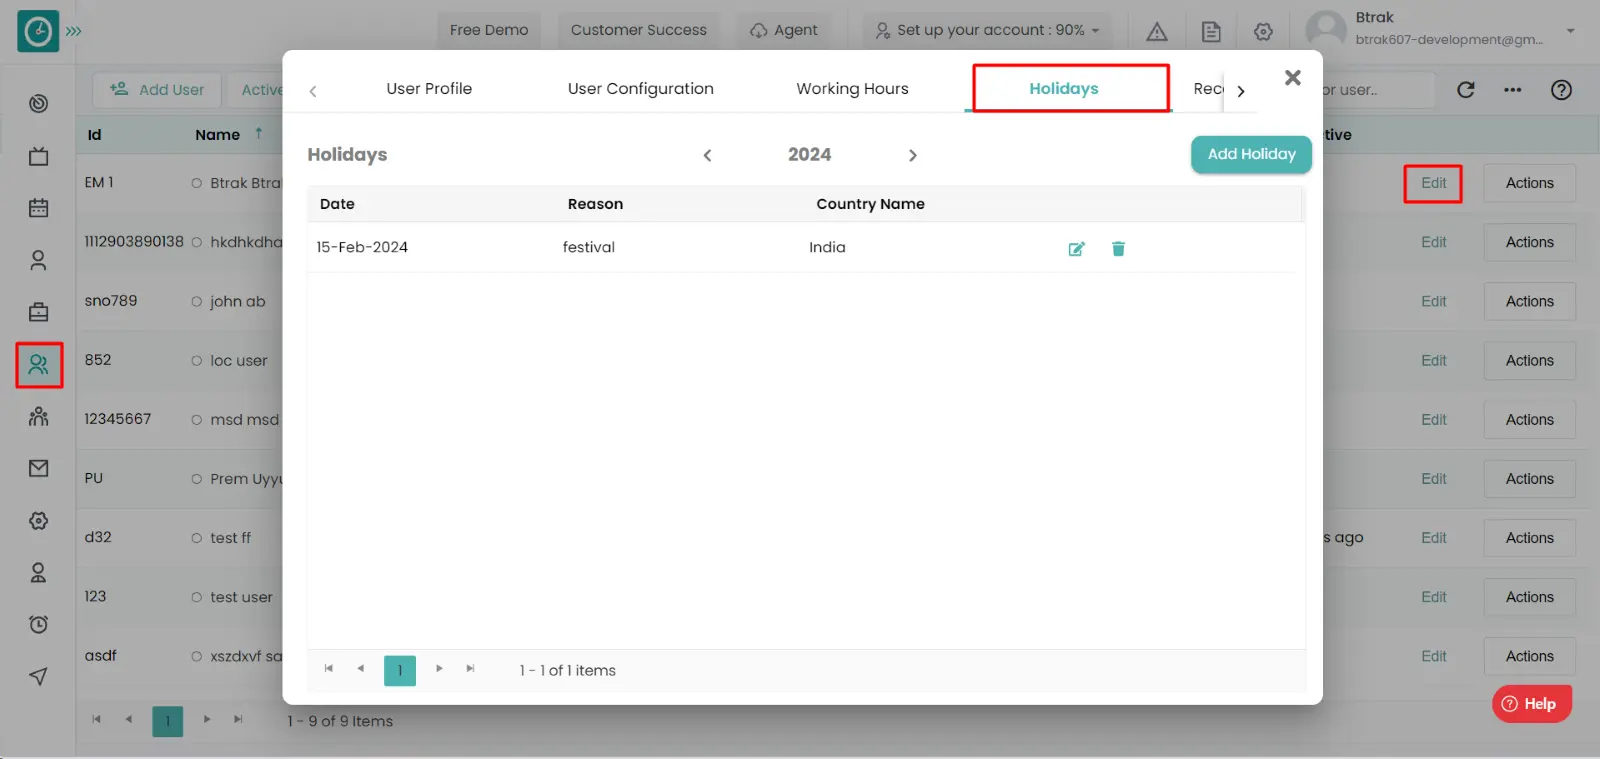
Now you can be able to view the Holidays of a user.
Time champ allows you to view the holidays of a team, because to plan the work accordingly to complete the work on time.
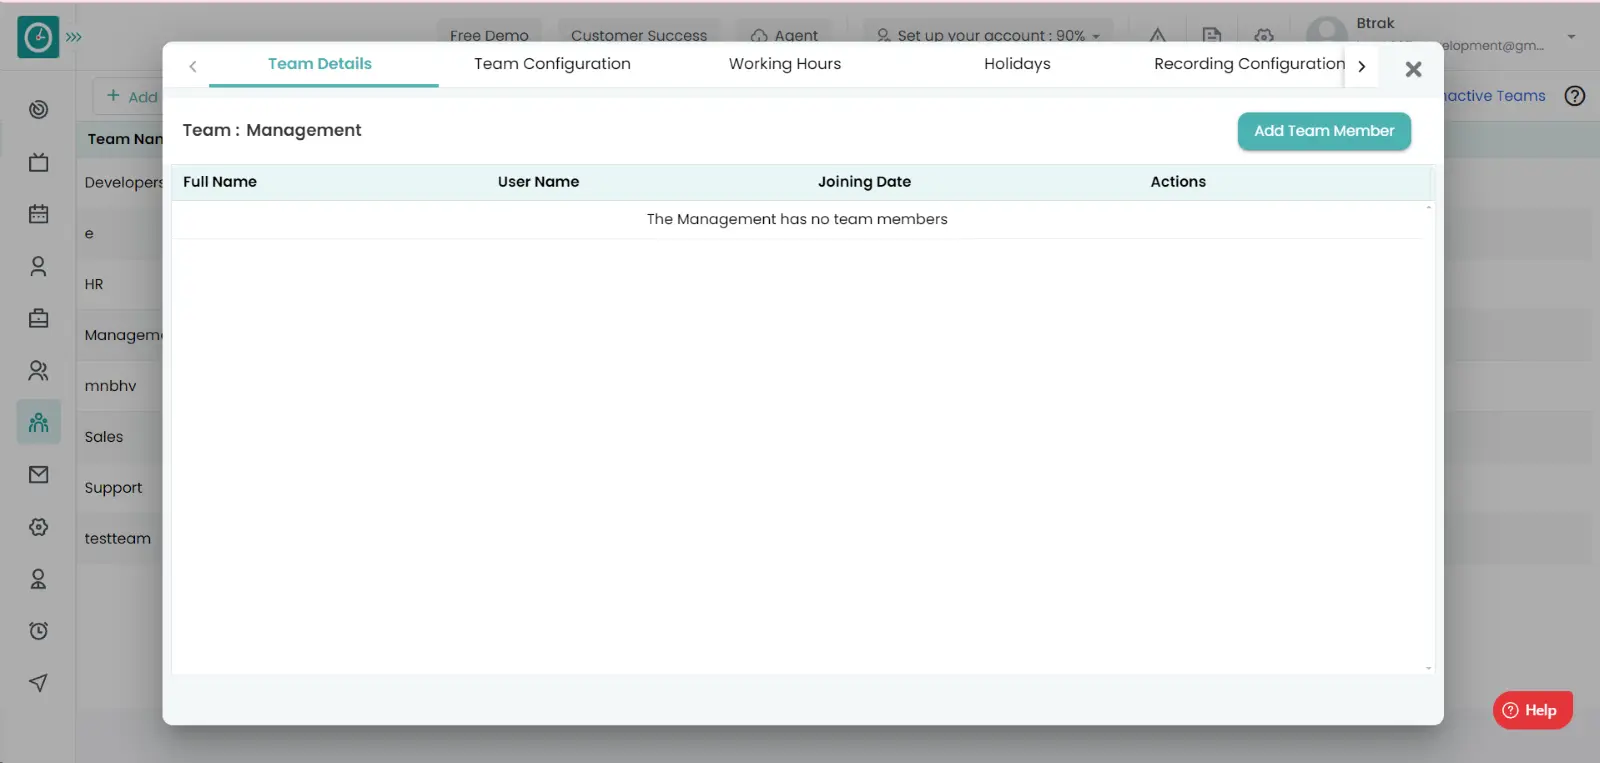
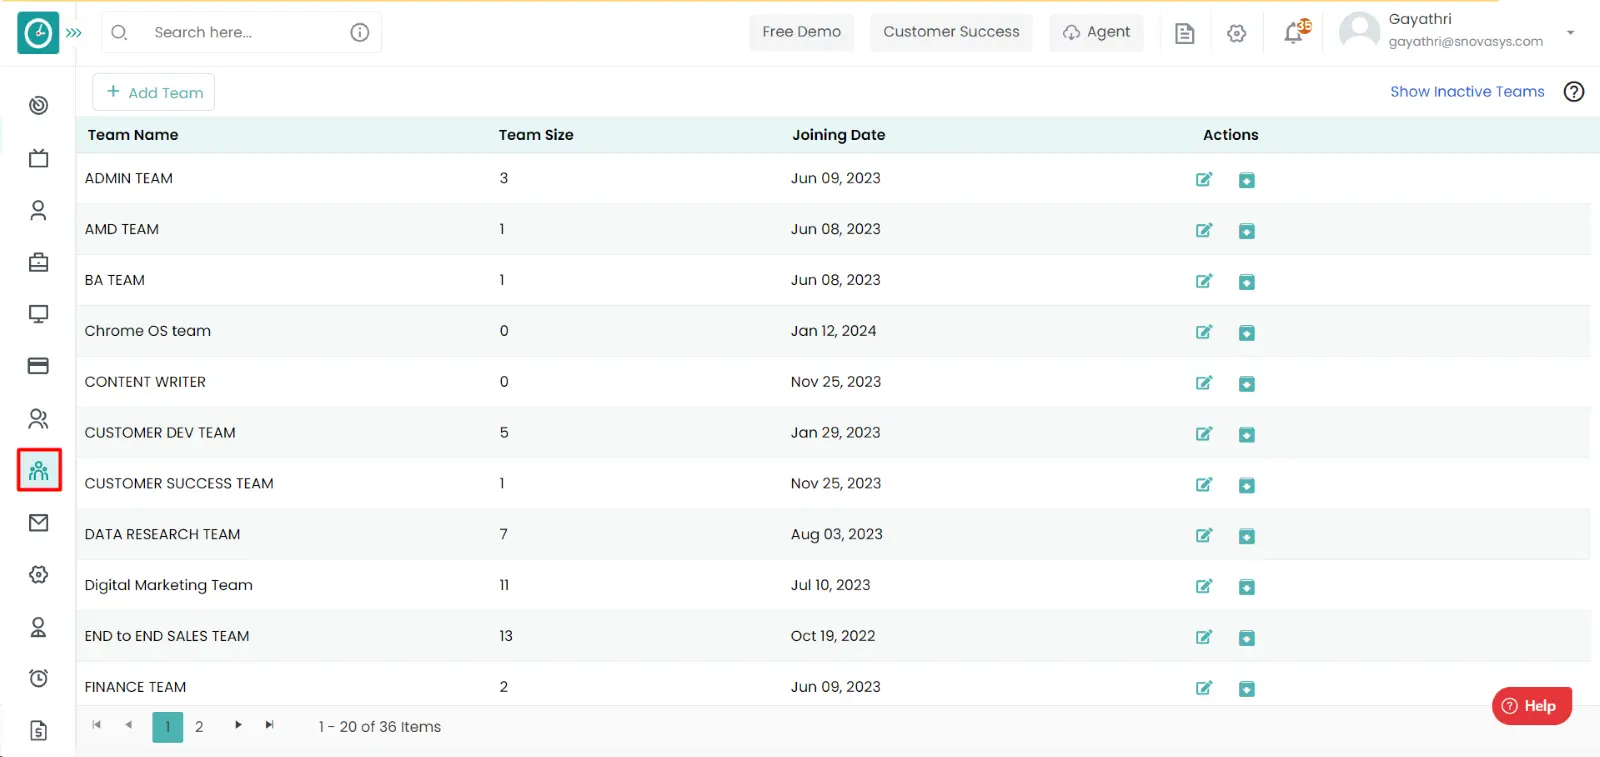
Navigation: Goto Teams
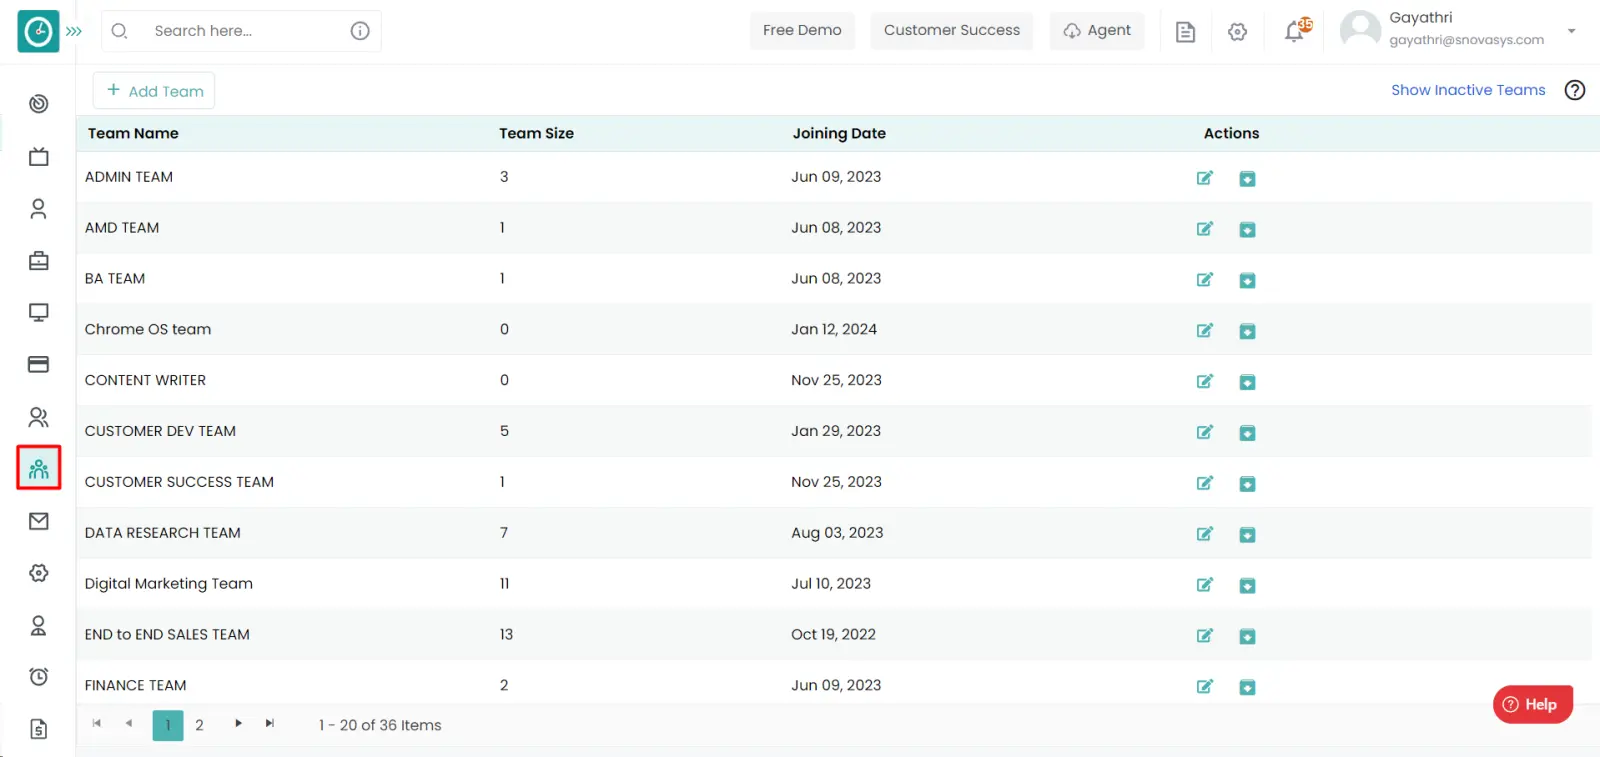
If the user is having Super Admin
permissions, then he can be able to view a Holidays of an employee.
This permission can be configured by following the steps: -
Manage Teams, Manage Team Settings from Users and team’s module,
then select the roles for what you must give the permissions to configure and check them.view the holidays of a team
usage for the defined roles.
Procedure: -
Now you are able to view the Holidays of a team.
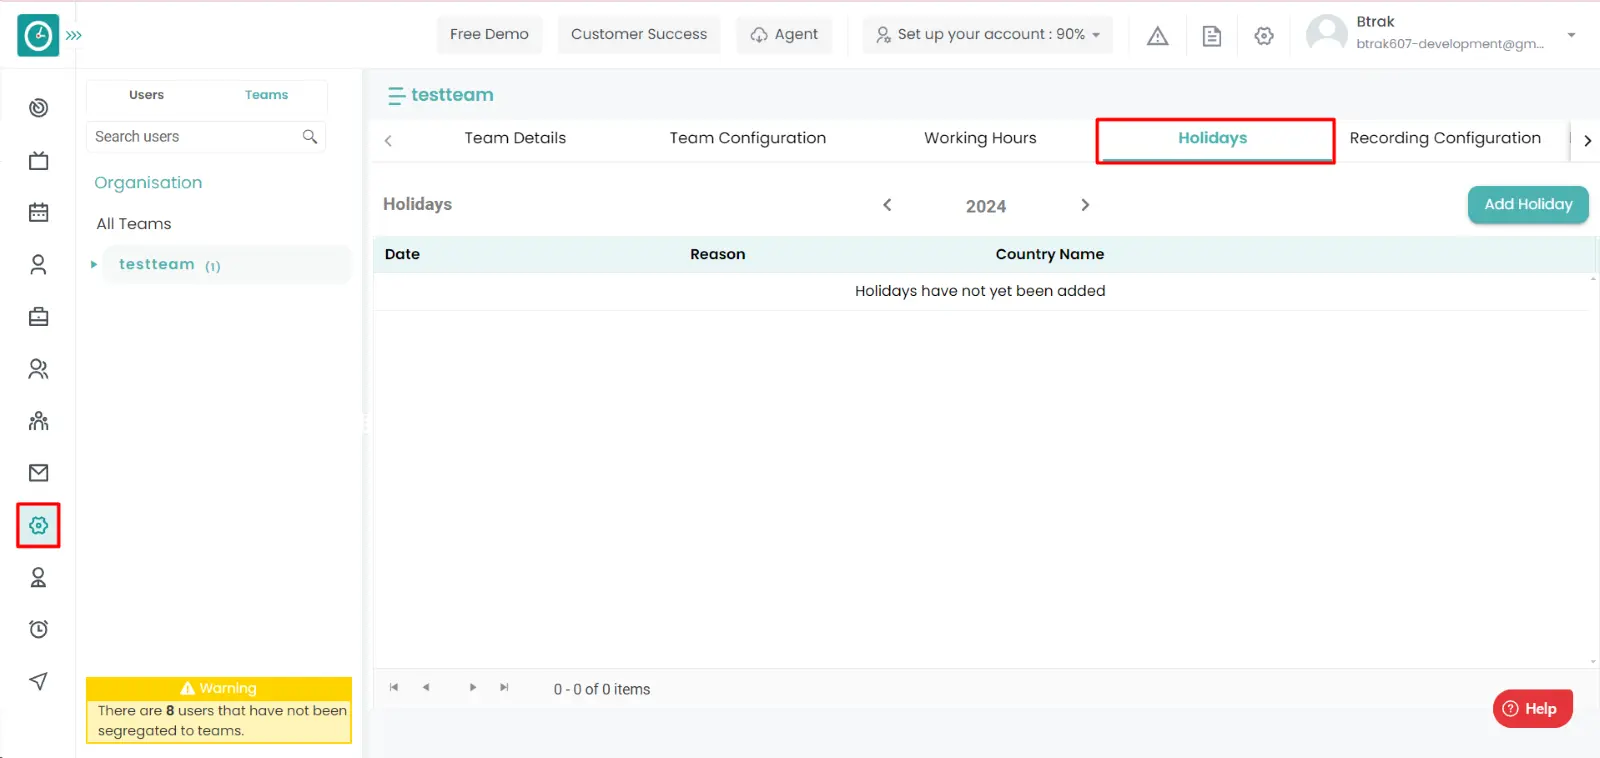
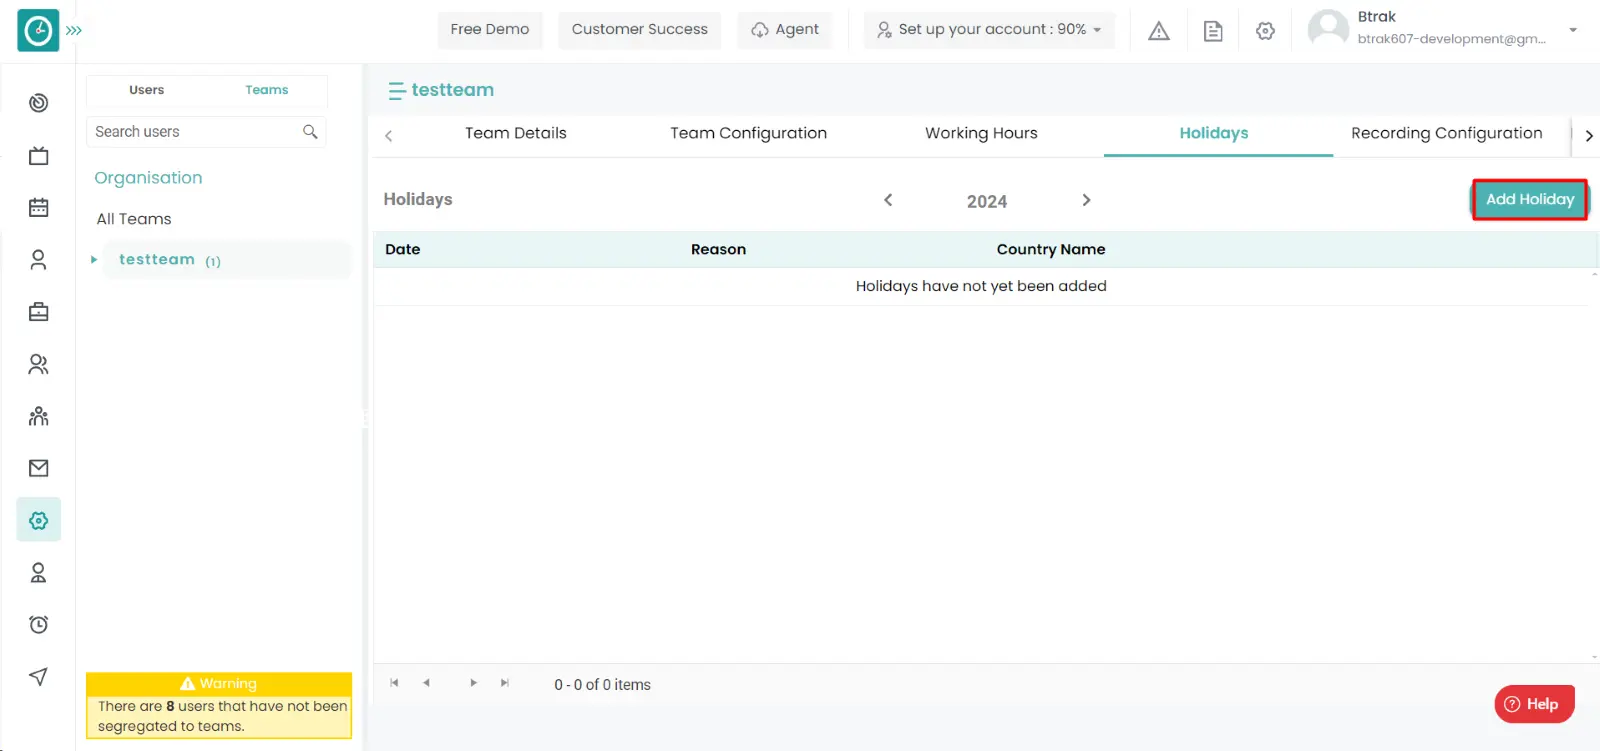
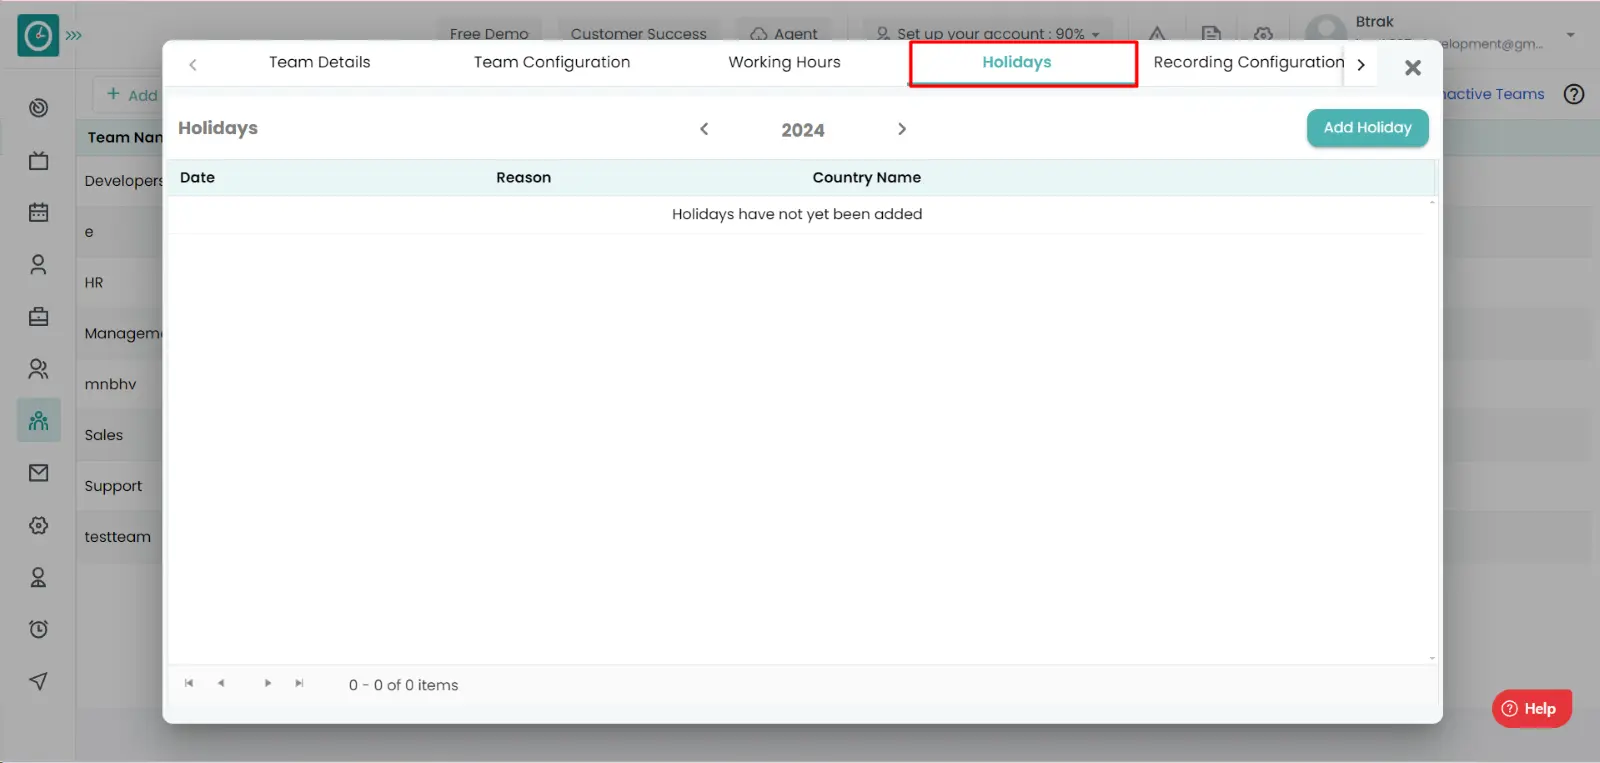
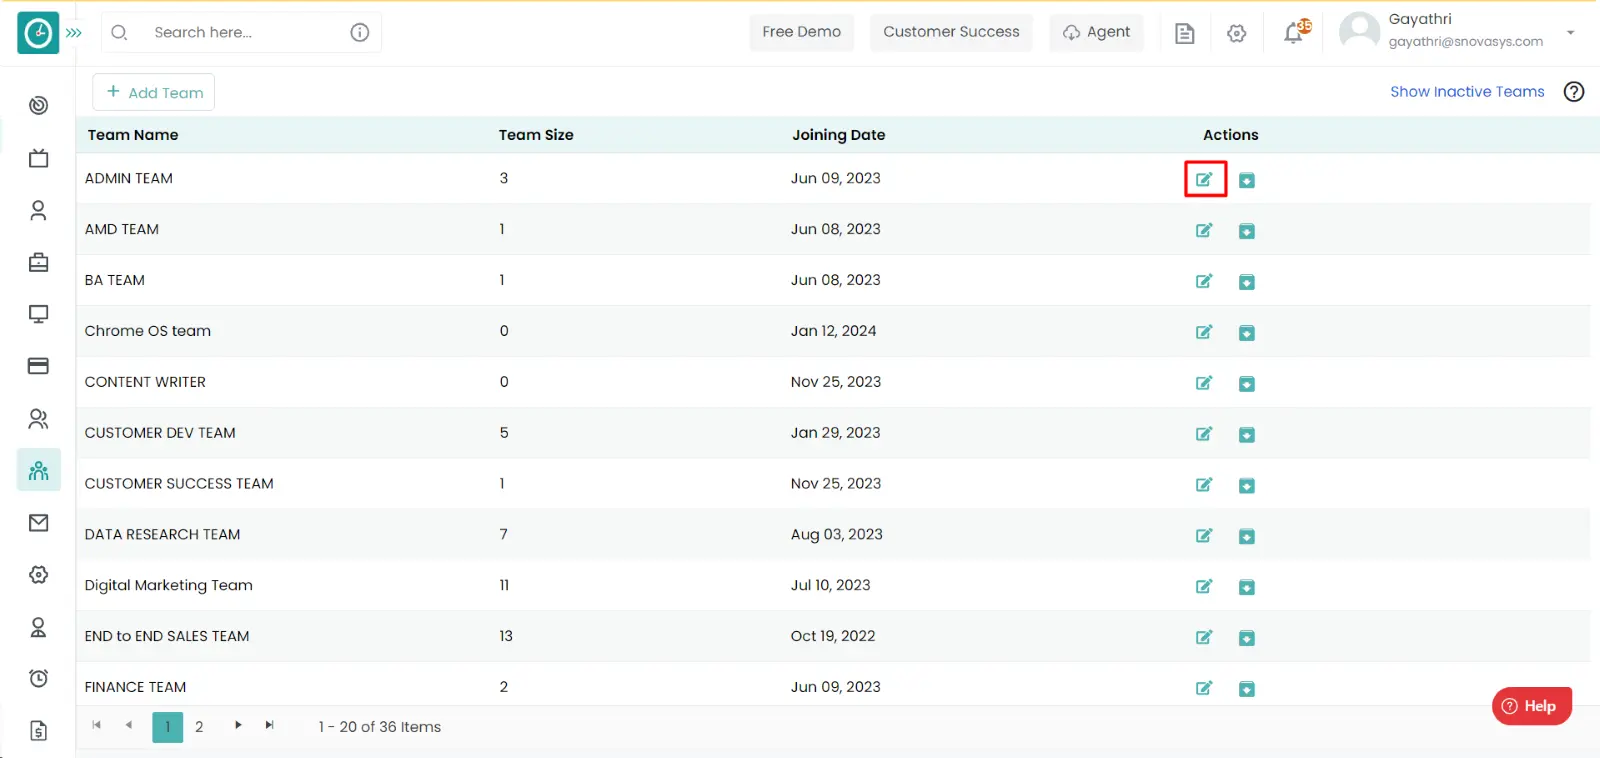
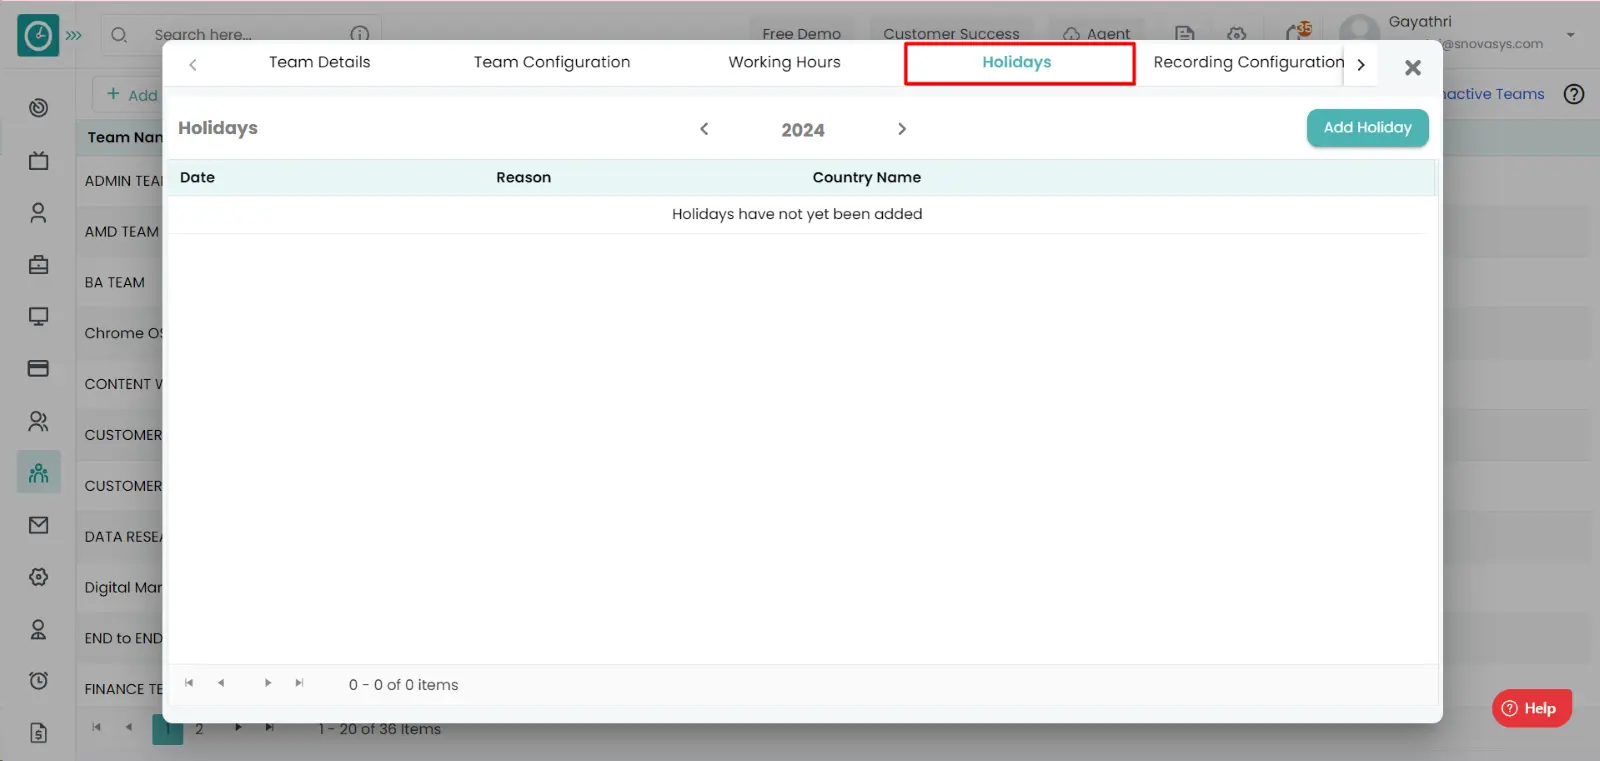
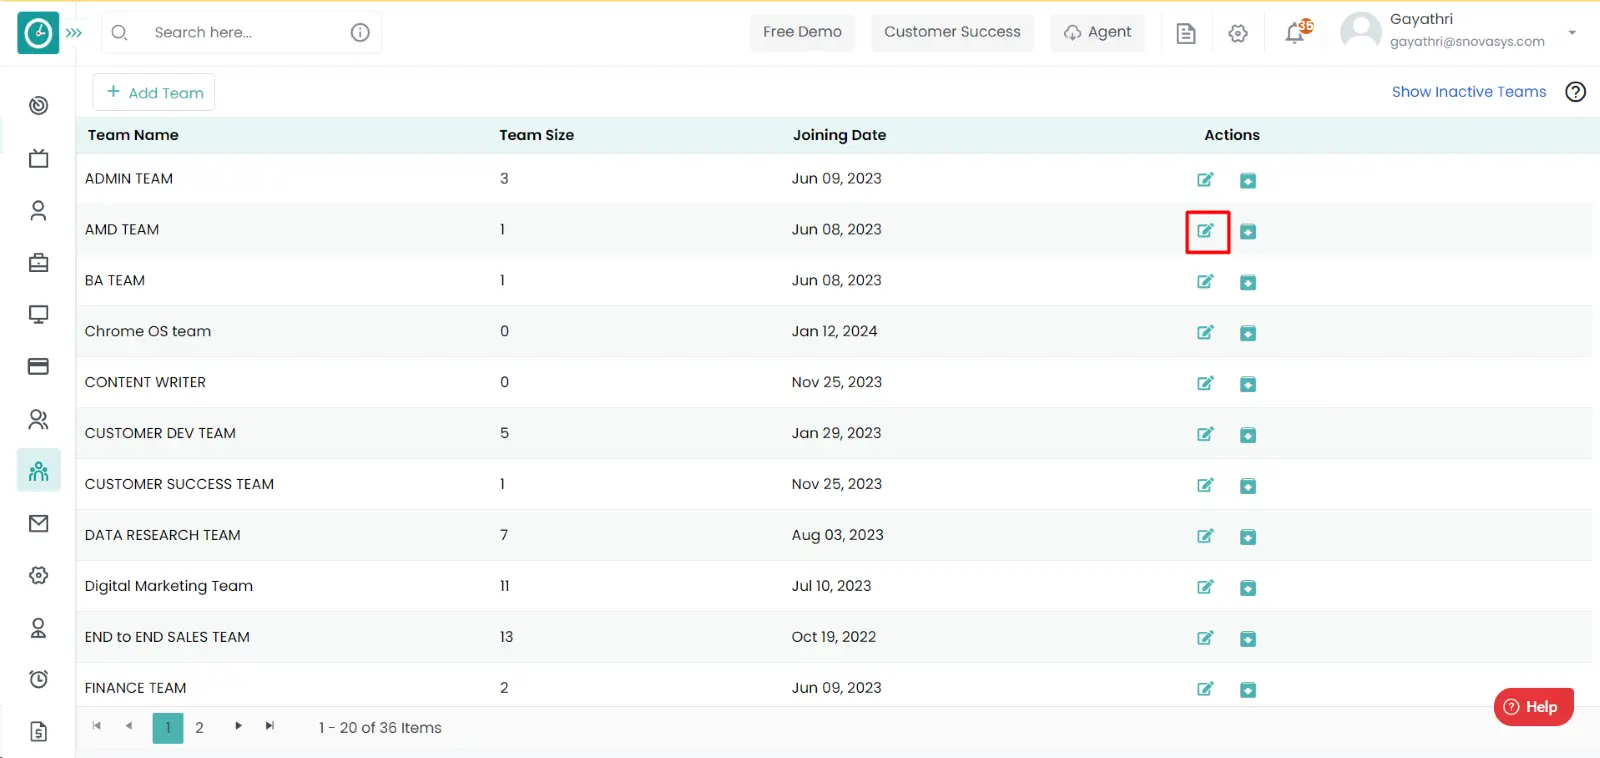
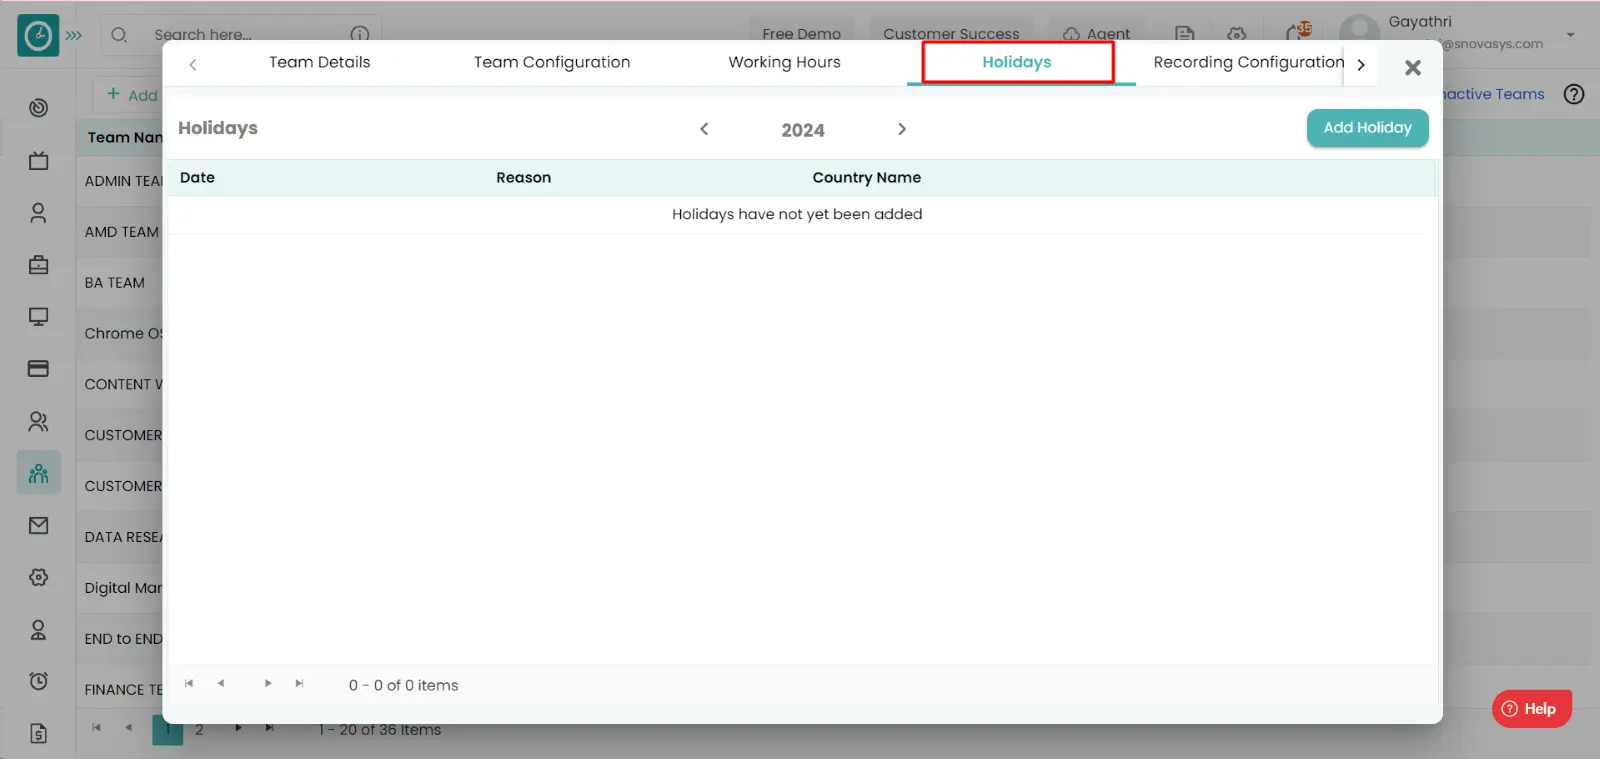
Time champ allows you to add the holiday to a team. If a team is working in another state/country, you need to add the specific holidays to the team based on the region and the conditions.
Navigation: Goto Teams.

If the user is having Super Admin
permissions, then he can be able to Add/edit the Holidays of an Team.
This permission can be configured by following the steps: -
Manage Team Settings from Users and team’s module,
then select the roles for what you must give the permissions to configure and check them.Add /edit the holiday to a team
usage for the defined roles.
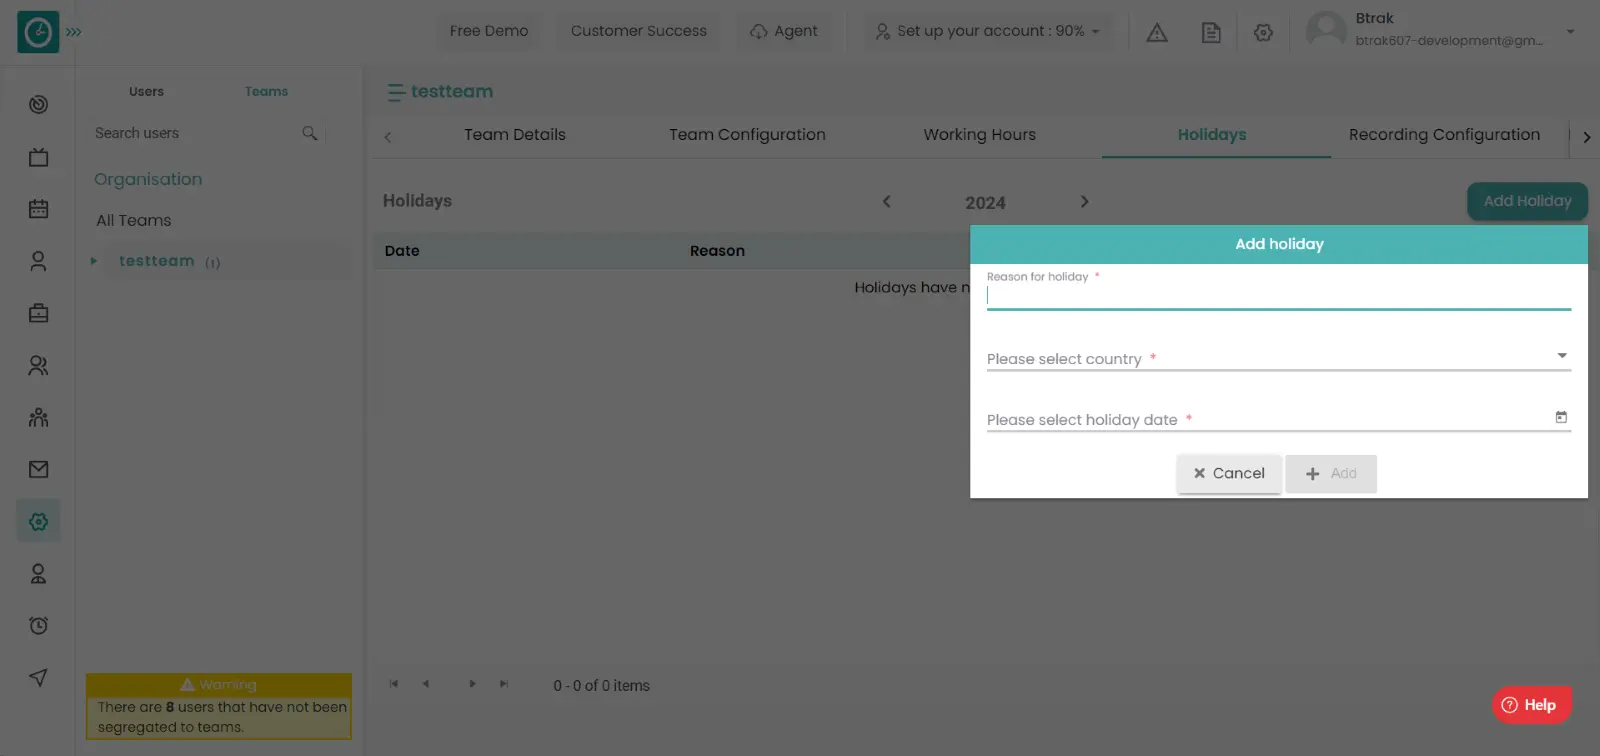
Add Holiday:


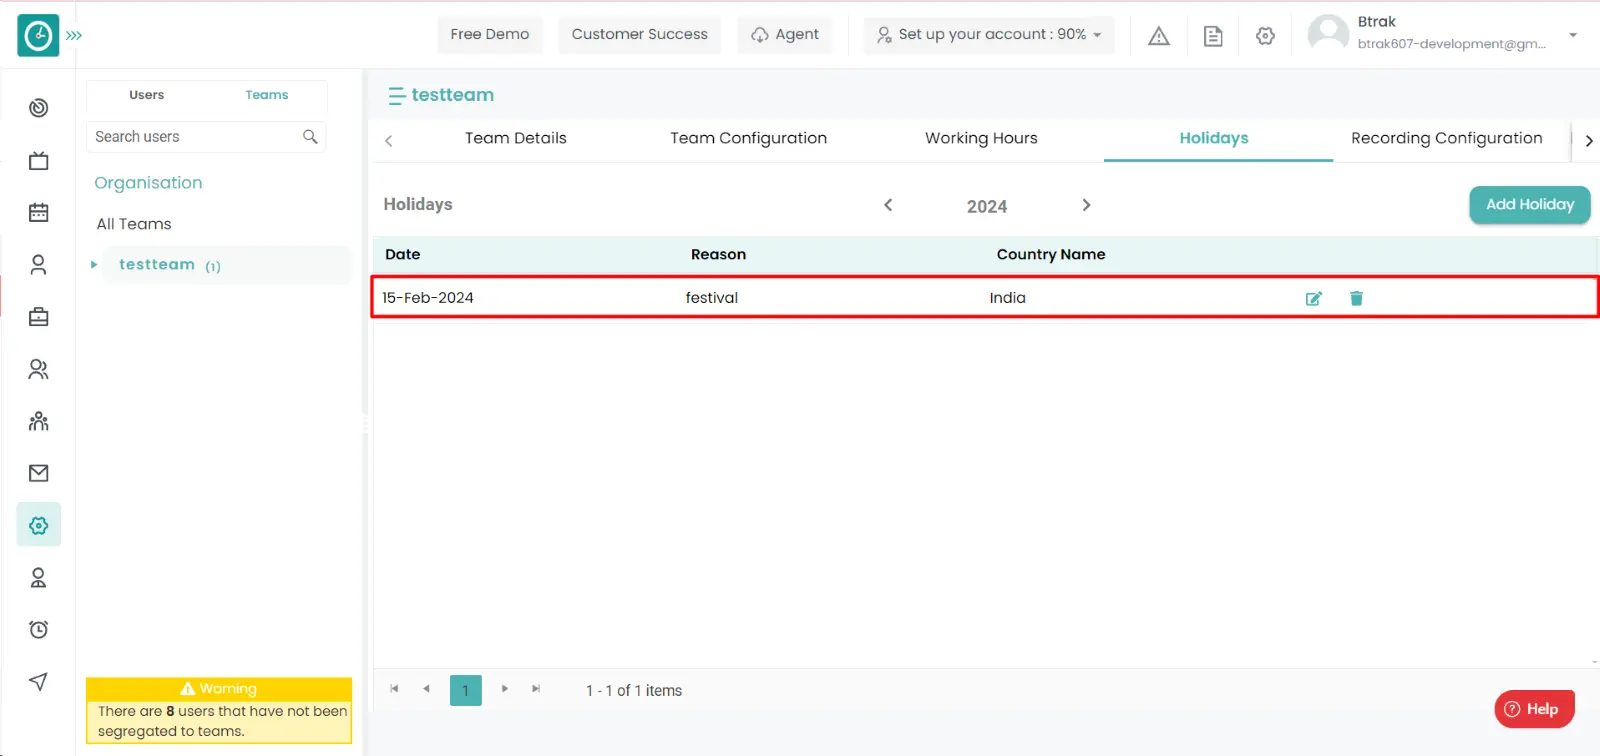
Edit Holiday:
Now you successfully added the holiday to a team.
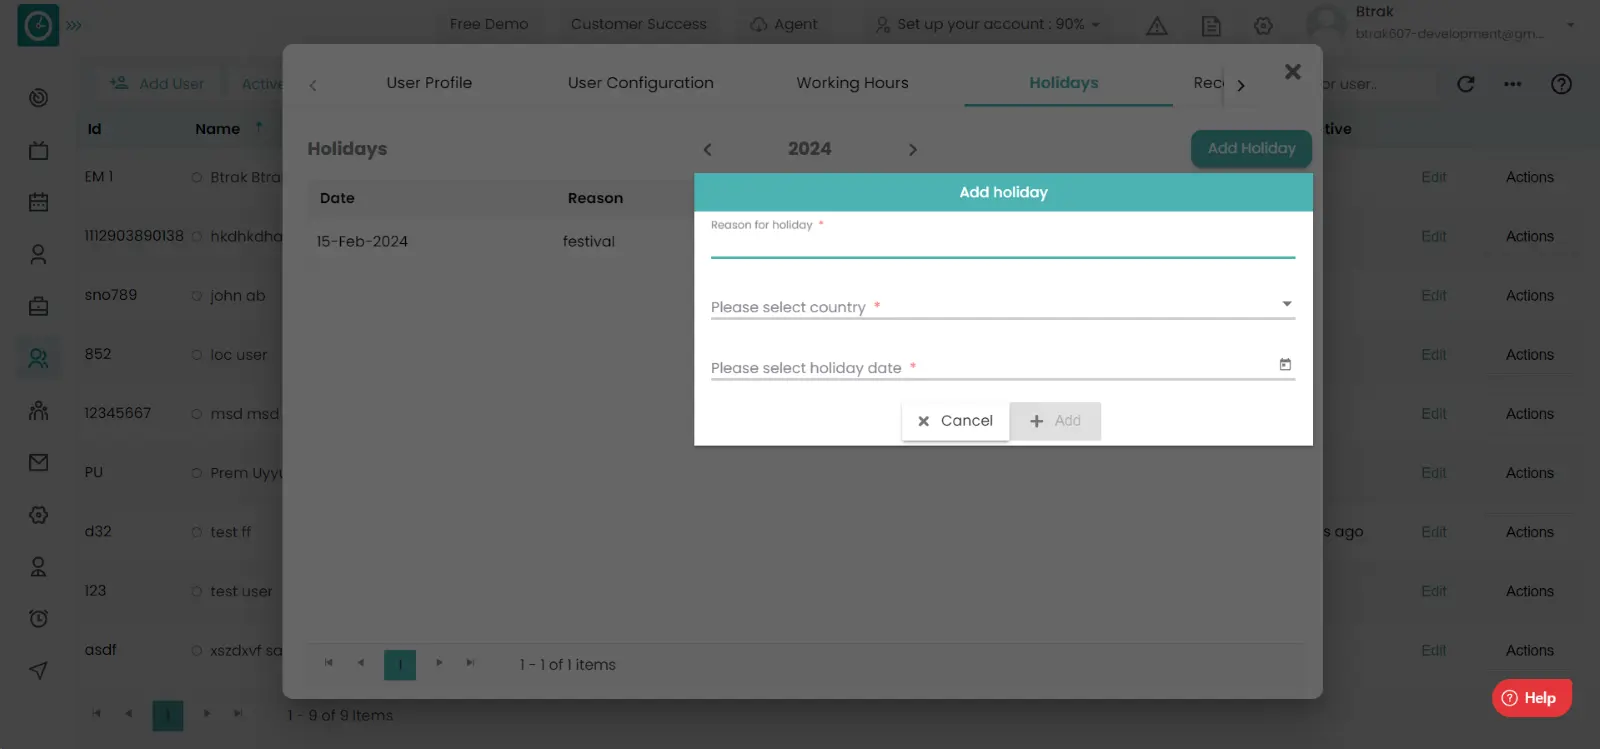
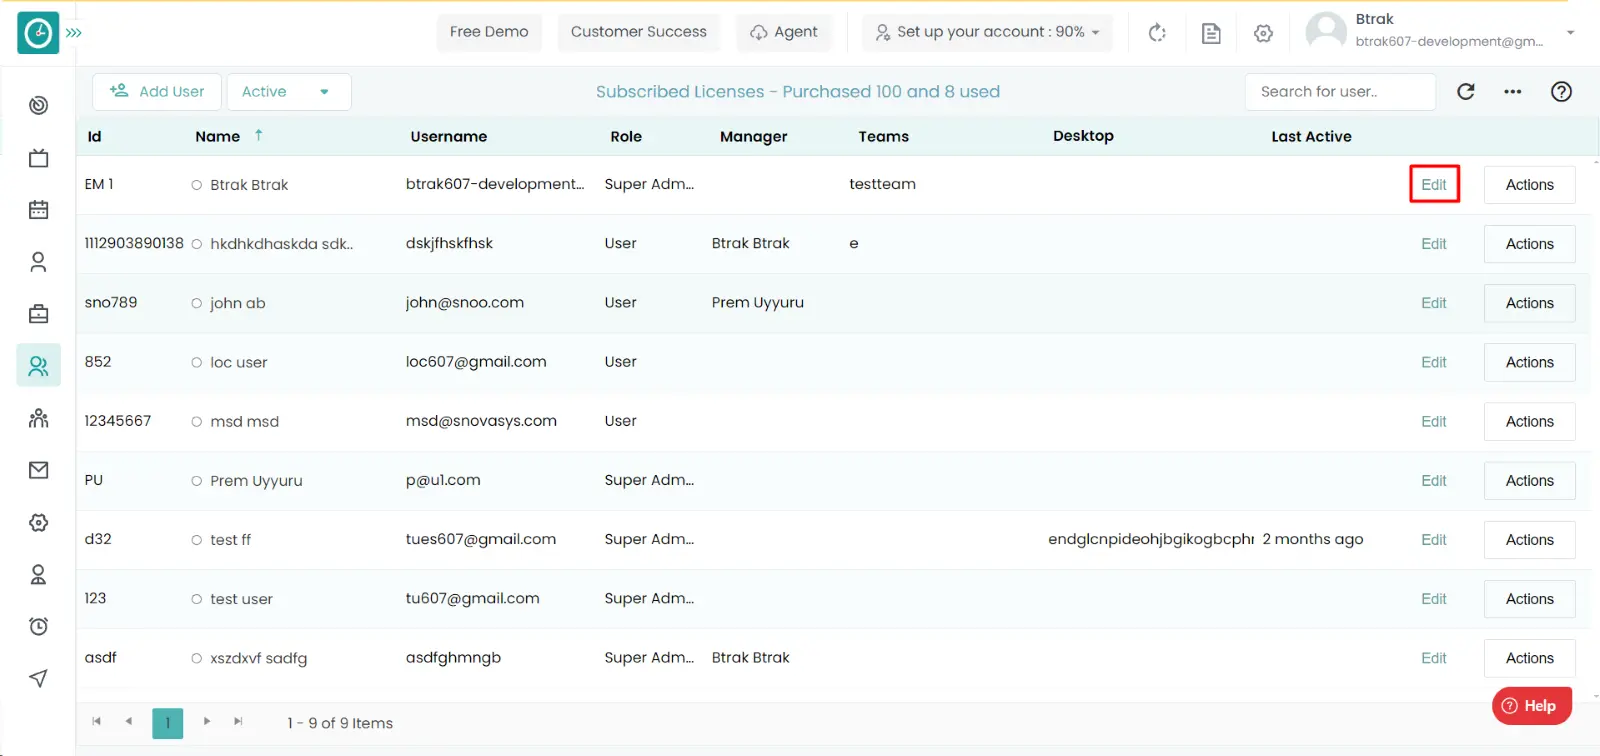
In any organization users will be from different regions. If a user is working in another state/country, you need to add the specific holidays to the user based on the region, religion, and the conditions.
Navigation: Goto Users
If the user is having Super Admin
permissions, then he can be able to Add/edit a Holidays of a user.
This permission can be configured by following the steps: -
View Subordinate users, edit subordinate users, manage user level Settings from Users and teams,
then select the roles for what you must give the permissions to configure and check them.Aadd the holiday for a user
for the defined roles.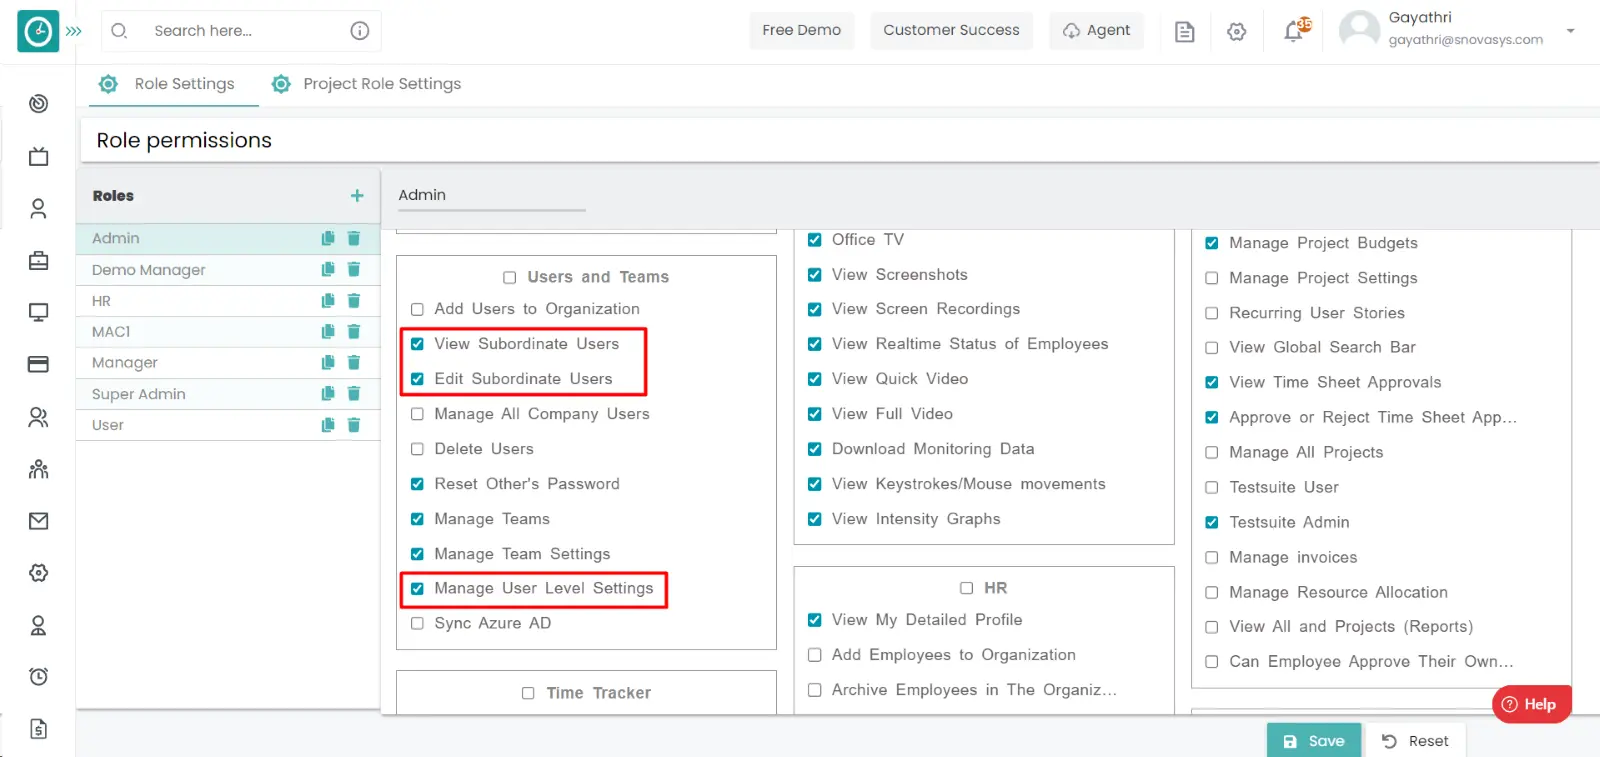
Add Holiday:

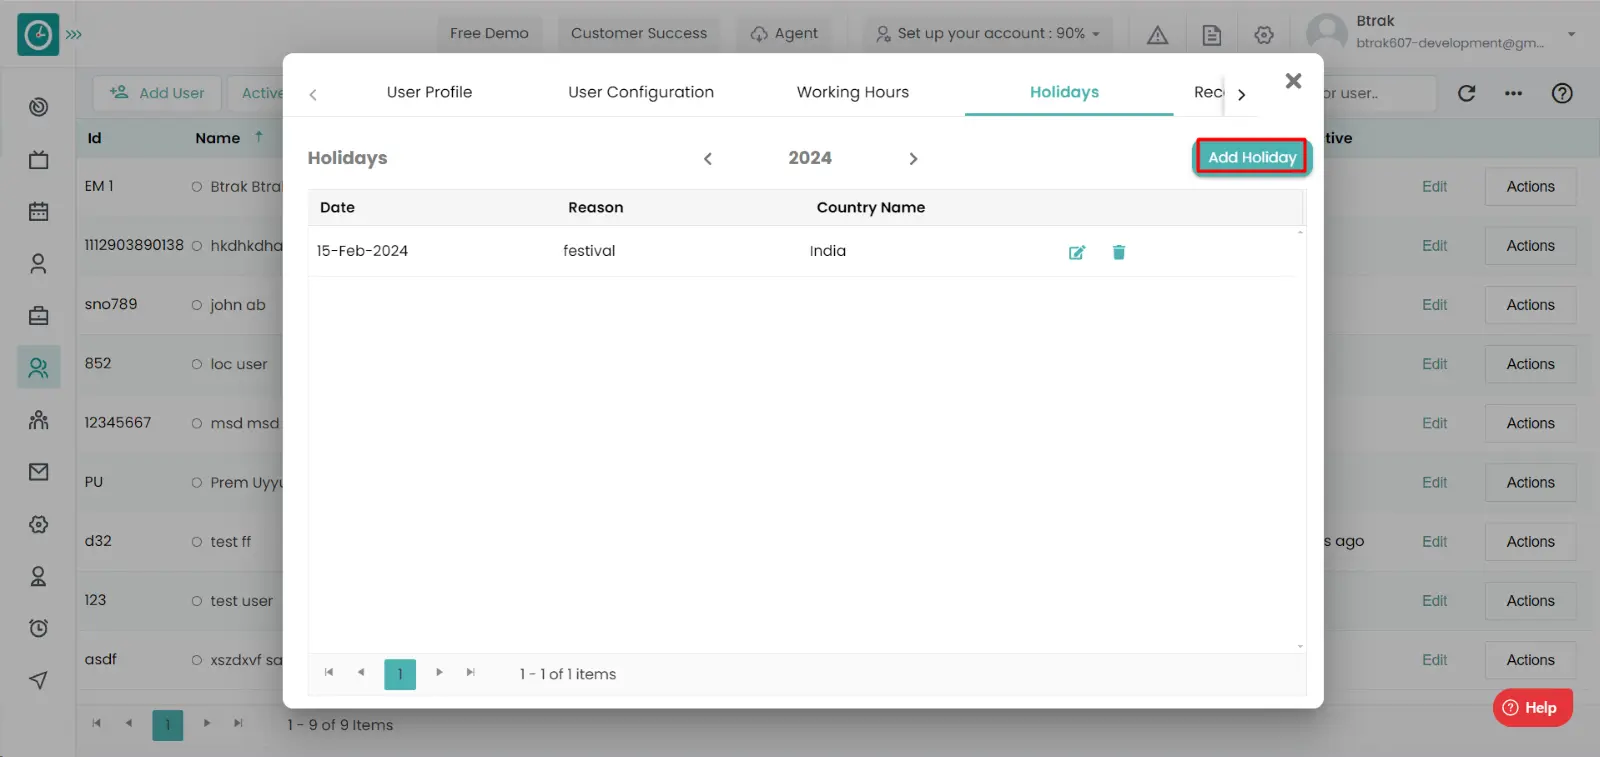
Edit Holiday:
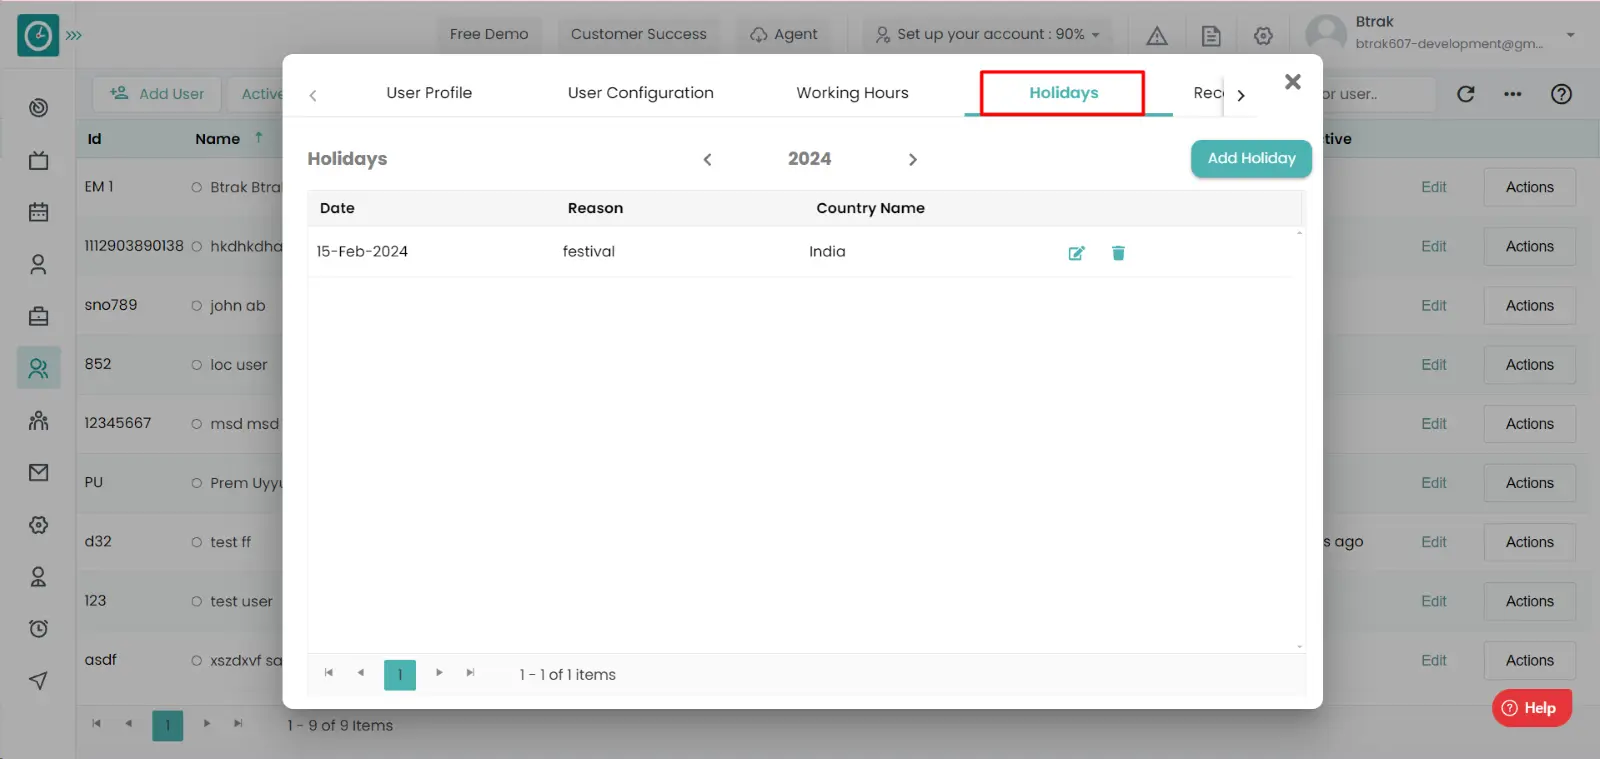
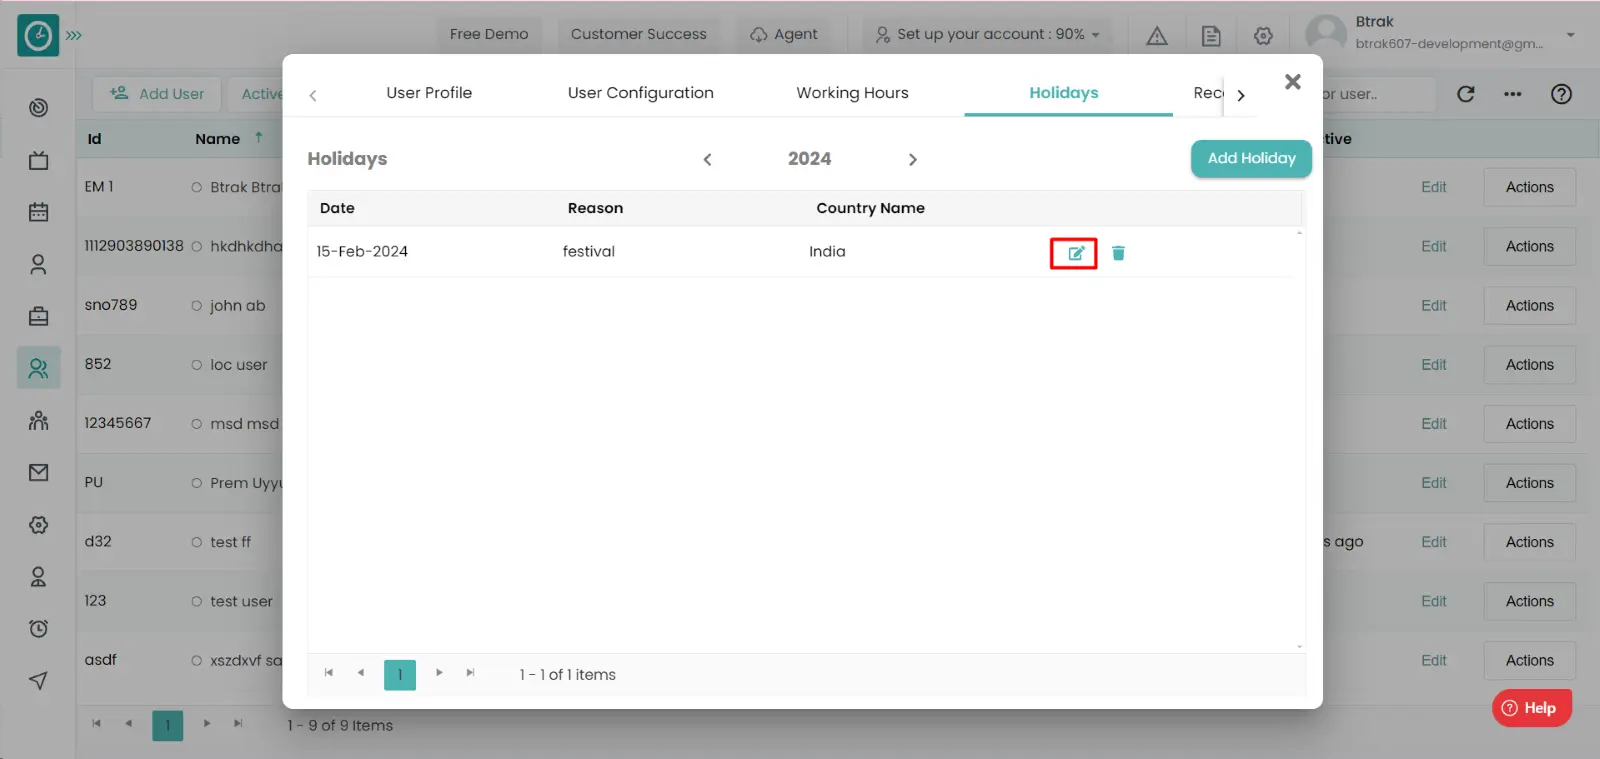

Now you have successfully added the holiday to a user.
Yes, you can add multiple holidays on the same day, but each holiday must be added under a different country.